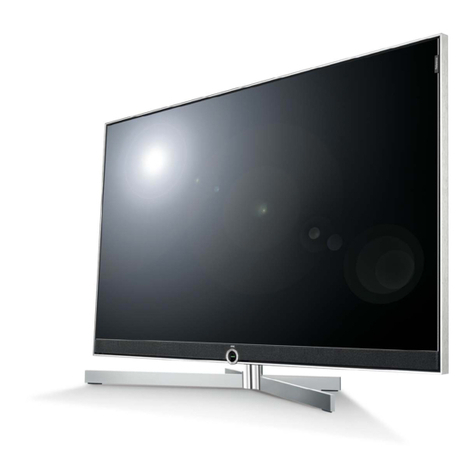
SOLE SLTV20MS3 User manual


NTSC
!
Safety Instructions
To reduce the risk of fire, electrical shock and other injuries, keep these safety
precautions in mind when installing, using and maintaining your TV.
The socket-outlet shall be installed near the equipment and shall be easily
accessible.
A Warning that an apparatus with class I constructions shall be connected to a
mains socket outlet with a protective earthing connection.
Warning : If you manipulate against the notice, it may cause serious injury or
death to user.
Caution : If you manipulate against the notice, it may cause slight injury to
user or appliance.
To preserve the Environment do not rubbish.
Notes & Descriptions
32 20 WIDE TFT-LCD TV
Thank you for buying our 20” LCD TV.
Please take the time to read this manual for the best
performance of this TV.
Please keep this manual for future reference.
The present home appliance is certified and approved by
EMC/EMI and can be used in all places including residency area.
Information in this manual is subject to change without prior
notice.
Ver 1.40NSO

NTSC 54 20 WIDE TFT-LCD TV
Warning
Disconnect the power cable and signal cable connected to the product in
case of thunder or lightning.
Do not attempt to touch its power cord with wet hands.
If any electric pin is wet or dusty, remove the moisture or dust first before
use.
It is recommended to pull out the power cord unless you use it for a long
time.
Damaged power cord, plug or unfitted outlet may be very dangerous.
Do not install the set close to any heating sources.
Do not place heavy articles on it or step on the product.
The product should be installed on a clean and dry place.
When you detect any smog, unusual noise or smell, just disconnect the
electric power and refer servicing to qualified service personnel.
Do not place any bowl with water, beverage, can or other liquid products
on it.
Do not use or place any combustible sprayer or inflammable substances
close to the product.
Warning
Do not arrange the power cord close to any heating devices/sources.
Install the outdoor antenna for the set far away from high voltage cables.
When moving it, do not apply any forces on the set.
Do not attempt to disassemble, repair or change the product.
Whenever you need to repair, adjust or check it, refer servicing to qualified
service personnel.
Do not directly spray water or rub it with inflammable substances (thinner
or benzene) when cleaning it.
Do not wet or penetrate water over/into the set.
When cleaning the LCD surface, disconnect the power and use a piece of
smooth cloth against any scratches on it. Never use wet cloth.
Caution
Make sure to pull out the power cord when cleaning or removing the
product.
Ventilation should be always open and the set should be installed in a
well-ventilated and wide enough place (a minimum distance away from a
wall 10cm or more).
Do not install the set in a place directly exposed to sunlight.

NTSC
CHAPTER 2. Connection
CHAPTER 3. Using TV Menus
76 20 WIDE TFT-LCD TV
CHAPTER 1. Before Use
1-1. Accessories
1-2. Panels
1-3. Remote Control
1-4. Menu Configuration
1-5. Jog Shuttle Button
1-6. Inserting the Batteries in the Remote Control
2-1. Connecting Power
2-2. Connecting TV Antenna
2-3. Connecting PC
2-4. Connecting DVD
2-5. Connecting HDTV
2-6. Connecing VIDEO / S-VIDEO
2-7. Connecting Headphone (Speaker)
3-1. Watching TV
3-2. Channel Search & Fine Tune
3-3. Add/Remove Channel
3-4. Channel Swap
3-5. Change TV Channel Mode
3-6. Closed Caption
3-7. V-Chip Function
30
29
28
26
23
22
22
21
21
20
20
16
14
11
10
18
18
31
32
33
Contents
Operating Temperature 0~40˚C
Storage Temperature -10~50˚C
Operating Humidity 10~60% RH
Storage Humidity 10~90% RH
For dot defect [dead pixel] of LCD ;
TFT-LCD produced by using high-end semiconductor technology with precision of
99.9% above is used for this TV (3,147,264 pixels).
However the pixels of R.G.B. & White color seem to be right sometimes or some of
black pixels could be seen on the LCD. This is not from bad quality or functional
problem and you can use it without any problem.
When used as a PC monitor ;
Optimal Resolution: 1280 768 @ 60Hz.
A ailable Temperature & Humidity

NTSC
CHAPTER 4.
Using Menus of Picture, Sound and Others
CHAPTER 5.
Using PC MENU
CHAPTER 6. Specifications
CHAPTER 7.
Services & Others
98 20 WIDE TFT-LCD TV
1
Before use
1-1. Accessories
1-2. Panels
1-3. Remote Control
1-4. Menu Configuration
1-5. Jog Shuttle Button
1-6. Inserting the Batteries in the Remote Control
4-1. Setting Picture Mode
4-2. Setting Sound Mode
4-3. Setting Option
5-1. Auto Adjustment
5-2. Setting Picture
5-3. Setting PC Scale Mode
5-4. Setting Sound
5-5. Setting Option
5-6. Setting Color Temperature
6-1. Dimensions
6-2. Specifications
7-1. Troubleshooting
40
39
36
44
43
42
47
46
4
4
1
0

NTSC 1110 20 WIDE TFT-LCD TV
1-2 Panels
1) Front Panels
Power / Menu -Power-On / Off
Channel Button -AUTO / Move above Menu
Sound Cont. -SOURCE / Move under Menu
Remote Control Sensor -Exit Menu
LED - Load Menu
Power button is jog shuttle type button and it operates different functions by pushing it to
Up/Down/Left/Right.
1-1 Accessories
Please make sure the following items are included with your LCD TV.
If any items are missing, contact your dealer.
Remote Control
AAA-type battery( 2)
Power Cord
RF Cable
DC Adaptor
User’s Manual
-
--
-
-

3) Side Panels
COMPONENT (HDTV) Video Input (480i, 480p, 720p, 1080i)
COMPONENT (HDTV) Audio Input (L R)
Vodeo Input
S-Vodeo Input
AV Input (L R)
Upgrade Input
NTSC 1312 20 WIDE TFT-LCD TV
2) Rear Panels
Power Input
PC Input
COMPONENT (DVD) Video Input (480i)
COMPONENT (DVD) Audio Input
Audio (PC input / Headphone Output)
TV Antenna Input

NTSC
1-3
1514 20 WIDE TFT-LCD TV
Functions by remote control buttons
Button unction Button unction
POWER Power On/Off MUTE Sound off Temporarily
0~9 Numeric Buttons.
- / --(+100)
Select channels over 100
PRE Previous Channel
CH UP/DOWN
Move TV Channels
VOL +/- Control Volume
SOURCE( / )
Input Source selection Botton (PC S-Video Video Full SCART TV Half SCART)
PC PC Input TV TV Input
PM Control Picture Mode
SM
Control Sound Mode
MENU Displays the MENU On Screen
DUAL I/II (MTS) Choose Stereo, Mono or Secondary Audio Program (SAP brodcast)
ON SCREEN Display screen status
SCALE Control Picture Scale EXIT Exit Main / Sub MENU
//
MENU settings (Move MENU up and down / Move MENU left and right / MENU Confirmation)
TELETEXT Turn ON / OFF Teletext broadcasting
MEM Add / Remove a TV CH SCREEN Not available
SLEEP Sleep Timer setting LIST Not available
HISTORY Not available DTV Not available
SUBTI Not available
MENU Not available EPG Not available
TV/RADIO Not available PIP Not available
Remote Control
Power On/Off
Sound off Temporarily
Channel Selection Button
TV & Input Source Selection Button
Control Sound mode
Control Picture Mode
Channel & Volume Control Button
Menu Control Button
Not available
TV Functions & Teletext Menu Button
Not available
Not available
The remote control provided is available up to 7m from the optical receive part within Left/Right
30 degrees.

NTSC
1-4
17
MENU Configuration
Most functions of the TV set can be controlled by MENU and selection buttons on the
remote control, so learning how to operate them would be convenient for you.
1) Menu Configuration
16 20 WIDE TFT-LCD TV
2)
Using Remote Control
Press button to display main menu.
Press Menu control button ( /) to move to sub menu of a
selected main menu.
To move among menus, use Menu control button ( /).
To change a selected menu setting, use Menu control button ( /).
Press button to return from sub menu to main menu or
from main menu to menu removal.
EXIT
MENU
Main Menu Sub Menu Settings

NTSC
1-5
1-6
1918 20 WIDE TFT-LCD TV
JOG Shuttle Button
Push button right to display main menu.
Push it right again to display sub menu.
Push button left to return to main menu.
Push it left again to clear menu.
Push the button up and down to move among menus.
If pushing it upward when menu is not displayed, it controls
automatic PC settings.
If pushing it downward when menu is not display, it changes input
signals.
Inserting the Batteries in the Remote Control
Remove the cover of the remote control.
Check the polarity of batteries and insert them in right directions.
Replace the cover.
Available batteries : 2 DC 1.5V AAA-type batteries
Since incorrect insertion of batteries may cause breakage, leakage or injuries, check the
polarities before the insertion.
Separate and collect used batteries for the protection of environment.
Do not use alkaline and manganese batteries together.
MENU
MENU 2
Connection
2-1. Connecting Power
2-2. Connecting TV Antenna
2-3. Connecting PC
2-4. Connecting DVD
2-5. Connecting HDTV
2-6. Connecing VIDEO / S-VIDEO
2-7. Connecting Headphone (Speaker)
Table of contents
Other SOLE TV manuals