
SICK G6L Series User manual

OPERATING INSTRUCTION
GTE6L
Miniature photoelectric sensors

Described product
G6L
GTE6L
Manufacturer
SICK AG
Erwin-Sick-Str. 1
79183 Waldkirch
Germany
Production location
SICK Malaysia
Legal information
This work is protected by copyright. Any rights derived from the copyright shall be
reserved for SICK AG. Reproduction of this document or parts of this document is only
permissible within the limits of the legal determination of Copyright Law. Any modifica‐
tion, abridgment or translation of this document is prohibited without the express writ‐
ten permission of SICK AG.
The trademarks stated in this document are the property of their respective owner.
© SICK AG. All rights reserved.
Original document
This document is an original document of SICK AG.
Laser
1
2006/42/EC
NO
SAFETY
8025471 / 24.06.2020 /
24.06.2020 | SICK
Subject to change without notice
3

Contents
1 General safety notes......................................................................... 5
2 Notes on UL approval........................................................................ 5
3 Intended use...................................................................................... 5
4 Operating and status indicators...................................................... 5
5 Mounting............................................................................................. 6
6 Electrical installation........................................................................ 7
7 Commissioning.................................................................................. 8
7.1 Alignment.................................................................................................. 8
7.2 Sensing range........................................................................................... 8
7.3 Settings..................................................................................................... 9
8 Troubleshooting................................................................................. 10
9 Disassembly and disposal............................................................... 10
10 Maintenance...................................................................................... 11
11 Technical specifications................................................................... 12
11.1 Dimensional drawing................................................................................ 12
11.2 Light spot diagram.................................................................................... 13
CONTENTS
48025471 / 24.06.2020 | SICK
Subject to change without notice

1 General safety notes
■Read the operating instructions before commissioning.
■
Connection, mounting, and configuration may only be performed by trained
specialists.
■
2006/42/EC
NO
SAFETY
Not a safety component in accordance with the EU Machinery Directive.
■
When commissioning, protect the device from moisture and contamination.
■These operating instructions contain information required during the life cycle of
the sensor.
EN/IEC 60825-1:2014
IEC60825-1:2007
LASER CLASS 1
Laser
1
Maximum pulse power < 5.95 mW
Puls length: 2 µs
Wavelength: 670 - 690 nm
Complies with FDA performance
standards except for conformance with
IEC 60825-1 Ed. 3,
as described in Laser Notice No. 56,
dated May 8, 2019
ATTENTION
WARNING: Interruption, manipulation or incorrect use can lead to hazardous exposure
due to laser radiation.
2 Notes on UL approval
UL Environmental Rating: Enclosure type 1
3 Intended use
The GTE6L is an opto-electronic photoelectric proximity sensor (referred to as “sensor”
in the following) for the optical, non-contact detection of objects. If the product is used
for any other purpose or modified in any way, any warranty claim against SICK AG shall
become void.
4 Operating and status indicators
Energetic photoelectric proximity sensor.
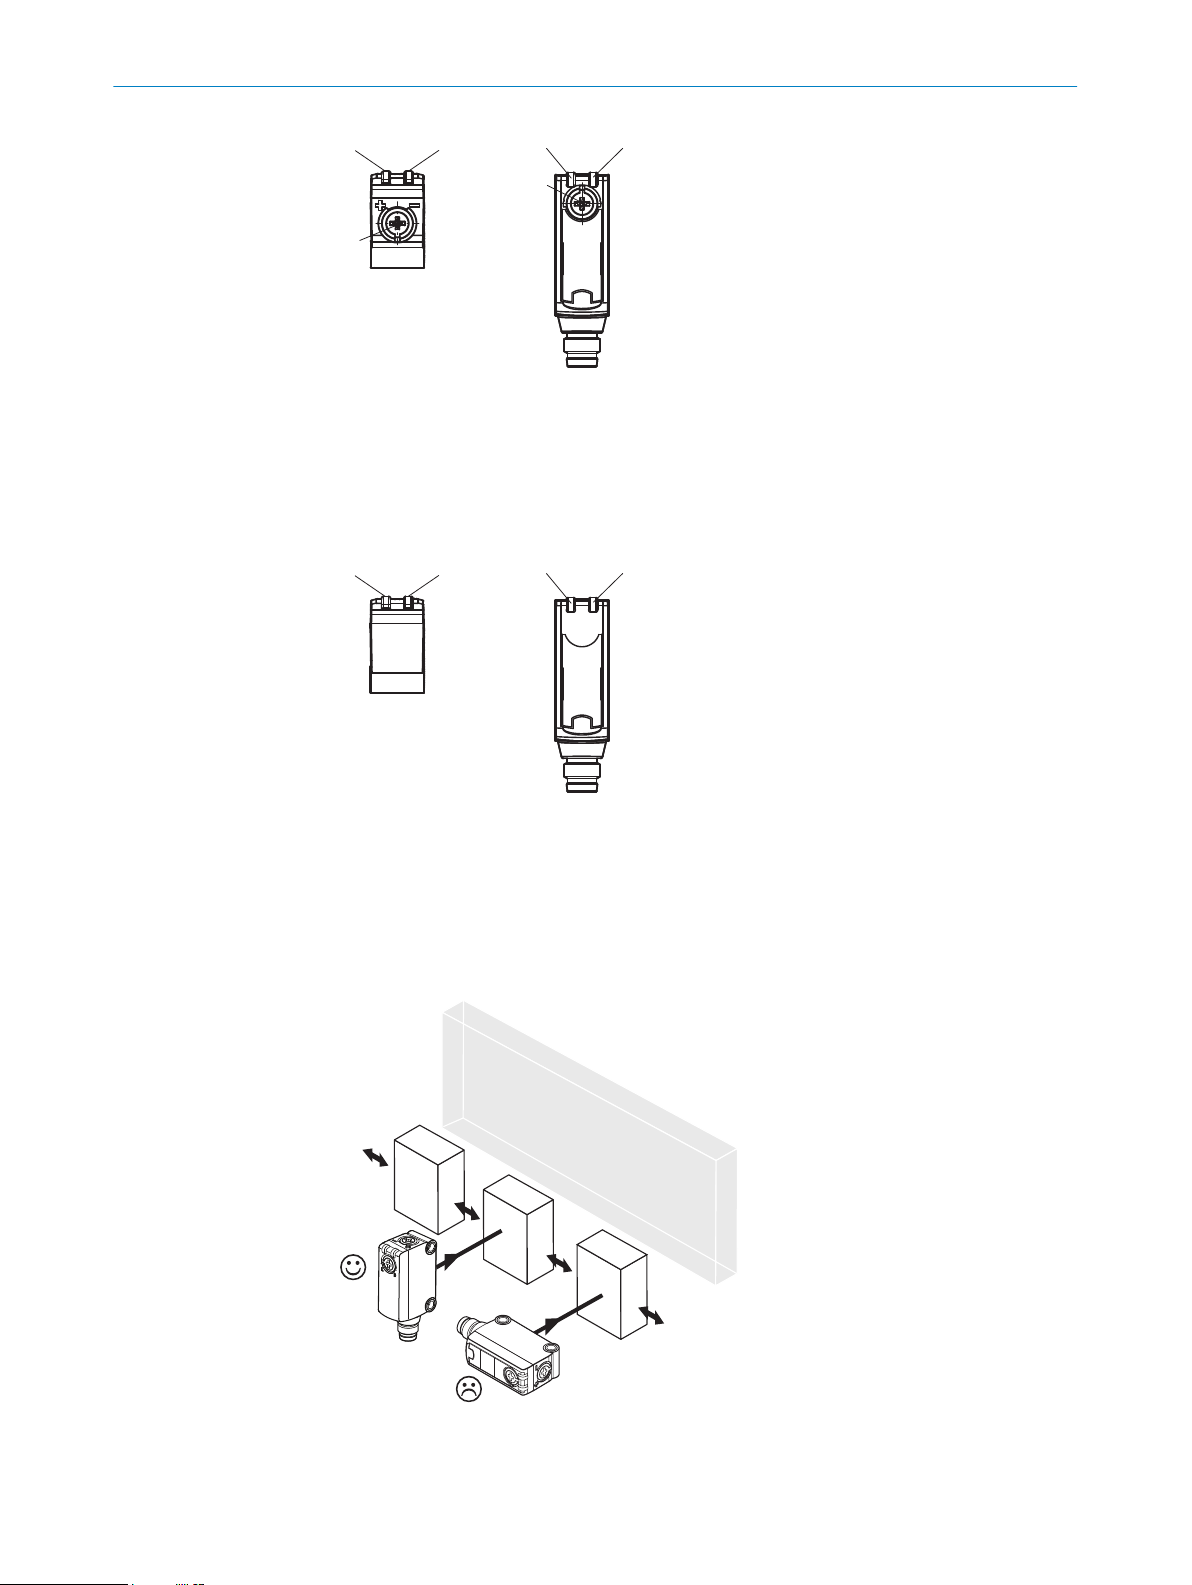
GTE6L-xxx1x
GENERAL SAFETY NOTES 1
8025471 / 24.06.2020 | SICK
Subject to change without notice 5
1
2 3 23
1
1Potentiometer: sensitivity adjustment
2Yellow LED indicator: Switching output
3LED indicator green: supply voltage active
GTE6L-xxx3x
Sensor which it is not possible to set: The sensor is adjusted and ready for operation.
2 3 23
5 Mounting
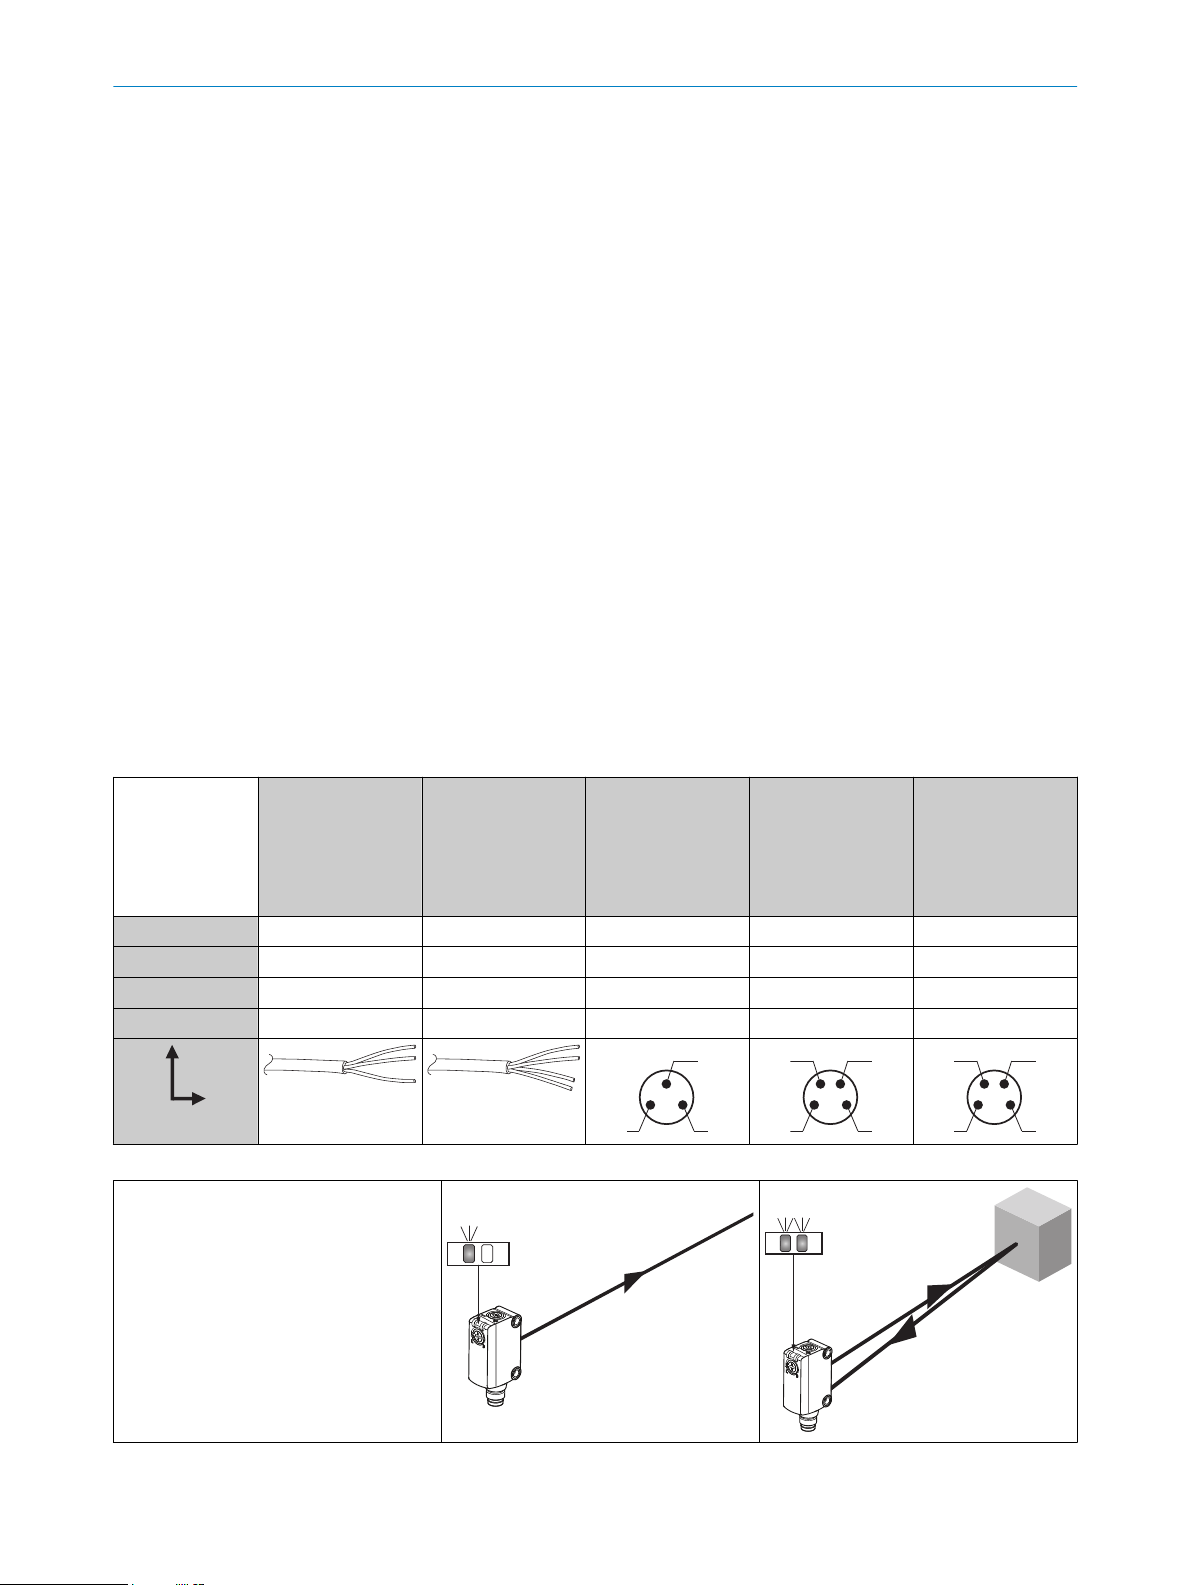
Mount the sensor using a suitable mounting bracket (see the SICK range of acces‐
sories).
Note the preferred orientation of the sensor relative to the direction of object motion,
refer to figure 1.
Figure 1: Sensor orientation relative to object direction
4 OPERATING AND STATUS INDICATORS
68025471 / 24.06.2020 | SICK
Subject to change without notice
6 Electrical installation
The sensors must be connected in a voltage-free state (UV = 0 V). The following informa‐
tion must be observed depending on the connection type:
– Plug connection: pin assignment
– Cable: wire color
Only apply voltage/switch on the voltage supply (UV > 0 V) once all electrical connec‐
tions have been established.
Explanation of connection terminology:
BN = Brown
WH = White
BU = Blue
BK = Black
n. c. = no connection
Q = switching output 1
Q = switching output 2
L+ = supply voltage (Uv)
M = common
L.ON = light operate
D.ON = dark operate
Connection and Output detail:
Table 1: DC
GTE6L -P1xxx
-N1xxx
-E2xxx
-F2xxx
-P3xxx
-N3xxx
-P5xxx
-N5xxx
-P4xxx
-N4xxx
-P6xxx
-N6xxx
-P7xxx
-N7xxx
-E4xxx
-F4xxx
-E6xxx
-F6xxx
-E7xxx
-F7xxx
1 = BN + (L+) + (L+) + (L+) + (L+) + (L+)
2 = WH -Q- n. c. Q
3 = BU - (M) - (M) - (M) - (M) - (M)
4 = BK QQQQQ
0.205 mm2 /
AWG24 0.205 mm2 /
AWG24
1
4
3
2
1
4
3
2
1
4
3
Table 2: Output function
GTE6L
ELECTRICAL INSTALLATION 6
8025471 / 24.06.2020 | SICK
Subject to change without notice 7

-Px1xx
-Px2xx
-Px3xx
-Px4xx
L.ON, PNP: Q (≤ 100 mA)
+ (L+)
Q
‒(M)
Load
+ (L+)
Q
‒(M)
Load
-Px1xx
-Px2xx
-Px5xx
-Px6xx
D.ON, PNP: Q (≤ 100 mA)
+ (L+)
Q
‒(M)
Load
+ (L+)
Q
‒(M)
Load
-Nx1xx
-Nx2xx
-Nx3xx
Nx4xx
L.ON, NPN Open Collector Q (≤ 100 mA)
+ (L+)
Q
‒(M)
Load
+ (L+)
Q
‒(M)
+ (L+)
Q
‒ (M)
Load
-Nx1xx
-Nx2xx
-Nx5xx
-Nx6xx
D.ON, NPN Open Collector Q (≤ 100 mA)
+ (L+)
Q
‒(M)
+ (L+)
Q
‒ (M)
Load
+ (L+)
Q
‒(M)
Load
7 Commissioning
7.1 Alignment
Align sensor on object. Select the position so that the red emitted light beam hits the
center of the object. You must ensure that the optical opening (front screen) of the sen‐
sor is completely clear [see figure 0].
7.2 Sensing range
Check the application conditions: Adjust the mounting position so that the sensing
range and remission capability are within the corresponding diagram [see see figure 2].
(x = sensing range, y = operating reserve).
During this process, an object can only be detected in front of a background if the
remission capability of the object is significantly higher than that of the background or
if the distance between the object and the background is sufficiently long.
7 COMMISSIONING
88025471 / 24.06.2020 | SICK
Subject to change without notice

1
0
10
100
0
Operating reserve
Distance in mm (inch)
300
(11.81)
200
(7.87)
100
(3.94)
500
(19.69)
400
(15.75)
18 %
2
390 %
6 %
1
Figure 2: GTE6L
1Sensing range on black, 6% remission
2Sensing range on gray, 18% remission
3Sensing range on white, 90% remission
7.3 Settings
Sensing range setting
Sensor which it is not possible to set: The sensor is adjusted and ready for operation.
The sensitivity (sensing range) is adjusted with the potentiometer (type: 5-turn). Clock‐
wise rotation: sensitivity (sensing range) increased; counterclockwise rotation: sensitiv‐
ity (sensing range) reduced. We recommend placing the object within the sensing
range, e.g. see figure X. Once the sensitivity is set, remove the object from the beam
path. The switching output changes.
Table 3: Adjustment sensing range
COMMISSIONING 7
8025471 / 24.06.2020 | SICK
Subject to change without notice 9

The sensor is adjusted and ready for operation.
8 Troubleshooting
The Troubleshooting table indicates measures to be taken if the sensor stops working.
Table 4: Troubleshooting
LED indicator/fault pattern Cause Measures
Yellow LED does not light up
even though the light beam is
aligned to the object and the
object is within the set sensing
range
No voltage or voltage below
the limit values
Check the power supply,
check all electrical connec‐
tions (cables and plug connec‐
tions)
Voltage interruptions Ensure there is a stable power
supply without interruptions
Sensor is faulty If the power supply is OK,
replace the sensor
Yellow LED flashes Sensor is still ready for opera‐
tion, but the operating condi‐
tions are not ideal
Check the operating condi‐
tions: Fully align the beam of
light (light spot) with the
object / Clean the optical sur‐
faces / Check sensing range
and adjust if necessary
Yellow LED lights up, no object
in the path of the beam
Excessive background remis‐
sion
Check changes to the back‐
ground. Reduce the sensitivity
of the sensor or use sensors
with background suppression
Object is in the path of the
beam, yellow LED does not
light up
Sensitivity is set too low or dis‐
tance between the sensor and
the object is too long
Increase the sensing range,
take note of the distance
between the sensor and the
background
Object is in the path of the
beam, yellow LED does not
light up
Remission capability of the
object is insufficient
Increase the sensing range,
take note of the distance
between the sensor and the
background
9 Disassembly and disposal
The sensor must be disposed of according to the applicable country-specific regula‐
tions. Efforts should be made during the disposal process to recycle the constituent
materials (particularly precious metals).
8 TROUBLESHOOTING
10 8025471 / 24.06.2020 | SICK
Subject to change without notice
This manual suits for next models
1
Table of contents
Languages:
Other SICK Accessories manuals

SICK
SICK PowerProx WTT12L-A Series User manual

SICK
SICK deTec4 Core User guide

SICK
SICK WT24-2 Series User manual

SICK
SICK RAY26 User manual

SICK
SICK WTT190LC-B2233A00 User manual

SICK
SICK GLS611 User manual

SICK
SICK MPS-M User manual

SICK
SICK CSM User manual

SICK
SICK TiM781 User manual

SICK
SICK RMS1000 User manual

SICK
SICK deTem4 Core A/P User manual

SICK
SICK WTT190L-A Series User manual

SICK
SICK PowerProx WTT12L-A Series User manual

SICK
SICK GLS100 User manual

SICK
SICK GSE6L Series User manual

SICK
SICK LFV 200 User manual

SICK
SICK LUT9 User manual

SICK
SICK PS30 User manual

SICK
SICK WTF26 User manual

SICK
SICK JEF300 Manual













