SAIXIN SRW-28S/D User manual

Instruction Manual
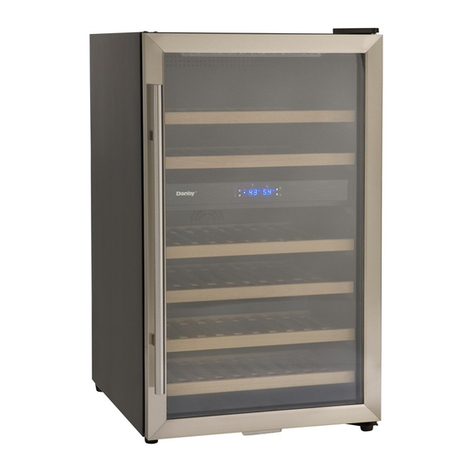
Wine Cellar
Thank for choosing our products, please read this manual carefully before using it.
0

Single Zone
1: Control panel 6: Big wooden rack 11: Glass door
2: Odour filter : Small wooden rack
3: Ventilation fan 8: Front ventilation base
4: Sensor 9: Hung
5: Ball beering 10: upper hinge
1

Dual Zones
1: Upper ventilation fan 6: Odor filter 11: Hung
2: Big rack : Sensor 12: Upper hinge
3: Ball bearing 8: Lower ventilation fan 13: Glass door
2

4: Sensor 9: Small wooden rack
5: Control panel 10: Front ventilation base
2-IMPORTANT SAFETY INSTRUCTIONS
WARNING
To reduce the risk of fire, electrical shock, or
injury hen using your appliance, follo these
basic precautions:
Read all instructions before using the Wine Cellar
DANGER or WARNING: Risk of child entrapment.
Child entrapment and suffocate on are not only problems of the past. Junked or abandoned
appliances are still dangerous… even if they ill “just sit in the garage for a fe days”.
Before you throw away old wine Cellar: Take off the door. Leave the Shelves in piece so that
children may not climb inside easily.
Never allo children to operate, play ith, or cra l inside the appliance.
Never clean appliance parts ith flammable fluids. The fumes can create a fire hazard or
explosion.
Do not store or use gasoline or any other flammable vapors in the vicinity or any other
appliance. The fumes can create a fire hazard or explosion.
Keep ventilation openings, in the appliance enclosure or in the built-in structure, clear of
obstruction.
WARNING Do not use mechanical devices or other means to accelerate the defrosting process,
other than those recommended by the manufacturer.
WARNING Do not damage the refrigerant circuit.
WARNING Do not use electrical appliances inside the food storage compartments of the
appliance, unless they are of the type recommended by the manufacturer.
Warning: Do not store explosive substances such as aerosol cans ith a flammable propellant
in this appliance.
The appliance has to be unplugged after use and before carrying out user maintenance on the
appliance.
This appliance can be used by children aged from 8 years and above and persons ith reduced
3

physical, sensory or mental capabilities or lack of experience and kno ledge if they have been
given supervision or instruction concerning use of the appliance in a safe ay and understand
the hazards involved.
Children should be supervised to ensure that they do not play ith the appliance.
If the supply cord is damaged, it must be replaced by the manufacturer, its service agent or
similarly qualified persons in order to avoid a hazard.
The product Cyclopentane as blo ing gas, disposal of the product shall be as per local body
regulations.
This appliance is intended to be used in household and similar applications.
3-INSTALLATION INSTRUCTIONS
Installation di agram for the built-in models
Installing a unit with a technical door
● Level the unit inside the cabinet.
● Open the door of the unit at a 90°angle.
● Fix the facing of the kitchen cabinet on the door of the unit (8 scre s included).
4

● Be sure the gasket seal properly.
Before Using Your Wine Cellar
Remove the exterior and interior packing.
Before connecting the Wine Cellar to the po er source, let it stand upright for
approximately 2 hours. This ill reduce the possibility of a malfunction in the
cooling system from handling during transportation.
Clean the interior surface ith luke arm ater using a soft cloth.
Install the handle on the left side of the door.
Installation of Your Wine Cellar
This appliance is designed for free standing installation or built-in(fully recessed).
Place your Wine Cellar on a floor that is strong enough to support it hen it is fully
loaded. To level your Wine Cellar, adjust the front leveling leg at the bottom of the
Wine Cellar.
Locate the Wine Cellar a ay from direct sunlight and sources of heat(stove, heater,
radiator, etc.).Direct sunlight may affect the acrylic coating and heat sources may
increase electrical consumption. Extreme cold ambient temperatures may also
cause the unit not to perform properly.
Avoid locating the unit in moist areas.
5

Plug the Wine Cellar into an exclusive, properly installed-grounded all outlet. Do
not under any circumstances cut or remove the third(ground) prong from the po er
cord. Any questions concerning about po er and/or grounding should be directed
to ard a certified electrician or an authorized products service center.
Reversing the Door Swing of Your Appliance
The door of this appliance has the capability of opening from either left or right side. The unit
is delivered to you ith the door opening from the left side. If you desire to reverse the
opening direction, please call service for reversal instructions (SRW-28S,SRW-28D,SRW-
54S,SRW-54D,SRW-76S,SRW-76D,SRW-128S, SRW-128D, SRW-168S,SRW-168D, SRW-
230S,SRW-230D)
6

Figure A: Dismantle the right hinge Figure E: Install the lo er hinge
Figure B: Dismantle the upper hinge Figure F : Install the door
Figure C: Dismantle the lo er hinge Figure G: Install the upper hinge
7

Figure D: Dismantle the door Figure H: Finish installation
4-OPERATING YOUR WINE CELLAR
The ine cellar should be placed here the ambient temperature is bet een 32-100.4
degrees Fahrenheit (0-38°C). If the ambient temperature is above or belo this range,
the performance of the unit may be affected. For example, placing your unit in extreme
cold or hot conditions may cause interior temperatures to fluctuate. The range of 40-65
degrees Fahrenheit (5-22°C) may not be reach
Single zone
Recommended Temperatures for Chilling Wine.
Red Wines: 15-18°C (58-65°F)
Dry/White Wines 9-15°C (48-57°F)
Sparkling Wines 5-9°C (40-47°F)
The above temperatures may fluctuate depending on hether the interior light is ON or
OFF or the bottles are located on the upper/middle/lo er section.
Digital Touch Panel (single zone)
ON/OFF Power
To turn ON/OFF the appliance, press the button.
Setting the Temperature Control
You can set the temperature as you desire by pushing the (+) or (-) button.
When you push the t o buttons for the first time, the LED readout ill sho the original
8

temperature set at previous time (the temperature preset at the factory is 41°F (5°C)).
The temperature that you desire to set ill increase 1°F or 1°C if you push the (+)
button once, on the contrary the temperature ill decrease 1°F or 1°C if you push the
(-) button once.
When you store mostly red ines, the temperature hich you control by pushing the
above t o buttons need to be set at bet een 58 to 65 °F(15-18°C)
When you store mostly hite ines, the temperature needs to be set at bet een 48 to
57°F(9-15°C)
When you store mostly sparkling ines, the temperature needs to be set at bet een 40
to 47°F(5-9°C)
You can select temperature display setting from Fahrenheit to Celsius degree by
pushing the “ ” button. Fahrenheit or Celsius degrees indicator ill appear in
green color in the “○°C” or “ ○°F” indo .(Due to different market, some units can only
display Fahrenheit or Celsius)
The temperature inside the unit ill be appear in red color in the DISPLAY indo .
The above temperatures may fluctuate depending on hether the interior light is ON or OFF
or the bottles are located on the upper/middle/lo er section.
Digital Touch Panel (dual zone)
ON/OFF Power
To turn ON/OFF the appliance, press the button.
9
This manual suits for next models
5
Table of contents