Reiner jetStamp 790 User manual
Version 2.0
Operating Instructions
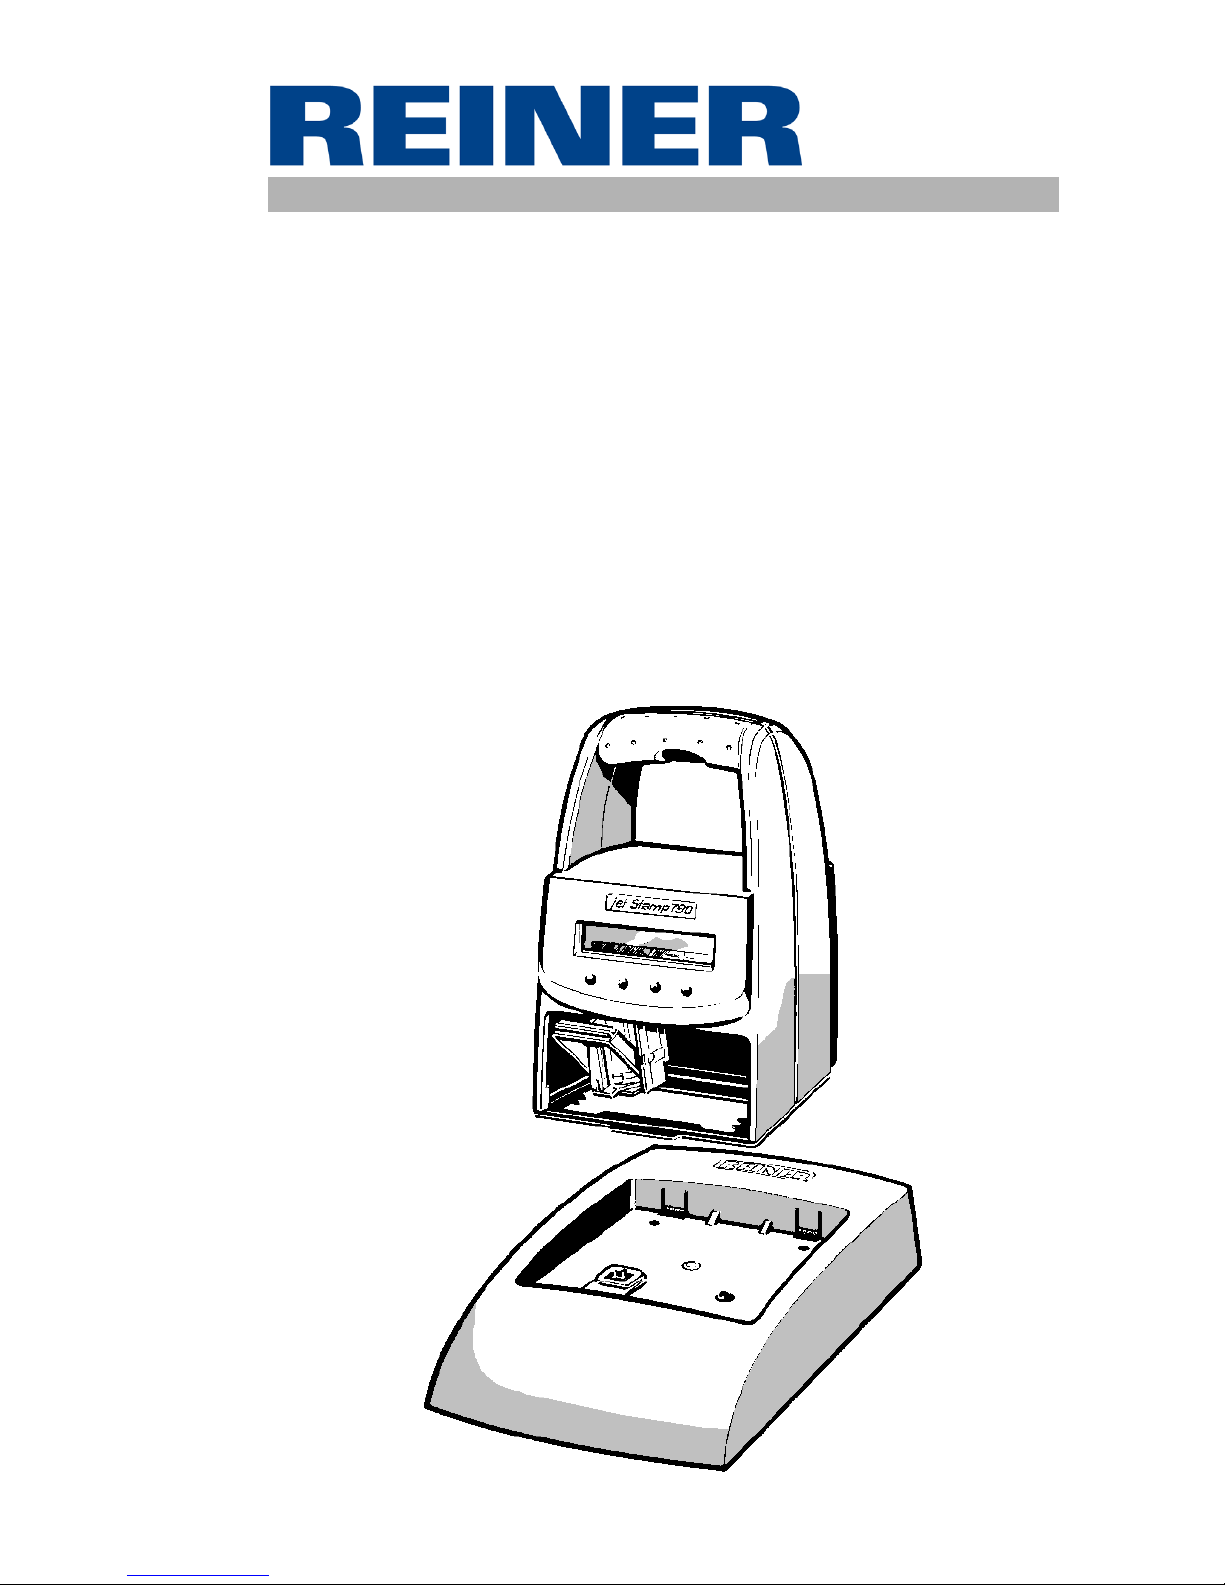
jetStamp 790
Mobile electronic hand stamp with changeable
accumulators and flexible impression selection

2
© 2003 Ernst Reiner GmbH & Co. KG
All rights reserved. Translations, reprints, or any other form
of reproduction of this manual, even in part and regardless of form,
require prior written permission.
This manual is subject to change without prior notice.
This manual has been compiled with the utmost care
and diligence, however we cannot assume any form
of liability for errors or omissions or for damage
resulting from them.

Control elements .........................................................................................
Commissioning .............................................................................................
Display zones and button functions ............................................................
Impression selection ...................................................................................
Stored impressions ......................................................................................
Customer-specific impressions ...................................................................
Setting time and date ...................................................................................
Setting numbering device or figures ............................................................
Setting pre-texts ..........................................................................................
Stamping .......................................................................................................
Changing the ink cartridge ...........................................................................
Setup module ..............................................................................................
Description of the Setup module ................................................................
Troubleshooting ...........................................................................................
Reset button ................................................................................................
Safety guidelines for accumulators ..............................................................
Guidelines on commissioning and operating accumulators ........................
Technical data .............................................................................................
Certifications ...............................................................................................
= Information / Notice
= Caution
= Safety hint
4
5
8
9
10
12
13
14
16
17
18
20
21
25
25
26
27
28
29
Table of contents
i
Note
!
Warning
4
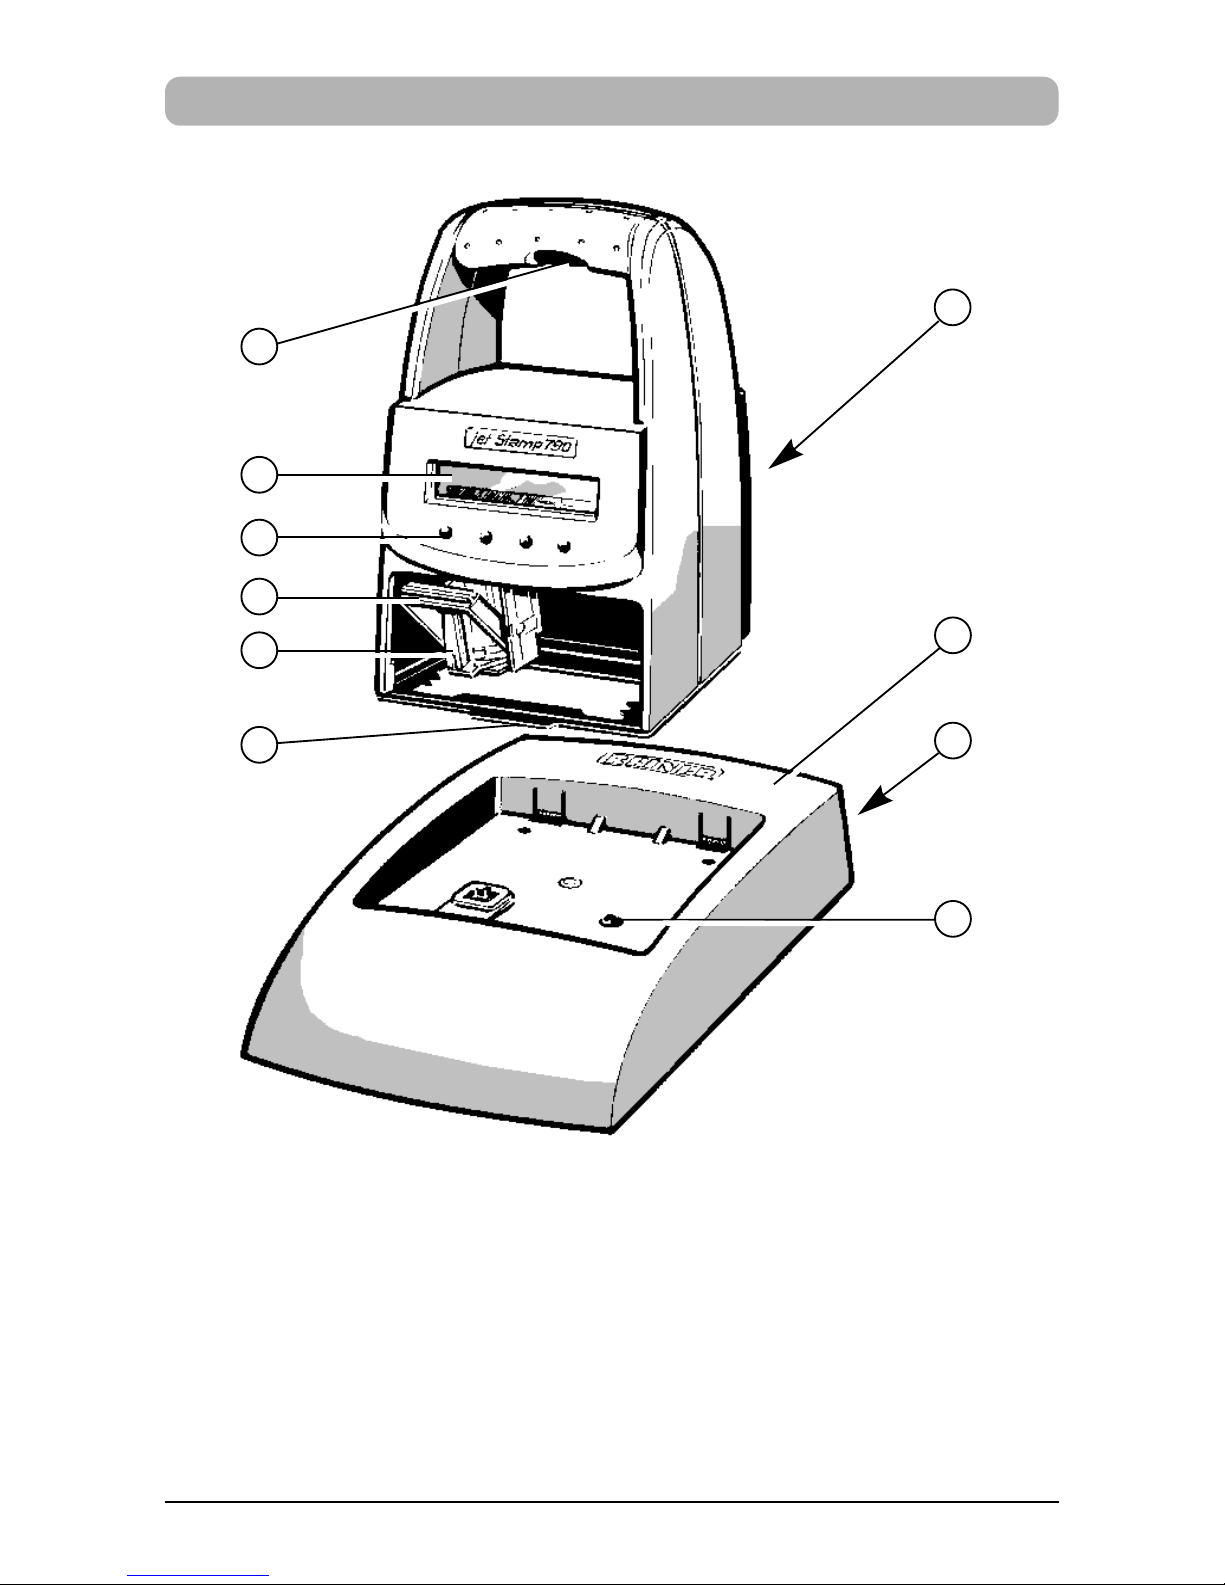
1 = Charging station with mains unit
2 = Socket for power supply (reverse side)
3 = Green charge-indicator lamp
4 = Trigger
5 = Display
6 = Buttons
7 = Locking rail
8 = Ink cartridge
9 = Notch
10 = Accumulator case (reverse side)
Control elements
1
2
3
4
5
6
7
8
9
10
5
Commissioning
Unpack equipment,
Connect plug power adaptor provided to base station and connect
to mains voltage
Note: Only use original REINER components!
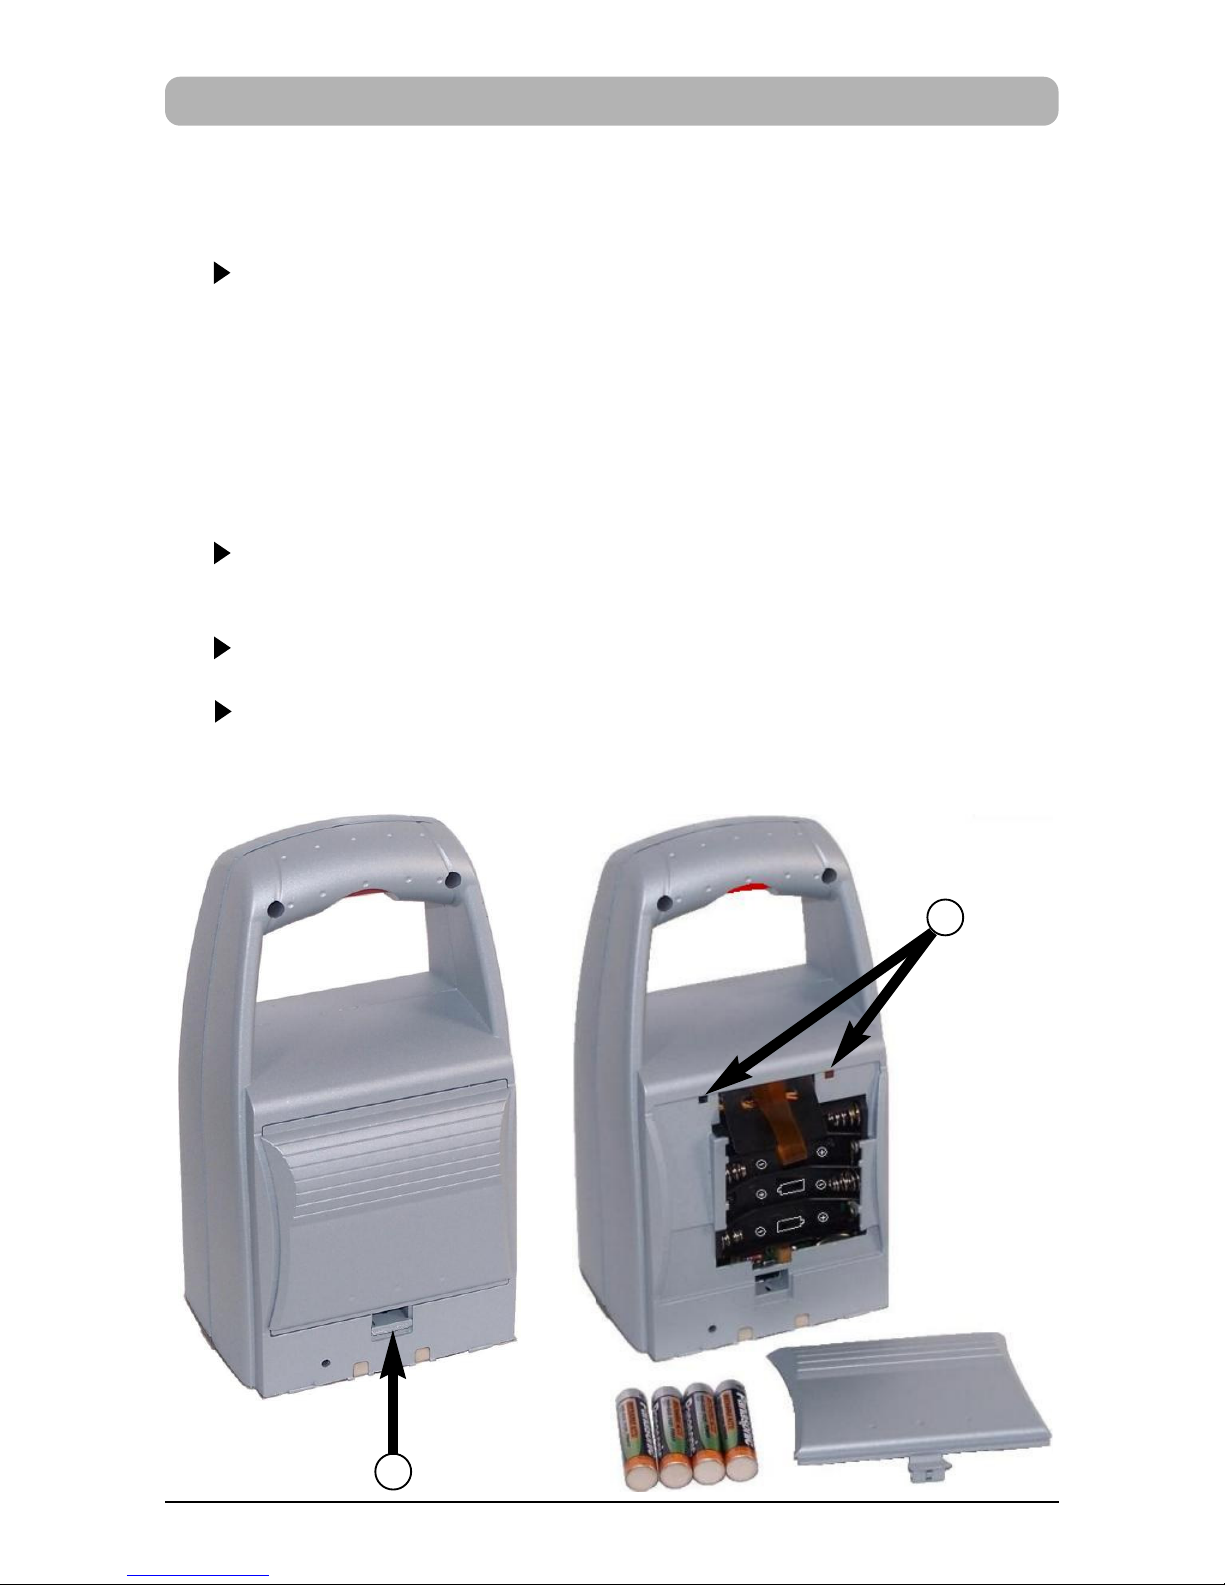
Insert accumulators
Remove cover on back: To do this push locking latch (1) up
and remove cover
Insert accumulators, according to correct polarity markings!
Attach stop levers of cover to the openings (2) of the equipment
and close the accumulator case again
1
2
6
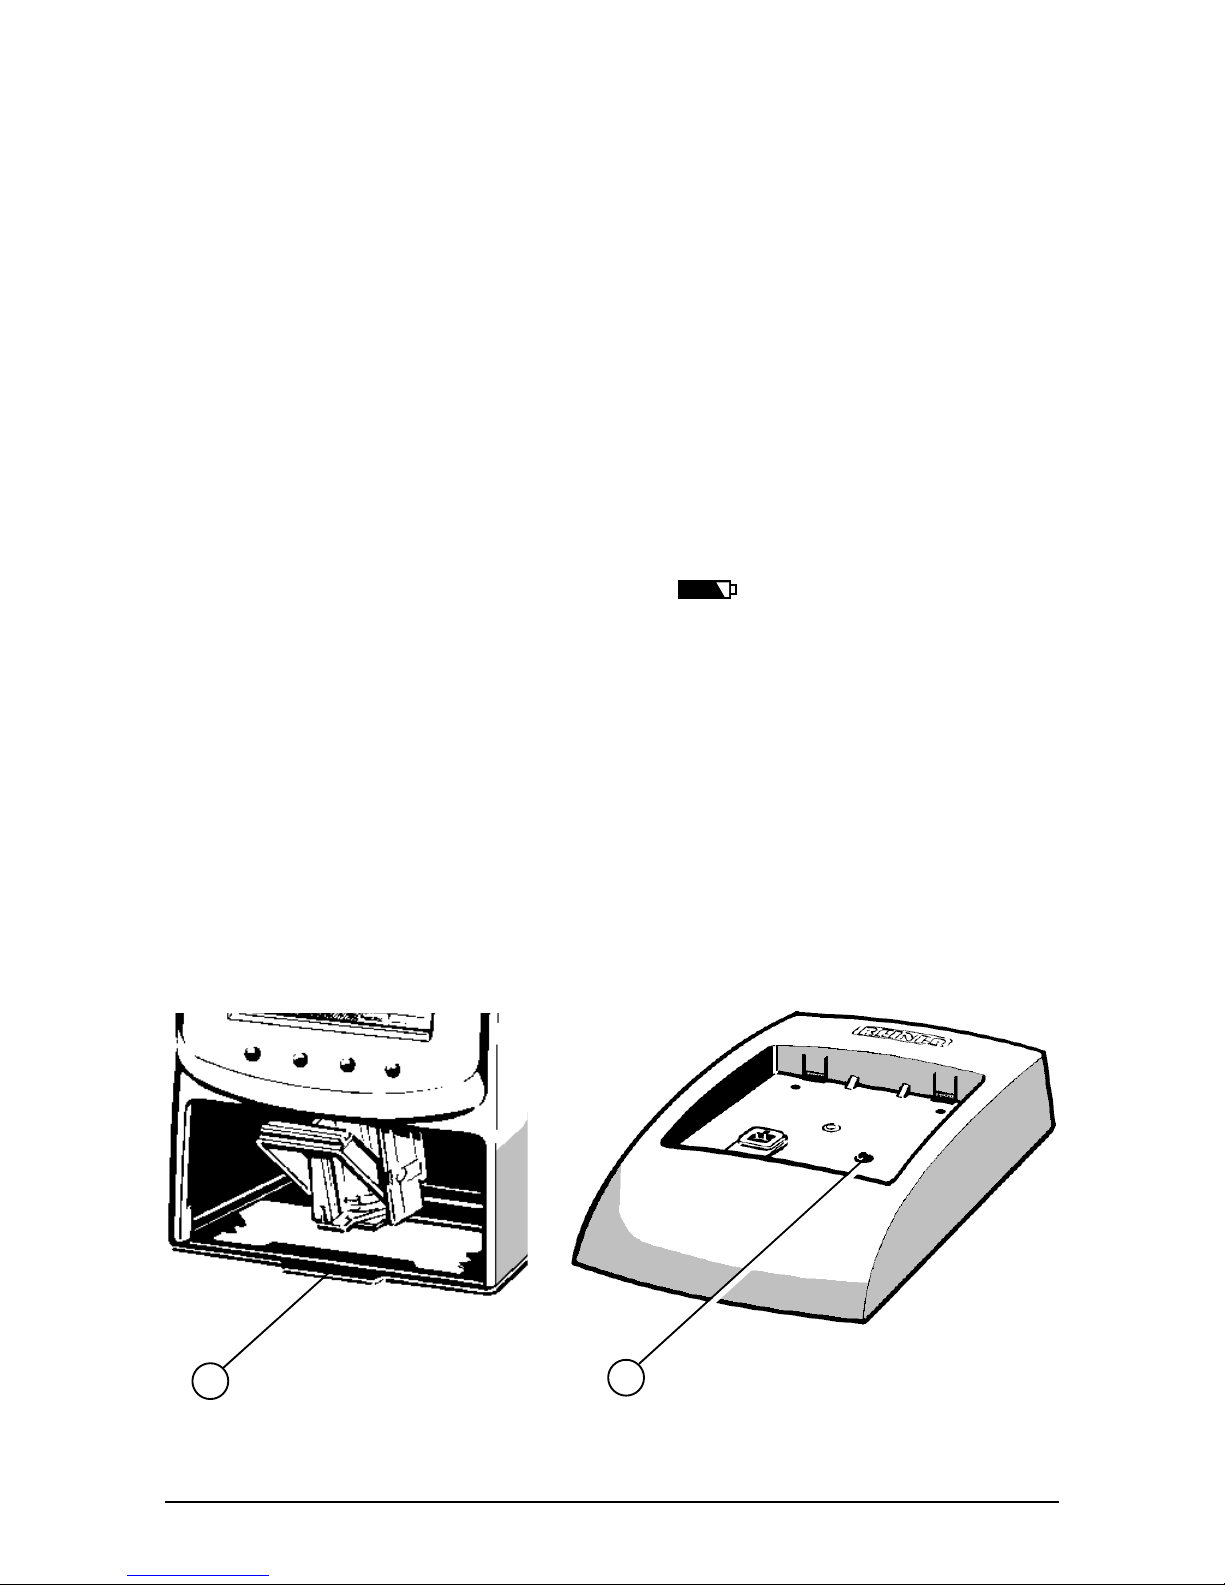
Place jetStamp in the charging station and load accumulators
Observe the following guidelines:
•
Hook jetStamp to the notch (9) and place in the charging station
•Fully charge the accumulators to begin with. We recommend
charging the accumulators for around 16 hours continuously,
e.g. overnight, for the first time. After this, between four and six
hours is required for charging.
•Accumulators charge status is indicated on the display in the top
right hand corner by the symbol
•Whilst charging the green charge status indicator (3) lights up
in the charging station
•Do not expose jetStamp to direct sunlight
(For ambient temperature see page 28, 'Technical data')
3
9
7
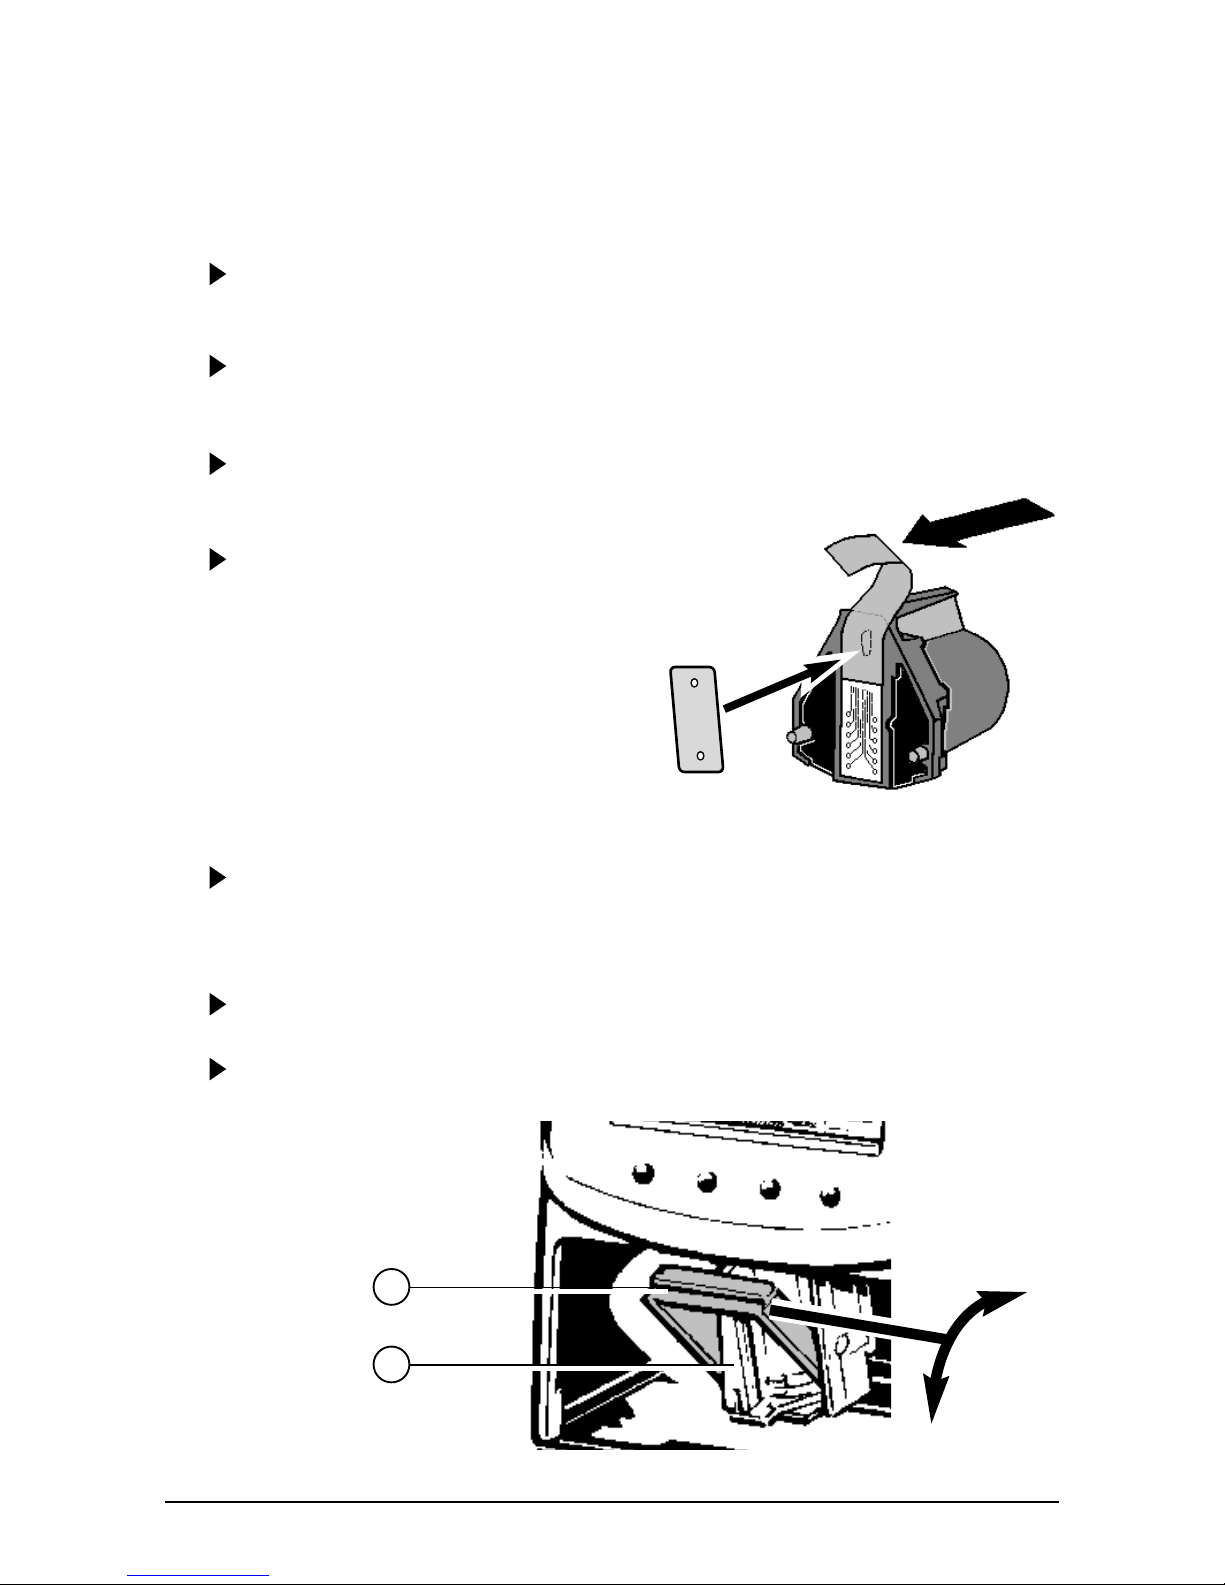
Insert ink cartridge
When necessary press repeatedly [ MODE ] until menu item
"INKJET" is displayed on the lower display line
Press [ INKJET ] : The print carriage now automatically
moves to the middle of the equipment for easier handling
Remove ink cartridge from packaging and remove protective film
from the ink cartridge
Hold the small felt plate provided with
the felt-side on the ink cartridge nozzles
for about 2 seconds until there is
some ink on the felt
Push the locking rail (7) back on the print carriage and insert
the ink cartridge with the handle strip (8) in the print carriage
pointing to the operator
Pull the locking rail forward again (7) until it engages
Press [ INKJET ] : The print carriage will return to its original
position
7
8

8
Display zones and button funcitons
P : 25 R : 01 / 01
SENT 00000000
10. APR 2007 14 : 47
CLOCK NO/TXT NEXT MODE
The display is divided into three zones:
AThe top line is the status line.
On the left is the number of the impression selected (P:01 ... P:29) .
To the right of that, if the impression includes numbering, is the
repetition setting (e.g. R:02/02) .
At the right of the top line is the battery symbol, showing the state
of charge of the battery.
BThe middle of the display shows the impression currently
selected on one or two lines.
CThe bottom line of the display contains the menu bar.
The menu items and commands displayed here can be selected
by pressing the appropriate button.
DBelow the display there are four buttons.
Each button is associated with the menu field in the display
immediately above it, i.e. a button function always depends
on the menu or command displayed.
Example of a display:
A
B
C
D
Pre-text Numbering device

9
Impression selection
A total of 25 different standard impressions are stored (see pages 10 / 11).
These contain the individual printing fields 'Pre-text' 'Numbering device'
'Date' and 'Time .
A 'pre-text' can be selected from 12 standard texts, or switched off
(see page 16).
The impressions are numbered 'P:01' to 'P:25'.
The number of the impression currently selected is shown at the top left
of the display.
'P:26' ... 'P:29' are reserved for customer-specific impressions
(see page 12) .
The required impression can be selected in one of two ways, which are
described below:
a) Select the required impression by pressing [ NEXT ]
Only those impressions can be selected that are marked 'ON'
in the Setup Menu (menu item ‘SET STAMP PICT’ ) .
(See page 22, 'SET STAMP PICT' ).
The display can be changed using the [ MODE ]
button.
Press this button, if necessary repeatedly, until
the menu item “NEXT” appears in the menu bar.
b) Select an impression using the SETUP menu.
Here, all available impressions can be selected, including those
marked 'OFF' in the Setup menu under 'SET STAMP PICT'
(see page 22, 'STAMP PICTURE' )
i
Note
10
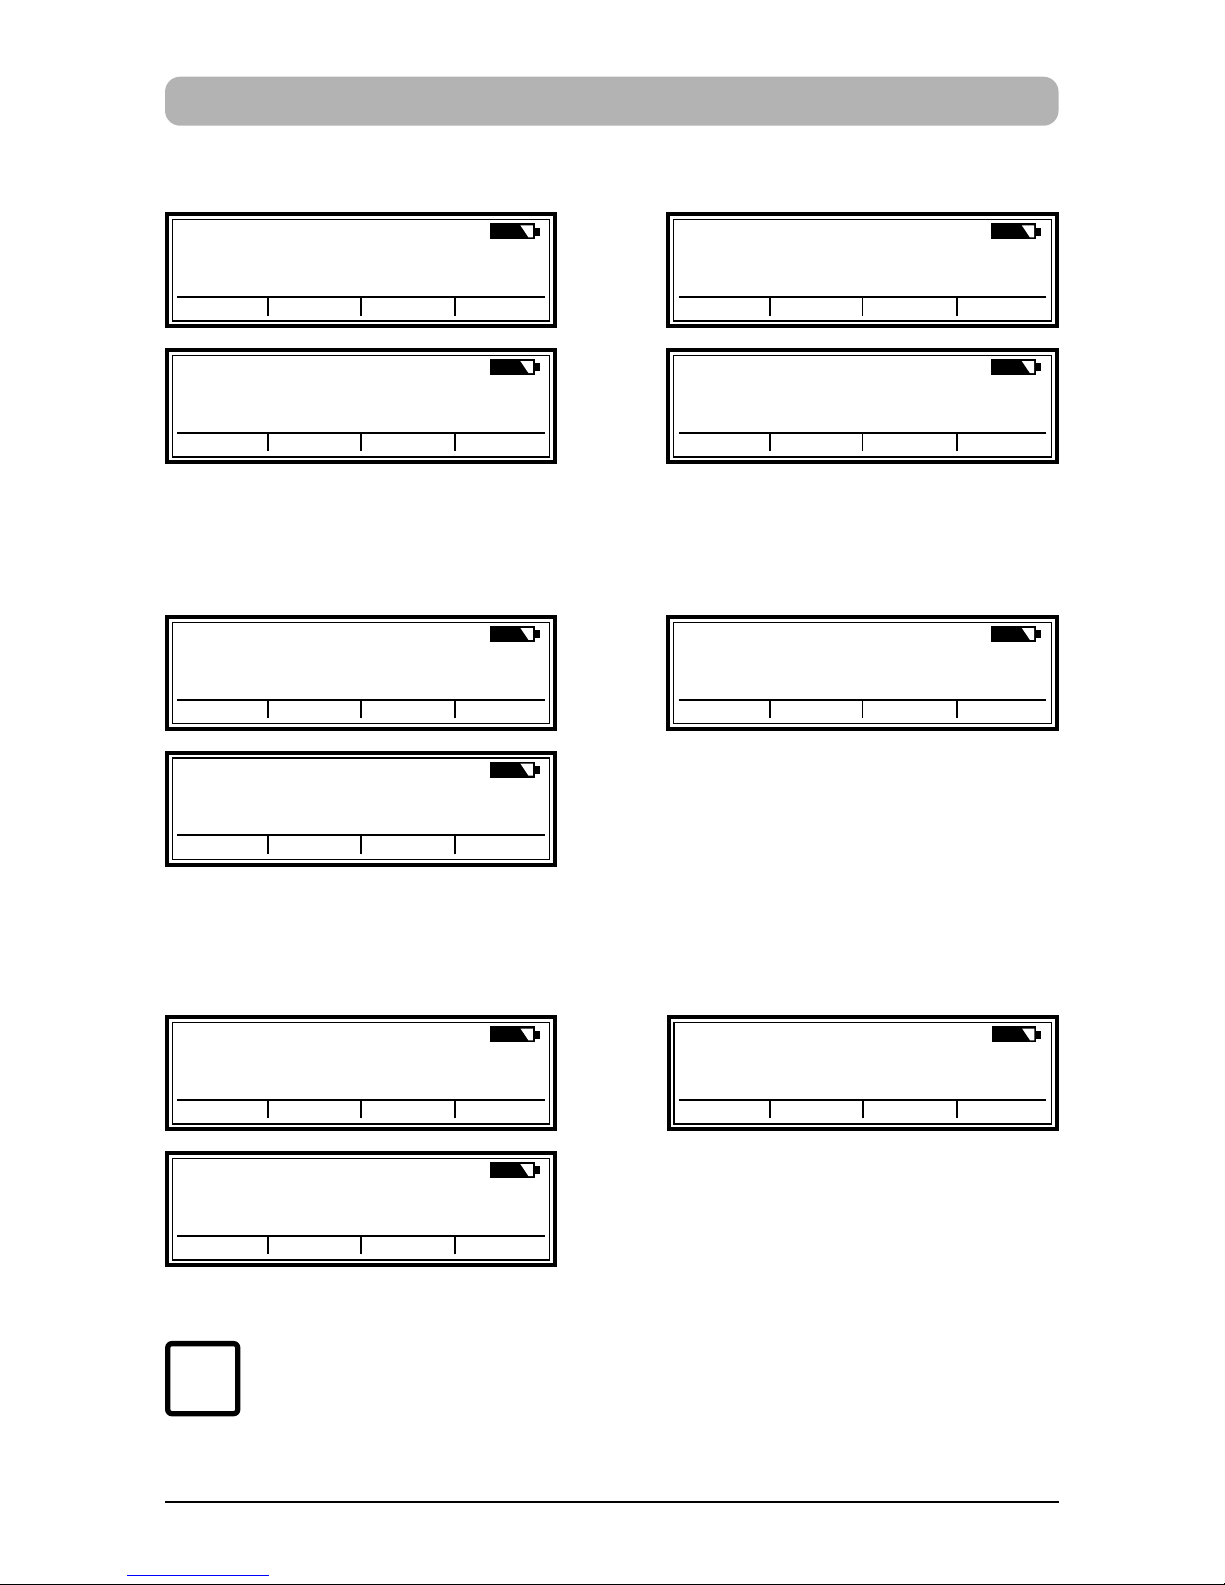
Stored impressions
P:01
SENT 10. APR 2007
CLOCK NO/TXT NEXT MODE
P:02
SENT 10. 04. 2007
CLOCK NO/TXT NEXT MODE
P:03
SENT 2007 - 04 - 24
CLOCK NO/TXT NEXT MODE
P:04
SENT APR 24. 2007
CLOCK NO/TXT NEXT MODE
P : 05 R : 01 / 01
SENT 00000000
NO/TXT NEXT MODE
P : 06 R : 01 / 01
SENT
0 0 0 0 0 0 0 0
NO/TXT NEXT MODE
P : 07 R : 01 / 01
SENT 00000000
NO/TXT NEXT MODE
P:08
SENT 0000000000
NO/TXT NEXT MODE
P:09
SENT
0 0 0 0 0 0 0 0
NO/TXT NEXT MODE
P:10
SENT 000000000000
NO/TXT NEXT MODE
Impressions P : 01 ... P : 04 = pre-text + date
Impressions P : 05 ... P : 07 = pre-text + numbering device
Impressions P : 08 ... P : 10 = pre-text + figures
On selection of one of the impressions P:08 ... P:10 , the
numbering-device setting is automatically cleared.
i
Note
Other manuals for jetStamp 790
3
Table of contents
Other Reiner Accessories manuals


