
Red Kite Junior Rider Manual

IMPORTANT
Keep these instructions for future reference. Your child’s safety
may be affected if you do not follow these instructions.
Instruction Leaet
Junior Rider
The Junior Rider is designed for children aged upwards
of 15 months and with a body weight of up to 20 kg.
Complies with the relevant elements of BS EN 1888 : 2012
Customer Care Line: 01454 326 568
Assembly instructions
The Junior Rider enables you to transport your second child comfortably and quickly when they are feeling
tired. It can be attached to the axle, rear bar or folding plate of most of prams, strollers and buggies.
IMPORTANT
•The Junior Rider is built for children aged upwards of 15 months and with a body weight of up to 20 kg.
•The Junior Rider is developed for prams, strollers and folding buggies with a rigid rear axle or tube with a
diameter of up to 45mm. It may not be suitable for some models without applicable rear construction or in
cases where the brake function is hindered.
A. Secure the wheels (2) to the foot-board (1) with the bolts (3) and nuts (4). Ensure that the nuts
are rmly tightened. Use the universal tool included for this and further steps.
B. The coupling part (6) of the Junior Rider can be assembled using one of 3 pairs of adaptors or the plastic
sleeves included. Select the most appropriate coupling to t your pram / stroller’s rear axle or tube diameter. To install
the adaptor, pull and hold the trigger back while sliding your adaptor upward onto the coupling wire. Repeat for the
other side.
IMPORTANT NOTE: If an adaptor is not required to t your stroller, we recommend covering the wire
with the plastic sleeve to avoid cosmetic damage to your stroller
C. The coupling parts (6-7) have already been pre-assembled by the manufacturer as Figure C.
D. Measure the axle height of your pram. Insert the bolt of the coupling plate (7) into the most appropriate hole (height
wise) in the “L” attachment (9). Secure with the locking nut (8). Your “L” attachment can be assembled facing upwards
or downwards depending on the axle height required to ensure that, when assembled, your Junior Rider will be as
parallel to the ground as practicable.
E. Fix the foot-board (1) to the “L” attachment (9) using the bolts and washers (10).
F. Fix the foot-board (1) under the “L” attachment (11) using the bolt and washer (10) provided.
G. Now adjust the Junior Rider width to the width of the pram, adjusting it as far as is possible (12). Tighten all bolts to t
the width to this position. Your Junior Rider is now ready for use.
H. If the Junior rider is temporarily not in use, it can be hooked up behind your stroller. Clip the hook onto the platfform
and attach the strap to a higher point on your stroller. (13).
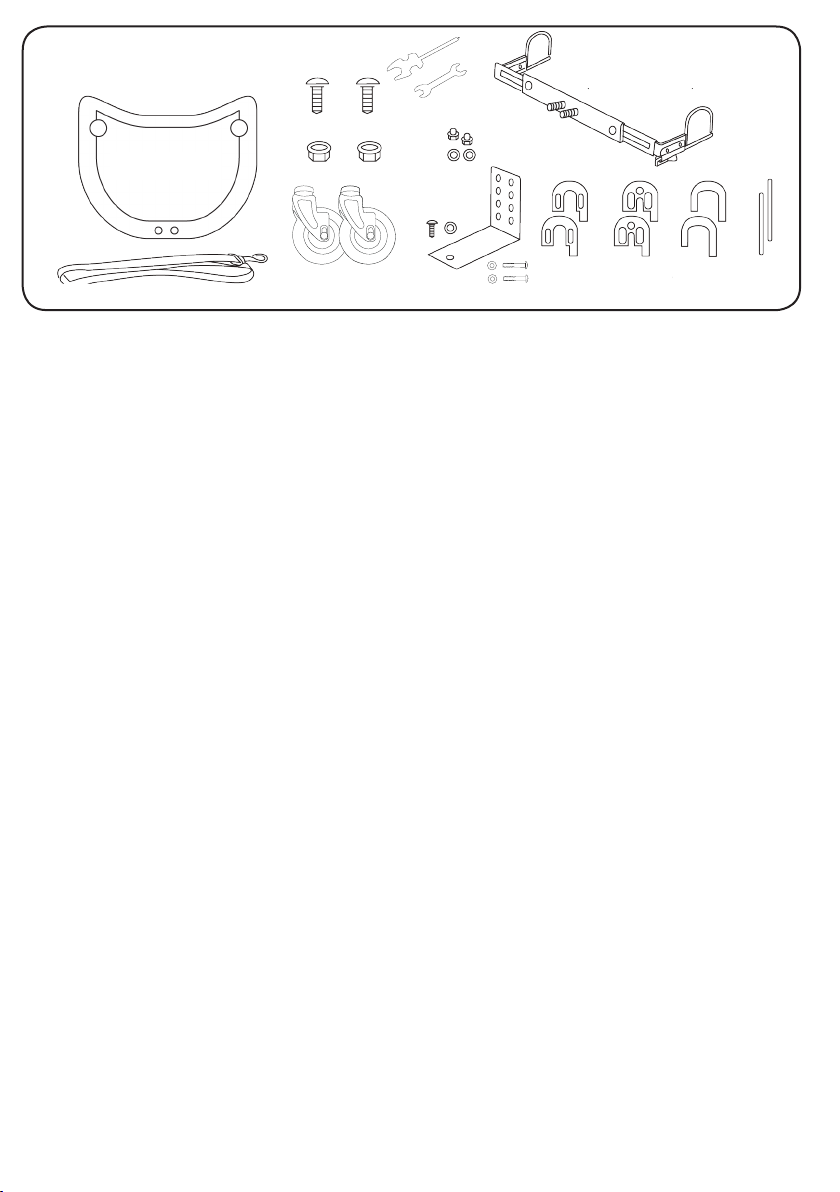
Parts List coupling plate
(Pre assembeled)
2 x plastic
sleeves
3 x set adaptors
‘L’ plate
2 x wheels
tether strap
anti slip board
2 x wheel bolts
2 x wheel nuts
2 x nuts
& washers
1 x bolt
& washer
2 x bolts & washers
assembly tools

A B
Assembly
C D
E F
G H
WARNING:
Ensurethat the foot plate is as horizontal
(parallel) as possible to the ground.
Check that all screws, nuts and bolts
have been rmly tightened before use.

SAFETY INSTRUCTIONS
•WARNING Never leave your child unattended.
•WARNING Ensure that all the locking devices are engaged before use.
•WARNING Any load attached to the handle and / or on the back of the backrest and/or on the sides
of the vehicle will affect the stability of the vehicle.
•WARNING This product is not suitable for running or skating.
•WARNING The Junior Rider is designed for children from 15 months and up to a maximum weight
of 20 kgs.
•Remove the Junior Rider before folding your stroller.
•Do not use the Junior Rider until your child can walk independently and without help.
•Children must only be transported on the Junior Rider in a standing position.
•Allow your child to step down from the Junior Rider before reaching pavement edges, stairs, steep
paths, tight corners, as well as when manoeuvring backwards.
•There may be types of pram for which the Junior Rider is not suitable because the coupling cannot be
attached rmly to the frame construction.
•Before starting out on each journey, check whether the Junior Rider and pram are correctly connected
to one another. From time to time, check that all screws and mountings of the Junior Rider are sitting
rmly and that all parts of the pram are sound.
•No alterations may be made to the Junior Rider or pram which result in safety no longer being
guaranteed.
•The Junior Rider is not suitable for use on snow or soft surfaces.
•Clean the Junior Rider and the wheels from time to time with warm soapy water.
•Adhere precisely to the instructions of your pram manufacturer.
•The use of the Junior Rider is only admissible if there is a second child in the pram or if the pushing
handles of the pram are held tightly with both hands by an adult.
•The Junior Rider is not a toy. In order to guarantee the safety and functionality of the device, avoid any
overloading and under no circumstances use it for transporting other items.
•Accessories which are not approved by Red Kite shall not be used.
This product complies with the relevant elements of BS EN 1888 : 2012
For all technical queries please call: 01454 326 568
Imported by:
The Red Kite Baby Co Ltd
35 Lavenham Road
Beeches Industrial Estate
Yate
Bristol
BS37 5QX
Table of contents











