Posh Solus User manual

of 04
Posh Solus Polymarble Shower Base
Posh Domaine MK2 Shower Base
Disclaimer: Products in this specification manual must by regulation be installed by licensed and
registered trade people. The manufacturer/distributor reserves the right to vary specifications or
delete models from their range without prior notification. Dimensions are nominal measurements only.
Dimensions and set-outs listed are correct at time of publication however the manufacturer/distributor
takes no responsibility for printing errors.
Published 27/04/2021
Dimensions are nominal measurements only.
To see the complete Posh range go to
www.reece.com.au
SPECIFICATIONS
Recommended Use Domestic, Hotel & Commercial
Colour Chrome
WARRANTY
Domestic Use Replacement Only 10 Years
Please refer to Warranty Page for full Terms and Conditions
CLEANING RECOMMENDATIONS:
We recommend the use of soapy water or approved cleaners. This product should not be cleaned with abrasive materials. Damage
caused by any improper treatment is not covered by the product warranty. Refer to Posh Warranty page for full Terms and Conditions.
Specification Sheet
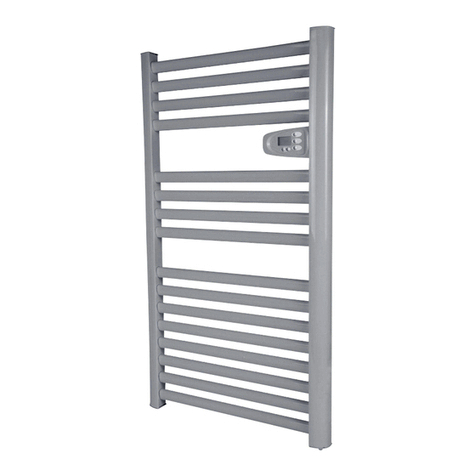
Posh Solus MK2 Towel Rack Chrome
9506583
TBA
Cartridge Sleeve x1 Anchor x4 Screw x4
A B C D E F G
H I
Mixer Body x1
Tools Required
Drill
Wrench
Test Plug x1 Cartridge Tile Cover x1 Cartridge Locknut x1
Cartridge Complete x1 Push In Connector x1
Allen Key
TBA
TBA
BACK EDGE PROFILE
Size
900x900
1200x900
A B
900 900
1220 900
A
B
150
35
80
15
10
Diagram
The Posh Solus polymarble shower base is a 4 sided, low profile shower base with a rear outlet. This model is available
in White.
Page 01

of 04
Posh Solus Polymarble Shower Base
Page 1 of 2
Installation Instructions
Plumbers, please ensure a copy of the Installation
Instructions are left with the end user for future reference
Posh Domaine MK2 Shower Base
Flush out new pipe work prior to connecting the new
mixer.
During installation, protect the exposed surface finish by
using the plastic covers provided.
In a typical installation, the mixer is mounted on a
timber/metal noggin and secured using suitable screws
through the mounting lugs.
For wall mounted Basin Tapware, consideration should
be made to installation height and length of outlet in
relation to height and positioning of basin on bench top.
Leaking joints are not covered by the warranty.
Leaking joints are not covered by the warranty.
Page 2 of 2
Installation Instructions
Posh Domaine MK2 Shower Base
Page 2 of 2
Installation Instructions
Posh Domaine MKII Shower Base
SMART PAN / TRAP
CLEANING
-
Avoid All Forms of Abrasion
-
WARRANTY
.
Warning
STORAGE
SMART TRAP / PAN LID MUST
REMAIN
ON IF USED UNDER SHOWER BASE
CUT HOLE IN LID OF SMART TRAP / PAN
THEN ALIGN WASTE FOR BASE SO THAT
IT FEEDS THROUGH HOLE IN LID
Plumbers, please ensure a copy of the Installation
Instructions are left with the end user for future reference
Plumbers, please ensure a copy of the Installation
Instructions are left with the end user for future reference
ŸIt is recommended installation practice to check the edge of the base
into the wall by the width of the tiling flange in order to achieve a leak-
free junction with the wall cladding material.
Pre-Installation Note
Tiles or wall
sheeting
Villaboard or
water resistant
wall lining
Sealant
Bottom
Plate
Check-in Base
as required
Mortar bed or
Adhesive
Do not use “Liquid Nails” or similar rigid construction
type adhesive to install base.
ŸLay the shower base on the prepared bed and use a spirit level to
adjust the base to ensure it is level along all sides and diagonally.
This will allow the base to drain properly as it has an inbuilt fall to the
waste outlet.
At this point it is imperative to check that water drains to
the waste outlet prior to lining the shower walls (see
Smartpan/ Smartwaste). Failure to do so is a breach of
warranty.
Timber Floor
Installation Instructions
120mm
Max.
Install base on mortar bed or cement-based
tile adhesive.
Page 02
ŸFloor boards or sheet flooring must cover the entire underside of the
base.
ŸCut a hole for waste no greater than 120x120mm.
Note: If renovating, ensure the floor is structurally sound. Replace
the floor if necessary.
ŸShower base to be fixed to floor by spreading cement-based tile
adhesive on the floor using a 12mm notched trowel or by use of
silicone sealant.
ŸAlternatively, where the floor is not perfectly level, the base can be
set into a mortar bed - spread a 10mm thick mortar bed of 4:1
Washed Sand: Spread the mortar over the whole area where base is
to be installed then trowel off level.

of 04
Posh Solus Polymarble Shower Base
Do not use “Liquid Nails” or similar rigid construction
type adhesive to install base.
Concrete Slab
300x300mm
Max.
Test water drainage to waste.
Smartpan/Smartwaste
Smartpan/ Smartwaste fitting -
lid/cover must remain on.
At this point it is imperative to check that water drains to
the waste outlet prior to lining the shower walls (see
Smartpan/ Smartwaste). Failure to do so is a breach of
warranty.
Page 03
ŸAny boxed opening in the slab to accommodate the waste must not
exceed 300mm in width beneath the shower base.
ŸShower base to be fixed to floor by spreading cement-based tile
adhesive on the floor using a 12mm notched trowel, or by use of
silicone sealant. Alternatively, where the floor is not perfectly level,
the base can be set into a mortar bed - spread a 10mm thick mortar
bed of 4:1 Washed Sand: Spread the mortar over the whole area
where base is to be installed then trowel off level.
ŸLay the shower base on the prepared bed and use a spirit level to
adjust the base to ensure it is level along all sides and diagonally.
This will allow the base to drain properly as it has an inbuilt fall to the
waste outlet.
ŸBackfill the opening in the slab with a 4:1 Washed Sand: Cement mix
ensuring the mortar is packed tightly around the waste outlet and all
the way back into the boxed section of the slab and up to the
underside of the base to give maximum support.
Note: Where required by regulation plastic pipe and fittings may
need to be lagged prior to backfilling.
ŸWhen the installation uses these products as waste collectors,
ensure that the lid/cover is fitted to provide adequate support for the
base. Cut a hole in the lid/cover the same size as the waste.

of 04
Posh Solus Polymarble Shower Base
TBA
ŸInstall the shower waste as shown.
Do not use “Liquid Nails” or similar rigid construction-
type adhesive to install base.
At this point it is imperative to check that water drains to
the waste outlet prior to lining the shower walls (see
diagram D). Failure to do so is a breach of warranty.
Shower Base Waste
Cleaning
We recommend the use of soapy water or approved cleaners. This product should not be cleaned with abrasive materials. Damage caused by any
improper treatment is not covered by the product warranty - refer to Warranty Conditions.
Care Details
Plumbers, please ensure a copy of the installation
instruction is left with the end user for future reference.
Care Details
Published 26/10/2022 Page 04
Warranty
ŸThe surface of this base will resist surface build-up. However to preserve it’s high lustre it may be cleaned with a soft
cloth using warm soapy water or mild household detergent.
Do not use any form of abrasive cleaner.
ŸIf accidental abrasion occurs the surface sheen can be restored by polishing with a silicone based polish.
Storage
ŸPosh Solus shower bases are made of solid synthetic polymarble. Shower bases are guaranteed for 7 years against
faulty materials or workmanship, subject to warranty terms and conditions.
ŸWarning: Warranty will be void if:
-The installation instructions are not adhered to.
-The base is subject to water at a temperature exceeding 55°C.
ŸShower bases can distort if not stored correctly. If not installed immediately the base must be stored flat, top side up
and not leaning on the waste outlet. Do not place objects on the base during storage. Distortion due to incorrect storage
is not covered by warranty.
Other Posh Bathroom Fixture manuals