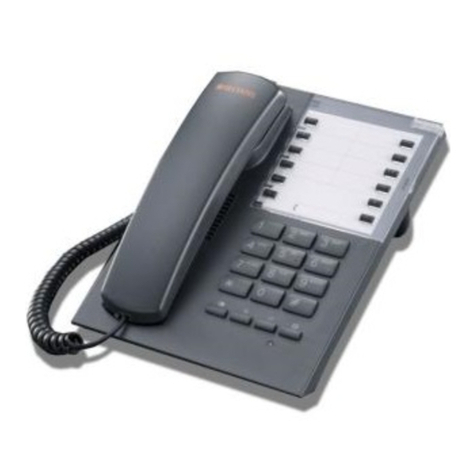
Panacom PA-7262 User manual

PA-7262 User Manual
PA-7262 Manual del Usuario


Pg. 3
PA-7262 Caller ID Telephone
User’s Guide
Thank you for purchasing Panacom’s telephone PA-7262.
Please read the manual carefully before operating.
INSTALLATION
CAUTION
• Do not place product in moisture or hot environment.
• Avoid splashing water or impact on product.
• Normally clean the product using a soft dry cloth. Always before
cleaning, disconnect all connection cables.
OPERATION
Functions setting
1. Date/Time setting:
Press “SET”, LCD display SET 123456789, and 123456789 ash,
press “1”, LCD display 1-DATE 2-CL, and ash, press 1 to set the
Date and press 2 to set the Time.
1). Date setting: When 1-DATE 2-CL ash, press “1” to enter Date
setting, then LCD display D 2006 01-01, and 06 01-01 ash which
means Year (06) Month (01) Date (01) setting , then press keypad to
input Year, Month, Date, then press “SET” to conrm.
2).Time setting: When 1-DATE 2-CL ash, press “2” to enter Time
setting, LCD will display CL 00-00, and 00-00 ash, then press key-
pad to input Hour and Minute and press “SET” to conrm.
Press “ ”key button to quit the currently setting and enter next setting.
2. Flash & P/T setting
1). Flash time setting: Press “SET” button, press “51”, LCD will
display “FLASH 600”, then you can use “ ” or “ ” button to
select the ash time “1000/600/300/180/120/100/95/90 ms”, press
“SET” to conrm.
2) P/T setting: Press “SET” button, press “52” button, LCD will display
“ P T TONE”, and “TONE” ash, then you can use “ ” or “ ” button
to select TONE or Pulse, press “SET” to conrm.
Pg. 4
3). Anti-parallel switch: Press “SET” button, press “53”, LCD will dis-
play “DEFEND OFF”, and “OFF” ash, then you can use
“ ” or “ ” button to select on or off, press “SET” to conrm.
3. Local code setting
Press “SET” button and press “6”, LCD will display “1-LOC- - 2-OL”,
and “- - -“ ash, select “1” to enter local code setting, then input the
local code. This phone can set 8 digits local code, if you set the lo-
cal code, the local incoming call number will not include local code;
Select 2 enter out of range code setting, LCD will display OUT OFF,
press “ ” or “ ” to input out of range code , the setting mode is
the same as setting local area code. If want to cancel out of range
code, press “ ” or “ ” to select “OFF”
Note: Out of range code only used for virtual net and small PBX us-
ers, and the direct line users can not setting.
4. LCD brightness adjusting
Press “ET” button, then press “7”, LCD will display “LCD CON 4”,
and “4” ash ( total 5 levels, default as the Forth one), you can press
“ ” or “ ” to select, press “SET” to conrm.
Making a call
Pick up the handset..Wait for dial tone. Dial the phone number. When
nished, press button again or put back the handset to hang
up after 13s.
Receiving a call
When phone rings. Pick up the handset. press button, when
nished, put back the handset to hang up.
Reviewing the incoming and outgoing calls:
To review the incoming calls by pressing “ ” or “ ”.
To review the outgoing calls by pressing “Check” key continually.
Press “REDIAL” to dial the selected number.
5. Function key operation
DELETE button -Press “DEL” to delete the selected number when
reviewing the incoming or outgoing calls. Press and hold this key for
3 seconds to delete all the incoming or outgoing calls. When dialing

Pg. 5
a number, press “DEL” to delete the last digit.
Redial/Pause button - The telephone automatically remembers the
last number dialed. Detail operation:
1)On Hands-free, just press Redial to dial the last number.
On Hook-on state, press Redial, then pick up the handset to dial the
last number, or just press twice Redial to dial out. This Redial is not
working when on Hook-Off state.
2)On Hook-on state, direct dial the number that you want. when meet
the voice need press PAUSE key. then press the BACK or SPEAKER
button can dial out
HOLD key
When off hook mode press HOLD key, LCD will display HOLD, and
unit will play the music only. Press the key again or pick up the hand-
set or just press key to release hold on music and continue con-
versation.

Pg. 6

Pg. 7
PA-7262 Teléfono con Caller ID
Guía del Usuario
Gracias por comprar su teléfono Panacom PA-7262.
Por favor lea este manual cuidadosamente previo al uso.
CUIDADO
• No exponga el producto a altas temperaturas ni en un ambiente con
humedad elevada.
• Evite los golpes al producto y el contacto con líquidos.
• Sobreexigir las operaciones del producto causará daños y reduc-
ción de la vida del producto.
• En caso de limpiar el producto, desconecte siempre los cables co-
nectados.
FUNCIONAMIENTO
Ajuste de la funciones
1 . Fecha / Hora
Pulse la tacla “SET”, la pantalla LCD mostrará SET 123456789 y
123456789 parpadeará, pulse “1“, la pantalla mostrará LCD 1 - DATE
2 -CL, pulse 1 para ajustar la fecha y pulse 2 para ajustar la hora .
1)Ajuste de fecha: pulse “ 1 “ para entrar en la conguración de fecha y con-
tinuación, el LCD msotrará D 2006 01, 01, a continuación, pulse el teclado
para introducir el año, mes, fecha, y luego pulse “SET” para conrmar.
2) Ajuste de la hora: pulse 1, la pantalla mostrará DATE 2 -CL parpa-
deando, pulse “2 “ para acceder al ajuste de la hora , la pantalla LCD
mostrará CL 00-00 y 00-00, presione el teclado para ingredar hora y
minutos, presione “SET“ para conrmar. Pulse el botón “ ” clave
para salir de la conguración actual y pasar al siguiente ajuste.
2 . Flash & P / T Ajuste
1) Ajuste del tiempo de Flash : Presione el botón “SET”, pulse “51” , el
LCD mostrará “FLASH 600“, con las teclas “ ” o “ ” seleccione el
tiempo deseado 1000/600/300/180/120 /100/95/90ms, pulse la tecla
”SET “ para conrmar.
2) Ajuste de P / T: pulse la tecla “ 52 “, el LCD mostrará “ PT TONE” , y
parpaderá “TONE “ , con las teclas “ ” o “ ” selecione la funcion

Pg. 8
deseada -Tono o Pulso-, pulse “ Set” para conrmar.
3 ) . Interruptor anti - paralelo : pulse la tecla “53” , LCD mostrará “
DEFDEND OFF” , el “OFF“ parpadeará, entonces usted puede utilizar
las taclas “ ” o “ ” para seleccionar ON o OFF, pulse el botón “
SET” para conrmar.
3 . Ajuste del código de área local
Pulse el botón “SET” y pulse “ 6“, el LCD mostrará “ 1 - LOC- - 2 -
OL” , y “ ---” parpadeará, seleccione “1“ para entrar en la congura-
ción del código local, a continuación introduzca el código local. Este
teléfono puede establecer 8 dígitos de código local, si se establece
el código local, el número de la llamada entrante local no incluirá el
código local. Seleccione “2” para ingresar al ajuste del código de rang
, el LCD mostrará OUT OFF, presione “ ” o “ ” para ingresar el
código de rango, el modo de ajuste es el mismo que para ajustar el
código de área local. Si desea cancelar el código de rango, pulse “ ”
o “ ” y seleccione “ OFF”
4 . Ajuste de brillo del LCD
Pulse el botón “SET“ y luego pulse “ 7 “, el LCD mostrará “LCD CON
4 “ y “ 4 “ Parpaderá, -hay 5 niveles diferentes para seleccionar-, pre-
sione “ ” o “ ” para seleccionarel deseado, pulse “SET” para
conrmar.
Realizar una llamada
Presione la tecla . Espere el tono de marcación. Marque el nú-
mero de teléfono. Cuando haya terminado, pulse el botón de nuevo
para cortar.
Recibir una llamada
Cuando suena el teléfon, levante el auricular, pulse el botón ,
Cuando haya terminado, vuelva a presionar el botón para colgar.
Revisión de las llamadas entrantes y salientes :
Para revisar las llamadas entrantes pulse “ ” o “ ”.
Para revisar las llamadas salientes pulse la tecla “Check” continua-
mente .
Pulse el botón “ REDIAL“ para re-marcar el número seleccionado.

Pg. 9
5. Operación de tecla 5.Function
Botón DEL: Pulse la tecla “ DEL “ para borrar el número seleccionado
en la revisión de las llamadas entrantes o salientes . Pulse y mantenga
pulsado este botón durante 3 segundos para borrar todas las llama-
das entrantes o salientes . Al marcar un número, presione “DEL” para
borrar el último dígito.
Tecla HOLD
Cuando la tecla presione la tecla hold, el LCD mostrará HOLD, y la
unidad reproducirá música solamente. Pulse la tecla nuevamente
para detener la música y continuar la conversación.

Pg. 10
INTERNATIONAL WARRANTY
Terms and Conditions
1. PANACOM warrants the operation of this product to be free from
any manufacturing and/or material defect for a period of 6 months
from the date of purchase by the user.
2. This warranty is limited to the repair and/or replacement of this
product, according to our own criterion, free of charge within the
stipulated term and it does not extend to consequential or inci-
dental damages to other products that may be used with this unit.
3. The warranty shall be voided in the following cases: a) repair or
attempt to repair by third parties not authorized by the company. b)
in case of performing any type of cut in connection cables, plugs,
connectors, or other adapters different from the original ones pro-
vided by the company.
4. To make this warranty effective, you shall contact the Authorized
Service Center of your country and they shall carry out the per-
tinent procedure; said information is available at www.panacom.
com. In order to start the necessary procedure to get said war-
ranty, you shall hand in the Original Purchase Invoice where the
purchase date, dealer name and product identication shall be
stated clearly.
5. Transportation, freight, stay and/or insurance expenses, if any,
are not covered by this warranty.
Table of contents
Languages:
Other Panacom Telephone manuals

Panacom
Panacom PA-7272 User manual

Panacom
Panacom PA-7700 User manual

Panacom
Panacom PA-7600 User manual

Panacom
Panacom PA-7580 User manual

Panacom
Panacom PA-7220 User manual

Panacom
Panacom PA-7400 User manual

Panacom
Panacom MP-1104 User manual

Panacom
Panacom MP 1124 User manual

Panacom
Panacom PA-7934 User manual

Panacom
Panacom PA-7400 User manual