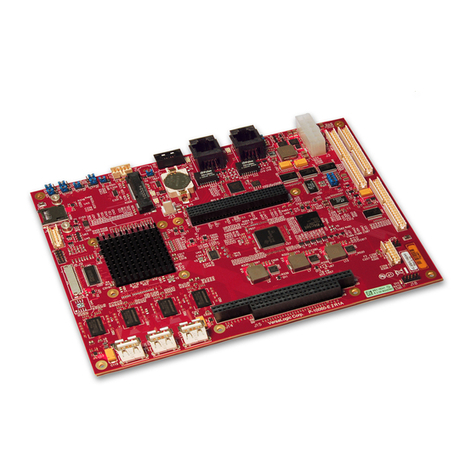
OLIMEX A13-OLinuXino User manual

OLIMEX© 01 A13-OLinuXino user's manual
DI CLAIMER
© 01 Olimex Ltd. Olimex®, logo and combinations thereof, are registered trademarks of Olimex Ltd.
Other product names may be trademarks of others and the rights belong to their respective owners.
The information in this document is provided in connection with Olimex products. No license, express
or implied or otherwise, to any intellectual property right is granted by this document or in connection
with the sale of Olimex products.
The Hardware project is released under the Creative Commons Attribution-Share Alike 3.0 United States
License. You may reproduce it for both your own personal use, and for commercial use. You will have to
provide a link to the original creator of the project http://www.olimex.com on any documentation or website.
You may also modify the files, but you must then release them as well under the same terms. Credit can be
attributed through a link to the creator website: http://www.olimex.com
The software is released under GPL.
It is possible that the pictures in this manual differ from the latest revision of the board.
The product described in this document is subject to continuous development and improvements. All
particulars of the product and its use contained in this document are given by OLIMEX in good faith.
However all warranties implied or expressed including but not limited to implied warranties of
merchantability or fitness for purpose are excluded. This document is intended only to assist the reader in the
use of the product. OLIMEX Ltd. shall not be liable for any loss or damage arising from the use of any
information in this document or any error or omission in such information or any incorrect use of the
product.
This evaluation board/kit is intended for use for engineering development, demonstration, or evaluation
purposes only and is not considered by OLIMEX to be a finished end-product fit for general consumer use.
Persons handling the product must have electronics training and observe good engineering practice
standards. As such, the goods being provided are not intended to be complete in terms of required design-,
marketing-, and/or manufacturing-related protective considerations, including product safety and
environmental measures typically found in end products that incorporate such semiconductor components or
circuit boards.
Olimex currently deals with a variety of customers for products, and therefore our arrangement with the user
is not exclusive. Olimex assumes no liability for applications assistance, customer product design, software
performance, or infringement of patents or services described herein.
THERE I NO WARRANTY FOR THE DE IGN MATERIAL AND THE
COMPONENT U ED TO CREATE OLINUXINO. THEY ARE CON IDERED
UITABLE ONLY FOR OLINUXINO.
Page of 37
Downloaded from Elcodis.com electronic components distributor

OLIMEX© 01 A13-OLinuXino user's manual
Table of Contents
DI CLAIMER ............................................................................................................. 2
CHAPTER 1: OVERVIEW ........................................................................................ 5
1. Introduction to the chapter ....................................................................................................... 5
1.1 Features ..................................................................................................................................... 5
1.2 Target market and purpose of the board ............................................................................... 6
1.3 Board variants .......................................................................................................................... 6
1.4 Organization ............................................................................................................................. 6
CHAPTER 2: ETTING UP THE OLINUXINO BOARD ..................................... 7
2. Introduction to the chapter ....................................................................................................... 7
2.1 Electrostatic warning ............................................................................................................... 7
2.2 Requirements ........................................................................................................................... 7
2.3 Powering the board .................................................................................................................. 8
2.4 Prebuilt software ...................................................................................................................... 9
2.5 Button functions in Android ................................................................................................. 10
2.6 How we configured the Android image ................................................................................ 10
2.6.1. Getting the Android DK tools .................................................................................................................. 10
2.6.2. Adding information for the board in the Linux ........................................................................................ 10
2.6.3. Installing the DK tools .............................................................................................................................. 11
2.6.4. Connecting the A13-OLinuXino ............................................................................................................... 12
2.6.5. Downloading the default config file and script tool .................................................................................. 13
2.6.6. Applying the script and uploading the confing ......................................................................................... 13
2.6.7. Restarting the A13-OLinuXino .................................................................................................................. 13
2.7 Configuration of hardware in the Debian image ................................................................ 13
CHAPTER 3: A13-OLINUXINO BOARD DE CRIPTION ................................. 14
3. Introduction to the chapter ..................................................................................................... 14
3.1 Layout (top view) ................................................................................................................... 14
CHAPTER 4: THE ALLWINNER A13 MICROCONTROLLER ....................... 15
4. Introduction to the chapter ..................................................................................................... 15
4.1 The microcontroller ............................................................................................................... 15
4.2 Block diagram ........................................................................................................................ 17
CHAPTER 5: CONTROL CIRCUITY ................................................................... 18
5. Introduction to the chapter ..................................................................................................... 18
5.1 Reset ........................................................................................................................................ 18
5.2 Clocks ...................................................................................................................................... 18
5.3 Power supply circuit .............................................................................................................. 18
CHAPTER 6: CONNECTOR AND PINOUT ...................................................... 19
6. Introduction to the chapter ..................................................................................................... 19
6.1 Communication with the A13 ............................................................................................... 19
6.1.1 U B communication ..................................................................................................................................... 19
Page 3 of 37

Downloaded from Elcodis.com electronic components distributor

OLIMEX© 01 A13-OLinuXino user's manual
6.1.2 UART1 interface ........................................................................................................................................... 20
6.2 D/MMC slot .......................................................................................................................... 21
6.3 UEXT module ......................................................................................................................... 22
6.4 GPIO-1 (General Purpose Input/Output) 10pin connector .............................................. 23
6.5 GPIO-2 (General Purpose Input/Output) 40pin connector .............................................. 23
6.6 LCD_CON 40pin connector ................................................................................................. 25
6.7 PWR Jack ............................................................................................................................... 26
6.8 Headphones and microphone connector .............................................................................. 26
6.9 Battery connector ................................................................................................................... 27
6.7 VGA video connector ............................................................................................................. 27
6.8 Jumper description ................................................................................................................ 28
6.8.1 CE_NAND_E ................................................................................................................................................ 28
6.8.2 3.3V_OPTION, 1.5V_E ................................................................................................................................ 28
6.8.3 5V_E .............................................................................................................................................................. 28
6.8.4 HO T_EN, 5V_E_WIFI, WIFI-3.3V/5V_U B .......................................................................................... 28
6.9 Additional hardware components ........................................................................................ 28
CHAPTER 7: CHEMATIC .................................................................................. 30
7. Introduction to the chapter ..................................................................................................... 30
7.1 Eagle schematic ...................................................................................................................... 30
7.2 Physical dimensions ............................................................................................................... 32
CHAPTER 8: REVI ION HI TORY AND UPPORT ........................................ 33
8. Introduction to the chapter ..................................................................................................... 33
8.1 Document revision ................................................................................................................. 33
8.2 Board revision ........................................................................................................................ 35
8.3 Useful web links and purchase codes ................................................................................... 36
8.4 Product support ..................................................................................................................... 37
Page 4 of 37
Downloaded from Elcodis.com electronic components distributor

OLIMEX© 01 A13-OLinuXino user's manual
CHAPTER 1: OVERVIEW
1. Introduction to the chapter
Thank you for choosing the OLinuXino single board computer from Olimex! This document
provides a user’s guide for the Olimex OLinuXino board. As an overview, this chapter gives the
scope of this document and lists the board’s features. The document’s organization is then detailed.
The OLinuXino development board enables code development of applications running on the
microcontroller A13, manufactured by Allwinner Technology from China.
OLinuXino is an open-source, open-hardware project and all documentation is available to the
customer.
1.1 Features
•A13 Cortex A8 processor at 1GHz, 3D Mali400 GPU
•51 MB RAM
•6-16VDC input power supply, noise immune design
•3 + 1 USB Host, 3 available for users 1 for (optional) WIFI RTL8188CU 80 .11n 150Mbit
module on board
•1 USB OTG which can power the board
•SD-card connector for booting the Linux image
•(optional) 4GB NAND flash
•VGA video output – 800 x 600 resolution
•LCD signals available on connector so you still can use LCD if you diasble VGA/HDMI
•Audio Output
•Microphone input
•RTC PCF8536 on board for real time clock and alarms
•5 Keys on board for android navigation
•UEXT connector for connecting addtional UEXT modules like Zigbee, Bluetooth, Relays,
etc
•GPIO connector with 68/74 pins and these signals : 17 for adding NAND flash; for
connecting LCDs; 0+4 including 8 GPIOs which can be input, output, interrupt sources; 3x
I C; x UARTs; SDIO for connectinf SDcards and modules; 5 system pins: +5V, +3.3V,
GND, RESET, NMI
•(Optional low cost 7" LCD with touchscreen)
Page 5 of 37
Downloaded from Elcodis.com electronic components distributor

OLIMEX© 01 A13-OLinuXino user's manual
1.2 Target market and purpose of the board
The boards from the OLinuXino family are easy to setup and powerful. They are suitable for
embedded programming enthusiasts, Linux and Android gadget fans and also professionals (since
its low cost makes it very good solution for application orientated embedded systems). The main
usage of the board is software embedded development without the urge of understanding perfectly
the hardware.
The strong points of the boards are the processor speed, the mobility of the board and the low ratio
price to productivity.
Customers have full access to the technical documentation of the board. The software is released
under General Purpose License and the board is considered open-hardware.
1.3 Board variants
There are two major board variants. According to the names: A13-OLinuXino and A13-OLinuXino-
MICRO.
The base model has also two flavors: A13-OLinuXino and A13-OLinuXino-WIFI. The first one is
the base model that goes without any operating system image on board, while the second has two
additional components – a WIFI module on the board and NAND memory with stored Android
image.
The information on A13-OLinuXino-Micro will be added at a later time but so far the board is most
likely to differ from the base A13-OLinuXino by having only 1 USB host, 1 USB OTG, no power
connector, no NAND memory, no WIFI, no audio out connector, less buttons.
1.4 Organization
Each section in this document covers a separate topic, organized as follow:
–Chapter 1 is an overview of the board usage and features
–Chapter provides a guide for quickly setting up the board and software notes
–Chapter 3 contains the general board diagram and layout
–Chapter 4 describes the component that is the heart of the board: the A13 – Allwinner
processor
–Chapter 5 is an explanation of the control circuitry associated with the microcontroller to
reset. Also shows the clocks on the board
–Chapter 6 covers the connector pinout, peripherals and jumper description
–Chapter 7 provides the schematics
–Chapter 8 contains the revision history, useful links and support information
Page 6 of 37
Downloaded from Elcodis.com electronic components distributor

OLIMEX© 01 A13-OLinuXino user's manual
CHAPTER 2: ETTING UP THE OLINUXINO BOARD
2. Introduction to the chapter
This section helps you set up the OLinuXino development board for the first time. Please consider
first the electrostatic warning to avoid damaging the board, then discover the hardware and software
required to operate the board.
The procedure to power up the board is given, and a description of the default board behavior is
detailed.
2.1 Electrostatic warning
OLinuXino is shipped in a protective anti-static package. The board must not be exposed to high
electrostatic potentials. A grounding strap or similar protective device should be worn when
handling the board. Avoid touching the component pins or any other metallic element.
2.2 Requirements
In order to set up the OLinuXino optimally, the following items are required:
- 6V to 16V, 6W required (6V @ 1A or 16V @ 0.4A) – for optimal power
- LCD (preferably with touchscreen panel) display for the LCD_CON OR TV monitor with RGB
port
- A USB mouse – if you use touchscreen LCD you might skip the mouse
Additional items include:
- USB keyboard – for convenience with text input
- USB-SERIAL-CABLE-F – for serial communication with UART1 connector
- USB-MINI-CABLE – for connecting with the USB OTG and being able to firmware update ot
power A13-OLinuXino
- Wireless internet connectivity or USB modem – for browser access and access to the Android
market
Some of the suggested items can be purchased by Olimex, for instance:
Y0612E - power supply adapter 1 V/0.5A for A13-OLinuXino
U B- ERIAL-CABLE-F - USB serial console cable female
U B-MINI-CABLE – standard USB type A to USB type mini cable
Page 7 of 37
Downloaded from Elcodis.com electronic components distributor

OLIMEX© 01 A13-OLinuXino user's manual
A 7'' LCD display with optional touch screen panel is available for purchase also:
https://www.olimex.com/Products/OLinuXino/A13/A13-LCD7/
https://www.olimex.com/Products/OLinuXino/A13/A13-LCD7-TS/
Note that if you wish to use one of the LCD displays mentioned above you need to upload different
Android image – configured for 480x800 screen resolution.
2.3 Powering the board
There are three possible ways of powering A13-OLinuXino – via external supply using the power
jack, via a battery using the battery connector or via the USB OTG connector. Depending on your
preferred way of powering A13-OLinuXino you might need additional hardware.
The preferred way of powering board is via the PWR jack with 6Vdc to 16Vdc with a power of 6W
(e.g. 6Vx1A to 16Vx0.4A). This will make the board fully powered and able to power all the
peripherals connected to it.
When powered by the typical 3.7V Lithium-polymer battery the board will be fully functional and
you will be able to operate with most of the peripherals. However when using all three USB-A
connectors and an LCD connected to the LCD_con it might cause flickering and not sufficient
power. If you suspect the power is not enough for the peripherals you have connected use the PWR
jack.
The board can be also powered by the USB OTG connector (mini USB standard) but the voltage
provided is not enough to power a possible LCD connected to the LCD_con. However, this power
option is capable of driving the board when using external display connected to the VGA connector.
If you have a standard LCD display connected to LCD_con, Android and WIFI running the typical
consumption is between 150mA and 350mA depending on the current load. While the board is in
stand-by mode it consumes a minimum of 60mA. All the three approximate values above were
taken when I applied 1 V to the board.
Important! Avoid disconnecting the power supply while Android or Linux is running, since that
might corrupt the operating system and you will need to install the OS again (for Android install
instructions check chapter .6. Use the PWR_BUT before disconnecting the supply.
If the board has entered power-down state you can bring it back without restart using the
PWR_BUT.
For the European customers we sell a power supply adapter 1 V/0.5A – Y0612E. We also sell
USB OTG to USB type A cables if you lack such.
Page 8 of 37
Downloaded from Elcodis.com electronic components distributor

OLIMEX© 01 A13-OLinuXino user's manual
2.4 Prebuilt software
The A13-OLinuXino-WIFI board comes with Android 4.0 ready to use. The default settings of the
software are followed.
Note that the A13-OLinuXino (standard version without WIFI) lacks NAND memory and there isn't
OS uploaded on the shipped boards (no Android).
How we have installed the software? We have configured an Android image with settings suitable
for A13-OLinuXino. Then using LiveSuit tools we uploaded the image to the board. To activate
A13 bootloader do as follows: run Livesuit, disconnect the power supply and USB cable, then press
HOME button, apply power supply, attach USB cable and release the button, Livesuit will detect
the bootloader and will ask which file to program to the NAND flash. The image will be available
for users to try and tweak the settings. You can find and image with the view of the progress
window in LiveSuit:
Download links to all available images (and tools needed) can be found at the A13-OLinuXino wiki
page: https://www.olimex.com/wiki/A13-OLinuXino.
Helpful information about the Android and Linux images can be found at the OLIMEX forums.
Page 9 of 37
Downloaded from Elcodis.com electronic components distributor

OLIMEX© 01 A13-OLinuXino user's manual
2.5 Button functions in Android
The following buttons represent functions in the Android:
PWR_BUT – used to wake the board from stand-by
HOME – shows the home screen; note that HOME is also used to enter bootloader mode for
firmware update
ENTER – to select a choice
MENU – brings up the main menu
VOL+ – increases the volume
VOL- – lowers the volume
For more information on the button functions check the Android documentation.
Note that RE ET button will perform a hardware reset of the board, not controlled by the OS.
2.6 How we configured the Android image
This is a detailed explanation of how we got to tweak the Android image configuration files. It is
worth mentioning that we used Ubuntu with Linux Kernel 3. for the steps below.
2.6.1. Getting the Android DK tools
Download the Android SDK tools for Linux from: http://developer.android.com/sdk/index.html
Note that you have to click “Other platforms” and get the one for Linux. Then you extract it:
tar zxfv android-sdk_r 0.0.3-linux.tgz
Note that the above line would vary depending on the version you have downloaded (by the time of
writing 0.0.3 was the latest one).
2.6.2. Adding information for the board in the Linux
Create the following file:
.../etc/udev/rules.d/70-android.rules
and add the following line inside:
SUBSYSTEM=="usb_device", SYSFS{idVendor}=="18d1", MODE="0666"
then we save the file and change its properties with chmod +x 70-android.rules and reboot the
computer.
Page 10 of 37
Downloaded from Elcodis.com electronic components distributor
Other manuals for A13-OLinuXino
2
This manual suits for next models
1
Table of contents
Other OLIMEX Single Board Computer manuals

OLIMEX
OLIMEX A13-OLinuXino-MICRO User manual

OLIMEX
OLIMEX OLinuXino-MICRO User manual

OLIMEX
OLIMEX A10S-OLinuXino-MICRO User manual

OLIMEX
OLIMEX A64-OLinuXino User manual

OLIMEX
OLIMEX OLinuXino-NANO User manual

OLIMEX
OLIMEX A20-OLinuXino-MICRO-e4Gs16M User manual

OLIMEX
OLIMEX A13-SOM-256 User manual

OLIMEX
OLIMEX A20-OLINUXINO-LIME2 User manual

OLIMEX
OLIMEX A13-OLinuXino User manual

OLIMEX
OLIMEX A20-OLINUXINO-LIME2-EMMC User manual