Lyfco PRC-2032 User manual

1
POOL ROPOT
PRC-2032
BRUKSANVISNING

2
Important Precautions
1. In order to prevent severe damage to the cleaner, never power on the unit when it
is outside of the swimming pool.
2. The power cord must be connected to an appropriate earthed socket.
3. Do not operate the cleaner when people are in the pool.
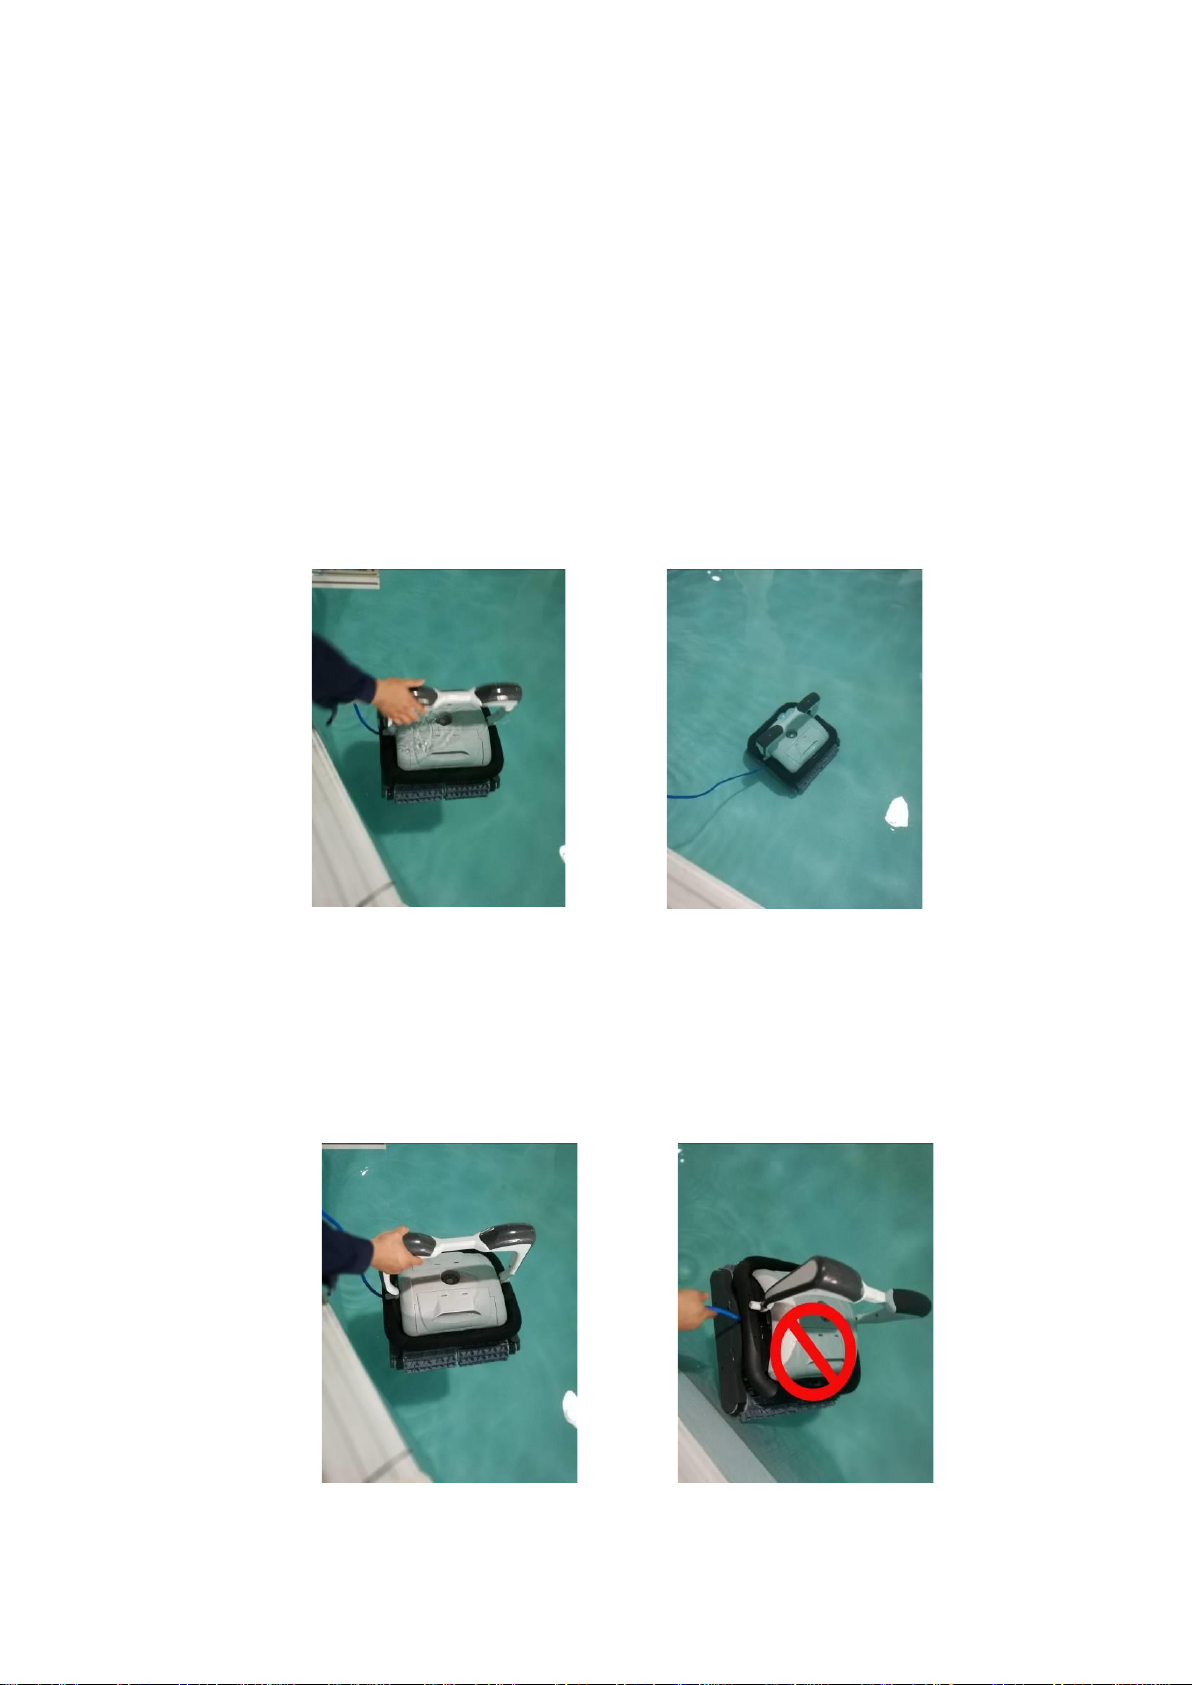
4. Hold the top handle when putting the cleaner into water or lifting out of the water, do
not pull the cable.
5. Before power on, make sure to empty the trapped air inside the cleaner (no more
air bubbles coming from the cleaner and the cleaner is fully submersed on the pool
bottom).
6. Before power on, make sure the filter be assembled in position and cable be fully
released to avoid any winding, which could affect the cleaner’s performance or
cause damage.
7. Remote control should be hold vertically for a maximum control distance.
8. Please clean and wash the filter bag every time after use.
9. The cleaner should be stored in a cool and ventilated place, away from direct
sunlight when not in use.
10.The power supply unit should be placed in a shaded area during working. In order
to avoid overheating and potential damage of components, never cover the power
supply unit.
11.Only authorized after sales service personnel should open the cleaner’s power
supply unit and motor assembly, otherwise the warranty will be invalidated.
12.In order to avoid any accident/damage, it is strongly recommended to connect the
caddy with a fixed holder beside the swimming pool by using the safety rope
(included in the package).
13.Do not use the cleaner beyond the working environment/conditions stated in this
manual.
3
14.After power off the machine, must wait until at least 30 seconds to restart it.
15.For different season different density of the filter net need to be chosen. More detail
please contacts your local distributor.
16.This machine is for clean the pool only not for other purpose.
17.It may cause minor pollution in case of the leaking from the oil seal.
Attention
When put the cleaner into the water please hold the top handle make sure to empty
the trapped air inside, then the cleaner can immerse into the pool floor.
When pulling cleaner out of water suspend the cleaner above water for about 10-15
seconds to empty the water inside. Please holds the top handle only, never pull the
cable.

4
Contents
Ⅰ. Introduction--------------------------------------------------------------------------------P 5
Ⅱ. Safety-----------------------------------------------------------------------------------------P 5
Ⅲ. Specifications------------------------------------------------------------------------------P 6
Ⅳ. Operation instructions------------------------------------------------------------------ P 7
Ⅴ. Packing list----------------------------------------------------------------------------------P 11
Ⅵ. Warranty--------------------------------------------------------------------------------------P 12

5
Ⅰ.Introduction
The robotic pool cleaner HJ2032 is a new type of highly efficient and energy-saving
swimming pool cleaning robot. Through its advanced computer controlled program, it can
clean the pool walls and bottom automatically. At the same time, it filters the pool water and
gets rid of suspended particles without replace the pool water. It’s totally environmental-
friendly.
For safe operation, the cleaner works on 24V direct current. Please read this user manual
carefully before use.
Ⅱ. Safety
1. Power supply unit position:
Power supply unit need to be placed in proper position so as to reach the distal end of pool
for the cleaner, meanwhile as least 3.5m from pool edge.
2.important:
Before power on, make sure local voltage/frequency matches the rated voltage/frequency
of the cleaner
Rated input voltage:110VAC (120VAC) / 220VAC (230VAC)
Frequency:50Hz/60Hz

6
Ⅲ. Specifications
1.Rated input voltage: 220VAC (230VAC)/ 110VAC (120VAC)
2.Frequency:50Hz/60Hz
3.Output voltage:DC20V
4. Power:200W
6. Remote control frequency:315 MHz
7.Cable length: 18m
8.Roller length:465mm
9.Max cleaning area:Appr. 200 ㎡
10.flow rate:20m³/h
11.Filter net density: 180um
12.Pool water temperature:10℃-32℃
13. Moving speed:MAX 12.5m/min
14. IP grade:Cleaner IPX8
Power supply unit IPX5
15. Water deepness: max. 2m
16. Moving speed: appr. 12m/min
17. Remote distance: >20m
18. Water temperature: 0℃-+40℃

7
Ⅳ. Operation instructions
4.1 Panel
No.
Indicator
Description
Function
1
ON/ OFF
Power on/ off
Press this button, the cleaner
starts to work;
Press a second time, the cleaner
is stopped.
2
CYCLE
To choose working cycle
When the cleaner is on, use this
button to choose preferred
working time.
3
Indicator
Indicator
2H flashes
Working time of 2 hours
3H flashes
Working time of 3 hours
4H flashes
Working time of 4 hours
2H, 3H and 4H flash
together
Working cycle finishes
Fault Code
Meaning
Suggestions
Fault
2H and 3H flash
Pump
Stop the cleaner,
2
3
1

8
4.2 Remote control (optional)
NO.
Sign
Indicate
Function
1
Antenna
Signal reception
2
Indicator light
3
3H
Working for 3 hours
Press this button, machine
will working for 3 hours
4
4H
Working for 4hours
Keep press this button
machine will turn right
5
STOP
Stop working
Press this button machine
will stop working
6
2H
Working for 2hours
Press this button machine
will stop walking forward
7
FWD
Move forwards
manually
Press this button, machine
will move forwards
8
REW
Move backwards
manually
Press this button, machine
will move backwards
together, with warning
sound
overload
check if anything is
stuck in impeller
3H and 4H flash
together, with warning
sound
Driving motor
overload
Check if anything is
stuck in the belt
2H and 4H flash
together, with warning
sound
Cleaner out of
water
Eliminate the air
inside the cleaner,
immerge the cleaner
and restart.

9
4.3 Clean the filter tray
2 ,
6,清洗过滤盒
4. Move the filter panel outwards
about 2 cm
5 .Pull out the filter panel vertically
3. Push towards the middle to
open the filter tray
7. Slide the filter tray along the groove; press the two ends of handle to fix
with robot
1. Lift the filter tray cover
2. Lift the filter tray
.
6. Rinse the filter
Center
10
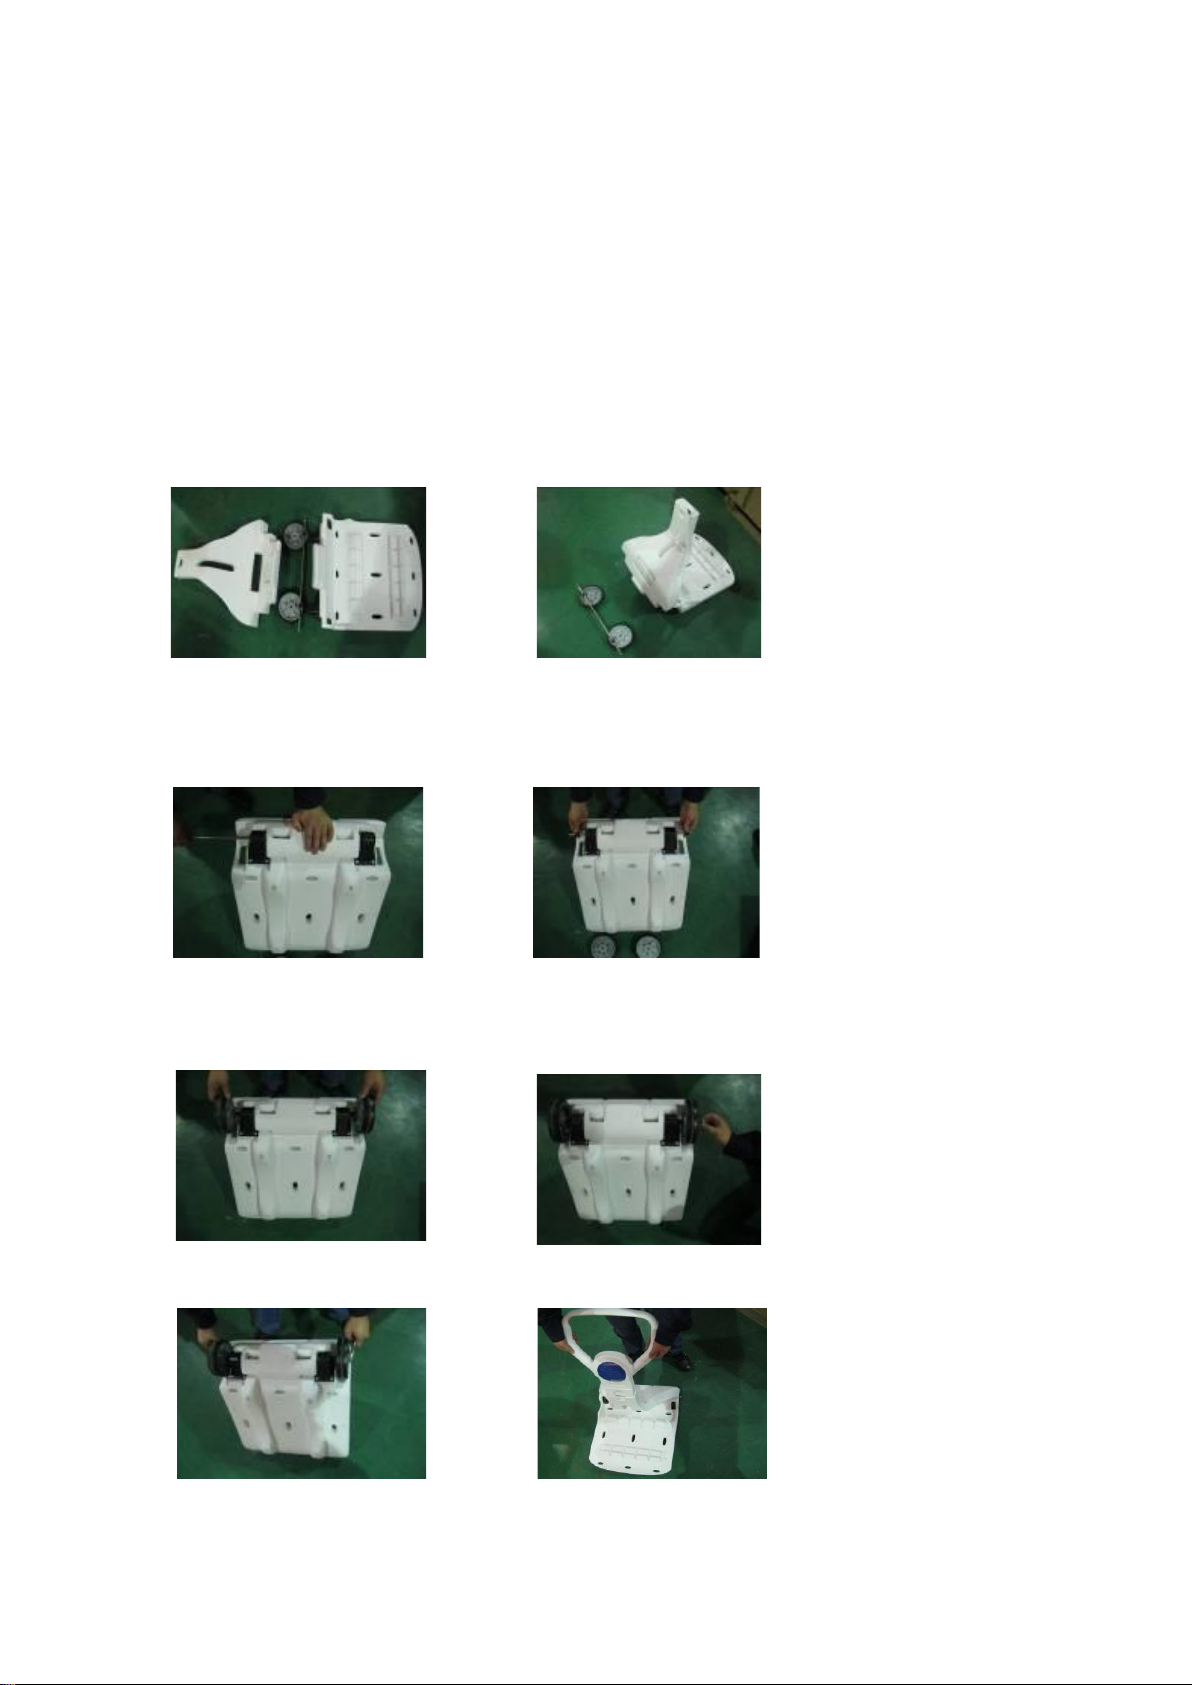
4.4 Assembly of transport caddy ( optional)
1. Open the package for assembling 2. Put the Connection part onto the plate
3. Insert the wheel axle 4. Assemble the protecting cover and axle cover
5, Assemble wheel 6. Put on the nut
7. Tighten the nut 8. Assemble the top handle
9,Assemble power unit holder 10. Assemble cable holder
Table of contents
Other Lyfco Swimming Pool Vacuum manuals


