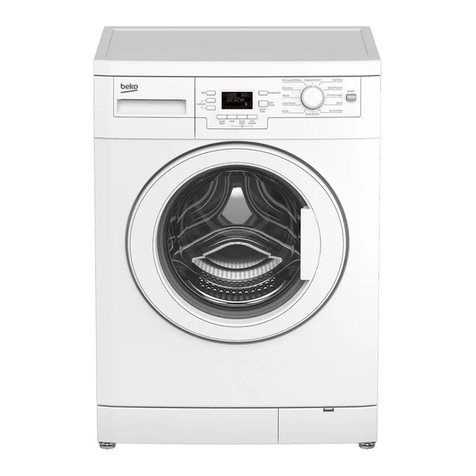
LG WD-12270BD User manual

P/No.: 3828ER3033L
WD-12270BD

Washing Machine
OWNER’S MANUAL
WD-12270BD
Thank you for buying a
LG Fully Automatic Washing machine.
Please read your owner's manual carefully, it rovides
instructions on safe installation, use and maintenance.
Retain it for future reference.
Record the model and serial numbers of your washing machine.

roduct Feature
P
ontents
C
2
Warnings...............................................................................................3
S ecification..........................................................................................4
Installation.............................................................................................5
Care before washing...........................................................................10
Using the dis enser ............................................................................11
Function ..............................................................................................13
How to use washer .............................................................................14
Maintenance .......................................................................................17
Troubleshooting guide ........................................................................20
Terms of Warranty ..............................................................................23
■Direct Drive System
The advanced Brushless DC motor directly drives the drum
without belt and ulley.
■Tilted Drum and Extra Large Door Opening
Tilted drum and extra large o ening make it ossible to load
and unload clothing more easily.
■Water Circulation
S ray detergent solution and water onto the load over and over.
Clothes are soaked more quickly and thoroughly during wash
cycle.
The detergent suds can be removed more easily by the water
shower during rinse cycle. The water circulation system uses both
water and detergent more efficiently.
■RollerJets
Washing ball enhances the wash erformance and reduces
damage to the clothing. The jets s ray and hel tumble clothes to
enhance washing erformance while maintaining fabric care.
■Automatic Wash Load Detection
Automatically detects the load and o timizes the washing time.
■Built-in Heater
Internal heater hel s to maintain water tem erature at its o timum
level for selected cycles.
■Child Lock
The Child lock revents children from ressing any button to
change the settings during o eration.
추가선택, 예약,

arnings
W
3
For your safety, the information in this manual must be followed to minimize
the risk of fire or explosion, electric shock, or to prevent property damage,
personal injury, or loss of life.
!
READ ALL INSTRUCTIONS BEFORE USE
WARNING!
• Read all instructions before using the washer.
• Do not wash articles that have been reviously
cleaned in, washed in, soaked in, or s otted with
gasoline, dry cleaning solvents, or other
flammable or ex losive substances, as they give
off va ors that could ignite or ex lode.
• Do not add gasoline, dry cleaning solvents, or
other flammable or ex losive substances to the
wash water. These substances give off va ors
that could ignite or ex lode.
• Under certain conditions, hydrogen gas may be
roduced in a hot water system that has not
been used for 2 weeks or more. HYDROGEN
GAS IS EXPLOSIVE. If the hot water system
has not been used for such a eriod, before
using the washing machine, turn on all hot water
faucets and let the water flow from each for
several minutes. This will release any
accumulated hydrogen gas. As the gas is
flammable, do not smoke or use an o en flame
during this time.
• Do not allow children to lay on or in the washer.
Close su ervision of children is necessary when
the washer is used near children.
• Before the washer is removed from service or
discarded, remove the door to revent children
from hiding inside.
• Do not install or store the washer where it will be
ex osed to the weather.
• Do not tam er with controls.
• Do not re air or re lace any art of the washer
or attem t any servicing unless s ecifically
recommended in the user-maintenance
instructions or ublished user-re air instructions
that you understand and have the skills to carry
out.
• See Installation Instructions for grounding
requirements.
• ALWAYS follow the fabric care instructions
su lied by the garment manufacturer.
• Do not lace items ex osed to cooking oil in
your washer. Items contaminated with cooking
oils may contribute to a chemical reaction that
could cause a load to catch fire.
• Do not use fabric softeners or roducts to
eliminate static unless recommended by the
manufacturer of the fabric softener or roduct.
GROUNDING INSTRUCTIONS
This a liance must be grounded. In the event of malfunction or breakdown, grounding will reduce the risk
of electric shock by roviding a ath of least resistance for electric current. This a liance is equi ed with
a cord having an equi ment-grounding conductor and grounding lug. The lug must be lugged into an
a ro riate outlet that is ro erly installed and grounded in accordance with all local codes and ordinance.
• Do not use an ada ter or extension cord.
• Do not remove ground rong.
• If you don’t have the ro er outlet, consult an electrician.
IMPORTANT SAFETY INSTRUCTIONS
WARNING :To reduce the risk of fire, electric shock, or injury to ersons when using
the washer, follow basic recautions, including the following:
SAVE THESE INSTRUCTIONS
WARNING :Im ro er connection of the equi ment-grounding conductor can result in risk of electric
shock. Check with a qualified electrician or serviceman if you are in doubt as to whether the a liance
is ro erly grounded. Do not modify the lug rovided with the a liance - if it does not fit the outlet,
have a ro er outlet installed by a qualified electrician.
!
!

pecification
S
4
Transit
Name : Front loading washing machine
Power su ly : 120V~, 60Hz
Size : 686 mm(W)×756 mm(D)×983 mm(H)/1291 mm(D, door o en)
Weigh : 86 kg (190 lbs)
Wash ca acity : 12 kg (26.46 lbs)
S in s eed : 1100 r m max.
Permissible water ressure : 0.3-10kgf/㎠(30-1000kPa)
❋The a earance and s ecifications may be varied without notice to raise the units quality.
Accessories

nstallation
I
5
1. To revent internal damage during
trans ort, the s ecial 4 bolts are locked.
Before o erating the washer, remove
the bolts along with the rubber bungs.
• If they are not removed, it may cause severe
vibration, noise and malfunction.
3. Take out the 4 bolts along with the rubber
bungs by slightly twisting the bung. Kee
the 4 bolts and the s anner for future use.
• Whenever the a liance is trans orted, the
transit bolts must be refitted.
The a liance is fitted with transit bolts to revent internal damage during trans ort.
2. Unscrew the 4 bolts with
the s anner su lied.
4. Close the holes with the ca s su lied.
Removing transit bolts
cap
Install or store where it will not be exposed to temperatures below freezing or exposed to the weather.
Properly ground washer to conform with all governing codes and ordinances.
To reduce the risk of electric shock, do not install the washer in humid spaces.
The base opening must not be obstructed by carpeting when the washing machine is installed on a
carpeted floor.
In countries where there are areas which may be subject to infestation by cockroaches or other
vermin, pay particular attention to keeping the appliance and its surroundings in clean condition at
all times.
Any damage which may be cause by cockroaches or other vermin will not be covered by the
appliance guarantee.
Transit bolts

nstallation
I
6
■Installation clearances
The location must be large enough to fully o en
the washer door.
■Washer dimensions
• Most installations require a minimum
10 cm clearance behind the washer.
■Minimum installation spacing for
recessed area installation.
The following dimensions shown are for
the minimum s acing allowed.
Additional s acing should be considered
for installation and servicing.
• Additional clearances might be required
for wall, door and floor moldings.
• Additional s acing of 2.5 cm on all
sides of the washer is recommended to
reduce noise transfer.
Com anion a liance s acing should also be
considered.
■Level floor
• Allowable slo e under entire
washer is 1°.
•To minimize noise and vibration,
the washer MUST be installed
on a solidly constructed floor.
• Wood floors may need to be
reinforced to reduce noise and
vibration.
• Car eting and soft tile surfaces are
not recommended.
• Never install the washer on a
latform or weakly su orted
structure.
■Power outlet
Must be within 1.5 m of either side of
the washer. Do not overload the
outlet with more than one a liance.
[Vista frontal]
[Vista lateral]
68.6 cm
75.6 cm
98.3 cm
129.1 cm
68.6 cm
2.5 cm 2.5 cm
75.6 cm

7
nstallation
I
▶
Water supply pressure must be between
30kPa and 1000kPa (0.3~10kgf/cm2)
▶
Don’t strip or crossthread when connecting
Inlet hose to the valve.
▶
If the water supply pressure is more than
1000kPa, a decompression device should be
installed.
• Two rubber seals are su lied with the
water inlet hoses these are in order to
revent water leaks.
• Check water tightness of washing
machine connections by turning the ta
com letely on.
• Periodically check the condition of the
hose and re lace the hose if necessary.
• Make sure that there is no kink on the
hose and that it is not crushed.
▶
When your washer has two valves,
• The Inlet hose which has red connector is
for the hot water ta .
• If the washer has two valves, the energy
is saved by using hot valve.
Washing Machine is to be connected to the water mains using new hose-
sets and that old hose-sets should not be used.
Connecting water supply hose
Rubber seal
Hose connector
1. Do not use an extension cord or double ada ter.
2. If the su ly cord is damaged, it must be re laced by the manufacturer or its service agents
or similarly qualified erson in order to avoid a hazard.
3. Always un lug the machine and turn off the water su ly after use.
4. Connect the machine to an earthed socket in accordance with current wiring regulations.
5. The a liance must be ositioned so that the lug is easily accessible.
• Re airs to the washing machine must only be carried out qualified ersonnel. Re airs carried out by
inex erienced ersons may cause injury or serious malfunctioning. Contact your local service center.
• Do not install your washing machine in rooms where tem eratures below freezing may occur. Frozen
hoses may burst under ressure. The reliability of the electronic control unit may be im aired at
tem eratures below freezing oint.
• If the a liance is delivered in the winter months and tem eratures are below freezing : Store the
washing machine at room tem erature for a few hours before utting it into o eration.
Electrical connection

8
nstallation
I
Installation of drain hose
about
about
about
max. 100cm
min. 60cm
Hose
Retainer
Laundry tub
Tie
stra
max. 100cm
min. 60cm
about
about
about
• The drain hose should not be laced
higher than 100 cm above the floor.
• Pro er securing of the drain hose will
rotect the floor from damage due to
water leakage.
• When the drain hose is too long, do
not force back into the washer. This
will cause abnormal noise.
• When installing the drain hose sink,
secure it tightly with a string.
• Pro er securing of the drain hose will
rotect the floor from damage due to
water leakage.
This equi ment is not designed for maritime use or for use mobile installations such as
caravans, aircraft etc.
Turn off the sto cock if the machine is to be left for any length of time (e.g. holiday),
es ecially if there is no floor drain(gully) in the immediate vicinity.
When dis osing of the a liance, cut off the mains cable, and destroy the lug Disable the
door lock to revent young children being tra ed inside.
Packaging material (e.g. Films, Styrofoam) can be dangerous for children. There is a risk
of suffocation !
Kee all ackaging well away from children.

9
nstallation
I
Level adjustment
1. Adjusting the washing machine level
ro erly revents excessive noise and
vibration.
Install the a liance on a solid and level
floor surface, referably in a corner of
the room.
2. If the floor is uneven, adjust the
adjustable feet as required. (Do not
insert ieces of wood etc. under the feet)
Make sure that all four feet are stable
and resting on the floor and then check
that the a liance is erfectly level.
(Use a s irit level)
❊After the washer is level, tighten the lock
nuts u towards of the base of the
washer. All lock nuts must be tightened.
❊ Diagonal Check
When pushing down the edges of the
washing machine top plate diagonally, the
machine should not move up and down at
all. (Please, check both of two directions)
If machine rocks when pushing the machine
top plate diagonally, adjust the feet again.
Table of contents
Other LG Washer manuals


Popular Washer manuals by other brands

Tricity Bendix
Tricity Bendix AW 1000 W Operating & installation instructions

Panasonic
Panasonic NA-F60L5WRB operating instructions

GE
GE WSLP1500 Dimensions and installation information

Electrolux
Electrolux EWF1284EDW Service manual

Bosch
Bosch WAN2829BSN User manual and installation instructions

VESTEL
VESTEL CMH-XL 7510 TE user manual