
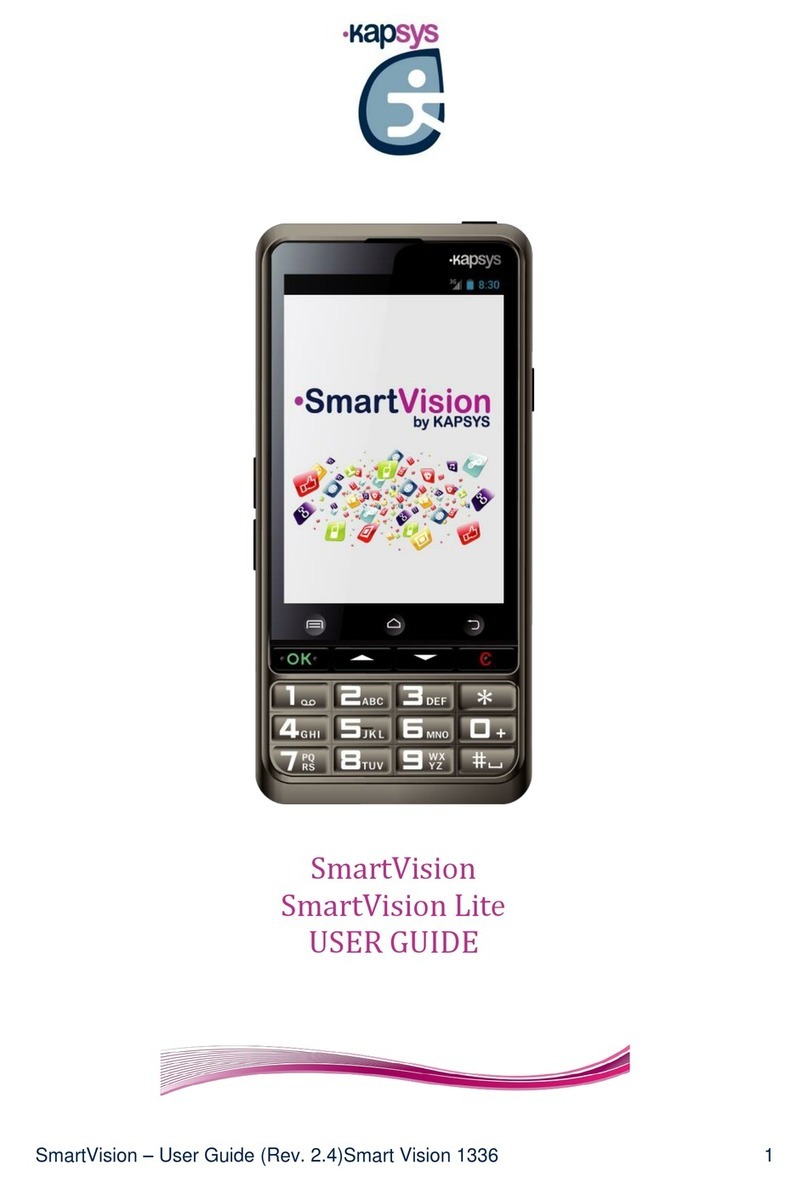
Kapsys SmartVision User manual

SmartVision & SmartVision LITE –User Guide (Rev. 2.5 –version SW 1454) 1
SmartVision
SmartVision Lite
USER GUIDE

SmartVision & SmartVision LITE –User Guide (Rev. 2.5 –version SW 1454) 2
Introduction
Congratulations on purchasing SmartVision or SmartVision Lite.
SmartVision is the first Android Smartphone especially designed for people with low
vision and visual impairment. SmartVision combines a physical keypad, a full voice
interface, and a touchscreen, making it a fully accessible device.
SmartVision is the latest generation smartphone that provides you with a fully
adaptive interface and functionalities that are easy to navigate for everyday use. Its
applications are organised by favorites, its user interface has been simplified with a
large display (large icons, 4 font sizes), voice command, speech-to-text (dictation
mode for message writing), voice over description of what is on your screen, Kapten
GPS(1) with voice control, a magnifier feature with contrast filter panels, NFC tags(1),
web based assistance, character recognition(1), etc… it’s all there!
SmartVision gives you the best of smartphones with ease-of-use and unique
accessibility.
This User Guide has been developed to help you learn step by step, with the help of
screen shots, how to use the various basic functions in any of the three operating
modes that you have chosen.
It is complementary to the Quick Guide, and will allow you to make the most of your
SmartVision.
How to use this material
This User guide describes SmartVision’s main features and operating modes.
Features are described in a generic manner without reference to the more specific
requirements of the advanced accessibility mode (default mode) which are fully
described in the "Accessibility mode" section.
(1) : Not available on SmartVision Lite.

SmartVision & SmartVision LITE –User Guide (Rev. 2.5 –version SW 1454) 3
Content of the box
SmartVision by KAPSYS includes:
- A battery
- A 220/110V - 5V USB mains charger
- A docking station for charging(1).
- A USB / micro USB cable
- A lanyard
- Two stereo earphones with microphone and a push-to-talk button.
- A protective case(1).
This list of accessories may vary depending on the country, device configuration or
model version.
(1) : Not available on SmartVision Lite.

SmartVision & SmartVision LITE –User Guide (Rev. 2.5 –version SW 1454) 4
Table of Contents
Introduction 2
Content of the box 3
Introducing SmartVision 5
Installation 8
Keypad, Touchscreen and Voice control 13
Accessibility Mode 16
Voice interface 22
Screen reading 29
Home screen 30
The notification status bar 31
Applications 33
Favorites 34
Telephone 36
Messaging 42
E-Mail 46
Settings 50
People 57
SOS Function 63
Kapten(1) 65
Assistance 78
Calendar 80
Alarm Clock 80
Camera 80
Calculator 81
Gallery 81
Video Player 81
Magnifier 82
Colors Detections 82
Sound recorder 83
Music 83
Browser 84
NFC(1) 84
OCR(1) 85
FM Radio 86
Search 86
Downloads 86
Legal notice and Warranty 87
Troubleshooting 91
Technical Specifications 93

SmartVision & SmartVision LITE –User Guide (Rev. 2.5 –version SW 1454) 5
Introducing SmartVision
Front panel
The numeric keypad at the bottom part of the front panel enables you to dial a phone
number or type characters for text messaging using multi-tap mode.
4 control keys are located above the keypad:
- "OK" key to pick up a call, or confirm your entry.
- The two arrow keys "" allow to scroll or browse within a menu or a current
page.
- "C" key to end a call or clear an entry.
Above these 4 control keys, there are 3 easily recognizable Android recessed push
buttons:
- “Menu” on the left: press to access the ongoing "Menu".
- “Home” in the middle: press to go back to the "Home screen" any time.
- “Back” on the right: press to go "Back" to the previous screen.
Top:
The "On Off" and screen off mode button is located on the top right side of the
handset. Press and hold this button to start or stop your SmartVision. A short key
press will set the handset to standby mode and an additional short press will
reactivate it. On the middle, a clip for the necklace.
Then, the audio 3.5 jack on the left side of the "On Off" button connects to the
earphones supplied with the device.
Right side:

SmartVision & SmartVision LITE –User Guide (Rev. 2.5 –version SW 1454) 6
The voice control key is located on the right side of your SmartVision. Press briefly
this key to send a voice command and press and hold if you want to write a message
through dictation.
The mini-USB port on top of the handset provides for connection to a PC or to a
mains charger using the cable included in the box.
Bottom:
Connection terminals at the bottom of the handset are used to connect to a docking
station to charge the battery, and a microphone.
Left side:
The two keys located on the left side of the handset are used to increase (volume up
key) or decrease (volume down key) the sound volume.

SmartVision & SmartVision LITE –User Guide (Rev. 2.5 –version SW 1454) 7
Rear:
The emergency orange button is located on the back panel top left. Push down this
button to start an emergency instance. On the right of this SOS button are found the
camera lens and a port for amplified listening.

SmartVision & SmartVision LITE –User Guide (Rev. 2.5 –version SW 1454) 8
Installation
Inserting the SIM Card
The SIM Card is issued by a telephone service provider when you take out your
telephone contract.
Please note: only Mini-SIM (2-FF) Cards are supported by SmartVision. If you have a
different SIM card, please ask your telephone service provider to replace it with a
Mini SIM. It is recommended to change the format of the SIM card rather than using
an adapter.
Inserting the SIM Card:
1. Turn the device upside down, look for the notch at the bottom left, and lift the
back cover.
2. Install the SIM Card, with the chip downwards and the tapered angle to the
bottom right. Slide the SIM card pushing upwards to fit it snugly into its
compartment.
Please note: the Micro-SD memory card reader is located right above the SIM Card
holder. Depending on the configuration of your product, the Micro-SD may be already
installed in the product.

SmartVision & SmartVision LITE –User Guide (Rev. 2.5 –version SW 1454) 9
The battery
Inserting the battery:
1. Insert first the bottom of the battery into the slots.
2. Snap the battery into place.
3. Put back the rear panel fitting the top part first.
4. Snap firmly and close your device.

SmartVision & SmartVision LITE –User Guide (Rev. 2.5 –version SW 1454) 10
Charging the battery
The battery you purchased with your SmartVision is not fully charged. Before using
the device, we recommend that you charge the battery for at least 4 hours.
You may subsequently charge it as needed and depending on your use and the
available charge of the battery.
You may check the icon located in the top right bar at anytime to know how much
charge is available in the battery. You can also short press the control key and say
clearly the keyword “Battery level”
To charge the battery, plug the USB cable (included in the box) into the mains
charger.
You may also charge your SmartVision using the docking charge.
Please note(1): the protective case should be removed when using the docking
station. If you don’t want to remove the protective case to charge the device, you
may use the USB port located on the right side of the device.
(1) : Not available on SmartVision Lite.
Other manuals for SmartVision
3
This manual suits for next models
1
Table of contents
Other Kapsys Cell Phone manuals

Kapsys
Kapsys SmartVision User manual

Kapsys
Kapsys SmartVision2 User manual

Kapsys
Kapsys SmartVision2 How to use

Kapsys
Kapsys SmartVision3 User manual

Kapsys
Kapsys SmartVision3 User manual

Kapsys
Kapsys MiniVision2 User manual

Kapsys
Kapsys MiniVision2 User manual

Kapsys
Kapsys SMARTVISION 2 User manual

Kapsys
Kapsys MiniVision2 User manual
Kapsys
Kapsys SmartVision User manual


