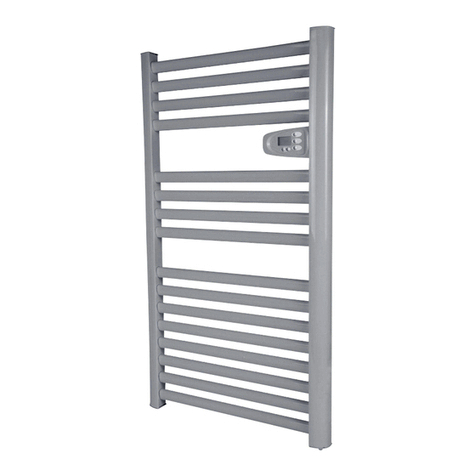
HydroTherm B Series User manual

HYDROTHERM
B - SERIES TOWEL RAIL
SPECIFICATIONS
Recommended use Domestic, hotel and commercial
Materials Made entirely from Copper Tube with Brass
Fittings
Element Low wattage, replaceable water element
Power Cable Bottom of unit (Only) Left or Right Side -
Safety rating IPX5 (allows for installtion in zone 1 & 2 of
bathroom)
Finish High Polish Chrome Plate
Standards AS/NZS:3350
FEATURES
Replaceable Element Heating element easily replaced
Classic Design Classical features of the B-Series bring a timeless
elegance to your bathroom
Copper Tube Ensures ultimate thermal conductivity and
radiation.
Note: arms do not move independently
Local Product 100% Australian owned and manufactured
Towel Rail must be installed so that the bottom rail is at least 600 mm above the oor to avoid a hazard for children.
The cord extension set must be positioned so that it is not subject to splashing or ingress of moisture .
The supply shall have means for disconnection with an air gap in all active conductors incorporated in the xed
wiring according to the Wiring Rules in AS/NZS 3000:2000
CAUTION
Warning:
Caution:
This appliance is not intended for use by young children or infirm persons without supervision.
Young children should be supervised to ensure they do not play with this appliance
Manufactured by Hydrotherm Australia ,96 Commercial Drive Thomastown Victoria 3074
c
250
500
600
B Model - Triple Tube
Width: 600mm (Standard)
500, 600,700, 800mm (custom)
Element: 10 watt - 20 watt
B Model - Mini -
Height: 500mm(h) + Hard Wire
Width: 600mm (Standard)
500, 600,700, 800mm (custom)
Element: 40 watt - 70 watt

B SERIES INSTALLATION - MINI
STEP 2
When the brackets are in place, hold the
towel rail up to the wall and with a pencil,
mark around all the brackets so that you
may align the unit.
STEP 3
Remove the wall bracket from bracket arm.
Take one bracket and carefully
drill the hole to insert the screw 7
(for tiled wallls a masonry plug 5 should
be placed in the wall).
6 goes into
4
5
105 mm
80mm MIN.
+ 15mm MAX
STEP 1
measure alignment of brackets on the wall.
Slide the WALL BRACKET into the
1.
BRACKET ARM
2.
Hold up to the wall in position and
2
1
3
5
6
TOWEL RAILS MUST ALWAYS BE INSTALLED WITH THE ELECTRIC ELEMENT
POSITIONED AT THE BOTTOM OF THE UNIT FOR CORRECT HEAT TRANSFER
STEP 4
Using the screws provided, the bracket
may be screwed into place.
PLEASE NOTE: Do not over-tighten, as
some sliding movement in the bracket is
required to allow expansion and contraction
of the heated metal.
STEP 5
When the brackets are fixed to the wall,
use the allen key to undo the screws 4 on
the sides of the brackets.
STEP 6
Slide the towel rail into place, then with the
allen key secure the screw 4.
Do not tighten the screw 4 too much, as
this will impede removal of the unit if
required.
7
allen key
7
6

WIRING OPTIONS
PLUG IN VERSION
DOUBLE HARD-WIRED VERSION
HARD-WIRED VERSION
HARD WIRING
Hydrotherm recommends that all hard-wired heated towel rails be connected to a light switch
or timer.
Connecting hard-wired heated towel rails to a light switch or timer will prolong the life of the
electric element and reduce energy consumption.
Hydrotherm recommend the brand HPM and the model XLP77TO, this particular unit is
designed specically for heated towel rails that is incorprated into a light switch panel.
Hard wire
attachment
(FIG.1)
(FIG.3)
The Hydrotherm TR - Series ElectricTowel rails come
with water, and with electric elements already
fitted (standard on the left unless otherwise specified)
PLUG IN OPTION - REQUEST ONLY
(See Fig. 3)
Plug is supplied with element cable (1200mm long).
Cable may be cut and plug attached to required length.
(See Fig 3)
This option is only available by request.
HARD WIRED - STANDARD OPTION
(See Fig.1 & Fig.2)
The cable may be hard-wired into the wall with an
element attachment. This attachment must be installed
by a qualified electrician.
Two attachments are provided for both the cable side, and non-cable side
so to allow the unit to have a symmetrical apperance
(see Fig 1).
All hard-wired elements have an IPX Rating of IP55.
(IPX5) for use in wet areas. Hydrotherm also
recommend all electric towel rails be connected
to a timer for convenience and to prolong the life
of the element.
55mm
80mm
HARD-WIRE ATTACHMENT
Cord
All Hydrotherm Elements carry the following approvals.
Elements have a built in thermostat and internal cut out ensuring
safety and energy efficiency.
All Hydrotherm electric elements can be supplied as 240v or 110v.
All electric elements are replaceable and can be easily
changed over.
®IP55
(FIG.2)

B SERIES INSTALLATION - SINGLE RAIL
STEP 2
When the brackets are in place, hold the
towel rail up to the wall and with a pencil,
outline both brackets so that you
may align the unit.
STEP 3
Remove the wall bracket from bracket arm.
Take one bracket, feed wall cable through bracket arm.
Using a pencil mark screw hole position.
Mark screw hole for second bracket.
Carefully drill the hole to insert the screw 5.
(for tiled wallls a masonry plug 4 should
be placed in the wall). If tiled wall
installer must use a DIAMOND HEAD drill
bit.
5 goes into
3
105 mm
80mm MIN.
+ 15mm MAX
STEP 1
Slide the WALL BRACKET over the
1.
BRACKET ARM
2.
2
1
3
4
5
TOWEL RAILS MUST ALWAYS BE INSTALLED WITH THE ELECTRIC ELEMENT
POSITIONED AT THE BOTTOM OF THE UNIT FOR CORRECT HEAT TRANSFER
STEP 4
Using the screws provided, the bracket
may be screwed into place.
PLEASE NOTE: Do not over-tighten, as
some sliding movement in the bracket is
required.
STEP 5
Slide the towel rail into place, then with the
allen key secure the grub screw 3.
5
allen key
A qualied electrician must then
connect towel rail element to existing
wall cable.
STEP 7
4
5 goes into

To change an element from one side to the other, or to replace an old element is a very simple process.
There are Four Basic S teps:
1. Remove towel rail from brackets (if already installed), and slip o Hard Wire Attachments.
2. Turn the towel rail upside down and with a spanner loosen the hex nut of the electric element.
When the element is loose, unscrew it by hand. If you are changing the element from left to right
or vise versa, the internal plug on the opposite side must also be removed and swapped over wth
the element.
3. Swap the element and screw in place. Reattach hard wire pieces.
4. Turn the towel rail the right way up and position back into brackets, refit grub screws to secure.
Please note:
Hydrotherm advise that the unit be removed from the wall and turned upside down to ensure that water does
not spill. Ensure element always remains at bottom of towel rail
Element
on left side
Turn rail
upside down
Swap
element over
Element
on right side
tuowercsnu
niwercs
At Hydrotherm we pride ourselves on the highest quality standards of design and manufacturing.
All Hydrotherm products come with a 10 year manufactures warranty on the construction and finish of our
towel rails. All electric heating elements are also covered by a 3 year manufactures warranty.
100% Australian Made and Owned
Construction & Finish
Manufacturers Warranty
year
Electric Element
Manufacturers Warranty
10 3
year
CHANGINGELEMENTS
Disclaimer: Products in this specication manual must by regulation be installed by licensed and registered
trade people. The manufacturer/distributor reserves the right to vary specications or delete models from
their range without prior notication. Dimensions are nominal measurements only. Dimensions and set-outs
listed are correct at time of publication however the manufacturer/distributor takes no responsibility for
printing errors.
CLEANING RECOMMENDATIONS
This bathroom product should not be cleaned with abrasive
materials eg. steel wool/scourers. Do not use any corrosive or
abrasive cleaning agents containing acids or scouring agents.
Bleaches can also discolour products and therefore should not
be used. Damage caused by any improper treatment is not
covered by the product warranty.
wercsnu
niwercs
1. 2. 3. 4.
HYDROTHERM WARRANTY
Other manuals for B Series
1
This manual suits for next models
2
Table of contents
Other HydroTherm Bathroom Fixture manuals

HydroTherm
HydroTherm HF Series User manual

HydroTherm
HydroTherm FC/500 User manual

HydroTherm
HydroTherm H Series User manual

HydroTherm
HydroTherm TR Series User manual

HydroTherm
HydroTherm SWIVEL Series User manual

HydroTherm
HydroTherm SWIVEL Series User manual

HydroTherm
HydroTherm HR Series User manual

HydroTherm
HydroTherm TR Series User manual

HydroTherm
HydroTherm B Series User manual