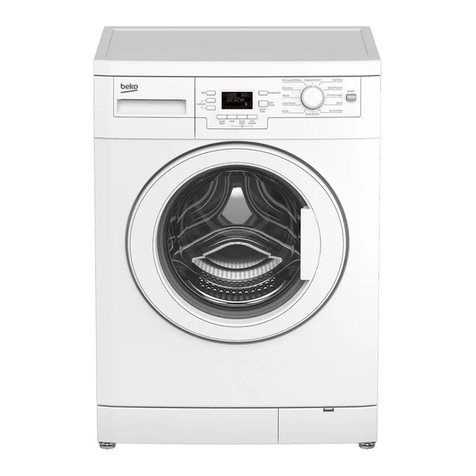
Homemaker XQB50-808GF User manual

READ ALL OF THE INSTRUCTIONS BEFORE USING THE WASHING MACHINE AND
KEEP THE INSTRUCTION MANUAL IN A SAFE PLACE FOR FUTURE REFERENCE.
FULLY AUTOMATIC WASHING MACHINE
Model: XQB50-808GF

Compliance Plate found on back of unit

Accessories
Parts and components
Level adjustment knob
(Please close the
tab after using)
Inlet hose
Lint filter
Pulsator
Power cord
Drain hose
(Hang up the drain
hose when washer works)
Adjustable foot
Inner tub
Control panel
Base
Detergent case
Softener dispenser
Noise and mice-proof
plate
(It is inserted into
the base to reduce
noise and keep the
mice away.)
SOAK
WASH
RINSE
SPIN
NORMAL
STRONG
SPEED
GENTLE
WASH
TEMP
WATER
LEVEL
PROGRAM
POWER
START
PAUSE
FUNCTION
Rated voltage
Rated input power
Rated wash and spin
capacity
Dimension
Specifications
Rated frequency
Rated water volume
(high water level )
230-240V~ 50Hz
350W 35L
Net weigh
5.0kg
545mmX550mmX860mm
32kg
2PC 1PC
(2set screws)
Inlet hose Noise and mice-proof plate

Wash temperature select button
Press the button to select wash temperture.
6Start/Pause button
Press the button once to start program, press the
button once again to pause it .
5
Power switch button
Press power switch button to start
operating, When you press the button to "OFF"
you have to wait for 3 seconds or more to press to
The power will be automatically
switch off after 10 minutes without any operating.
10
Displays the preset time, and trouble code .Shows
the remaining time of each wash cycle when the
machine is working.
Digital indicator
1
Water level indicator
Indicate the water level you choose.
2
Control panel
Program indicator
Indicate the program you choose.
3
Function indicator
Indicate the function you choose.
4
Water level select button
Select the water level according to the wash
load.
7
Program select button
Press the button to choose program of fuzz
normal speedy gentle.
8
Function select button
You can choose the function of soak, wash,
rinse or spin with it.
9
1
2
4
5
3
Wash temperature indicator
Indicate the wash temperature you choose.
11

5cm
Install the washing machine on a stable and level surface, adjust the level
adjustment knob to level the washing machine.
1.Take out the noise-proof plate.
2.The entrance is in front of the
bottom part.
3.Insert the noise-proof plate
into the base.
4.Lay down the washing
machine on the back, fix the
plate with two screws.
Insert the noise-proof plate into the washing machine base
Keep the washing machine at
least 5cm away from the wall.
Installation instructions
Adjust the foot
In order to prevent vibration during wash
operation, you can level the washing machine
by adjusting the height of the adjustable foot
until the washing machine is stable on the floor,
and then fasten it. (The inclination of the washer
should not be more than 2 degrees)
Loosen Fasten
Level
adjustment knob

Installation instructions
Water Temperature
Cold :
Recommended cold water temperature is 10~23.8 .
Hot :
Recommended hot water temperature is 50~60 .
Warm:
Mixture of hot and cold water. (Warm water temperature is dependent upon the water
temperature and the pressure of both the hot and cold water supply lines.)
IMPORTANT:
Owner should turn off water supply whenever there will be an extended period of non-use.
Water Pressure
Do not operate the washer when the water pressure is lower than 0.05MPa or higher than
0.5MPa to avoid damage of the inlet system.
Water supply requirements
Change the direction of the drain hose
Unfasten the fixed screw of
the drain hose joint.
Lead out the drain hose from
the opening to the other side.
Fasten up the screw to fix
the drain hose.
Connection of the drain hose
0.7m~1.2m
Insert the end of the drain hose into the hook shelf, and hang
the drain hose over a drain outlet (bath tub, sink, etc.).
Note: The highest point of the drain hose must be in the
height of 0.7m~1.2m above floor level, otherwise, the
washer can not work normally.
Connection of the drain hose

Installation instructions
Connection of the inlet hose
Refer to Section on Water Supply Requirements before connecting water
inlet hoses.
Faucet:
The faucet must be with G3/4" standard screw
thread. If not , it is impossible to connect the
inlet hose properly.
I. About faucet
1. If you just have one water supply line (cold or hot water), connect the
inlet hose to the cold water connector in water mixing valve. (Do not
unscrew the lid of hot water connector in water mixing valve, otherwise
it will result in water leakage from the hot water valve during fill cycles.
IMPORTANT: At this situation you can not set wash temperature to
WARM/COLD or HOT/COLD.
II. About washing machine
Connect the other end of water inlet
hoses to the cold connector in water
mixing valve by turning the connecting
nut.
WATER
INLET HOSE
CONNECTING
NUT
COLD WATER
CONNECTOR LID OF HOT WATER
CONNECTOR
RUBBER RING SEAL
WARNING:
Do not twist the inlet hose.
If water leakage, check the nut whether it is
filled with sealed rubber ring.
Connection of faucet:
Put rubber ring seal into the nut at one
elbow of inlet hose and fasten it to the
faucet as shown in the illustration.
Installation and connection of the Inlet hose
RUBBER RING
SEAL
Note:
The washing machine is to be connected to the water mains using new
hose-sets supplied with the appliance are to be used and old hose-sets
should not be re-used.

1.5mm
No movements of hose
Inlet connecting nut must be tighten to a point where
there is only approximately 1.5mm gape of the thread
showing. In addition, the hose should not be loose when moved
from left to right.

Installation instructions
2. If you have both cold and hot water supplied, connect the inlet hose by
cold to cold and hot to hot.
Unscrew the lid of hot water connector
in water mixing valve, and then connect
the other end of water inlet hoses to the
connectors in water mixing valve by
turning the connecting nut.
WATER INLET HOSE CONNECTING NUT
COLD WATER
CONNECTOR
HOT WATER
CONNECTOR
DISMANTLING THE INLET HOSE
Note:If the machine is used frequently, it is unnecessary to take off inlet
hoe to avoid damage to the nut at the elbow.
Dismantling the hose directly may cause water to splash since the water pressure is still high, even
after the faucet has been turn off, so please take off the hose according to the following.
steps:
1) Turn off the faucet.
2) Turn on the power and keep the machine in operation.
3) Turn off the power after approximately 5 seconds.
4) Loosen the nuts on both sides of inlet hose.
5) The washing machine is to be connected to the water
main using new hose-sets and old hose-sets should be not re-used.
Warning:
The socket should have assembled the 3A fuse.
Use three jacks socket, which can be connected ground wire.
Note:
The ground wire of the washing machine is set in the plug, don't try to
modify it.
The socket should have reliable ground wire. If no ground wire in socket,
please call the technician to assemble.
Never try to connect the ground wire of the washing machine together with
that of gas pipe or water pipe, telephone cord or lightening rod.
Do not use the damaged cord because it could cause electrical leakage and fire.
If the supply cord is damaged, it must be replaced by the manufacturer, its
service agent or similarly qualified persons in order to avoid a hazard.
Connection of the power cord

Operation instructions
Preparation
1.Connect the water inlet hose
to the water faucet.
4.Load clothes not exceeding
rated capacity.
5.fill suitable quantity of detergent
into the detergent case according
to the wash load.
6.Close wash lid completely.
(Otherwise it will not spin and
will give alarm)
2.Plug in the power cord.
Wiring Diagram
C-capacitance L-inductance IV-inlet valve Ms-drain water motor assembly
b-blue bl-black br-brown g-gray gr-green o-orange p-purple r-red w-white y-yellow
Ms
Microcomputer Programmer
bl/w
ywbl
water level
switch
safety switch
rr
r
motor
plug y/gr
b
y
y
b
r
b
b/w
br
br
br w
CL
br/w
bl
P
gr
bl
pump
g
(cold)
p
(hot)
g
w
w
p
w
3.Insert the end of the drain hose
into the hook shelf, and hang the
drain hose over a drain outlet
(bath tub, sink, etc.).
0.7m~1.2m
Note: The highest point of the drain hose must
be in the height of 0.7m~1.2m above floor level,
otherwise, the washer can not work normally.
Table of contents
Other Homemaker Washer manuals
Popular Washer manuals by other brands

Tricity Bendix
Tricity Bendix AW 1000 W Operating & installation instructions

Panasonic
Panasonic NA-F60L5WRB operating instructions

GE
GE WSLP1500 Dimensions and installation information

Electrolux
Electrolux EWF1284EDW Service manual

Bosch
Bosch WAN2829BSN User manual and installation instructions

LG
LG TV2516DV3B owner's manual