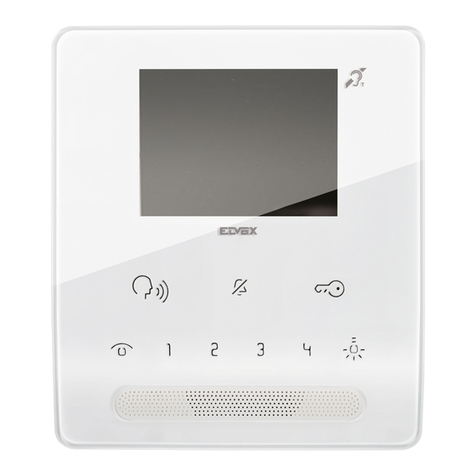
HME Clear-Com DX410 EU User manual

Part Number: 399G216 Rev A
Date: 5/22/17
Clear-Com HME DX410 EU
Dual-Channel Wireless Intercom
User
Guide

Copyright © 2017 Clear-Com, LLC, an HM Electronics, Inc. company. All rights reserved.
Clear-Com, the Clear-Com logo and Clear-Com Concert are trademarks or registered trademarks of
HM Electronics, Inc.
The product described in this document is distributed under licenses restricting its use, copying, dis-
tribution, and decompilation/reverse engineering. No part of this document may be reproduced in any
form by any means without prior written authorization of Clear-Com, an HME Company.
Clear-Com Ofces are located in California, USA; Cambridge, UK; Montreal, Canada; and Beijing,
China. Addresses and contact information can be found on Clear-Com’s corporate website at www.
clearcom.com.
Clear-Com Contacts
Americas and Asia-Pacic Headquarters
California, United States
Tel: +1.510.337.6600
Email: [email protected]
Europe, Middle East, and Africa Headquarters
Cambridge, United Kingdom
Tel: +44 1223 815000
Email: [email protected]
Canada Ofce
Quebec , Canada
Tel: +1 (450) 653-9669
China Ofce
Beijing Representative Ofce
Beijing, P.R.China
Tel: (008610)-8528-8748

FCC NOTICE
This device complies with Part 15 of the FCC rules. Operation is subject to the following two conditions: (1) This device
may not cause harmful interference, and (2) This device must accept any interference received, including interference
that may cause undesired operation.
NOTE: This equipment has been tested and found to comply with the limits for a Class A digital device, pursuant to Part
15 of the FCC rules. These limits are designed to provide reasonable protection against harmful interference when the
equipment is operated in a commercial environment. This equipment generates, uses and can radiate radio frequency
energy and, if not installed and used in accordance with the instruction manual, may cause harmful interference to radio
communication. Operation of this equipment in a residential area is likely to cause harmful interference, in which case
the user will be required to correct the interference at his own expense.
Changes or modications not expressly approved by Clear-Com, LLC, an HM Electronics, Inc. company could void the
user’s authority to operate this equipment.
MANDATORY SAFETY INSTRUCTIONS
FOR INSTALLERS AND USERS
Use only manufacturer or dealer supplied antennas, power supplies, batteries and battery chargers. All products are
compliant with regulatory requirements when installed correctly per Clear-Com installation instructions. The Federal
Communications Commission has adopted a safety standard for human exposure to RF (Radio frequency) energy,
which is below the OSHA (Occupational Safety and Health Act) limits.
Base Station Antenna minimum safe distance: 7.9 inches (20 cm) at 100% duty cycle.
Base Station Antenna gain: This device has been designed to operate with an antenna having a maximum gain of up to
7dBi.
Antenna mounting: The antenna(s) used for the base transmitter must be installed to provide a separation distance of at
least 7.9 inches (20 cm) from all persons and must not be co-located or operating in conjunction with any other antenna
or transmitter.
Antenna substitution: Do not substitute any antenna for the one supplied by the manufacturer. You may be exposing
person or persons to excess radio frequency radiation. You may contact your dealer or the manufacturer for further
instructions.
WARNING: Maintain a separation distance from the base station transmit antenna to a person(s) of at least 7.9 inches
(20 cm) at 100% duty cycle.
WARNING: Excessive sound pressure level from earphones or headphones can cause hearing loss. You, as the
qualied end-user of this radio device must control the exposure conditions of bystanders to ensure the minimum
separation distance (above) is maintained between the antenna and nearby persons for satisfying exposure
compliance. The operation of this transmitter must satisfy the requirements of Occupational /Controlled Exposure
Environment, for work-related use. Transmit only when person(s) are at least the minimum distance from the properly
installed, externally mounted antenna.
Canada IC Notice to Users English/French in accordance with RSS GEN
This device complies with Industry Canada license-exempt RSS standard(s). Operation is subject to the following two conditions:
(1) this device may not cause interference, and (2) this device must accept any interference, including interference that may cause
undesired operation of the device.
Cet appareil est conforme avec Industrie Canada RSS standard exempts de licence (s). Son utilization est soumise à Les deux
conditions suivantes: (1) cet appareil ne peut pas provoquer d’interférences et (2) cet appareil doit accepter Toute interférence, y
compris les interférences qui peuvent causer un mauvais fonctionnement du dispositif.

Hereby, Clear-Com, LLC, an HM Electronics, Inc, company, declares that the DX410 is in compliance with the essential
requirements and other relevant provisions of the RED (Radio Equipment Directive). In AFH mode, complies with
European Telecommunications Standards Institute (ETSI) harmonized European standard EN 300 328.
This product operates in the 2400 to 2483.5 MHz frequency range. The use of this frequency range is not yet harmonized
between all countries. Some countries may restrict the use of a portion of this band or impose other restriction relating to
power level or use. You should contact your Spectrum authority to determine possible restrictions.
WASTE ELECTRICAL AND ELECTRONIC EQUIPMENT (WEEE)
The European Union (EU) WEEE Directive (2012/19/EU) places an obligation on producers (manufacturers, distributors
and/or retailers) to take-back electronic products at the end of their useful life. The WEEE Directive covers most Clear-
Com products being sold into the EU as of August 13, 2005. Manufacturers, distributors and retailers are obliged to
nance the costs of recovery from municipal collection points, reuse, and recycling of specied percentages per the
WEEE requirements.
Instructions for Disposal of WEEE by Users in the European Union
The symbol shown below is on the product or on its packaging which indicates that this product was put on the market
after August 13, 2005 and must not be disposed of with other waste. Instead, it is the user’s responsibility to dispose of
the user’s waste equipment by handing it over to a designated collection point for the recycling of WEEE. The separate
collection and recycling of waste equipment at the time of disposal will help to conserve natural resources and ensure that
it is recycled in a manner that protects human health and the environment. For more information about where you can
drop off your waste equipment for recycling, please contact your local authority, your household waste disposal service or
the seller from whom you purchased the product.
Clear-Com, LLC, an HM Electronics, Inc. company, is not responsible for equipment malfunctions due to erroneous
translation of its publications from their original English version. Illustrations in this publication are approximate
representations of the actual equipment, and may not be exactly as the equipment appears.
Korea KCC EMC Class A Warning
A급기기(업무용방송통신기자재)
이 기기는 업무용 환경에서 사용할 목적으로
적합성 평가를 받은 기기로서 가정용 환경에서
사용하는 경우 전파 간섭의 우려가 있습니다.
English: Class A (Commercial broadcasting and communication equipment) Sellers and user should note that this
equipment is an electromagnetic device for business (Class A) and intended for operation in non-residential locations.
Korea KCC 2.4Ghz device warning
해당 무선설비는 전파혼신 가능성이 있으므로 인명안전과 관련된 서비스는 할 수 없음
English: This device cannot provide services related to human life safety.

TABLE OF CONTENTS
System Overview ...................................................................1
System Components .......................................................................1
Base Station Front Panel....................................................................2
Base Station Rear Panel ....................................................................3
Belt Pack – BP410.........................................................................3
All-In-One Headset – WH410 ................................................................4
System Setup ......................................................................5
Battery Charging ..........................................................................5
Connect AC Power Supply ..................................................................5
Charging the Batteries......................................................................6
Basic Base Station Setup ...................................................................7
COMMUNICATOR® Setup and Registration .....................................................8
Interfacing with 2-Wire or 4-Wire Intercoms .....................................................12
Interfacing with Auxiliary Audio Equipment ......................................................13
ISO Relay ...............................................................................14
System Operation...................................................................15
Base Station Operation .....................................................................15
COMMUNICATOR®Operation .........................................................16
EU BASE STATION Adaptive Frequency Hopping (AFH) ...................................18
Troubleshooting ....................................................................20
Technical Data .....................................................................21
BS410 Base Station Specications ............................................................21
BP410 Belt Pack Specications ..............................................................22
WH410 All-In-One Headset Specications ......................................................23
Appendix A: COMMUNICATOR®Indicator Light Functions .................................24
BP410 Belt Pack Indicator Lights .............................................................24
WH410 All-In-One Headset Indicator Lights .....................................................24
Appendix B: Multiple Base Station Daisy-Chaining .......................................25
Appendix C: Jumper Settings .........................................................26
ISO Broadcast Restrict .....................................................................26
2-Wire Channel Termination .................................................................26
DX SERIES LED AID .................................................................27
Syncing Primary to Secondary Bases Feature ...................................................27
Appendix D: Audio Routing Diagram ...................................................29
General Battery Safety Instructions for Battery Model BAT41, BAT50, BAT60 .................30
French ..................................................................................31
Spanish .................................................................................32
Korean ..................................................................................33

1
SYSTEM OVERVIEW
The Clear-Com® HME DX410 is a 2-channel Digital Wireless Intercom System that supports up to 15
COMMUNICATOR®s per base station, either Belt Packs or All-In-One Headsets, or a combination of the two.
Using the DX410 in the 2-channel mode, any three of the 15 Communicators can operate in full duplex mode. In the
single-channel mode, any four Communicators can operate in full duplex mode. This number can be increased by adding
up to three additional base stations. The DX410 supports both Clear-Com and RTS cabled 2-wire intercom systems, and
also has 4-wire and auxiliary audio connections.
System Components
BS410 Base Station
BP410 Belt Pack
AC50 Batteries
Antennas 110/240 Switching Power Supply
AC50 Battery Charger and Power Supply Adapter
WH410
All-In-One Headset

2
Base Station Front Panel
1 3 4 5 7 8 9
10
12
13 16
19
23 24 27
29
30 34 37
14
11 18 20
15 17 22 21
36
26 28 31
32
33 35 38
25
6
Digital Radio Controls
1. POWER switch
2. CLR/BND button
3. RESET button (recessed)
4. STATUS display
5. REG (registration) button
6. UNLATCH button
7. RECEIVE indicator lights
A Controls
8. (A) 2-W output level adjust
9. (A) 2-W input level adjust
10. (A) 2-W indicator light
11. (A) AUTO NULL button (recessed)
12. (A) 2-W/4-W SELECT button
13. (A) 4-W indicator light
14. (A) 4-W input level adjust
15. (A) 4-W output level adjust
B Controls
16. (B) 2-W indicator light
17. (B) 2-W input level adjust
18. (B) 2-W output level adjust
19. (B) 2-W/4-W SELECT button
20. (B) AUTO NULL button (recessed)
21. (B) 4-W input level adjust
22. (B) 4-W output level adjust
23. (B) 4-W indicator light
Auxiliary Controls
24. AUX INPUT SELECT button
25. AUX A INPUT ASSIGN indicator
26. AUX B INPUT ASSIGN indicator
27. AUX IN indicator light
28. AUX INPUT level adjust
29. AUX OUTPUT SELECT button
30. AUX OUT indicator light
31. AUX OUTPUT level adjust
Headset Controls
32. HEADSET A, B & ISO indicator lights
33. HEADSET A, B & ISO SELECT button
34. HEADSET VOLUME knob
35. HEADSET TALK On/Off button
36. HEADSET TALK indicator light
37. HEADSET MIC LEVEL adjust
38. HEADSET cable connector
2

3
Base Station Rear Panel
1 2 3 4 85 6 7 9 10 161311 12 1514
1. ANT (R-TNC)
2. PRIMARY/SECONDARY Select Switch
3. (A) 4-W RJ-45 Connector
4. (A) 2-W XLR-3M Connector
5. (A) 2-W XLR-3F Connector
6. CLEAR-COM/RTS Select Switch
7. (B) 2-W XLR-3F Connector
8. (B) 2-W XLR-3M Connector
9. (B) 4-W RJ-45 Connector
10. SINGLE/DUAL Channel Select Switch
11. AUX IN Connector
12. AUX OUT Connector
13. Relay Connector
14. DC Power Connector
15. ANT (R-TNC)
16. Chassis Grounding Screw
Belt Pack – BP410
1. Battery
2. Volume-up button
3. PWR (Power) button
4. Volume-down button
5. Headset cable connector
6. Battery-release latch
7. Power/mode lights
8. Channel A (Intercom 1) button
9. ISO (Isolate) button
10. Channel B (Intercom 2) button
7 78 9 10
21 3 4 5 6

4
All-In-One Headset – WH410
1. Channel A (Intercom 1) button
2. ISO (Isolate) button
3. Volume-up button
4. Volume-down button
5. Channel B (Intercom 2) button
6. Power/mode light
7. Microphone
8. Power button
9. Battery
10. Battery-release latch
1 2
3
6
5
4 7
8
9
10

5
SYSTEM SETUP
Displayed below is an example of a typical Clear-Com set up and conguration with the DX410.
Battery Charging
Before installing the system, connect the AC power supply to the battery charger and plug it
into an electrical outlet. Charge all the batteries while the other equipment is being installed.
Charging time is about 2.5 hours.
Connect AC Power Supply
To connect the AC power supply to the battery charger:
1. Connect the AC power supply cable connector to the
power connection on the battery charger.
2. Connect the AC power cord to an electrical outlet.
The red lights on the charger will briey display, and then the yellow
lights will appear and remain on.
This manual suits for next models
3
Table of contents
Other HME Intercom System manuals

HME
HME Clear-Com ProGrid PG8-INTERCOM-FX User manual

HME
HME Clear-Com Eclipse 12.1 HX-Median User manual

HME
HME PRO850 User manual

HME
HME DX100 User manual

HME
HME DX100 User manual

HME
HME Clear-Com Arcadia Central Station User manual

HME
HME DX200 User manual

HME
HME DX100 User manual

HME
HME DX200 User manual

HME
HME Clear-ComMS-704 User manual

HME
HME Clear-Com ARCADIA Series User manual

HME
HME Clear-Com HelixNet Partyline User manual

HME
HME DX121 EU User manual

HME
HME Clear-Com Tempest 2400 User manual

HME
HME DX200 User manual

HME
HME Clear-Com HelixNet Partyline User manual

HME
HME NEXEO HDX User manual

HME
HME DX121 User manual

HME
HME System 6001 Manual

HME
HME DX100 User manual