Haier HVF020A User manual

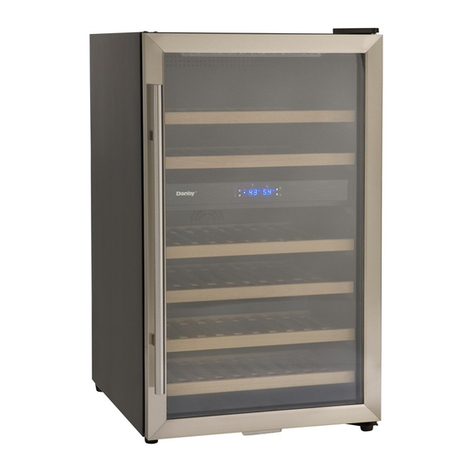
Wine Cooler
User Manual-
Guide de l’Utilisateur-
Manual del Usuario-
Model #’s
Modèles
Para Modelos de
Enfriador de Vino
Rafraîchisseur à Vin
HVFM20A
HVF020A

SAFETY PRECAUTIONS
Read all of the instructions before using this appliance.
When using this appliance, always exercise basic safety
precautions, including the following:
1) Use this appliance only for its intended purpose as described in this use
and care guide.
2) This wine cooler must be properly installed in accordance with the
installation instructions before it is used. See grounding instructions in the
installation section.
3) Never unplug your wine cooler by pulling on the power cord. Always
grasp the plug firmly and pull straight out from the outlet.
4) Repair or replace immediately, all electric service cords that have become
frayed or otherwise damaged. Do not use a cord that shows cracks or
abrasion damage along its length, the plug or the connector end.
5) Unplug your wine cooler before cleaning or before making any repairs.
Note:
If for any reason this product requires service, we strongly
recommend that a certified technician performs the service.
6) If your old wine cooler is not being used, we recommend that you remove
the door and leave the shelves in place. This will reduce the possibility
of danger to children.
7) This wine cooler should not be recessed or built-in an enclosed cabinet. It
is designed for freestanding installation only.
8) Do not operate your wine cooler in the presence of explosive fumes.
9) Do not store foods in wine cooler as interior temperature may not be cool
enough to prevent spoilage.
1
English
English
1

2
Thank you for using our Haier
product. This easy-to-use manual will
guide you in getting the best use of
your wine cooler.
Remember to record the model and
serial number. They are on a label in
back of the wine cooler.
Model number
Serial number
Date of purchase
Staple your receipt to your manual. You will need it to obtain
warranty service.
For Future Reference Please
SAVE THESE INSTRUCTIONS
DANGER
Risk of child entrapment. Before you throw away your old
wine cooler, take off the doors. Leave the shelves in place so
that children may not easily climb inside.
As per UL 250 11.2.6
English
English
2

Table Of Contents
PAGE
Safety Precautions ..........................................................................1
Parts And Features ..........................................................................4
Installing Your Wine Cooler ..........................................................5
Unpacking Your Wine Cooler..................................................................5
Leveling Your Wine Cooler......................................................................5
Proper Air Circulation ............................................................................5
Electrical Requirements............................................................................6
Wine Cooler
Features And Use ..........................................................7
Initial Set Up ..........................................................................................7
Temperature Adjustment..........................................................................7
Shelving ................................................................................................9
Interior Light ..........................................................................................9
Door Lock ..............................................................................................9
Normal Operating Sounds......................................................................9
Proper Wine Cooler Care and Cleaning....................................10
Cleaning and Maintenance ..................................................................10
Power Interruptions ..............................................................................11
Vacation and Moving Care ..................................................................11
Troubleshooting..............................................................................12
Warranty Information ..................................................................13
English
3
English
3

Parts And Features
1. White Wine Button (-)
2. Red Wine Button (+)
3. Interior Light Button (set)
4. LED Temperature Display
5. Light On/Off Switch
6. Door Lock and Key
7. Door Handle
8. Temperature Control
9. Adjustable Leveling Legs
(not shown)
10. 1 Slide-Out Basket
11. 3 Slide-Out Shelves
12. Interior Light
English
4
F
White Red Light
+
Set
12
346
5
8
7
Electronic Unit
123456789101112
HVFM20A
HVFO20A
10
Mechanical Unit
White
OFF
Mid Range
Coldest
Red
11
9
Mechanical Control
Unit Only
Electronic Controlled
Unit Only
12
English
4

1. Remove all packaging material. This includes the foam base and all
adhesive tape holding the wine cooler accessories inside and outside.
Slide out and remove plastic or foam guard used to secure the
compressor from shipping damage due to vibration and shock.
2. Inspect and remove any remains of packing, tape or printed
materials before powering on the wine cooler.
• Your wine cooler has four leveling legs which are located in the
front and rear corners of your wine cooler. After properly placing your
wine cooler in its final position, you can level your wine cooler.
• Leveling legs can be adjusted by turning them clockwise to raise your
wine cooler or by turning them counterclockwise to lower
your wine cooler. The wine cooler door will close easier when the
leveling legs are extended.
• To assure your wine cooler works at the maximum efficiency it
was designed for, you should install it in a location where there
is proper air circulation, plumbing and electrical connections.
• The following are recommended clearances around the wine cooler:
Sides……………2 "(50mm)
Top....................2" (50mm)
Back..................2" (50mm)
• Do not over fill your wine cooler for proper internal air circulation.
Installing Your Wine Cooler
Unpacking Your Wine Cooler
Proper Air Circulation
Leveling Your Wine Cooler
5
English
English
5

English
Electrical Requirement
• Make sure there is a suitable power Outlet (115 volts, 15 amps outlet)
with proper grounding to power the wine cooler.
• Avoid the use of three plug adapters or cutting off the third grounding in
order to accommodate a two plug outlet. This is a dangerous practice
since it provides no effective grounding for the wine cooler and may
result in shock hazard.
• Do not install your wine cooler in any location not properly insulated or
heated e.g. garage etc. Your wine cooler was not designed to operate
in temperature settings below 55˚ Fahrenheit.
• Select a suitable location for the wine cooler on a hard even
surface away from direct sunlight or heat source e.g. radiators,
baseboard heaters, cooking appliances etc. Any floor unevenness
should be corrected with the leveling legs located on the front and rear
bottom corners of the wine cooler.
• Your wine cooler is designed for free-standing installation only. It is not
designed for built-in application.
Install Limitations
6
English
6

Wine Cooler Features And Use
Electronic Controlled Units:
Once you have plugged the unit into an electrical outlet, let the unit run for
at least 30 minutes to acclimate itself before making any adjustments.
During this time the Red Wine light may stay on.
Mechanical Controlled Units:
The control for this is on the back of the unit. There are 6 settings
plus 0 (OFF). Initially set the temperature setting to 3. Let the unit run for at
least 30 minutes to acclimate itself before making any adjustments.
7
Initial Setup
Electronic Control Unit: See fig. # 1
• The wine cooler is preset from the factory to automatically
accommodate temperature requirements for red or white wines.
If you store mostly white wines, press the "White Wine" button and the
wine cooler will maintain an average temperature between
45˚ to 50˚ F. Pushing the "Red Wine" button will yield an
average temperature between 55˚ to 60˚ F.
• The wine cooler can be set to any temperature you desire to
accommodate your wine storage requirements. To set the temperature,
press both the "White Wine" and "Red Wine" buttons simultaneously
and hold for approximately 3 seconds. Now you are in temperature set
mode. Decrease the temperature by pushing the "White Wine" button
and increase the temperature by pressing the "Red Wine" button.
Pressing the appropriate button 3 times will adjust the temperature 3
degrees, press 4 times equals 4 degrees, 5 times equals 5 degrees, and
so on. Once you have selected the temperature you desire, push the
"Light/Set" button. Now the wine cooler is programmed and the LED
readout will return to current internal temperature reading.
Temperature Adjustments:
English
English
7

• There will be a 3 degree variance +/- between the temperature you
select and the temperature indicated on the LED readout.
This occurs because the wine cooler activates and deactivates
trying to maintain your desired temperature. There is often a
10˚ variance between the top and bottom shelves of the wine cooler.
Therefore, if you have set the wine cooler for 50˚ and have a
mix of red and white wines, you may want to put the white wine
on the bottom shelf where the temperature will be 45˚ F, and place the
red wine on the top shelf where the temperature will be 55˚ F.
Mechanical Control Unit: See fig. # 2
• Your wine cooler has a temperature control knob on the back of the
unit. There are 6 settings: 1 being the warmest and 6 being the coolest.
You can set the temperature of your wine cooler at any
setting you desire.
F
White Red Light
+
Set
fig. # 1
8
White
OFF
Mid Range
Coldest
Red
fig. # 2
English
English
8

9
• The shelves are designed for flexibility and easy cleaning.
To accommodate different sized bottles the shelves slide out
and can be moved up or down into any of the tracks molded
into the cooler cabinet. Larger bottles or Magnums can be more easily
accommodated on the cross shelves of the bottom basket of the cooler.
You will notice that the shelves are designed so the bottles do
not line-up directly over one another. This allows free air
movement and provides more space.
• To complement the look of your wine collection, a soft light has been
built into the wine cooler. Simply push the "Light/Set" button on the
electronic controlled unit, and the light comes on, push again for off.
On the mechanical control units, the light switch is on the front for your
convenience. For maximum energy efficiency, leave light off when not
viewing your collection.
Shelving
Interior Light
• For safety and security, your wine cooler is equipped with a door lock.
To eliminate the risk of accidental child entrapment, the lock was
designed so that the door will not lock until the key is removed
(consistent with UL requirements).
• Boiling water, gurgling sounds or slight vibrations that are the result of
the refrigerant circulating through the cooling coils.
• The thermostat control will click when it cycles on and off.
Door Lock
(electronic controlled unit only)
Normal Operating Sounds You May Hear
English
English
9
This manual suits for next models
3
Table of contents
Languages:
Other Haier Wine Cooler manuals

Haier
Haier JC 160GDD User manual

Haier
Haier HWS33GG User manual

Haier
Haier WS120GA User manual

Haier
Haier HWS77GDAU1 User manual

Haier
Haier WINE BANK 60 User manual

Haier
Haier JC-125G User manual

Haier
Haier HVTB18DABB User manual

Haier
Haier HVF030BLL User manual

Haier
Haier HVFM122ABL User manual

Haier
Haier HVTS18 User manual

Haier
Haier HVD042E-3S User manual

Haier
Haier HVTS18 User manual

Haier
Haier HJC-83KB User manual

Haier
Haier WS53GDA User manual

Haier
Haier JC-112G User manual

Haier
Haier HVFM122A User manual

Haier
Haier HVR035 User manual

Haier
Haier HWS84GA User manual

Haier
Haier HVTB40DPABS User manual

Haier
Haier JC 160GDD User manual