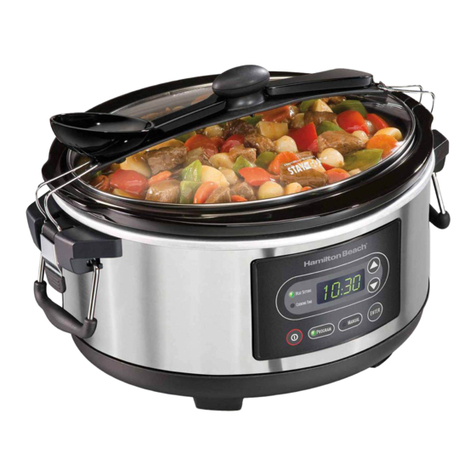
Ginnys 742476 User manual

BRAND
4-IN-1 SLOW COOKER
User Guide
Item: 742476
Ginnys.com • 800-544-1590
Facebook.com/GinnysBrand
Pinterest.com/GinnysBrand
Ginnys.com/Blog

TABLE OF CONTENTS
Important Safeguards 3
Electrical Safety and Specicaons 4
Get to Know Your Appliance 5-6
How to Operate 7-10
Cleaning & Care 11
Trouble Shoong 11
Recipes 12-15
Warranty 16
____________________________________________________________
____________________________________________________________
Thank you for purchasing a Ginny’s Brand
4-in-1 Slow Cooker! This appliance is a slow
cooker, oven, stovetop and steamer. The
simple-to-use controls give you the
exibility you need for one-pot cooking, and
the 6 quart pot is ideal for cooking family-size
meals. Enjoy!
President, Ginny’s
2Ginnys.com 800-544-1590
____________________________________________________________
____________________________________________________________

President, Ginny’s
IMPORTANT SAFEGUARDS
READ CAREFULLY BEFORE USING AND SAVE THESE INSTRUCTIONS!
• FOR HOUSEHOLD USE ONLY. Do not use this appliance for other than its
intended use.
• REMOVE all packaging materials and labels before rst use.
• WASH all removable parts before rst use. See Cleaning & Care.
• A SHORT CORD is provided to reduce the hazards resulng from
entanglement or tripping. Do not drape the cord over the counter or
tabletop, where it can be pulled on or tripped over. Never wrap the cord
ghtly around the appliance, as this could cause the cord to fray or
break.
• We do not recommend using an extension cord with this appliance.
However, IF AN EXTENSION CORD IS USED, the marked electrical rang
should be at least as great as the electrical rang of this appliance.
• CLOSE SUPERVISION is necessary when using this appliance near
CHILDREN.
• A re may occur if this appliance is used near FLAMMABLE MATERIALS,
including curtains, towels, walls, etc. Do not place any paper, plasc, or
other non-food items in the appliance. Do not place the appliance or its
cord on or near a heated surface, or in a heated oven.
• This appliance should always be used on a STABLE, DRY, HEAT-RESISTANT
SURFACE. Do not use near water.
• Do not use an accessory or aachment not recommended by Ginny’s, as
this may cause injury, or damage the appliance.
• Always use OVEN MITTS when handling hot food or appliances. Do not
aempt to move an appliance when it is hot, or has hot contents.
• Do not use this appliance for deep frying.
• Always use plasc or wooden utensils to avoid damaging the nonsck
surface.
• Do not use outdoors.
• Turn OFF AND UNPLUG this appliance when not in use.
• NO SERVICEABLE PARTS INSIDE THIS APPLIANCE.
• DO NOT USE AN APPLIANCE WITH A DAMAGED CORD OR PLUG, OR
AFTER THE APPLIANCE MALFUNCTIONS, OR HAS BEEN DAMAGED IN ANY
MANNER.
3
Facebook.com/GinnysBrand

ELECTRICAL SAFETY
SPECIFICATIONS
POWER RATING 120V 60HZ 1350W
CAPACITY 6 QUART
CORD LENGTH 27”
DIMENSIONS 18”L x 12 1/2”W x 11”H
MODEL ES-MC-600D
4Pinterest.com/GinnysBrand
This appliance is equipped with a polarized plug in which one prong is wider
than the other. This is a safety feature to reduce the risk of electrical shock.
The plug should be aached to the appliance before connecng to an
electrical outlet. The plug will t into a polarized outlet only one way. If you
are unable to insert the plug into the outlet, try reversing the plug. If it sll
does not t, contact a qualied electrician. Do not aempt to modify the
plug in any way. Ginny’s cannot accept any liability for damage or injury
resulng from failure to observe these safety procedures.

GET TO KNOW YOUR APPLIANCE
5
Ginnys.com/Blog
1. Lid with Handle and Vent
2. Cooking Pot
3. Cool Touch Handle of Cooking Pot (2)
4. Funcon Dial
5. LED Display
6. Time/Oven Temp Buon
7. Adjustment Dial
8. Housing
9. Handle of Housing (2)
10. Roasng Rack (not shown)
(connued on page 6)
7
6
12
5
9
8
3
4

GET TO KNOW YOUR APPLIANCE
6
Ginnys.com 800-544-1590
Use the FUNCTION DIAL (4) to select which funcon you want to use:
SLOW COOK - Select WARM, LOW, or HIGH and let the cooker
do all the work. See more informaon on page 7.
STOVETOP - Use the cooker as a stovetop. You can simmer or sear.
See more informaon on page 8.
OVEN - Use the cooker instead of the regular oven. You can roast
or bake. See more informaon on page 8.
STEAM - Use the cooker to cook healthy meals with steam. See
more informaon on pages 9 and 10.
THE LED DISPLAY (5) displays the mer sengs for SLOW COOK, OVEN
and STEAMER. It also displays me and temperature for OVEN.
Use the TIME/OVEN TEMP BUTTON (6) to toggle between the me and
temperature when using OVEN.
Use the ADJUSTMENT DIAL (7) to set the mer, or to change the me and
temperature when using OVEN.
CONTROL PANEL
4 765

HOW TO OPERATE
7
Facebook.com/GinnysBrand
1. When ready to cook, place the cooking pot inside the housing. This
cooker has a cut o switch which will not allow the appliance to heat
if the cooking pot is not inserted into the housing. (If the cooking pot is
removed during the cooking cycle and then put back, cooking will
connue as though it was not interrupted.)
2. Plug the cooker into an outlet. It will not turn on as long as the funcon
dial is in the OFF posion.
3. Select the funcon you want. The blue light behind the funcon dial will
come on and the red light behind the adjustment dial will come on.
SLOW COOK:
a. As with any slow cooker, be careful not to over-ll the pot
(contents may boil over).
b. Place the food you wish to cook inside the pot and put the lid on
top.
c. Turn the funcon dial to either WARM, LOW, or HIGH, per recipe
instrucons. The LED display will show “6:00” for WARM, “8:00”
for LOW, or “4:00” for HIGH.
d. Turn the adjustment dial to set the desired me. The me will
increase or decrease in 30 minute increments from 30 minutes to
12 hours. The mer will begin counng down aer 3 seconds.
Cooking me and temperature can be adjusted at any me
while cooking. Press the me/oven temp buon and turn the
adjustment dial to change.
e. When done, turn the funcon dial to OFF and unplug the cooker.
If you do not turn OFF the cooker, WARM seng will shut o
aer the set me expires. LOW and HIGH seng will go to auto
warm (the LED display will show “On” and the light behind the
adjustment dial will turn green). Auto warm will shut o aer 12
hours.

8
Pinterest.com/GinnysBrand
HOW TO OPERATE
STOVETOP:
a. Place the food you wish to cook inside the pot. Use the lid per
recipe instrucons.
b. Choose STOVETOP LOW (to simmer) or HIGH (to brown or sear).
c. When done, turn the funcon dial to OFF and unplug the cooker.
If you do not turn OFF, LOW will shut o aer 4 hours and HIGH
will shut o aer 1 hour.
Use the stovetop funcon on HIGH to brown or sear meats and
vegetables before slow cooking to enhance avors.
OVEN:
a. Choose OVEN. The LED display will show “350°F”. Turn the
adjustment dial to set the temperature per recipe instrucons. The
temperature will adjust in 25° increments from 250° to 425°F.
b. Press the me/oven temp buon once, and then turn the
adjustment dial to set the cooking me per recipe instrucons. The
me will increase in 5-minute increments from 5 minutes to 6
hours.
c. When nished preheang, place the rack inside the pot and put
the food you wish to cook on the rack. Reset the me and
temperature per recipe instrucons.
Cooking me and temperature can be adjusted at any me while
cooking. Press the me/oven temp buon and turn the
adjustment dial to change.
d. The mer will begin counng down aer 3 seconds.
e. When done, the cooker will beep 3 mes and the LED display will
blink for 2 minutes. At the end of the 2 minutes, the cooker will
shut o. Turn the funcon dial to OFF and unplug the cooker.
Food cooked on OVEN will not brown or crisp on top as much as
in a convenonal oven, as there is no upper heang element.
Cooking mes or temperatures from a tradional recipe may
need to be adjusted.

9
Ginnys.com/Blog
HOW TO OPERATE
STEAMER:
a. Add water to the boom of the cooking pot. In general, 1 cup of
water equals 10 minutes of steam me. (If addional water is
required during the cooking process, cauously li the lid away
from you and add room temperature water.) Water should NOT
touch the food.
b. Place the rack inside the pot and put the food you wish to cook
on the rack.
c. Choose STEAMER. The LED display will ash “0:00”. Use the
adjustment dial to select the me per recipe instrucons from 1
minute to 1 hour. The LED display will ash “P:” and the me
selected unl the cooker heats up (about 5 minutes). When
the cooker is hot, it beeps 3 mes and then starts to countdown.
Fresh Vegetable Steaming Guide (cooking mes may vary):
Asparagus whole 3-7 minutes
Beans, green or wax whole 6-10 minutes
Beets, small-medium whole 35-40 minutes
Greens whole leaves 3-9 minutes
Broccoli split stalks 5-7 minutes
Brussels sprouts whole 8-15 minutes
Carrots, baby whole 10-12 minutes
Corn on the cob whole, husked 7-10 minutes
Peas, snap whole pods 5-6 minutes
Potatoes large chunks 8-12 minutes
Potatoes, new whole 15-20 minutes
Squash, buernut large chunks 7-10 minutes
Turnips large chunks 8-12 minutes
Sweet potatoes large chunks 8-12 minutes
Zucchini large chunks 4-8 minutes
(connued page 10)

10
Ginnys.com 800-544-1590
HOW TO OPERATE
WARNING: Do not obstruct the lid vent during use. To avoid possible steam
damage, place the cooker away from walls and cabinets during
use.
• Add chopped fresh herbs, before or aer steaming.
• Toss steamed vegetables with onion or garlic sauteed in
olive oil.
• Add soy sauce, ginger, onions, garlic or herbs to your
steam water.
• Drizzle steamed vegetables with lemon juice.
• Toss vegetables with vinegar before steaming.
Easy ways to add avor to your steamed vegetables:
d. When the me is done, the cooker will beep 5 mes, and go to
auto warm. The LED diplay will show “0:00” and the light behind
the adjustment dial will turn green. Auto warm will shut o aer 1
hour.
e. When done, turn OFF and unplug the cooker.
Table of contents
Other Ginnys Slow Cooker manuals

Ginnys
Ginnys 759101 User manual

Ginnys
Ginnys 786284 User manual

Ginnys
Ginnys 60765 User manual

Ginnys
Ginnys 742475 User manual

Ginnys
Ginnys 770893 User manual

Ginnys
Ginnys JC762042 User manual

Ginnys
Ginnys 749125 User manual

Ginnys
Ginnys NSCDA-650 User manual

Ginnys
Ginnys MST-850 User manual

Ginnys
Ginnys 733000 User manual