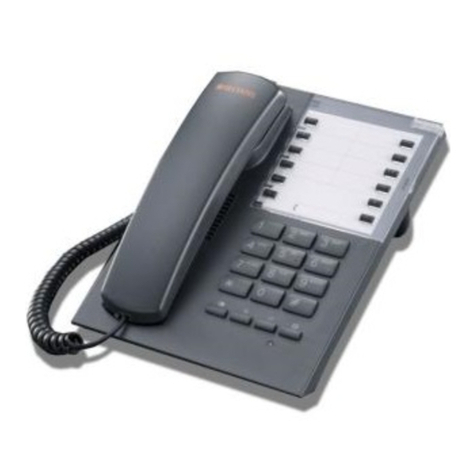
Fysic FX-3850 User manual

USER’S MANUAL
FX-3850

2
1 INTRODUCTION
The FX-3850 is a comfort phone with extensive functions to support
especially people with impaired hearing or sight.
Sight support:
- Big keys with contrasting numbers.
- Illuminated display with big characters.
- Also spoken support at pressing the keys and during set up.
- Possibility to record the concerning name with memory numbers.
These will be spoken when searching the memory.
Hearing support:
- Extra loud ring.
- Adjustable handset volume.
- Activation hearing aids.
Beside these extensive phone functions, the FX-3850 offers the possibility
to call a number of people, up to 30, automatically in case you need help.
- Alarm activation directly on the phone or through the included remote
control.
- The people that have been determined by you will be called, in the
order as indicated by you.
- If the emergency call is not answered, the next person will be called.
- Automatic enabling of the loudspeaker function.

3
So if you need help, and you press the red ‘SOS’ button on your phone,
or the red ‘SOS’ button on the remote control, these people will be called
one-by-one, and they will hear your recorded emergency message.
As soon as a called person actually responds, they can enable the
handsfree function of your phone remotely, and where possible consult
with and arrange help.
This way you do not depend on ofcial emergency centers, with their
monthly subscription fees, and you can also call for help for less urgent
issues.

4
2 INSTALLATION
2.1 Phone check:
The phone checks whether the phone line is connected. If the phone line
has not been connected yet, but the batteries have been inserted, or the
adapter has been connected, a short alert tone will sound every 10 sec-
onds. As soon as you have connected the phone to the phone connection,
this tone will stop.
2.2 Batteries:
To be able to have access to all phone function in case of a failure of the
230 V mains power or the adapter, you shall insert 4 batteries.
1. Unplug the phone connector off the phone socket.
2. Use a pointy object to remove the battery cover from
the underside of the phone.
3. Insert 4 alkaline batteries AA 1.5 V, as is indicated in
the battery compartment; at this, pay attention to the
polarity (+ and -).
4. Replace the battery cover onto the telephone.
Depending on the quality of the batteries, they can supply the phone
12 hours or more with power when the adapter is out of order.
ATTENTION: IF NO BATTERIES HAVE BEEN INSERTED, OR IF THEY
ARE EMPTY AND THE ADAPTER IS NOT CONNECTED, YOU ARE
STILL ABLE TO CALL THROUGH THE HANDSET. ALL OTHER FUNC-
TIONS, INCLUDING THE ALARM FUNCTION CANNOT BE USED ANY-
MORE.

5
2.3 Power adapter:
1. Plug the little connector of the adapter cable
into the 9 V DC, 200 mA connection
at the backside of the phone.
2. The power adapter in a 230 Volt mains
socket; nly use the included power adapter
with type number: S004LV0900020.
2.4 Phone cable:
1. Plug the little connector of the phone cord
cable into the TEL.LINE connection at the
backside of the phone; press the connector
until it clicks in place.
2. The Phone cable into a telephone wall jack.
2.5 Receiver:
1. Connect the receiver with the telephone by
attaching one side of the spiral cable to the
bottom of the receiver and the other side to
the left side of the telephone
2. Push in the plugs until they’re securely
connected

6
2.6 Wall mounting:
1. In a vertical line, drill 2 holes at a distance of 8.3 cm from each other
and insert plugs and screws; let the head of the screws protrude for
5 mm
2. Click the wall bracket to the underside of the
phone in conformity with the drawing (1), and
push it up (2).
3. Of the telephone, turn it 180° and place it back
onto the telephone; this clamp will hold
the receiver in case of wall-mounting
4. Hook the telephone with the screw
holes over the screws and press it downward
5. Fix the phone and adapter cables to the wall
with cable holders.
The wall bracket can be removed by pushing in the
locking tab (1), and sliding the bracket downwards
to remove it from the phone (2).

7
2.7 Remote control:
The remote control has been tted with a battery in the factory, and it is
ready for use.
Replacing the battery:
If the red indicator light on the remote control illuminates weakly or not
when you press the red SOS button, or you cannot activate an alarm any-
more, the battery shall be replaced.
1. Open the remote control by unscrewing the 4 small Phillips screws at
the backside, and open the remote control.
2. Remove the old, dead battery and insert a new battery; voltage: 12 Volt,
size 23A.
3. Close the remote control and fasten the screws.
TIP: check the condition of the battery regularly, for example once a
month, by pressing the red SOS-key more than a second. Now the phone
shall enable the emergency status (you hear the local alarm signal from
the phone, or you can see from the display that the rst programmed
emergency number is dialed. Now take the handset from the phone for a
while and hang it up again, to disable this test alarm.
To be sure that the remote control functions properly, we suggest to re-
place the battery once every 10 to 12 months.

8
3 OVERVIEW OF THE PHONE
3.1 Top view:
Volume control
of the handset
amplier.
Indicator light:
ashes when the
local alarm sounds in
an emergency situa-
tion, when new calls
have been registered
in the call list.
Indicator light:
illuminates when the
handset amplier has
been enabled.
Indicator lights:
illuminate when
you are called.
Tongue for handset,
keeps the handset
in case of wall
mounting.
Handset switch,
terminates the
connection when
the handset is put
down.
Built-in microphone, for
making handsfree calls,
for recording the memory
names and for recording
the emergency message.

9
OK key for programming and set up.
delete key.
keys to browse through the memory.
Also keys for setting with programming and set up.
direct memory keys
key for enabling the alarm
key to start programming
key for selection phone book memory/dial list
key for forwarding/telecom function
key for disabling the microphone
pause/redial last number
keyboard
‘star’ key and ‘hash’ key, for example for internet banking
key for enabling/disabling the loudspeaker function; with indicator light
key for enabling and disabling the handset amplier.

10
3.2 Right side view:
3.3 Backside:
Volume control for
the handsfree sound.
Switch ring volumeTone control for the
sound of the handset.
Connection for the
power adaptor.
Connection phone
cable
Table of contents
Other Fysic Telephone manuals