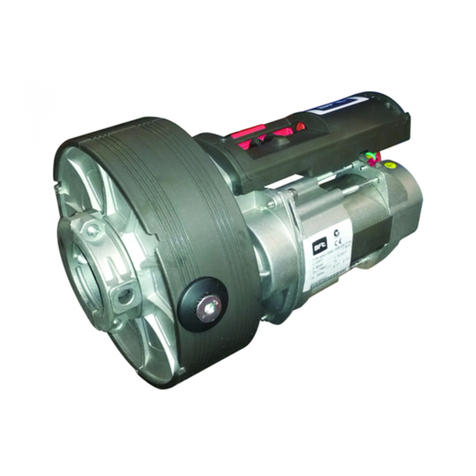
FAAC DOMOSWING battery User manual

6
1) ATTENTION! To ensure the safety of people, it is important that you read
all the following instructions. Incorrect installation or incorrect use of
the product could cause serious harm to people.
2) Carefully read the instructions before beginning to install the product.
3) Do not leave packing materials (plastic, polystyrene, etc.) within reach
of children as such materials are potential sources of danger.
4) Store these instructions for future reference.
5) This product was designed and built strictly for the use indicated in this
documentation. Any other use, not expressly indicated here, could
compromise the good condition/operation of the product and/or be a
source of danger.
6) FAAC declines all liability caused by improper use or use other than that
for which the automated system was intended.
7) Do not install the equipment in an explosive atmosphere: the presence
of inflammable gas or fumes is a serious danger to safety.
8) The mechanical parts must conform to the provisions of Standards EN
12604 and EN 12605.
For non-EU countries, to obtain an adequate level of safety, the Standards
mentioned above must be observed, in addition to national legal
regulations.
9) FAAC is not responsible for failure to observe Good Technique in the
construction of the closing elements to be motorised, or for any
deformation that may occur during use.
10) The installation must conform to Standards EN 12453 and EN 12445.
For non-EU countries, to obtain an adequate level of safety, the Standards
mentioned above must be observed, in addition to national legal
regulations.
11) Before attempting any job on the system, cut out electrical power and
disconnect the batteries (if provided).
12) The mains power supply of the automated system must be fitted with an
all-pole switch with contact opening distance of 3mm or greater. Use
of a 6A thermal breaker with all-pole circuit break is recommended.
13) Make sure that a differential switch with threshold of 0.03 A is fitted
upstream of the system.
14) Make sure that the earthing system is perfectly constructed, and connect
metal parts of the means of the closure to it.
EC DECLARATION OF CONFORMITY FOR MACHINES
(DIRECTIVE 98/37/EC)
Manufacturer: FAAC S.p.A.
Address: Via Benini, 1 - 40069 Zola Predosa BOLOGNA - ITALY
Declares that: DOMOSWING mod. operator
• is built to be integrated into a machine or to be assembled with other machinery to create a machine under the
provisions of Directive 98/37/EC;
• conforms to the essential safety requirements of the following EEC directives:
73/23/EEC and subsequent amendment 93/68/EEC.
89/336/EEC and subsequent amendment 92/31/EEC and 93/68/EEC
and also declares that it is prohibited to put into service the machinery until the machine in which it will be
integrated or of which it will become a component has been identified and declared as conforming to the
conditions of Directive 98/37/EC.
Bologna, 01 January 2004
The Managing Director
A. Bassi
15) The automated system is supplied with an intrinsic anti-crushing safety
device consisting of a torque control. Nevertheless, its tripping threshold
must be checked as specified in the Standards indicated at point 10.
16) The safety devices (EN 12978 standard) protect any danger areas
against mechanical movement Risks, such as crushing, dragging,
and shearing.
17) Use of at least one indicator-light (e.g. FAACLIGHT 12VDC) is
recommended for every system, as well as a warning sign adequately
secured to the frame structure, in addition to the devices mentioned
at point “16”.
18) FAAC declines all liability as concerns safety and efficient operation
of the automated system, if system components not produced by
FAAC are used.
19) For maintenance, strictly use original parts by FAAC.
20) Do not in any way modify the components of the automated system.
21) The installer shall supply all information concerning manual operation
of the system in case of an emergency, and shall hand over to the
user the warnings handbook supplied with the product.
22) Do not allow children or adults to stay near the product while it is
operating.
23) Keep remote controls or other pulse generators away from children,
to prevent the automated system from being activated involuntarily.
24) Transit is permitted only when the automated system is idle.
25) The user must not attempt any kind of repair or direct action whatever
and contact qualified personnel only.
26) Do not short-circuit the poles of the batteries and do not try to recharge
the batteries with power supply units other than those provided with the
equipment (in the battery—powered version).
27) Do not throw exhausted batteries into containers for other waste but
dispose of them in the appropriate containers to enable them to be
recycled. Disposal costs have already been paid for by the
manufacturer (in the battery—powered version).
28) Maintenance: check at least every 6 months the efficiency of the
system, particularly the efficiency of the safety devices (including,
where foreseen, the operator thrust force) and of the release devices.
29) Anything not expressly specified in these instructions is not permitted.
WARNINGS FOR THE INSTALLER
GENERAL SAFETY OBLIGATIONS

7
These instructions apply to the following model:
FAAC DOMOSWING
The DOMOSWING automated system can automate residential swing gates with leaves of up to 1.8 m in length with 100° max.
opening.
It consists of non-reversing electro-mechanical articulated operators, powered by 12 Vdc, and each operator is coupled to a
control unit. The non-reversing system guarantees the gate will automatically lock when the motor is not operating. A release
system enables the gate to be moved by hand in case of malfunction.
The DOMOSWING automated system was designed and built for controlling vehicle access. Do not use for any other purpose.
DOMOSWING
automated system
Tab. 1 - Technical specifications of DOMOSWING operator
MODEL DOMOSWING battery DOMOSWING transformer
Power supply 12Vdc
Rated absorbed power (W) 48
Max static force (N) 1000
Load-free linear speed (cm./sec.) 3.2
Rod effective stroke (mm) 280
Use frequency (cycles/hour) 5(1) 15 (2)
Consecutive cycles ~15 (1) 30 (2)
Recovery time ~10' for each completed cycle(1) 2' for each completed cycle (2)
Operating ambient temperature (°C) -20 ÷ +55
Operator weight (Kg) 2,2
Protection class IP 44
Leaf max length (m) 1,80
Leaf max weight (kg) 250
Operator overall dimensions LxHxD (mm) see fig.2
Length of operator power cable (m) 0.7 (CANNOT BE MODIFIED)
3. TECHNICAL SPECIFICATIONS
(1) The 5 cycles/hour are just a reference value for maintaining full efficiency of batteries. 15 consecutive cycles can be averagely
performed with charged battery. The recovery time (battery recharge) is approx. 10' each cycle performed. The consecutive cycles
could be reduced by over 50% at low temperatures (< 0°C).
(2) The 15 cycles/hour are just a reference value for maintaining full efficiency of motorisation. 30 consecutive cycles can be performed
with software thermal protection. Recovery time is 2' each cycle performed.
Fig. 1 Fig. 2
•
Dimensions in mm
a
DOMOSWING operator
b
Rear fitting
c
Front fitting
d
Release
e
Bracket bush
DOMOSWING
OPERATOR
1. DESCRIPTION 2. DIMENSIONS

8
Example:
for a Ddimension of 45 mm and a Bdimension of 100 mm, use the 4th hole (100° opening).
for a Ddimension of 45 mm and a Bdimension of 105 mm, use the 4th hole (90° opening).
The intersection of dimensions D and B (see Fig. 4) in the table determines which fixing hole on the bracket should be used.
Note:
Intersections without figures cannot be used.
4.2. Installation dimensions
4.1. Preliminary checks
To ensure safety and an efficiently operating automated
system, make sure the following conditions are observed:
•The enclosures of the control boards (see relevant
instructions) should be installed at a distance from the
operators not requi ring the motor cable to be extended.
•The structure of the gate must be suitable for being
automated. In particular, check that the structure is
sufficiently strong and rigid, and that its dimensions and
weight conform to those indicated in the technical
specifications.
•Make sure that the leaves move uniformly and correctly,
without any irregular friction during their entire travel.
•Make sure that the hinges are in good condition.
•Check if the mechanical stops of the limit-switches are
fitted.
•Remove any locks and lock bolts.
We advise you to have any metalwork carried out before the
automated system is installed.
There are 4 possible installation dimensions Z as shown in Fig. 3.
•
Dimensions in mm
Fig. 3
Fig. 4
•
Dimensions in mm
Z = see Fig. 3
Do not , on any account, cut the rear bracket to obtain
dimension A (Fig. 4).
Establish the installation position of the operator by referring to
Fig. 4 and Table 2.
1st hole
2nd hole
3rd hole
4th hole
4. INSTALLATION
Tab. 2 -
Installation
dimensions
D
88 ÷ 91 92 ÷ 97 98 ÷ 102 103 ÷ 107 108 ÷ 113 114 ÷ 119 120 ÷ 126
30 ÷ 39
40 ÷ 49
50 ÷ 59
60 ÷ 69
70 ÷ 79
80 ÷ 89
90 ÷ 99
100 ÷ 109
110 ÷ 119
120 ÷ 129
130 ÷ 140
B
90°
100°
90°
100°
90°
90°
90°
100° 90°
90°
100°
100° 90°
90°
100°
100° 90°
90°100°
100° 90°
90°
•
Dimensions in mm

9
Fig. 5
Fig. 6
4.3.3 Preparing the operators
·Check if the pin (Fig. 7 Ref. ) is in contact with the front of
the operator. If it is not, turn the release key - fitted in the
appropriate seat (Fig. 7) - clockwise to the end of its travel.
·Turn the release key anti-clockwise for 6-7 turns as shown in
Fig. 7.
4.3.1 Installing the rear fitting
Secure the rear fitting to the pillar by welding or using suitable
expansion plugs (Fig. 5), observing the dimension as shown in
Table 2 and checking if the fitting is perfectly horizontal.
Ü
The rear fitting must never be cut and it must face
downwards with its pillar fixing points
.
4.3. Installation sequence
4.3.2 Installing the operator-rear fitting
Secure the operator to the rear fitting, with the nut and washer
(Fig. 6), taking care to correctly fit the chamfered part of the
pin in the hole of the rear fitting determined in Table 2.
4.3.5 Re-positioning the front pin
·Turn the release key clockwise to the end of its travel.
·Turn the release key anti-clockwise for 3 turns.
4.3.4 Inserting the bush - front fitting
Insert the bush (Fig. 7 Ref. ) in the front fitting (Fig. 7 Ref. ).
The mechanical stop on the bush must coincide with the pin
groove of the operator. Fit the pin (Fig. 7 Ref. ) in the bush.
Fig. 7
4.3.6 Positioning the front fitting
• Take the leaf to its closed position.
• Rest the fitting on the leaf and mark out the fixing points
checking if the operator and the fitting are perfectly horizontal
(Fig. 8).
Fig. 8

10
Fig. 10
Fig. 9
• Turn the release key anti-clockwise for 2-3 turns.
• Remove the fitting from the operator and fit it on the leaf. The
fitting can be either welded directly or screwed on, using the
threaded inserts (Fig. 9).
4.3.7 Installing the front fitting
Fasten the operator to the front fitting as shown in Fig. 10 and turn
the release key clockwise to the closing stop position.
Ü
The operator is non-reversing, so do not, on any account,
try to move the leaves by hand.
4.3.8 Installing the operator-front fitting
5. MANUAL OPERATION
If the gate has to be moved manually due to a malfunction of
the automated system, use the release device as follows:
• Fit the supplied Allen wrench in the front part of the operator
and turn it anti-clockwise for 5-6 turns (Fig. 11 Ref. ).
• Lift the operator by its front end, detaching it from the fitting
(Fig. 11 Ref.) and remove the release key.
6. RESTORING NORMAL OPERATION MODE
Procedure to relock the gate:
• Re-position the operator on the front fitting (Fig. 10);
• Fit and turn the release key clockwise until the operator
reaches the closing stop position.
• remove the release key.
Fig. 11
a
b
a
b

User’s guide
Read the instructions carefully before using the product and
store them for future use
GENERAL SAFETY REGULATIONS
If correctly installed and used, the DOMOSWING automated
system ensures a high degree of safety.
Some simple rules concerning behaviour can prevent
accidental trouble:
- Do not pass through the leaves while they are moving.
Wait for the leaves to open fully before passing through.
- Do not, on any account, stand between the leaves.
- Do not stand near the automated system or allow children,
persons or things to stand or lie there, especially while it is
in use.
- Keep remote controls or other pulse generators away
from children, to prevent the automated system from
being activated involuntarily.
- Do not allow children to play with the automated system.
- Do not willingly obstruct leaf movement.
- Prevent any branches or shrubs from interfering with leaf
movement.
- Keep indicator-lights efficient and easy to see.
- Do not attempt to activate the leaves by hand unless you
have released them.
- In the event of a malfunction, release the leaves to allow
access and wait for qualified technical personnel to do
the necessary work.
- Before attempting any job on the system, cut out electrical
power and disconnect the batteries (if provided).
- Do not in any way modify the components of the
automated system.
- Do not attempt any kind of repair or direct action whatever
and contact qualified personnel only for the purpose.
- At least every six months: arrange a check of the
automated system, safety devices and accessories.
DESCRIPTION
These instructions apply to the following models:
FAAC DOMOSWING
The FAAC DOMOSWING automated system for residential
swing gates consists of non-reversing electro-mechanical
linear operators, powered by 12 Vdc, through battery or
transformer. Each operator is coupled to an electronic
control unit ensuring correct operation
If using the battery-powered version, it should be considered
that this is a work battery (not a back-up battery) therefore
when the battery is discharged, the automated system has
to allow for its recharge in order to resume operation.
The operators are controlled by an electronic control unit
(one for each motor), housed in an enclosure with adequate
degree of protection against atmospheric agents.
The leaves are normally in closed position.
When the electronic control unit receives an opening
command via the remote control or any other pulse
generator, it activates the operator to rotate the leaves
until they reach the opening position allowing access.
If automatic operating mode was set, the leaves closes
automatically after selected pause time has elapsed.
If the semi-automatic operating mode was set, a second
pulse must be sent to close the gate again.
A stop pulse (if supplied) always stops movement.
For details on the behaviour of the automated system in
different function logics, consult the installation Technician.
Automated systems may include safety devices that prevent
the leaves from moving when there is an obstacle in the
area they protect.
The DOMOSWING automated system is provided with an
adjustable anti-crushing device which reverses leaf
movement in case of contact with an obstacle.
The warning-light indicates that the leaves are moving.
MANUAL OPERATION
If the gate has to be moved manually due to a malfunction
of the automated system, use the release device as follows:
• Fit the supplied Allen wrench in the front part of the
operator and turn it anti-clockwise for 5-6 turns (Fig. 1-
Ref. ).
• Lift the operator by its front end, detaching it from the
fitting (Fig. 1- Ref. ) and remove the release key.
RESTORING NORMAL OPERATION MODE
Procedure to relock the gate:
• Re-position the operator on the front fitting (Fig. 2);
• Fit and turn the release key clockwise until the operator
reaches the closing stop position.
• Remove the release key.
Fig. 1
a
b
a
b
Fig. 2
DOMOSWING AUTOMATED SYSTEM
This manual suits for next models
1
Table of contents
Other FAAC Door Opening System manuals
Popular Door Opening System manuals by other brands

Normstahl
Normstahl IDO7 installation manual

Häfele
Häfele Finetta T 70 VF manual

AGS
AGS D-PL Instructions for fitting, operating and maintenance

Stanley
Stanley MA900ñ Installation and owner's manual

WITTUR
WITTUR Hydra Plus UD300 Instruction handbook

Alutech
Alutech TR-3019-230E-ICU Assembly and operation manual