EZMAX Co., Ltd. EZMP-2000 User manual

Report No: BWS-03-EF-0026
FCC ID Q9JEZMP-2000
Date of Test : Jun 14, 2003
EZMAX Co., Ltd.
Digital Audio Player EZMP-2000
Appendix 6. User Manual
Refer to the following pages

(N.B.) Copyright ©2003 by EZMAX Co., Ltd. All rights reserved.
The use of user's manual, pictures, software and other related documents of
this product requires the prior permission of EZMAX, whose violation would be
followed by a legal action or suit.
The content of user's manual are subject to change without any prior notice
due to improvements in the product.
EXMAX CO., LTD.
http://www.ezmax.co.kr

1
Features
Thank you for purchasing this product.
Make sure to use it after carefully reading the user's manual.
This device is small, light and easy to carry, and plays digital music that meets MP3
and WMA standards.
This device has been so improved that It could last for 40 hours with only one small
battery (AAA battery).
In addition, it adopts JOG button to easily use various functions and enables the
user to upgrade the functions without any inconvenience of visiting A/S center in
person.
If you want to upgrade to the latest software or have any inquiries, visit our website
at http://www.ezmax.co.kr.
Now, you can enjoy convenience of digital storage device and delicacy of digital
music our player provides.

2
Contents
Getting Started
1. What's in the box ..............3
2. PC System Requirements ..4
3. Cautions for Safety .............5
Name of Parts
1. Name of Parts ....................6
2. Name of LCD Window Display
...............................................7
Preparation
1. Install Manager Program ....6
2. Install USB Driver ...............9
3. How to Connect Player to PC
.................................................11
How to Use Manager Program
1. Description of Manager Screen .....
.
2. Download ............................14
3. Save File ............................15
4. Set Equalizer ......................16
5. Set Play Order/Delete File ..17
6. Format Flash Memory .......18
How to Use MP3 Player
1. Power ON / Play .................19
2. Power OFF / Pause ............20
3. Volume Control ...................21
4. Select Next/Previous Track 22
5. Menu Mode ........................23
6. How to Insert Battery ..........29
Others
1. Troubleshooting ..................30
2. Specification .......................31
3. MP3/WMA Responding Music
Format ................................32
3. Service Information(A/S) ....33
4. Warranty .............................34

3
1 What's in the box
Necklace Earphone User’s Manual
MP3 Player
USB Cable Install Program CD
A
AA Size Batte
r
y

4
1 2. PC System Requirements
There are basic requirements for PC to install software and use mp3 player.
Make sure to check recommendations before use.
Windows 98SE / ME / 2000 / XP
Pentium 200MHz or above
USB port supports
CD-ROM drive
64 MB RAM or above
Free space of hard disk over 20MB
(Additional space required for saving music file)

5
1 3. Cautions for Safety
For Listening to Music
Output level of this equipment guarantees quality sound at its middle volume. Since
listening at its high volume for a long time may cause a serious damage to your
hearing sense, listen at its proper volume.
Keep away from Strong Impact or Vibration.
Giving impact to or felling the main product or accessories on the floor may give a
severe damage to the player.
For Storage
Avoid any place with a severe change in temperature, high humidity or strong
magnetic field.
For Cleaning
Wiping the players with chemicals may change the color or give damage to the
surface.
Wipe out the players using soft fabrics.
Battery
Do not insert battery when you don't use player for a long time.
! Note: Never disassemble, repair or remodel in person.

6
2 1. Name of Parts
1. Earphone Jack
2. USB Port
3. Necklace connection hole
4. Operation Status LCD window
5. MENU Switch
6. Power( on/off /Play/Stop) button
7. Volume button
8. Battery cover
7
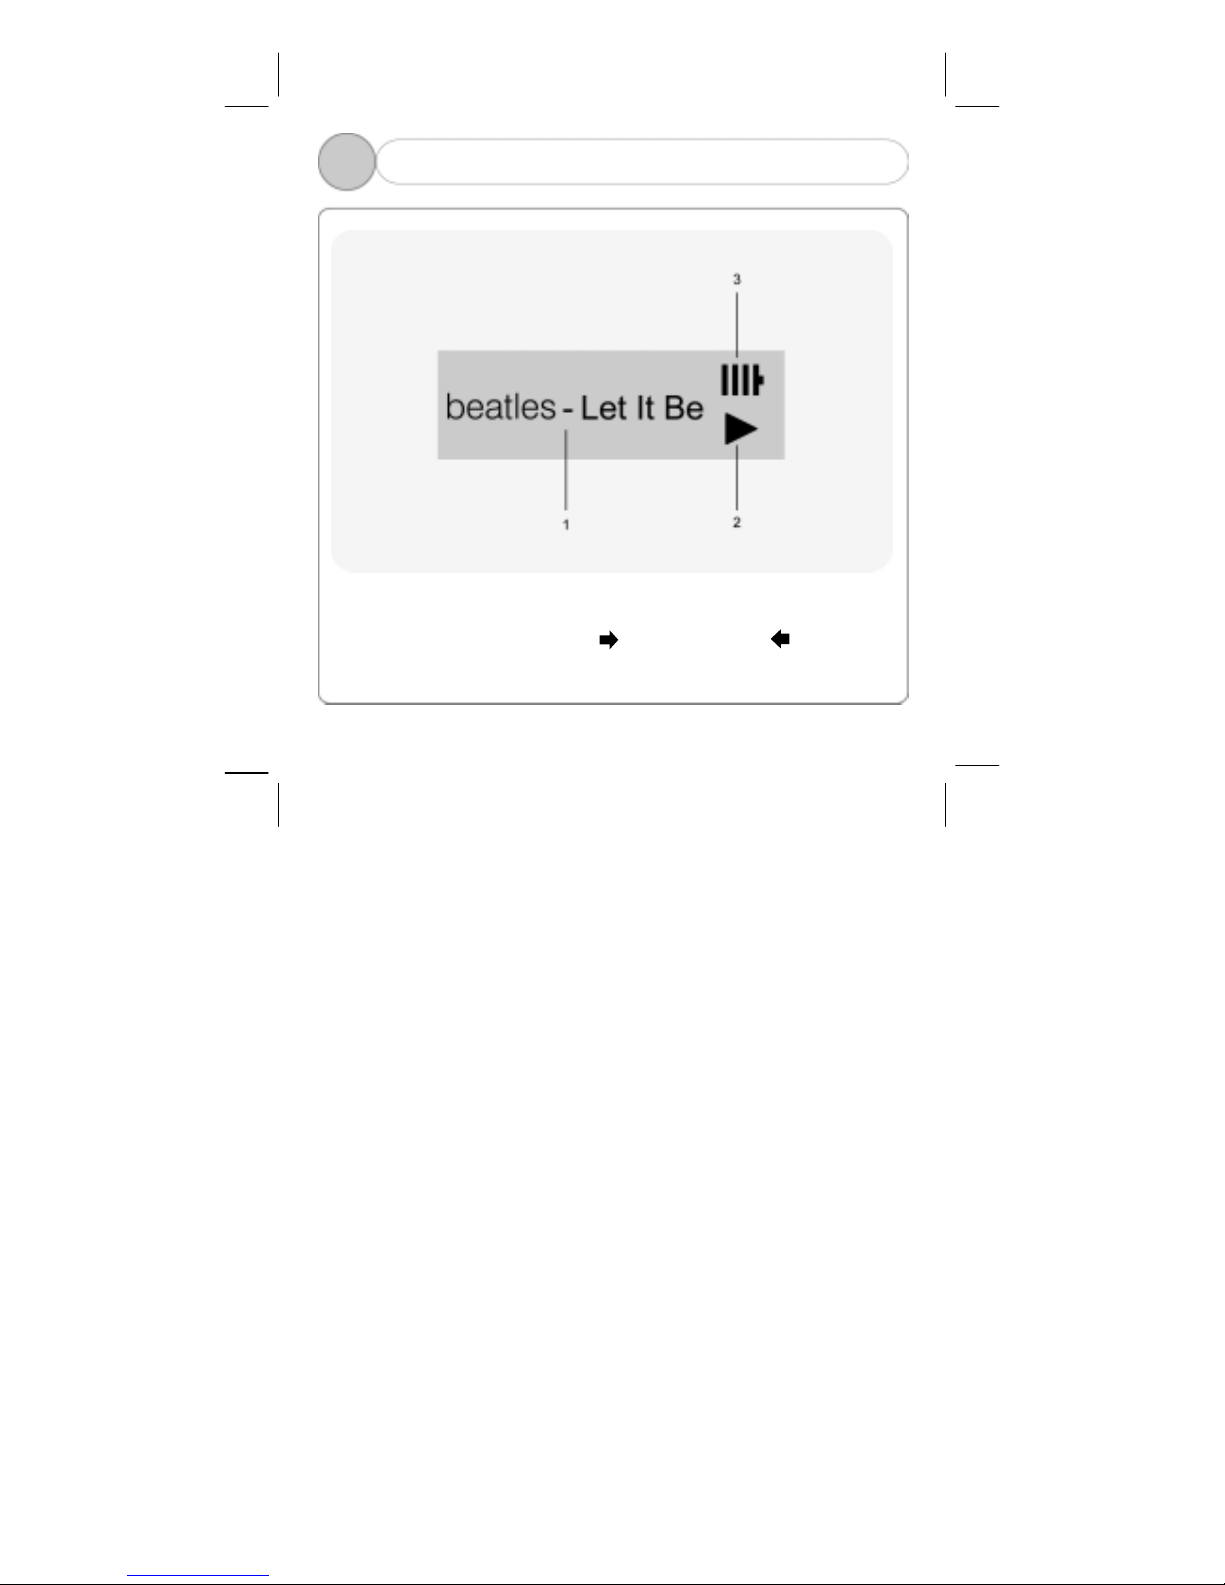
2 2. Name of LCD Window Display
1. Name of song selected or in play.
2. Progress status
( ▶: Play / ■:Pause / :FastForward / :Rewind)
3. Battery level

8
3 1. Install Manager Program
To install manager program, make sure that USB cable isn’t connected to PC while
you follow the steps below
Insert Install CD into CD-ROM drive, and the following screen will appear and
installing will start.
(This explanation is an example> of WIN XP. If you are a user of other OS, visit and
refer to our website. )
! Note: Insert install CD into CD-ROM drive only when you install program at the
beginning, and then remove it after installing is finished.
1) Select language to select and
press the "OK" button.
2) Click the “Next” button.
Table of contents