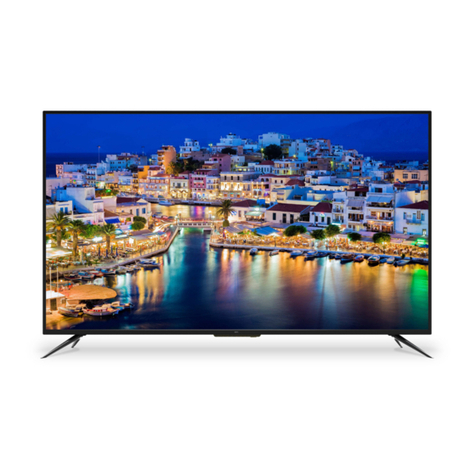
Denver LED-2256DVBTS User manual

22" fhd led tv with atv and mpeg-2 dvb-t +
dvb-s + c.i & usb input + pvr function
Instruction Manual
Model NO.: LED-2256DVBTS


Remote Control
Aerial connection
Connecting external devices
Auto installation setup
Source menu
Menu settings
5-6
Unit4
7
8-11
12
13
14-21
22-25
1-3 SAFETY INFORMATION
TROUBLE SHOOTING GUIDE
TECHNICAL SPECIFICATIONS
43
DVBS Operation26-42
44
Contents
Multimedia operation and RECORD Operation

SAFETY INFORMATION
CAUTION TO PREVENT ELECTRICAL SHOCK, DO NOT REMOVE ANY
COVER SCREWS, NO USER SERVICEABLE PARTS INSIDE, REFER
SERVICING TO QUALIFIED SERVICE PERSONNEL.
This symbol indicates that there are important operating maintenance instructions in
the literature accompanying this unit.
IMPORTANT SAFETY INSTRUCTIONS - READ CAREFULLY BEFORE USE.
Take note of the following safety information which appears on the back of the TV.
present within this unit.
This symbol indicates that dangerous voltage constituting a risk of electric shock is
Keep these instructions
• Do not use this TV near water.
• Clean only with a slightly damp cloth.
• Do not block any ventilation openings.
• Install in accordance with the supplied Quick Start Guide and this User Guide.
• Protect the power chord from being walked on or pinched, particularly at plugs, and the
point where it exits from the TV.
• Do not allow the power chord to overhang the edge of a table.
• Unplug this TV during lightening storms or when unused for long periods of time.
WARNING! TO REDUCE THE RISK OF FIRE OR ELECTRICAL SHOCK, DO NOT
EXPOSE THIS TV TO RAIN OR MOISTURE. THE TV MUST NOT BE EXPOSED
TO DRIPPING AND SPLASHING AND NO OBJECTS FILLED WITH LIQUIDS
SHOULD BE PLACED ON THE TV.
NOTE: No naked flames such as candles should be placed on the TV.
1

IMPORTANT SAFETY INFORMATION(Continued)
This unit has been produced according to all current safety regulations. The following safety
tips should safeguard users against careless use and the dangers connected with such use.
xAlthough this appliance has been carefully manufactured and rigorously checked
prior leaving the factory, as with all electrical appliances it is possible for problems to
develop. If you notice smoke, an excessive build up of heat or any other unexpected
phenomena, you should disconnect the plug from the mains power socket
immediately.
xEnsure that the unit is sufficiently ventilated! Never place next to or underneath
curtains!
xThe mains plug or appliance coupler is used as the disconnect device, the disconnect
device shall remain readily operarble.
xThis set should only be connected to a mains power supply which matches that
stated on the label on the rear of the TV – do not attempt to connect it to any other
type of supply.
xThe socket – outlet must be installed near the equipment and easily accessible.
xTo prevent overload, don’t share the same mains supply socket with too many other
items of equipment.
xApparatus with Class 1 construction shall be connected to a mains socket outlet with
a protective earthing connection.
xKeep away from rodents. Rodents enjoy biting into electric flexes.
xAlways hold the plug when pulling out the plug from the mains supply socket. Do not
pull on the flex, the flex can become overloaded and cause a short circuit.
xSet up the unit so that no one is able to trip over the flex.
xDo not place heavy items on the flex, which may damage it.
xTake note that the flex cannot be reached and pulled by young children, avoiding
injury.
xDo not set up the unit near to heat sources. The casing and the flex could be
damaged by the impact of heat.
xThe screen is made of plastic and can break if damage is done to it. Be careful when
collecting sharp edged plastic splinters to avoid injury.
xAvoid placing the unit on any surfaces that may be subject to vibrations or shocks.
xTo protect the unit during a thunderstorm unplug the AC power cable and disconnect
the aerial. Caution: Do not touch the aerial (RF) connector.
xWhen you leave your home for long periods of time, unplug the AC power cable for
safety reasons.
xThe unit becomes warm when in operation. Do not place any covers or blankets on
the unit in order to prevent overheating. The ventilation holes are not to be blocked.
Do not set up near radiators. Do not place in direct sunshine. When placing on a
shelf leave 5 cm (2”) free space around the whole unit.
xDo not allow water or moisture to enter the TV. Do NOT use in wet or moist areas
such as Bathrooms, steamy kitchens or near swimming pools.
xDo not use this unit when moisture condensation may occur
xAny repairs must be carried out by qualified personnel only.
xDo not open this unit. A non – expert attempting to repair the unit could be dangerous
and potentially cause a fire hazard.
2

IMPORTANT SAFETY INFORMATION (continued)
Liquids spilt into the unit can cause serious damage. Switch the set OFF and
disconnect the mains power supply, then consult a qualified service person before
attempting to use the unit again.
Do NOT remove the safety covers. There are no useable or serviceable parts inside.
You may invalidate the warranty. Qualified personnel must only service this
apperatus.
Do NOT tap or shake the screen, you may damage the internal circuits. Take good
care of the remote control, do not drop.
Never place hot objects or open flame sources on or close to the TV.
High temperatures can melt plastic and lead to fires.
Where to install
Locate the television away from direct sunlight and strong lights, soft indirect lighting is
recommended for comfortable viewing. Use curtains or blinds to prevent direct sunlight
falling on the screen. Place the TV on a sturdy platform of which the surface should be flat
and steady. This will prevent it from falling over.
Make sure the television is located in a position where it cannot be pushed or hit by objects,
as pressure will break or damage the screen, and so that small objects cannot be inserted
into the ventilation slots or openings in the cabinet.
Headphone Warning
Loud music can damage your hearing irreversibly, therefore do not set the volume to a high
level when listening through headphones, particularly for lengthy listening periods.
To clean the TV use a soft dry cloth. Do NOT use solvents or petrol based fluids. For
stubborn stains, you may use a damp cloth with dilute detergent.
3

Unit
The functions of the TV buttons are described below.
MENU Press to display the OSD menu, Press again to exit the menu.:
CH-/CH+: Press to scan through channels.
They are also can be used to move down/up in the OSD menu screen.
VOL-/VOL+: Press to adjust the volume.
They are also can be used to move left/right in the OSD menu screen.
VOL+ button can be used to skip forward to next menu.
INPUT: Press to select the source.
Power: Turn on/off the TV set.
4
Remote Control Window
(keep clear)
LED Indicator
INPUT MENU CH+ CH- VOL+ VOL- POWER

INPUTMENU
EXIT
USB
TV/RADIO
DISPLAY
DVBS-SAT DVBS-AUDIO
FAV SUBTITLE TEXT
PIC-FORMAT PAUSE EPG
DVBS-INFO
REC
Remote control
POWER:
Turn the TV on/standby.
INPUT: Press to display the input source menu.
VOL+/- : Adjust the volume.
CH+/- : Scan through channels.
Cursor left/right up/down : Cursor buttons used in menus.
OK:CONFIRM BUTTON for menu.
MENU : System setup menu.
Colour buttons: short cuts-follow the coloured links in
the text.
(In DTV mode, press red key to switch between TV and radio.
Green key, yellow key and blue key are invalid.)
Buttons for TELETEXT(In ATV mode)
TV/TXT: Teletext on/off
CANCEL: Turn off the Teletext display
REVEAL: Reveal any hidden text, for example-quiz answer
HOLD
NICAM/A2
: Hold or carry on the current subpage
SIZE: Press to see top half of page double size, Press
again to see the bottom half of page double size,
Press again for normal size
SUBPAGE: press to subpage, again to cancel.
INDEX: go to index.
EXIT : Exit the OSD menu.
USB: The short cuts to the multtimedia in DVBS mode.
0-9,-/--
Choose channel directly.
Returns to the previous channel.
5

Remote control (continued)
DISPLAY: Display current mode information.
PICTURE: Select the picture mode.
SOUND: Select the sound mode.
SLEEP: Standby Timer.
MUTE: Mutes the Audio.
F
DVBS-SAT: Display the satellite list.
DVBS-AUDIO: Shows the list of available languages for the
channel you are watching.
DVBS-INFO: Shows information of the current channel.
AV: Display the favorite program list.
PIC FORMAT: Press to change the display mode of the
screen: 4:3, 16:9.etc
SUBTITLE: To switch the dialogue at the bottom of the
screen.
TEXT: To view the teletext broadcasting program.
PAUSE: Pause the current screen in DVB-S.
EPG: To show the Electronic Program Guide during
no-menu state only.
TV/RADIO: Disc menu change between TV and Radio.
6
INPUTMENU
EXIT
USB
TV/RADIO
DISPLAY
DVBS-SAT DVBS-AUDIO
FAV SUBTITLE TEXT
PIC-FORMAT PAUSE EPG
DVBS-INFO
REC
REC:Press to start record the program in DVBS mode.
: Fast reverse.
: Fast forward.
: Stop.

Aerial connection
WARNING! ENSURE THE TV AND ALL ANCILLARY EQUIPMENT IS
UNPLUGGED FROM THE MAINS BEFORE MAKING ANY CONNECTIONS!
Connecting the TV Antenna
Connect the TV antenna to the aerial socket with a 75 ohm co-axial plug. For best
results use a high gain TV aerial, preferably roof or loft mounted.
vTo improve picture quality in a poor signal area, purchase
and install a signal amplifier.
vIf the antenna needs to be split for two TVs, use a 2-Way
Signal Splitter (not supplied).
Connecting external devices
This instruction manual shows the simplest and most effective way of
connecting your TV to ancillary equipment. Alternate methods are listed below.
HDMI Lead
You can connect this TV to a compatible device using a HDMI lead. This method will
give the best picture.
Connect the cable from the HDMI equipment to the TV HDMI socket.
SCART Lead
You can connect this TV to a compatible device using a SCART lead. The
connection uses component video signals, i.e. the red, green and blue (RGB)
content of the video are sent on separate signals.
VGA Cable
You can use your TV as a monitor for your personal computer by using a VGA cable.
Sound from your personal computer may also be played through the TV.
USER GUIDE
7
Y Pb Pr Video R in L in RF
Table of contents
Other Denver LED TV manuals

Denver
Denver LDD-3273 User manual

Denver
Denver LED-3259TC User manual

Denver
Denver LED-3274 User manual

Denver
Denver LED-2459TC User manual

Denver
Denver LED-3277 User manual

Denver
Denver LED-4072T2CS User manual

Denver
Denver LDD-2655DVBT User manual

Denver
Denver LED-2470 User manual

Denver
Denver LED-6570 User manual

Denver
Denver LED-5570T2CS User manual

Denver
Denver LED-2453MC User manual

Denver
Denver LED-5571 User manual

Denver
Denver LED-6569T2CS User manual

Denver
Denver LDD-2253 User manual

Denver
Denver TFD-3249MC User manual

Denver
Denver LDD-2453 User manual

Denver
Denver LED-2756MC User manual

Denver
Denver LDD-1954MC User manual

Denver
Denver LED-2469S User manual

Denver
Denver LED-3279 User manual