
Coway AP-1012GH User manual
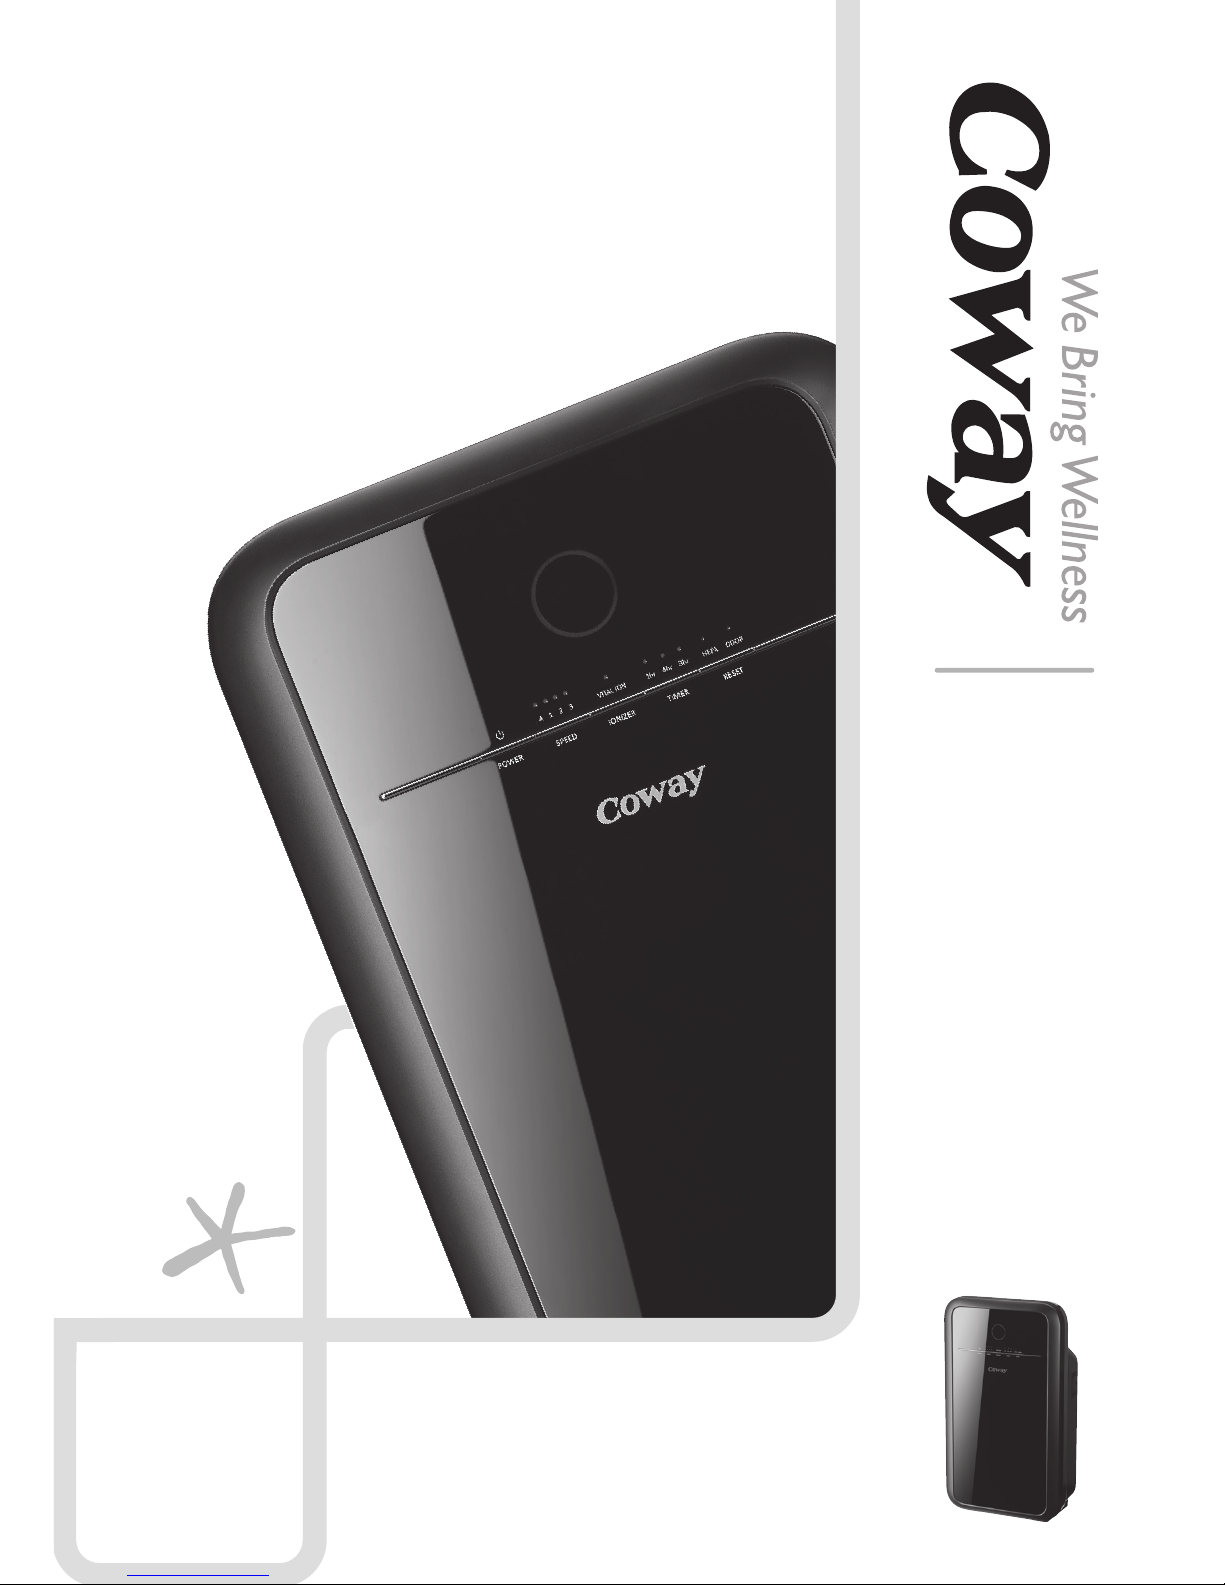
AP-1012GH
AIR PURIFIER
Before operating the unit, please read this manual thoroughly,
and retain it for future reference.
Owner’s
Instructions
- English
- Français
- Español
FEATURES
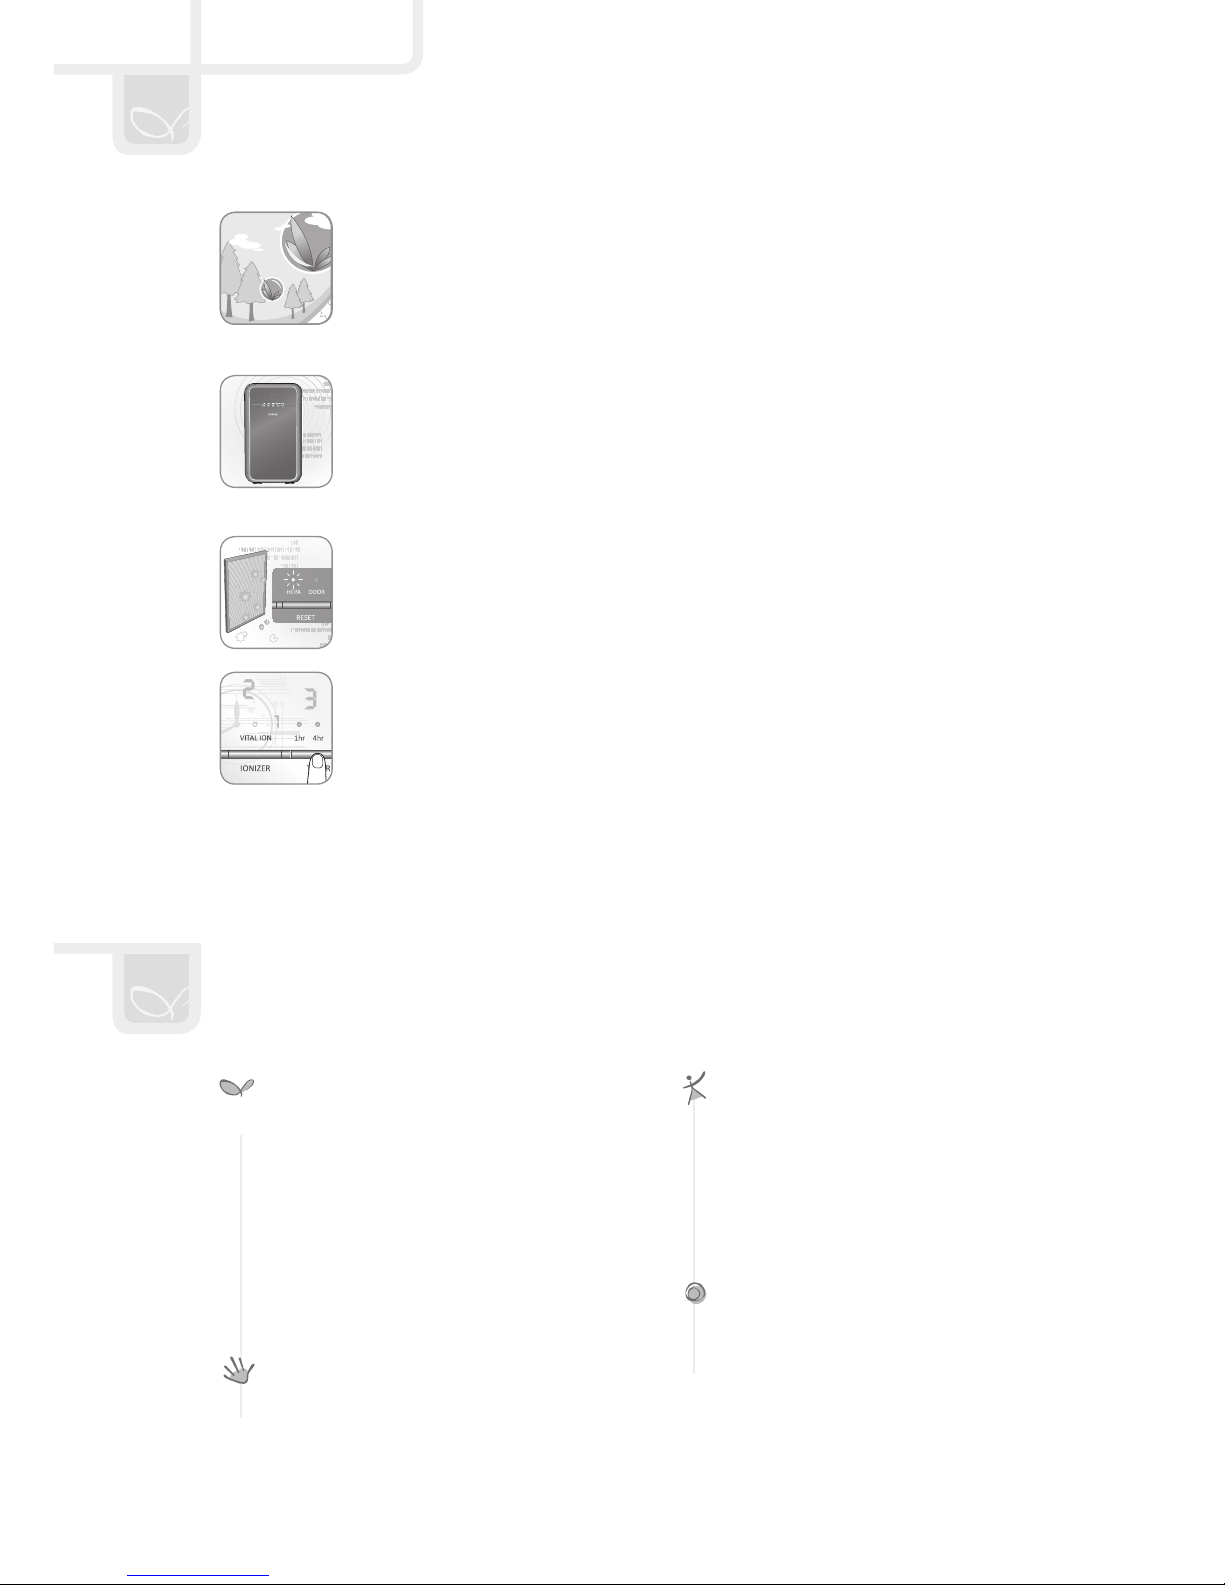
The True HEPA lter is capable of trapping airborne allergens and contaminants
down to 0.3 microns. It reduces airborne bacteria, mold spores and particles
that carry viruses. The unit’s lter system has been optimized to remove indoor
pollutants fast and effectively.
It shows the indoor air pollution level measured by the dust sensor.
The color of air quality indicator changes according to the indoor air pollution level
in real time. (Blue → Dark Purple → Red)
The product checks the lter replacement cycle and turns on the relevant indicator,
improving customer convenience with regard to lter replacement.
The Timer feature allows you to control how long you want the air purier to run
before automatically powering off.
CONTENTS
FEATURES .......................................01
CONTENTS ......................................01
SAFETY INFORMATION ..................02
PARTS NAME ...................................04
- Front / Rear ...............................04
- Operation / Indication Part ........05
AIR PURIFICATION PROCESS .......06
PREPARATIONS ..............................07
- How to Install Filter ....................07
HOW TO USE ...................................08
ADJUST AIR QUALITY SENSOR ....09
CLEANING METHOD .......................10
FILTER REPLACEMENT ..................12
- Filter Cleaning and Replacement
Cycles ........................................12
- Resetting the lter replacement
indicator .....................................12
- Forcible Reset Mode .................12
TROUBLE SHOOTING ....................13
SPECIFICATIONS ............................14
WARRANTY CARD ..........................18
1

DANgER :
• Do not use a damaged power plug or loose electric outlet.
• Please connect the power plug to a dedicated grounded electrical outlet for 120 V, 60 Hz.
• Do not move the product by pulling only the power cord.
• Do not handle the power plug with wet hands.
• Do not forcefully bend the power cord or place it under a heavy object to prevent it from being
damaged or deformed.
• Do not repeatedly connect and disconnect the power plug.
• If the electrical outlet is wet, carefully unplug the product and let the electric outlet dry
completely before subsequent use.
• Make sure to unplug the product before repairing, inspecting or replacing a part.
• Remove any dust or water from the power plug.
• Do not plug the product into an electrical outlet or power strip that is being used by several other
appliances. Use an electrical outlet dedicated to the product.
• Unplug the system if it is not used for a long time.
• Do not attempt to repair or modify the power cord yourself.
• If the power cord is damaged, do not replace the cord yourself. Call a service center to have it
replaced.
• Do not install the product near a heating device.
• Do not install the product in locations exposed to moisture or water (rainwater).
• Do not use the product in areas where ammable gases or combustible materials are used or
stored.
• Do not insert sharp objects such as a gimlet into the pollution sensor.
• If the product produces a strange noise, burning smell or smoke, unplug it from the electrical
outlet immediately and call our service center.
• Never place the product in water.
• Do not spray any ammable materials such as insecticides or air fragrances near or into the air
inlet.
• Do not disassemble, repair, or modify the product at your own discretion.
• Do not place any containers with water, medicine, food, metallic objects or ammable material
on top of the product.
• Unplug the system before cleaning it.
• Do not Clean by spraying water directly and do not clean the product using benzene or thinner.
• Use the product for home or business use according to the model.
• Do not use the air purier in a factory or industrial setting where machine oil may be present in
the air.
2

3
• The appliance is not to be used by children or persons with reduced physical, sensory or mental
capabilities, or lack of experience and knowledge, unless they have been given supervision or
instruction.
• Do not insert ngers or foreign objects into the air inlet or outlet.
• Do not let children hang on to the product or climb on it.
• When removing the front cover, exercise caution that a part of your body or any kind of object
does not become stuck in the top part of the product.
• This appliance has a polarized plug (one blade is wider than the other). To reduce the risk of
electric shock, this plug is intended to t in a polarized outlet only one way. If the plug does not
t fully in the outlet, reverse the plug. If it still does not t, contact a qualied electrician. Do not
attempt to defeat this safety feature.
• Do not operate any fan with a damaged cord or plug. Discard fan or return to an authorized
service facility for examination and/or repair.
• Do not run cord under carpeting. Do not cover cord with throw rugs, runners, or similar
coverings. Arrange cord away from trafc area and where it will not be tripped over.
• Do not install the product on a sloped surface.
• Do not apply force or impact to the product.
• When the product is in use, maintain a distance of at least 20 cm from the walls or adjacent
objects and 30 to 60 cm above the product.
• Install the product so that no obstacles block the circulation of air around the product.
• Install the air purier away from strong articial lighting or direct sunlight.
• Install the air purier at least 2 m away from electronic appliances such as a TV.
• Do not install the air purier in a location exposed to direct sunlight.
• Replace the lters according to the lter replacement cycles.
• Clean the Pre-lter with water regularly and dry it completely before use.
• Suitable for use with solid-state speed controls.
• Cleaning and user-maintenance, such as lubrication, may result in re, electric shock, or injury
to persons.
• Unplug or disconnect the appliance from the power supply before servicing.
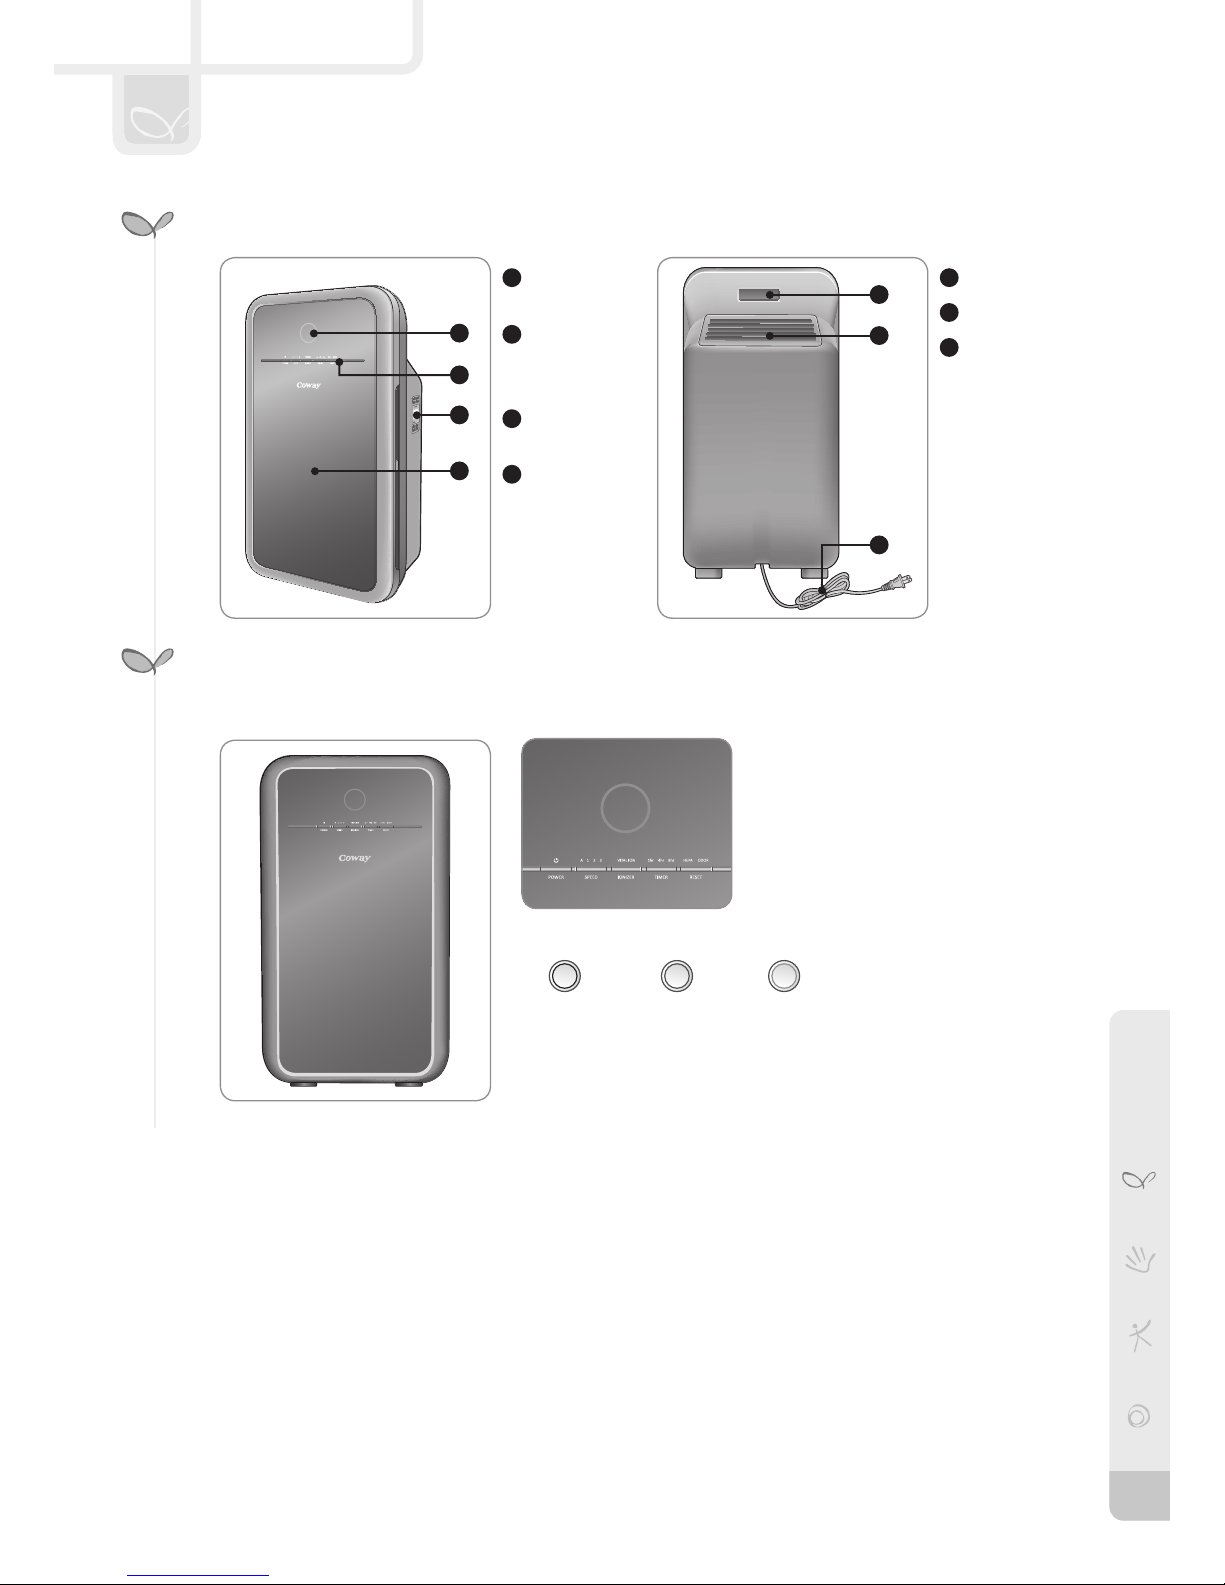
It displays the current pollution level of the room.
4
1
1
2
3
2Display part/
operation
part
3Air quality
sensor
4Front cover
1Air Quality
indicator
Handle
2Air outlet
3Power cord
Clean:Blue Polluted:
Dark purple
Highly
polluted: Red
- The quality level of the indoor air can be determined by
the color of the round lamp located at the front of the air
purier.
1
2
3
4
5
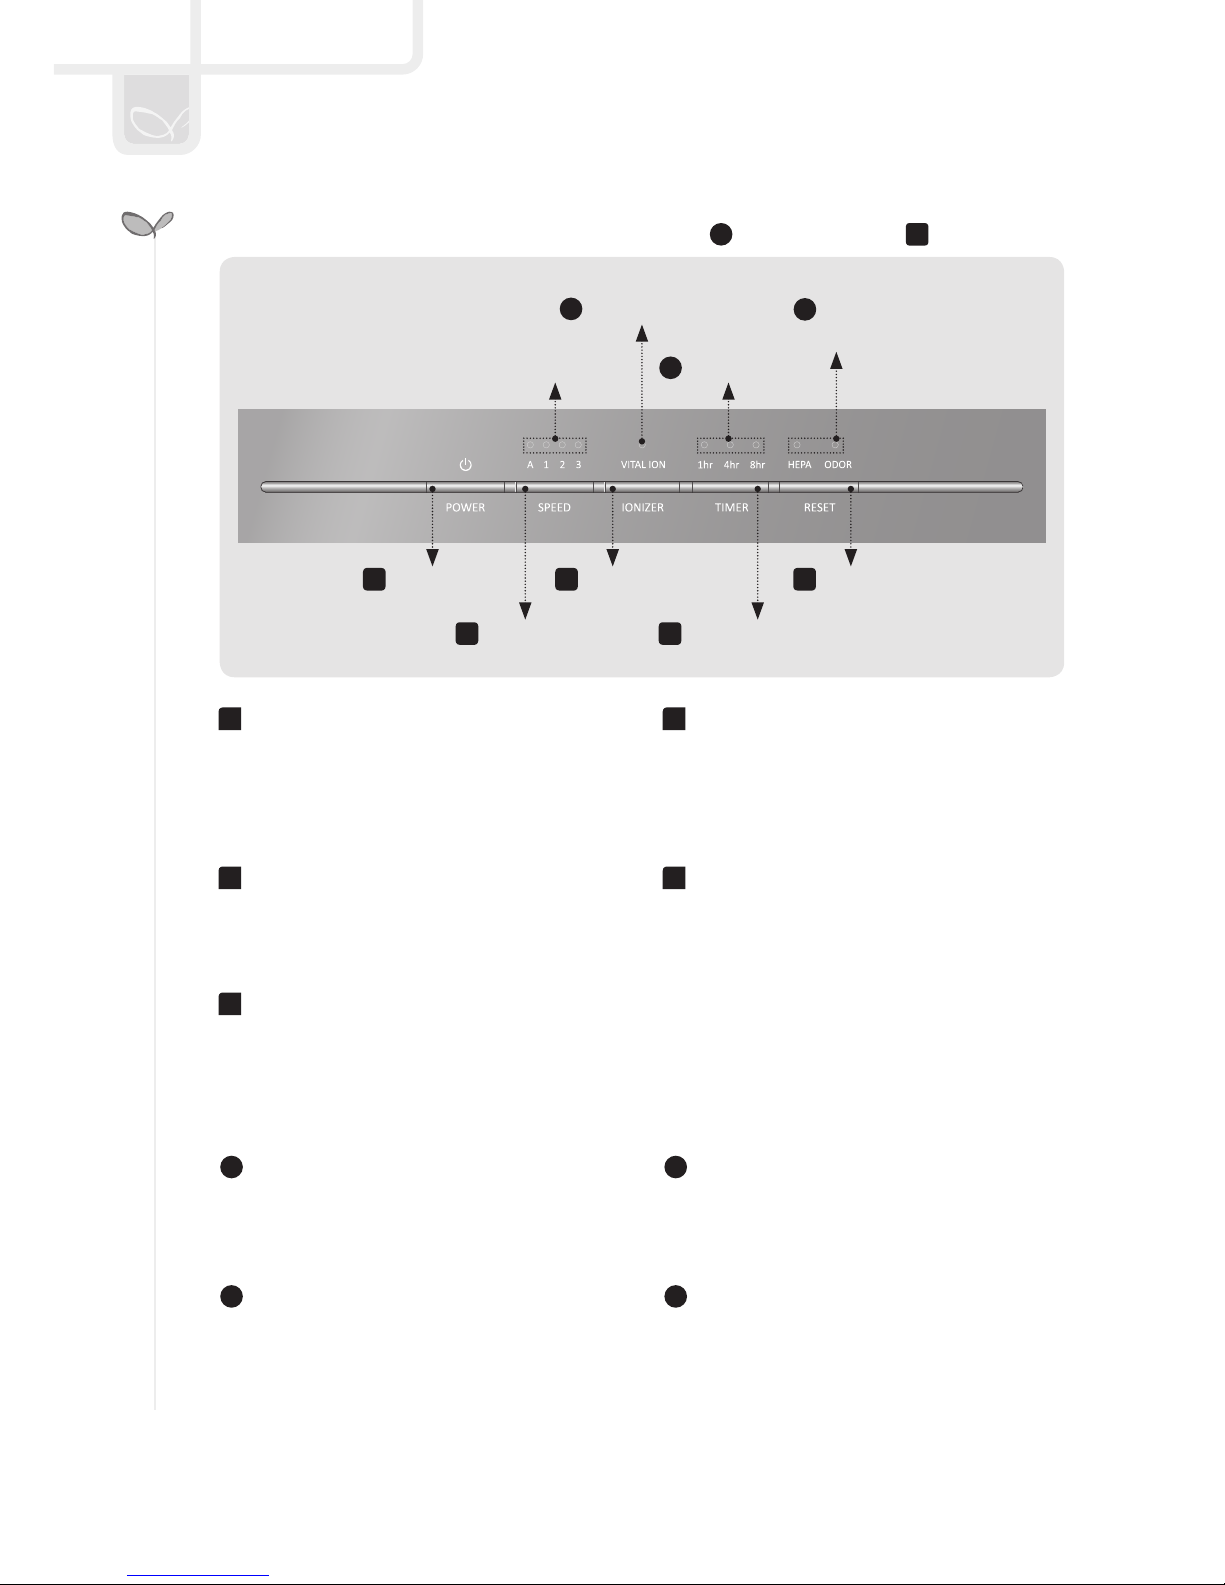
Indication Part Operation Part
3Timer indicator
1Power Button
4Timer Button
4Filter Replacement
indicator
5Filter Reset
Button
2Speed Button
3Ionizer Button
2Ionizer indicator
1
Use this button to turn the air purier on
or off.
- To power off, press and hold the
power button for one second.
2
Use this button to adjust the fan speed.
Available settings for the fan speed are
1 → 2 → 3 → Auto.
3
Use this button to turn the Ionizer on
or off.
4
Use this button to turn off the air purier
after a predetermined period of time.
Available timer settings are 1H, 4H, and 8H.
5
When the lter replacement indicator Is
turned on, replace the concerned lter
and press the RESET button.
1
It shows the current fan speed. Each
indicator is turned on as per its airow
speed.
2
It shows whether the ionizer is turned on
or off.
3
It shows the current time setting for air
purication. Each indicator is turned on as
per its set timer.
4
Replace the lter when this indicator is
on. Refer to lter replacement cycle for
each lter.
6
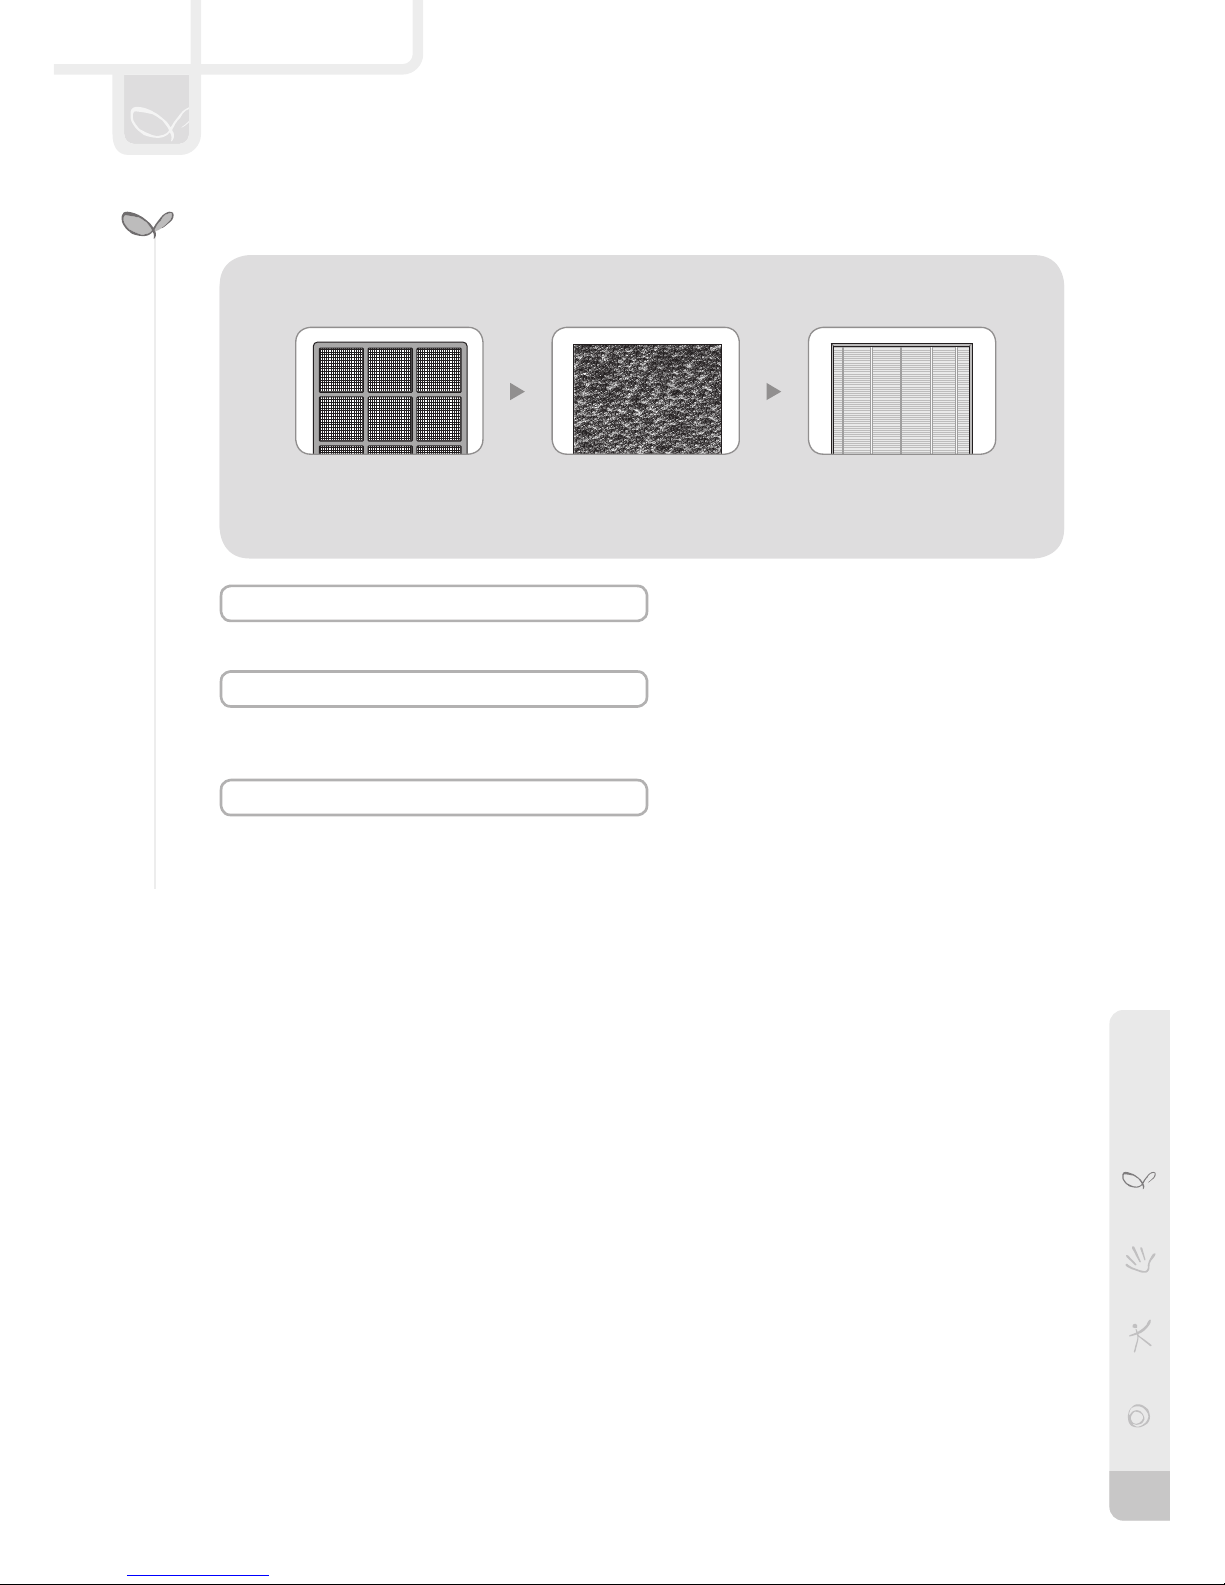
It removes relatively large dust and mold, human hair, pet hair, and so on.
Features a granular active carbon, which is particularly effective at trapping odors and harmful
gases to keep your home smelling fresh.
True HEPA Filter
The high-performance composite True HEPA lter effectively removes ne dust and cigarette
smoke up to 99.97%. It reduces airborne bacteria, mold spores and particles that carry viruses.
7
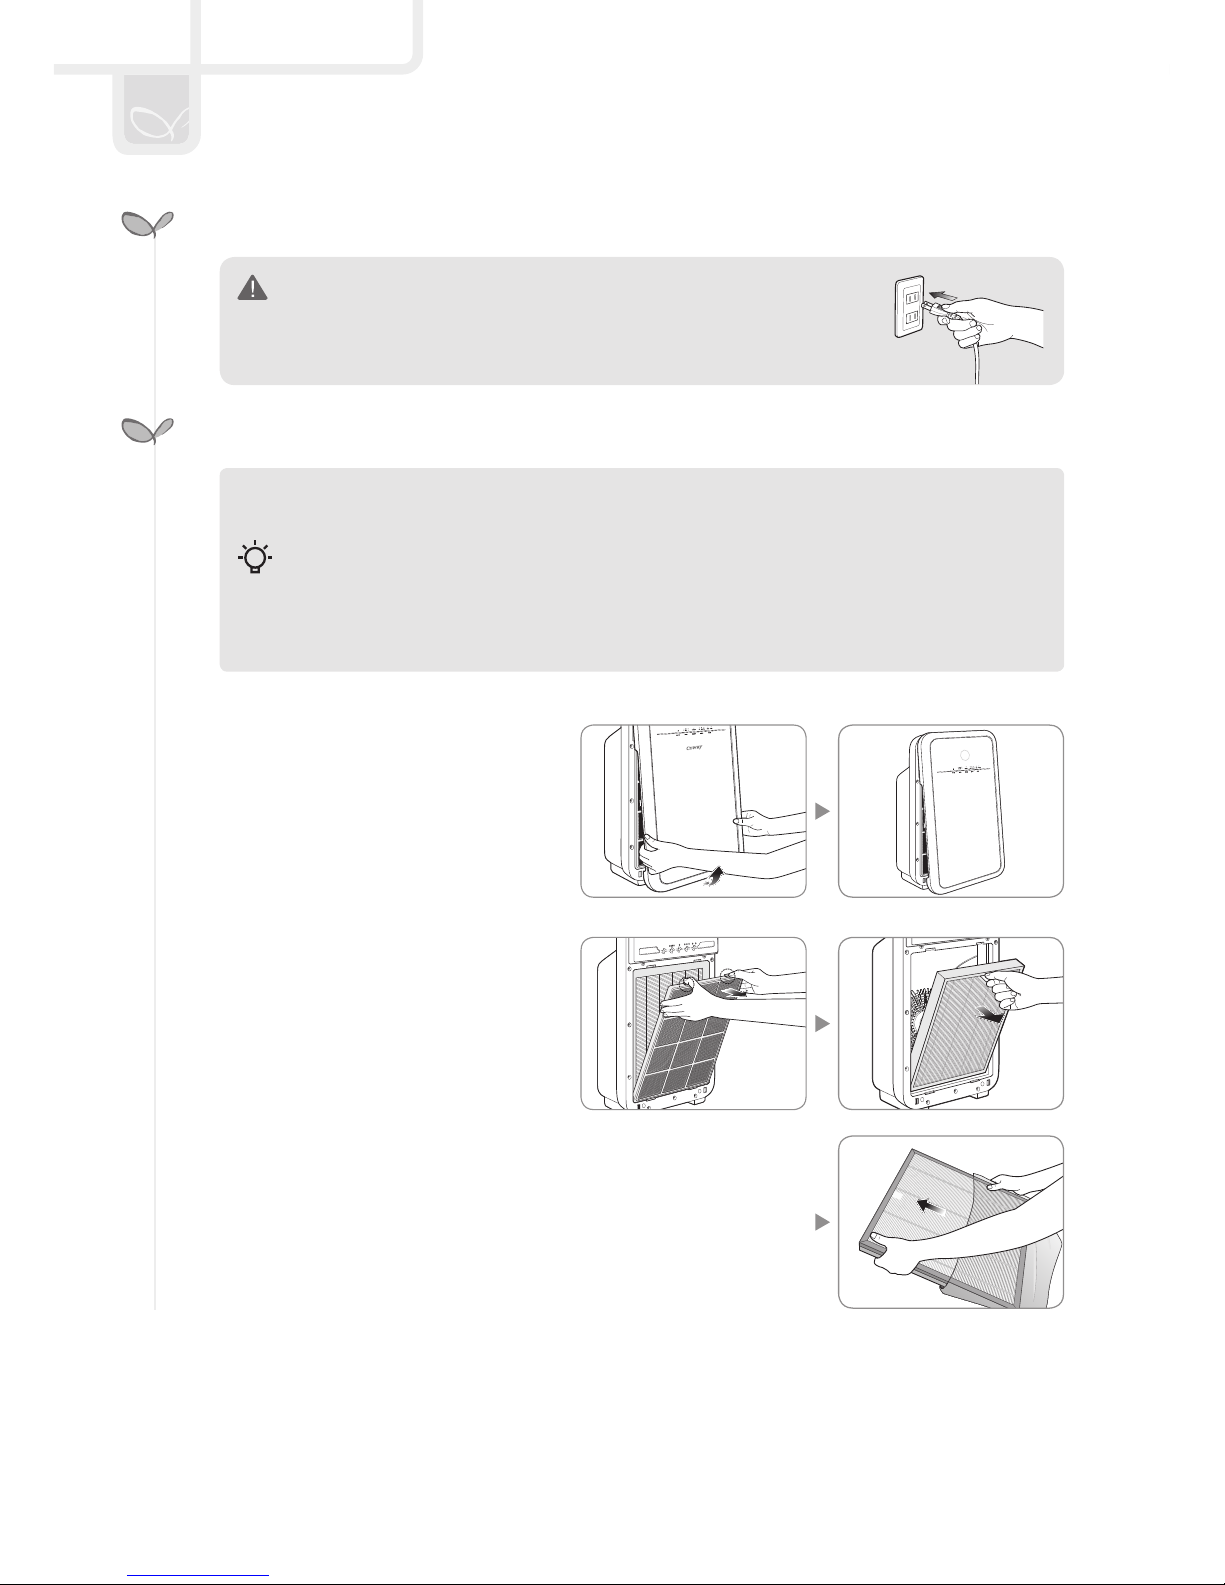
- Open the front cover by pulling
the lower part of it.
- Remove the plastic packing of
the lters and install the lters by
proper order.
- Make sure to remove each lter’s plastic packing before installing lters.
- The product is for household use. Use the product indoors only.
- When the product is not in use, remove the power plug from the electric outlet.
- When installing lters, make sure that lter direction is correct (Front/Back).
► Order of lters : Pre-lter → Deodorization Filter → True HEPA Filter
Tips
Make sure to connect the power plug to a grounded electric outlet
(120 V~, 60 Hz) dedicated to the product.

8
HOW TO USE
Press the power button and then select
the speed of the fan by pressing the speed
button.
1 → 2 → 3 → Auto
The Timer feature instructs the air purier to automatically power off
after 1, 4, or 8 hours.
- To deactivate the timer, press and hold the Timer button until the
indicator is no longer lit.
- 1H → 4H → 8H → Timer Off
- Before operating the product, connect the power plug to the electric outlet.
- When the air purier is turned on, it automatically operates in Auto mode.
Tips
►
Automatically optimizes the speed setting 1 through 4 based on the level of Indoor air
quality detected by dust sensor.
This mode is recommended for general users.

9
1. While the air purier is powered on, press the Speed buttons
for two seconds.
2. The Speed indicator will ash at 0.5 second intervals.
3. Adjust the sensitivity by pressing the speed button. The
sensitivity of the sensor is displayed by a blinking airow
speed indicator.
Speed step 1 Speed step 2 Speed step 3
Sensitive Standard Insensitive
- High Sensitivity: If the air purier indicates a pollution level of 1 for longer than one hour
when the actual pollution level is higher.
- Low Sensitivity: If the air purier continues to indicate the highest pollution level even after
running the air purier for more than two hours.
4. Press the Speed button for 2 seconds to apply the new sensor
sensitivity setting. The air purier will then resume normal
operations.
- The new setting will also be applied if no other button is
pressed for 10 seconds.
When the product is shipped out, the air quality sensor is set to standard sensitivity. If the
pollution level stays at the highest level after 2 hours of operation or stays at the lowest level
for more than 1 hour when the air does not seem clean, users can adjust the sensitivity of the
air quality sensor as follows.
2 seconds
2 seconds
Table of contents
Languages:
Other Coway Air Cleaner manuals

Coway
Coway Airmega 250 User manual

Coway
Coway AP-1717A User manual

Coway
Coway AP-1520C User manual

Coway
Coway AP-1019C User manual

Coway
Coway AP-0510IH User manual

Coway
Coway AIRMEGA AIM User manual

Coway
Coway AIRMEGA Icon User manual

Coway
Coway AP-1512HH User manual

Coway
Coway AIRMEGA AP-1515H User manual

Coway
Coway Airmega 150 User manual

Coway
Coway Airmega AP-1220B User manual

Coway
Coway AP-1008CH User manual

Coway
Coway AP-0512NH User manual

Coway
Coway Airmega AP-1220B User manual

Coway
Coway AP-1717A User manual

Coway
Coway AP-1516D User manual

Coway
Coway Air Purifier AP-1008DH User manual

Coway
Coway AIRMEGA AP-2015E User manual

Coway
Coway AP-1018F User manual

Coway
Coway AP-1008CH User manual


