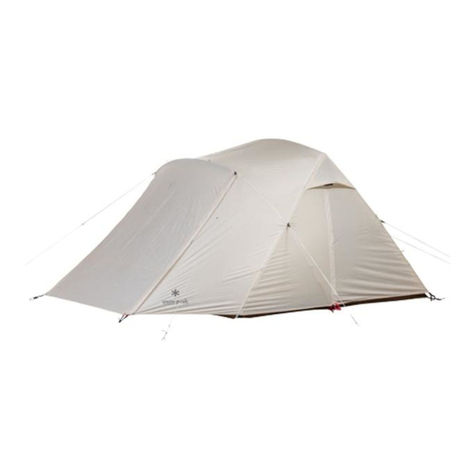
Costway NP10844 User manual

NP10844
If you're having difficulty, our friendly
customer team is always here to help.
THIS INSTRUCTION BOOKLET CONTAINS IMPORTANT SAFETY INFORMATION. PLEASE READ AND KEEP FOR FUTURE REFERENCE.
Pop Up Canopy/Pavillon/
Auvent Escamotable/Pabellón/
Gazebo/Składany pawilon ogrodowy
AUS:cs.au@costway.com
FRA:cs.fr@costway.com
DEU:cs.de@costway.com
ITA:cs.it@costway.com ESP:cs.es@costway.com
POL:sklep@costway.com
GBR:cs.uk@costway.com
DEU office: FDS GmbH, Neuer Höltigbaum 36, 22143 Hamburg, Deutschland
ITA office: Milano
FRA office: Saint Vigor d'Ymonville
POL office: GdańskGBR office: IpswichAUS office: TruganinaUSA office: Fontana

Before You Start
Please read all instructions carefully.
Retain instructions for future reference.
Separate and count all parts and hardware.
Read through each step carefully and follow the proper order.
We recommend that, where possible, all items are assembled near to the area in
which they will be placed in use, to avoid moving the product unnecessarily once
assembled.
Always place the product on a flat, steady and stable surface.
Keep all small parts and packaging materials for this product away from babies
and children as they potentially pose a serious choking hazard.
EN
DE
Bitte lesen Sie alle Anweisungen sorgfältig durch.
Bewahren Sie die Anweisungen zum zukünftigen Verwendung auf.
Überprüfen Sie, ob alle Teile und Zubehörteile vorhanden sind.
Lesen Sie jeden Schritt sorgfältig durch und befolgen Sie die richtige Reihenfolge.
Wir empfehlen, alle Teile möglichst in der Nähe des Aufstellungsortes zu
montieren, um unnötige Bewegungen nach der Montage zu vermeiden.
Stellen Sie den Artikel immer auf eine ebene, feste und stabile Fläche.
Halten Sie alle kleinen Teile und Verpackungsmaterialien fern von Babys und
Kindern, ansonsten besteht Erstickungsgefahr.
Vor dem Beginnen
FR
Veuillez lire attentivement toutes les instructions.
Conservez les instructions pour vous y référer ultérieurement.
Vérifiez toutes les pièces et les accessoires.
Lisez attentivement chaque étape et suivez l’ordre correct.
Nous recommandons que, dans la mesure du possible, tous les produits soient
assemblés à proximité de la zone où ils seront utilisés, afin d’éviter tout
déplacement inutile du produit une fois assemblé.
Placez toujours le produit sur une surface plane et stable.
Conservez toutes les petites pièces de ce produit et les matériaux d’emballage
hors de portée des bébés et des enfants, car ils pourraient présenter un risque
d’étouffement.
Lea atentamente todas las instrucciones.
Conserve las instrucciones para futuras consultas.
Separe y cuente todas las piezas y los accesorios.
Lea detenidamente cada paso y siga el orden correcto.
Recomendamos que, siempre que sea posible, todos los elementos se monten
cerca de la zona en la que se van a utilizar, para evitar mover el producto
innecesariamente una vez montado.
Coloque siempre el producto sobre una superficie plana, estable y firme.
Mantenga todas las piezas pequeñas y los materiales de embalaje de este
producto lejos de los bebés y los niños, ya que pueden representar un grave
riesgo de asfixia.
ES
Avant de Commencer
Antes de Empezar
02 03

Si prega di leggere attentamente tutte le istruzioni.
Conservare le istruzioni per riferimento futuro.
Separare e contare tutte le parti e gli accessori.
Leggere attentamente ogni passo e seguire l'ordine corretto.
Si consiglia, ove possibile, di assemblare tutti gli articoli vicino alla zona in cui
verranno posti in uso, per evitare di spostare inutilmente il prodotto una volta
assemblato.
Posizionare sempre il prodotto su una superficie piana, stabile.
Tenere tutte le piccole parti e i materiali di imballaggio di questo prodotto lontano
dalla portata di neonati e bambini, in quanto possono costituire un serio pericolo
di soffocamento.
Zapoznaj się z instrukcją.
Zachowaj instrukcję do wglądu.
Posortuj części i upewnij się, że zestaw jest kompletny.
Zapoznaj się ze sposobem montażu i postępuj zgodnie z instrukcją.
Zalecamy, aby montaż odbywał się możliwie najbliżej miejsca docelowego
położenia produktu, aby uniknąć niepotrzebnego przesuwania.
Upewnij się, że produkt znajdzie się na płaskiej i stabilnej po wierzchni.
Upewnij się, że materiały wykorzystane podczas pakowania produktu.
oraz jego elementy znajdują się poza zasięgiem dzieci.
IT
PL
Prima di Iniziare
Zanim Zaczniesz
Spare Parts
EN
A
B
C(L)
D
K(L)
K(L)
K(R)
H
P
I
H
E
F
L
E1
N
M
C(R)
J(R)
J(L)
G(L)
O(L)
O(R)
G(R)
DC(L)BA C(R)
E
E1
F
G(L)
G(R)
I
H
J(L) J(R)
K(R)
K(L)
LMN
O(L) O(R)
QR
PS
04 05

Setting Up the Canopy
1OPENING THE CANOPY FRAME
□With a partner, stand across from each other.
Grasp a truss at the top of the frame (a) and the other truss at
the bottom, as shown. Lift slightly off ground and step
backwards while squeezing trusses together.
Lift up one side. Grasp the outer or upper leg with one hand and
pull out the inner leg with the other.
Extend until the button engages.
□
□
x4
90%
Part
A
B
C(L)
C(R)
D
E
E1
F
G(L)
G(R)
H
I
J(L)
J(R)
K(L)
K(R)
L
M
N
O(L)
O(R)
P
Q
R
S
Description
Central Pole
Central Bottom Hub
Leg Cap(L eft)
Leg Cap(Right)
Slider
Ceiling Assembly
Ceiling Reinforce Assembly
Eave Assembly
Leg with wheel(Left)
Leg with wheel(Right)
Leg without wheel
Leg Extender
Awning Slider(L eft)
Awning Slider(Right)
Awning Tube Assembly(Left)
Awning Tube Assembly(Right)
M5 Bolt Kit
M4 Bolt Kit
M5-Bolt Kit(w/U Bracket)
Foot with wheel(Left)
Foot with wheel(Right)
Foot without wheel
Small Top Fabric-Grey
Small Top Fabric-White
Small Top Fabric-Navy Blue
Large Top Fabric-Grey
Large Top Fabric-White
Large Top Fabric-Navy Blue
Stow N Go Bag
Spare Parts
06 07

3 ATTACHING THE CANOPY
□
□
Lift up one side of the frame (a) and walk under it.
Place one hand on the upper frame and use the other hand to
push the central hub straight up until it clicks into the central
pole.
Setting Up the Canopy
CLICK!
Setting Up the Canopy
2 ATTACHING THE CANOPY
□
□
Attach small top fabric (c) by inserting corner pocket over Vent
Finger lifts.
Unfold the large top fabric (b) over the frame. Line up the
awning panels on same sides as the awning hardware. Insert
awning panel pockets on the awning arms.
Secure canopy to the corner of the frame and wrap the fabric
flaps together with the hook and loop.
□
x4
a
bc
x4x4 x4
x4 x8
Awning arm
Pocket
08 09

Setting Up the Canopy
4ADJUSTING THE CANOPY HEIGHT
□
□
Lift up one side. Grasp the outer or upper leg with one hand and
pull out the inner leg with the other.
Extend until the button engages.
Set legs to desired height.
□
5OPERATING THE AWNING PANELS
□
□
Pull up one side of the awning panel arms until the support arm
locks into hole on leg.
Rotate the stabilizer bar and slid over the rivet on the upper
perimeter truss as shown.
x4
Rivet
x4
6
□
CONFIGURING DESIRED SETUP FOR AWNINGS
Secure the strap around leg with toggle.
7
□
SECURING THE CANOPY IN PLACE
Fill the weight bag(d) with sand or gravel.
Connect the hook and loops of the weight bag around each leg.
The included weight bags are designed for quick and easy use.
Insert a stake into the foot of each canopy leg.
Measure out each leg to a proper distance and secure four
stakes(e) to the ground. Tie the pre-attached ropes to the stakes
in the ground. Ensure the ropes have the proper tension by
adjusting the plastic adjusters on the ropes.
Setting Up the Canopy
□
□
10 11

Taking Down the Canopy
2
□
UNLOCKING THE CANOPY
From underneath the canopy, press in the red lock button. Pull
down on the central hub until it is separated from the central
pole.
1
□
□
REMOVING THE STAKES AND RETRACTING THE LEGS
Remove all weight pockets and stakes from the ground.
Lower awning panels by lifting stabilizer bar and rotate back to
the upper leg.
Press the push button on each leg and retract the legs to their
original height.
□
x4
x4
3 FOLDING THE FRAME
4
□
□
PACKING THE CANOPY IN THE STORAGE BAG
Position the cover bag straps to align with the 2 wheeled legs.
Slide down the bag over the closed frame. Zip the cover closed.
Loosen the strap and insert the red plug into the opening in the
footpad and tighten straps by pulling down the strap loop.
Taking Down the Canopy
□Lift the canopy off the ground 2-3 inches and walk it in from both
sides until the frame is fully closed.
x2
x2
12 13

PACKAGE CONTENTS
a - Frame (with
guy ropes
pre-attached)
x1
d - Weight Bag
x4 e - Stake
x8
f - Hex wrenc (for
maintenance only)
x1
g - Stow N Go
Bag
x1
b - Large Top
Fabric
x1
c - Small Top
Fabric
x1
Use and Care Guide
18 ft. x 10 ft. Mighty Shade Instant Canopy with Extended
Shade Panels
Teile
DE
A
B
C(L)
D
K(L)
K(L)
K(R)
H
P
I
H
E
F
L
E1
N
M
C(R)
J(R)
J(L)
G(L)
O(L)
O(R)
G(R)
DC(L)BA C(R)
E
E1
F
G(L)
G(R)
I
H
J(L) J(R)
K(R)
K(L)
LMN
O(L) O(R)
QR
PS
14 15

Besteigen Sie den Pavillon
1ÖFFNEN SIE DEN PAVILLONRAHMEN
□Stellen Sie sich mit einem Partner gegenüber.
Fassen Sie eine Strebe oben am Rahmen (a) und die andere
Strebe unten an, wie abgebildet. Heben Sie sich leicht vom
Boden ab und treten Sie zurück, während Sie die Traversen
festziehen.
Heben Sie eine Seite an. Fassen Sie das äußere oder obere
Bein mit einer Hand und ziehen Sie das innere Bein mit der
anderen heraus. Verlängern, bis der Knopf passt.
□
□
x4
90%
Teile
A
B
C(L)
C(R)
D
E
E1
F
G(L)
G(R)
H
I
J(L)
J(R)
K(L)
K(R)
L
M
N
O(L)
O(R)
P
Q
R
S
Beschreibung
Zentrale Stelle
Untere mittlere Nabe
Beinabdeckung (links)
Beinabdeckung (rechts)
Schieberegler
Montage des Daches
Montage der Dachverstärkung
Montage der Traufe
Bein mit Rad (links)
Bein mit Rad (rechts)
Bein ohne Rad
Beinverlängerer
Pavillon-Schieberegler (links)
Schieberegler der Station (rechts)
Stationsrohrmontage (links)
Montage des Haubenrohrs (rechts)
Schraubensatz M5
Schraubensatz M4
Schraubensatz M5 (mit U-Bügel)
Fuß mit Rad (links)
Fuß mit Rad (rechts)
Fuß ohne Rad
Kleiner Oberstoff - Grau
Oberstoff klein - Weiß
Oberstoff klein - Marineblau
Oberstoff groß - Grau
Oberstoff groß - Weiß
Großes Taschentuch - Marine
Aufbewahrungstasche
Teile
16 17

3 VERRIEGELN SIE DEN RAHMEN
□
□
Heben Sie eine Seite des Rahmens (B) an und gehen Sie
darunter.
Legen Sie eine Hand auf den oberen Rahmen und drücken Sie
mit der anderen die Mittelnabe nach oben, bis sie in den
Mittelpfosten einrastet.
Besteigen Sie den Pavillon
KLICKEN!
Besteigen Sie den Pavillon
2 REPARIEREN SIE DEN PAVILLON
□
□
Bringen Sie den kleinen Oberstoff (c) an, indem Sie die
Ecktasche über die Erhebungen der Lüftungsfinger stecken.
Falten Sie den großen Verdeckstoff (b) über den Rahmen.
Richten Sie die Verdeckplatten auf den gleichen Seiten wie das
Verdeckzubehör aus. Stecken Sie die Taschen der Überdachung
in die Überdachungsarme.
Befestigen Sie das Verdeck an der Ecke des Rahmens und
haken Sie die Stofflaschen zusammen.
□
x4
a
bc
x4x4 x4
x4 x8
Baldachinarm
Tasche
18 19
Table of contents
Languages:
Other Costway Tent manuals

Costway
Costway GOPLUS NP10950 User manual

Costway
Costway NP10152 User manual

Costway
Costway HW65758 User manual

Costway
Costway NP10846 User manual

Costway
Costway NP10848 User manual

Costway
Costway TP10145 User manual

Costway
Costway AW10004 User manual

Costway
Costway TP10144 User manual

Costway
Costway NP10847 User manual

Costway
Costway NP11241 User manual

Costway
Costway GT3838 User manual

Costway
Costway TP10088 User manual

Costway
Costway NP11460 User manual

Costway
Costway NP10828 User manual

Costway
Costway NP10024 User manual

Costway
Costway NP10951 User manual

Costway
Costway OP70635 User manual

Costway
Costway NP10843 User manual

Costway
Costway NP10836WH User manual

Costway
Costway AW10002 User manual