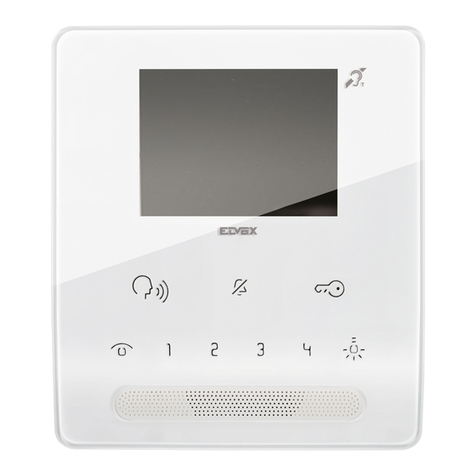
Commax CDV-43MH User manual

Printed In Korea / 2016.06.104
513-11, Sangdaewon-dong, Jungwon-gu, Seongnam-si, Gyeonggi-do, Korea
Int’l Business Dept. Tel. : +82-31-7393-540~550 Fax. : +82-31-745-2133
Web site : www.commax.com
PM0770N00010
•Thank you for purchasing COMMAX products.
•Please carefully read this User’s Guide (in particular, precautions for safety) before using a product and follow
instructions to use a product exactly.
•The company is not responsible for any safety accidents caused by abnormal operation of the product.
513-11, Sangdaewon-dong, Jungwon-gu, Seongnam-si, Gyeonggi-do, Korea
Int’l Business Dept. Tel. : +82-31-7393-540~550 Fax. : +82-31-745-2133
Web site : www.commax.com
•Thank you for purchasing COMMAX products.
•Please carefully read this User’s Guide (in particular, precautions for safety) before using a product and follow
instructions to use a product exactly.
•The company is not responsible for any safety accidents caused by abnormal operation of the product.
Fineview Video Phone CDV-43MH/CDV-43MH(M)
User Manual

2
2
Table of Contents
1. Warnings and Cautions...........................................................................2
Part Names and Functions ....................................................................3
Package Contents ..................................................................................3
Wiring and Connection Instructions. .......................................................4
Operation .....................................................................................................
4
Settings ...................................................................................................
...5
Installation...............................................................................................
Specifications and Features....................................................................7
2.
3.
4.
5.
6.
7.
8.
Please follow the things described below in order to prevent any danger or
property damage.
1.Warnings and caution
Warning
Caution
Prohibition.
No disassembly
No touch
Must follow strictly.
Shows plugging out the power cord
without an exception
Shows the warning and caution for an electricshock.
Shows the warning and caution for a fire.
It may cause a serious damage or
injury if violated.
It may cause a minor damage or
injury if violated.
6
Please don’t disassemble,
repair or rebuild this product
arbitrarily (please contact the
service center if a repair is
needed.
·It may cause an electric
shock or fire.
When cleaning the product,
please rub it with a soft and
dry cloth after plugging out
the power cable. (Please don’t
use any chemical products
such as wax, benzene, alcohol
or cleanser.)
If an abnormal sound, burning
smell or smoke is coming out
of the product, please plug out
the power cable and contact a
service center.
·It may cause an electric
shock or fire.
Please don’t insert any
metallic or burnable materials
into the ventilation hole.
·It may cause an electric
shock or fire.
Cleaning & Use
Warning& Caution

3
Power & Installation
Please don’t use several
products at the same time on
one power socket.
·It may cause a fire due to an
abnormal overheating.
Please don’t bend the power
cable excessively or it may
cause an electric shock.
·fire when using a damaged
power cable.
Please don’t handle the power
cable with a wet hand.
·It may cause an electric
shock.
Please plug out the power
cable from the socket when
not using it for a long period
of time.
·It may shorten the product
lifespan or cause a fire.
Please don’t install the
product in the place where
there is much oil, smoke or
humidity.
·It may cause an electric
shock or fire.
Please don’t install the
product with the lightening
and thunder.
·It may cause an electric
shock or fire.
Please don’t use and connect
this product with other
products with different rated
voltage
·It may cause a disorder or
fire.
When installing the product
that generates heat, please
install the product away from
the wall (10cm) for the
ventilation.
·It may cause a fire due to
the increased internal
temperature.
Warning& Caution
Parts Names
2.
User Manual (1EA)
Wall bracket mounting
screw (4EA)
Monitor fixing
screw (1EA)
Wall bracket
for monitor (1EA)
Connector (2EA)
3. ckage ContentsPa

1. Red: Talk (Audio)
2. Blue: GND
3. Yellow: Power (+12V)
4. White: Video
▷Polarity of the camera connector
1. Red: Talk (Audio)
2. Blue: GND
3. Yellow: Power (+14V)
4. White: Call signal
▷Polarity of interphone connector
4. Wiring and Connection Instructions
4
4
. Installation
▷Monitor installation
Note
Avoid installing the product in the area of direct sunlight.•
•The position of the unit's body should fit the standard height range
(Recommended height range is 1450 ~ 1500mm.)
•Avoid installing the product exposed to gas exposure, magnetic force,
in humid temperatures, as it may damage the condition and
performance of the product.
5
Each device should be connected by
If you use UTP CABLE[CAT.5] for
separated cables.
CAMERA1and CAMERA2, 2 lines of
UTP cable are required.
If you use UTP CABLE[CAT.5],
connect 4 lines between monitor and
interphone. the rest 4 lines to GND
after connecting

5
3. Parts Names
1 2
8
3 4 56 7
①HANDSET
⑤
②TFT-LCD
⑥DOOR OPEN BUTTON
③POWER LED
④MONITORING BUTTON
1. Red: Talk (Audio)
2. Blue: GND
3. Yellow: Power (+12V)
4. White: Video
▷Polarity of the camera connector
1. Red: Talk (Audio)
2. Blue: GND
3. Yellow: Power (+14V)
4. White: Call signal
▷Polarity of interphone connector
5. Wiring and Connection Instructions
⑦MENU BUTTON
Connector (1EA)
Wall bracket mounting
screw (4EA)
Monitor fixing
screw (1EA)
Wall bracket
for monitor (1EA)
4
4. Package Contents
⑧
4 5
The visitor
presses the
call button on
the camera
A chime
sounds
The visitor’s
image appears
on the monitor
Hang-up the
handset
End the dialog
Aview of the front door can be seen anytime the
entrance button is pressed and a dialog can be made
with anyone at the front door.
Dialog duration
60 seconds at
atime
Open the door
The door release function
operates only when the visitor’s
image is displayed on the screen
Dialog begins
1. Calling of visitor
6. Operation
The display will be shown up
for 60 seconds and turned off
automatically
Dialog between the interphone and camera is possible only when the
visitor’s image is visible on the monitor screen.
A three-way
conversation can take
place if the monitor or
interphone is
picked up
simultaneously
"Tu-Tu-Tu"
Sound
A chime rings
simultaneously
from both the
monitor and
interphone
Hang-up the
handset
Open the door
End the dialog
Call to the
monitor
Dialog begins
Dialog begins Dialog begins
A visitor
calls from
the entrance
Call
from the
monitor
2. Communication with the optional Interphone
In case of connecting two cameras
**
Press
once
Press
twice
Camera 1
view
Camera 2
view
The
visitor
presses
the call
button on the
camera1
The visitor’s
image appears
on the monitor
A chime
sounds
The
visitor
presses
the call
button on the
camera2
The visitor’s
image appears
on the monitor
A chime
sounds
※Caution : When you are holding the handset while the hook switch is off and someone may push
the button of camera, you may lose your hearing because of high volume of calling sound.

6
•You can adjust DOOR VIDEO SET, UTILITY and check INFORMATION(model
name &version) with (UP)△/ (DOWN)▽button after pressing Menu button on the
front of the product in video talk mode or stand-by monitoring.
•
Product settings need the following 4 buttons on the front of the product.
*Start Menu / Exit : MENU button * Select and in-put : SELECT (Interphone button)
* Move up / Move right : △/▷(Open button)
* Move down / Move left : ▽/◁(Monitoring button)
7. Settings
③Adjusting call level : 0(MUTE) ~ 3(MAX)
④To complete the set, press SELECT button.
①Move to CHIME-BELL VOLUME icon with △/▽button in UTILITY Menu.
②Press SELECT to enter the menu.
(4) RESET : Initializing
※How to Reset
①Move to RESET menu in DOOR VIDEO SET menu
②Press SELECT to enter the menu.
③Select YES with ◁/▷button
④Press SELECT button.
(5) EXIT : Go back to setting mode
7-2. UTILITY(additional function)
Press the Menu button and access to Utility SET and enter the menu by pressing SELECT
button.
(1) CHIME-BELL VOLUME : setting call sound level
7-1. Screen setting (Brightness/Contrast/Color adjustment function)
Press the Menu button and access to DOOR VIDEO SET and enter the setting menu by
pressing SELECT button.
(1) BRIGHTNESS : Adjusting Brightness of Screen
(2) CONTRAST : Adjusting Contrast of Screen
(3) COLOR : Adjusting Color of Screen
※ How to adjust
①Move to Menu you want to adjust with △/▽button on the list of DOOR VIDEO SET
②Press SELECT button to choose an icon.
③Adjust the set value with ◁/▷button
④To complete the set, press SELECT button.
3..
(stand-by mode) Operation
- By pressing the Monitor button repeatedly, the monitor will work as following in order.
Camera 1 ( Camera 2 ) OFF Camera 1 ............
(On talking mode)Operation
- By pressing Monitor button repeatedly, the monitor will work as following in order.
Camera1 ( Camera 2 ) Camera 1 ( Camera 2 ) ............

(2) SCREEN MODE : to set for screen ratio
①ZOOM: Zoon in(expansion) image maintaining actual ratio(4:3) is shown. (full of the
screen)
②4:3: Image of 4:3 ratio without expansion is shown.(This is actual ratio for camera)
③WIDE: Full of the screen. Not actual ratio (4:3). Image is expanded according to LCD
(WIDE LCD) ratio.
※How to adjust
①Access to SCREEN MODE with △/▽button in UTILITY Menu
②Press SELECT button to enter the menu.
③Adjust screen ratio value with◁/▷button.
④To complete the set, press SELECT button.
7
7
(3) EXIT : Go back to Setting menu
7-3. INFORMATION (The function to check Model name & Version)
In order to check the product information, press menu button and move to INFORMATION
menu with ◁/ ▷ button.
(1) MODEL : You can check the model name.
(2) VERSION : You can check the model version.
(3) SYSTEM : SINGLE (FINE VIEW VIDEOPHONE)
(4) TOUCH : You can check the touch-key version
(5) VIDEO : You can check the video transmission formats(NTSC / PAL)
(6) SOURCE : You can check the position of camera(DOOR) which is shown
on the screen for now.
7-4. EXIT(Finish setting menu)
Specifications and Features
Power source
Power Consumption Standby : 1.4W, Operating : 10W
Wiring 4 wires with door camera (Polarity),
4 wires with an Interphone (Polarity)
Screen Size Color 4.3" TFT LCD
Communication Simultaneous communication
From a door camera : Electric chime
From an interphone : Beep sound
Time to display the screen 60 ±10sec
Distance from camera 28m(Ф0.5) / 50m(Ф0.65) / 70m(Ф0.8)
Operating Temperature 0 ~ +40℃(32°F ~ 104°F)
Call Sound
Reference : Design and functions of the product are a subject of constant
development as a pursuit of quality improvement
8.
100-240V~, 50/60Hz(FREE VOLTAGE)

Printed In Korea / 2017.04.104
513-11, Sangdaewon-dong, Jungwon-gu, Seongnam-si, Gyeonggi-do, Korea
Int’l Business Dept. Tel. : +82-31-7393-540~550 Fax. : +82-31-745-2133
Web site : www.commax.com
PM0743MH0010
•Thank you for purchasing COMMAX products.
•Please carefully read this User’s Guide (in particular, precautions for safety) before using a product and follow
instructions to use a product exactly.
•The company is not responsible for any safety accidents caused by abnormal operation of the product.
513-11, Sangdaewon-dong, Jungwon-gu, Seongnam-si, Gyeonggi-do, Korea
Int’l Business Dept. Tel. : +82-31-7393-540~550 Fax. : +82-31-745-2133
Web site : www.commax.com
•Thank you for purchasing COMMAX products.
•Please carefully read this User’s Guide (in particular, precautions for safety) before using a product and follow
instructions to use a product exactly.
•The company is not responsible for any safety accidents caused by abnormal operation of the product.
Fineview Video Phone CDV-70N
User Manual
This manual suits for next models
1
Table of contents
Other Commax Intercom System manuals

Commax
Commax CDV-35A User manual

Commax
Commax CAV-51M User manual

Commax
Commax CDV-35U User manual

Commax
Commax DR-2PN User manual

Commax
Commax CDV-70UX User manual

Commax
Commax CDS-481L User manual

Commax
Commax DRC-nAB2 User manual

Commax
Commax CIOT-700ML User manual

Commax
Commax CDV-70K User manual

Commax
Commax CM-810 User manual

Commax
Commax WDC-244L User manual

Commax
Commax CDV-43K User manual

Commax
Commax CDV-70KM User manual

Commax
Commax CDV-70A User manual

Commax
Commax DR-nUM User manual

Commax
Commax CDV-70K User manual

Commax
Commax DRC-8TML/RF1 User manual

Commax
Commax CDV-71BQS User manual

Commax
Commax DP-ML User manual

Commax
Commax CMV-70M User manual