CO/Tech J1X-KZ2-210-UK User manual

Art.no Model
18-3073 J1X-KZ2-210-UK
30-9441 J1X-KZ2-210
ENGLISH
SVENSKA
NORSKSUOMI
Compound Mitre Saw
Kap- & geringssåg
Kapp- & gjæresag
Katkaisu- ja jiirisaha
Ver. 200802

2
ENGLISH
Compound Mitre Saw
1050 W 210 m
Article number 18-3073 Model J1X-KZ2-210-UK
30-9441 J1X-KZ2-210
Please read the entire instruction manual before using and save it for future use. We apologise for any text or photo
errors and any changes of technical data. If you have any questions concerning technical problems please contact
our Customer Service Department (see address on reverse.)
Safety
Warning! When using this tool fundamental safety measures must be observed to decrease the risk of fire, electric shock
and personal injury. Read all of these instructions before using the product and retain these instructions.
1. Keeptheworkplaceclean.
Cluttered areas and work tables could cause accidents waiting to happen.
2. Taketheworkingenvironmentintoconsideration.
Do not expose the tools to rain. Do not use the tools in damp or wet areas. Keep the working area well-lit. Do not use
the tools in the proximity of inammable liquids or gases.
3. Avoidelectricshocks.
Avoid physical contact with earthed objects such as water pipes, radiators, kitchen cookers and fridges.
4. Keepeveryoneatadistance.
Do not let anyone, especially children, who is not participating in the work touch the tool or any of the extensions.
Keep everyone at a distance from the work place.
5. Storethetoolinasafespace.
When the tool is not being used, store it in a dry, locked space out of the reach of children.
6. Donotforcethetool.
It carries out the job more efciently and safely at the intended feed speed.
7. Usethecorrecttool.
Do not force small tools to do big jobs which require powerful tools. Do not force a tool or auxiliary equipment to
carry out work for which it is not designed; e.g. do not use a circular saw to cut down branches or timber.
8. Wearappropriateclothing.
Do not wear any loose clothing or jewellery as they can get caught in rotating parts. When working outdoors, non-slip
shoes are recommended. Wear a hairnet (or similar) if you have long hair.
9. Alwayswearprotectiveequipment.
Wear safety goggles. Use a protective mask if the work creates a lot of dust.
10. Usedustcollectingequipment.
If it is possible to attach a dust collector to the tool, ensure that it is tted and used properly.
11. Donotmanhandlethepowercable.
Instead of tugging at the cable, disconnect it by pulling the plug out of the socket. Ensure that the power cable does
not come into contact with heat, oil or sharp edges.
12.Securetheworkpieceproperly.
When possible, use clamps or a vice to secure the workpiece. That is safer than holding the workpiece with one hand.
13. Donotoverreach.
Ensure that you stand safely and with good balance at all times.
14. Keepthetoolsinworkingorder.
Ensure that they are clean and that the cutting edges are sharp for an optimal and safe result. Follow the recommen-
dations in the manual regarding lubrication and change of ttings. Check the power cable regularly. If it is damaged it
should be changed by a qualied service technician. Check all extension cables regularly to ensure that they are not
damaged. Ensure that the handles and controls of the machinery/tools are dry, clean and completely free from oil,
grease etc.
3
ENGLISH
15. Switchthepoweroff.
Pull out the plug and press the emergency stop button before servicing and when changing accessories such as
planer tools, drill bits, tools, abrasive belts or blades.
16. Removeallkeysandservicetools.
Make a habit of checking that all keys and service tools are removed from the machinery before switching on the
power.
17. Avoidstartingunintentionally.
Do not carry a tool with your nger on the switch/trigger if the cable is plugged into a socket. Ensure that the switch
is in the off position when connecting the plug.
18. Usethecorrectextensioncables.
When using extension cables outdoors, only use those which are intended for outdoor use. Use extension cables
with sufcient conductivity. Uncoil the entire cable.
19. Usecommonsenseandbecareful.
Think twice before carrying out a working operation so that you can carry it out in a safe manner. Do not use the
machinery/tool when you are tired, under the inuence of medication etc.
20. Beforestartingthemachinerycheck:
- That all covers and other parts are undamaged and in working order.
- That all moving parts can rotate freely and are correctly set.
- That no moving parts can get caught.
- That no defects have arisen.
- Other circumstances which could inuence the manner in which the work is carried out.
A safety guard or other part that has been damaged must be repaired by a service technician or changed. Damaged
power cables and switches must always be changed by a qualied technician. Never use the tool if you cannot
switch it off or start it in a safe manner.
21. Userecommendedaccessories.
Using accessories that have not been recommended may cause accidents and personal injury.
22. Mustberepairedbyaqualiedtechnician.
The machinery conforms to current safety requirements. Repairs on the machinery must always be carried out by a
qualied technician using genuine replacement parts. Otherwise the tool may cause accidents or personal injury.
Safety symbols on the machine
Readthemanual!
Read the entire manual and try to understand the machine’s work cycle!
Warning!
Useearprotectors!
Risk of hearing damage, always use ear protectors when using the machine.
Userespiratoryprotectiveequipment
Dust and wood chippings from certain kinds of wood and wood products can have a detrimen-
tal impact on your health. Always use a wood chipping extractor if possible.
Usesafetygoggles!
Protect your eyes against shooting wood chippings. Use safety goggles or a visor.
Watchyourngers
Keep ngers away from the rotating blade. Ensure that your hands are placed in a safe man-
ner so that they do not get fed into the sawblade should you lose your balance. Never saw
workpieces which are so small that they cannot be held in a safe manner.

4
ENGLISH
Specific safety regulations for the compound mitre saw
Warning!Disconnect the power cable plug before service or changing blade.
Ensure that all parts are in a satisfactory condition and that all safety covers work as intended before starting the saw!
1. Warning! Use only cross-cutting blades. Ensure that the hard metal blades have negative toothing. Do not use
blades with deep spacing between the teeth as they may bend and come into contact with the blade cover. A
damaged sawblade must be changed immediately!
2. Do not use the saw until it is completely and correctly assembled according to this manual. Check the rotation
direction of the motor and blade (see rotation arrow on the blade cover). Check that the sawblade does not touch the
rotation table irrespective of setting. Disconnect the plug and lean the sawblade manually to 45° and 90°. Adjust the
saw head if necessary.
3. If you do not understand how to operate the saw you should ask somebody who does for advice.
4. Do not saw free-hand. Secure the workpiece safely against the work top in a suitable manner before starting to saw.
If the workpiece requires you to have one hand as close to the blade as 10 cm, you should always x the workpiece
using a clamp etc. before sawing.
5. Warning! Keep your hands away from the sawblade. Never saw small pieces. Use something to push them.
6. Ensure that the blade is centred properly, sharp and runs smoothly and without vibration.
7. Let the motor run before starting to saw.
8. Keep the motor ventilation openings clean and free from wood chippings.
9. Ensure that all clamps are fastened before starting to saw even if the table is xed in a steady angular position.
10. Ensure that the blade and anges are clean and that the spindle nut is tightened. Only use the blade anges which
belong to your saw.
12. Only use blades with a 210 mm diameter with the correct speed classication (min. 6000 rpm.).
13. Ensure that there is an extra support when sawing long workpieces.
14. Before sawing, always check that the blade is not cracked or damaged. If so, such a blade must be changed
immediately!
15. Do not use the saw if a saw component is missing, is damaged or works improperly. Disconnect the saw if it starts
sounding strangely or starts vibrating. Let a qualied technician add or change the component which is missing or
damaged before using the saw again.
16. Never saw if the covers are not in place and are not in good working order!
17. Never reach over or behind the blade while it is rotating. Stand rmly so that you can always keep your balance.
18. Ensure that the blade can rotate freely (especially after transport and/or blade change) before connecting the plug
and starting the saw.
19. Never lock the power switch in the ON position.
21. Important!When you have cut through the entire workpiece: Release the power switch and wait until the blade has
stopped rotating before raising the saw head.
22. Release the power switch and wait until the blade has stopped before moving the workpiece or change any other
setting.
23. Do not remove jammed or cut pieces before the blade has stopped.
24. Never saw ferruginous metals, bricks or mortar.
25. Never use the saw in proximity to inammable gases or liquids.
26. Never clean the plastic details of the saw using solvents. The solvents may dissolve the plastic and damage the
material in other ways. Only clean using a damp soft cloth.
27. Disconnect the power cable plug and clean the saw before leaving it. Ensure that the work surface is clean when you
have nished working.
28. Save this manual. Look through it often and use it to instruct others. Ensure that all people who use the saw read
this manual.
29. Do not expose the saw to rain and do not use it in a damp environment.
30. Ensure that the workplace lighting is good.
31. Use suitable work-clothes. Loose clothing or jewellery may get caught in rotating parts.
32. The user must be at least 18. Users who are aged between 16 and 18 should be supervised by an instructor when
using the saw. Keep children away from the saw at all times.
33. Keep the workplace in order and do not let offcuts or other refuse lie around. Ensure that the offcuts are removed
from the sawblade as they can be slung away from the sawblade.

5
ENGLISH
34. Do not distract anyone working with the saw.
35. Do not try to stop the blade by pressing something against the side of the blade when you have switched off the
electricity to the saw.
36. Never use sawblades which do not match the specications of this manual.
37. It is important to always check that all sawblade covers are in good working order.
38. Never lock the cover in the open position and never disassemble the machine’s covers nor change their function.
Never use a damaged or faulty cover - change it immediately!
39. Ensure that your hands are placed in a safe manner so that they do not get fed into the sawblade should you lose
your balance. Never saw workpieces which are so small that they cannot be held in a safe manner.
40. Use a table, support etc. when working with long workpieces so that the machine does not tip over.
41. Secure round workpieces using appropriate measures so that they cannot rotate.
42. There must never be any nails or other foreign objects in the workpiece which is to be sawed.
43. Always stand to the side of the sawblade when the machine is being used to prevent you from being hit by the blade,
should it break.
44. Always press the workpiece against the table during sawing so that it cannot turn or move during sawing.
45. Never saw several workpieces at the same time.
46. Never try to remove wood chippings, splinters or wood which has stuck while the sawblade is still rotating. If you
have to adjust the machine or remove pieces which have jammed, always switch the machine off rst and disconnect
the power cable plug.
47. If you want to change, adjust, or clean the machine or measure the workpiece, always switch the machine off rst
and disconnect the power cable plug.
48. Switch the motor off and disconnect the power cable plug when leaving the workplace.
49. Electrical installations, repairs or maintenance must be carried out by a qualied technician.
50. All covers and safety devices must be reassembled immediately after repairs and maintenance.
51. It is important to follow the manufacturer’s safety- and user- and maintenance instructions as well as follow the
dimension information which is stated in “Technical Data”.
52. It is necessary to follow the regulations of the works safety organization as well as other general safety rules.
53. In a closed room, only use the machine with a chip extractor if the room has an ingoing ow of air. This is to prevent
a vacuum in the room.
54. The saw must be connected to a 230 V socket with a 10 A fuse.
55. Damaged safety devices and parts should be changed or repaired by a qualied technician at an authorized service
workshop.
56. This machine complies with all relevant safety regulations. The machine must only be repaired by qualied
technician at an authorized service workshop using original spare parts. If you do not follow these regulation this can
lead to accidents and expose the user to danger.
Measures before the machine is started
• The machine must be rmly mounted, e.g. on a workbench or on a stand.
• All covers and safety devices must be mounted correctly before the machine is started.
• The sawblade must be able to work freely whatever the setting.
• When working with wood which has been used earlier be careful and look for foreign objects in the workpiece e.g.
nails or screws.
• Before starting the machine check that the sawblade is correctly assembled and that all moving parts run freely.
• Check that the locking handle which secures the saw head and mitre table is fastened before starting to saw.
• Before connecting the machine to a socket check that the supply voltage is correct.

6
13 8
76
5
2
19 3 4 12 10
1
18
9
11 17 16 15 14 20
24
23
22
21
ENGLISH
The package contains
• Spanner
• Wood chipping bag
• Support (2x)
• Manual
Description
1. Handle
2. Sawblade
3. Mitre table
4. Work top
5. Saw cover, moveable
6. Power switch
7. Detachment lever
8. Saw head
9. Bottom plate
10. Index mark for mitre
11. Locking knob for mitre table
12. Grading for mitre
13. Dust extraction bag
14. Grading for angle
15. Index mark for angle
16. Latch for saw head
17. Spindle lock
18. Lid to carbon brushes
19. Material support
20. Locking knob for angle
21. Nut
22. Socket screw
23. Nut
24. Socket screw
7
24
23
22
21
ENGLISH
Use
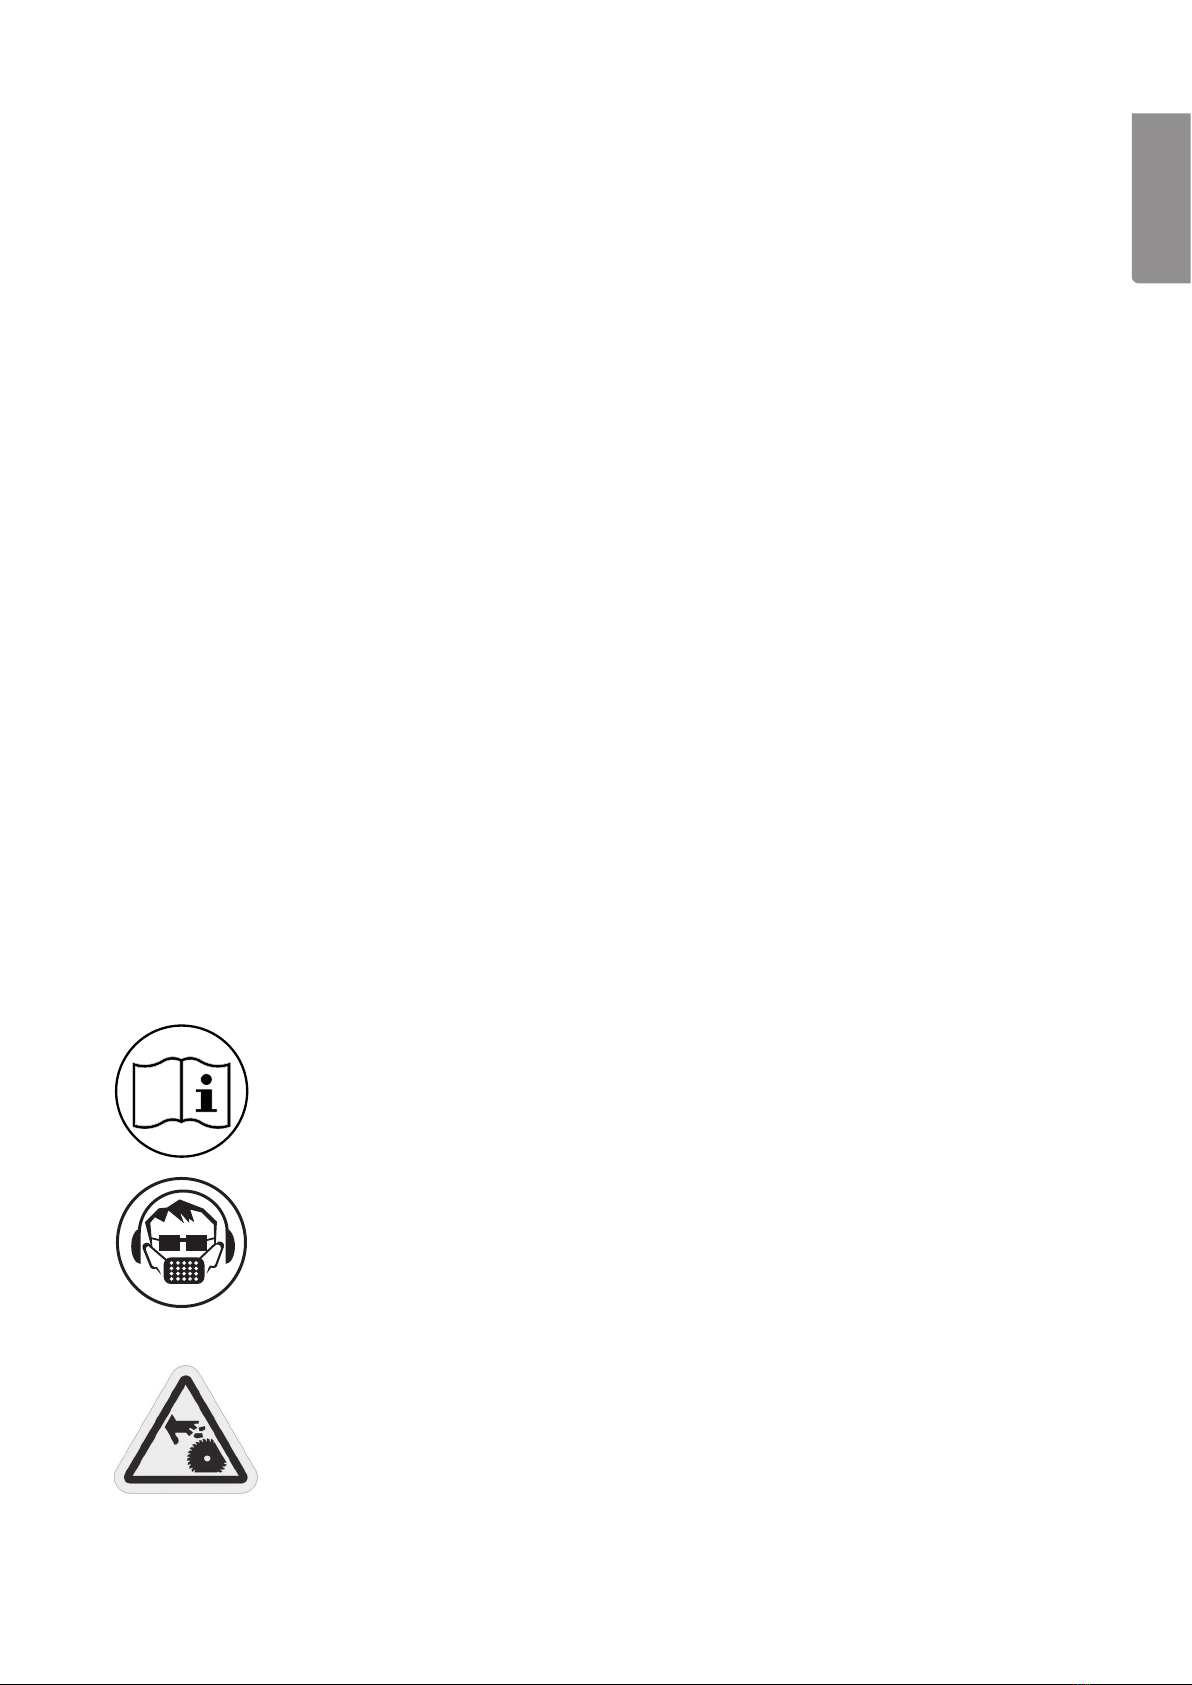
Saw with the blade angled at 0°
1. Ensure that the index marking is at “0” on the grading.
2. Pull the catch out and release the saw head to its upper
position.
3. Place the workpiece which is to be cut against the work top on
the mitre table.
4. Push the power switch to start the motor, press the
detachment lever and bring the handle down smoothly and let
the sawblade cut the workpiece.
5. When the cutting is nished: Release the power switch and
when the motor has stopped the sawblade can be brought up
to its upper position.
Warning!The machine’s balance springs automatically press the
saw head back up after carrying out the cutting. Therefore, do not
release the handle when the cutting is nished. Keep a hold of the
handle and brake carefully when the saw head springs back up.
Saw with the blade angled at 0°–45°
Using the saw you can cut at an angle of 0°–45°.
1. Loosen the angle locking knob, then move the blade to the
required angle using the grading.
2. Tighten the angle locking knob to x the blade position again.
3. Cut according to previous description.
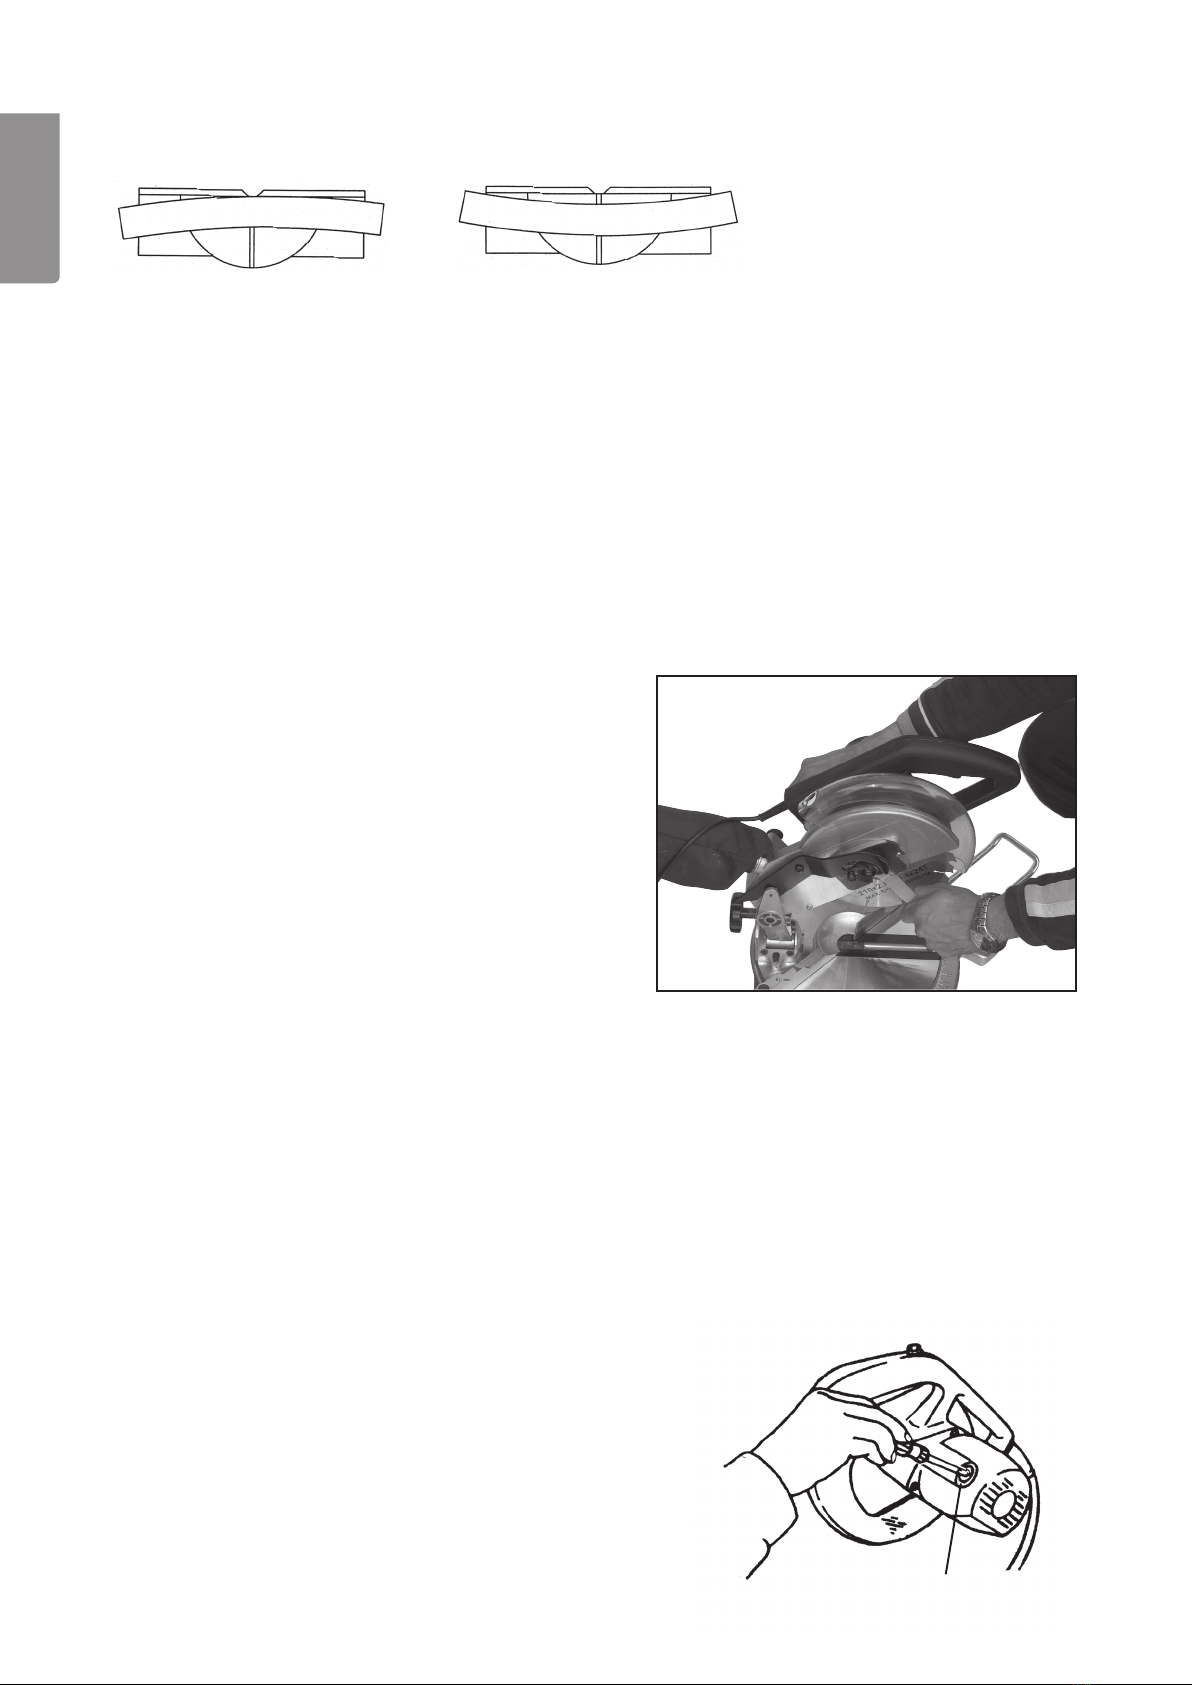
Fine adjustments to the end positions 0° and 45°
1. Loosen the locking handle and angle the saw to the end
position 0°.
2. Check the angle between the blade and the mitre table using
a 90° template.
3. If necessary, adjust the end piece by loosening the nut (21)
and adjusting the end piece using the socket screw (22).
4. Tighten the nut (21) after the adjustment has been made.
5. The same procedure is applicable when checking the end
position for 45° but using a 45° template and adjusting the nut
(23) and the socket screw (24).
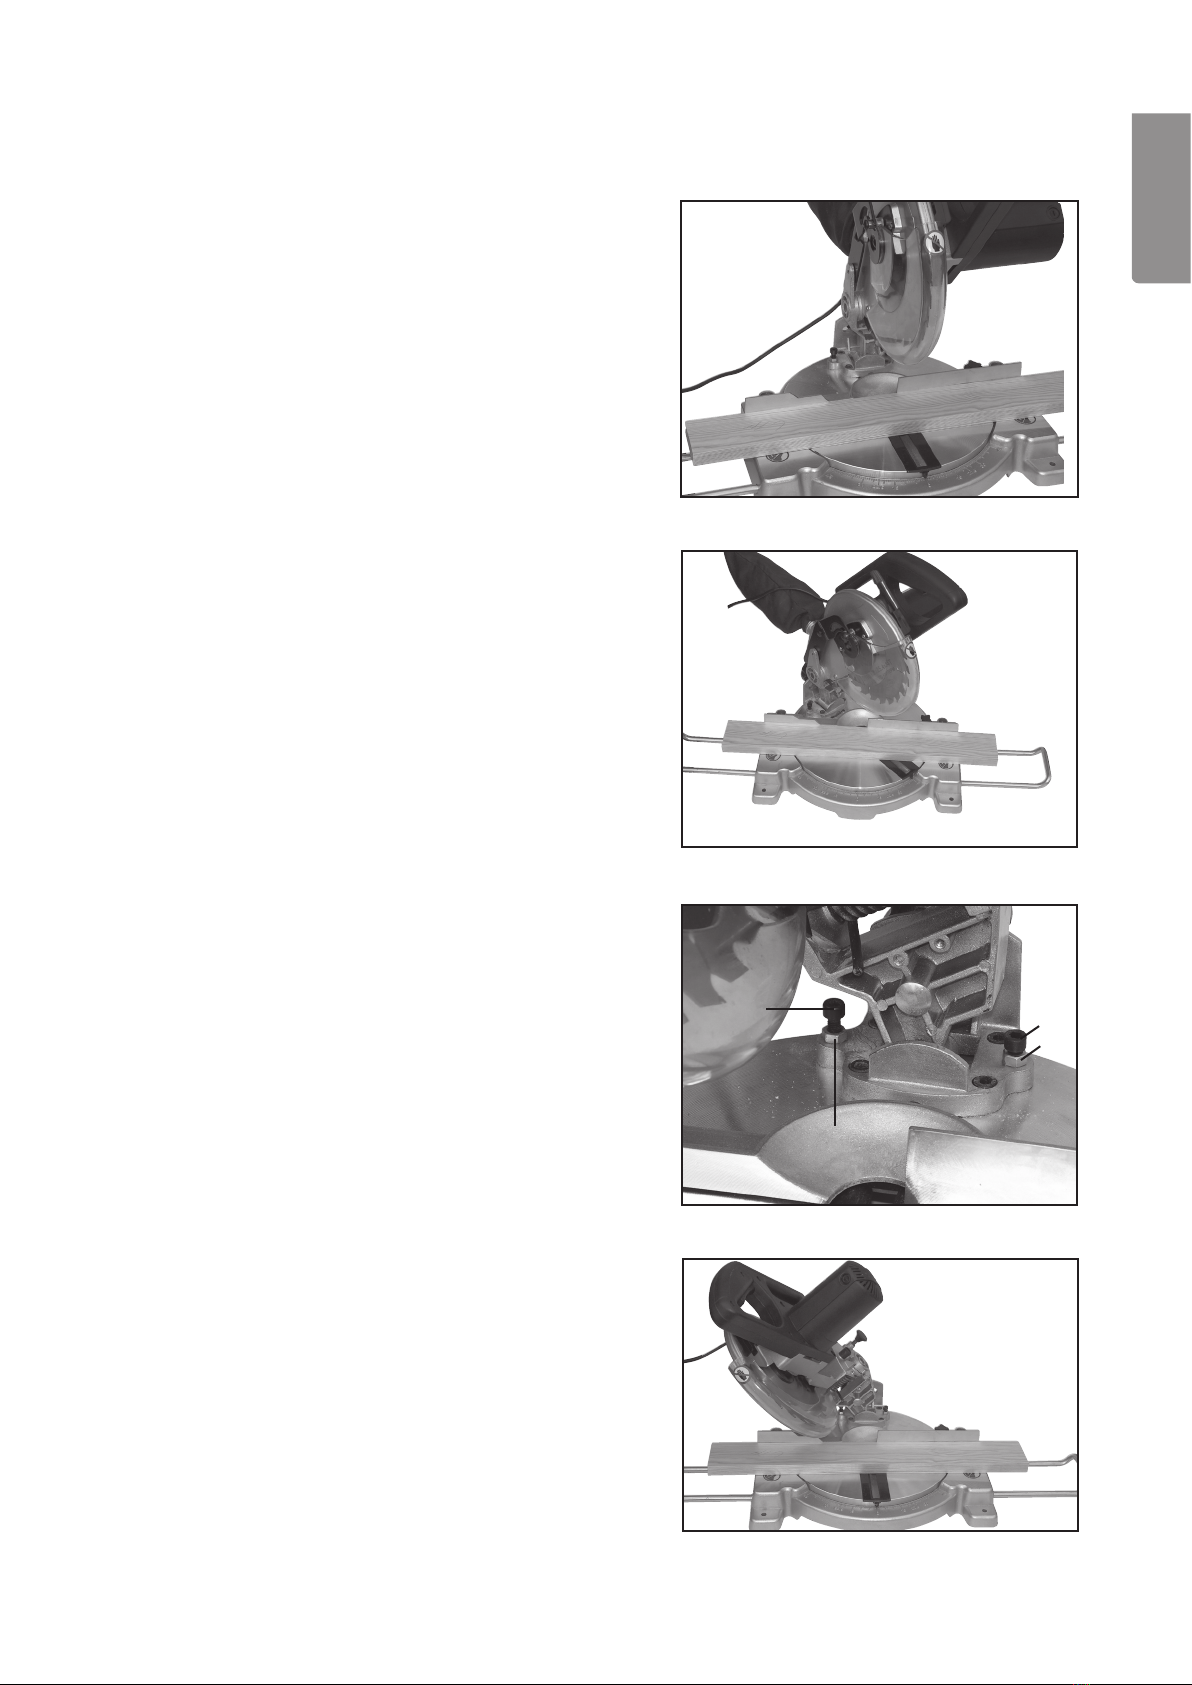
Mitre sawing
Using the saw you can saw at an angle of - 45° / 0° / +45°
1. Pull the latch out and release the saw head to its upper
position.
2. Place the workpiece which is to be cut against the work top on
the mitre table.
3. Loosen the mitre table locking knob and set the required mitre
angle using the mitre grading. Tighten the locking knob again.
4. Push the power switch to start the motor, press the
detachment lever and bring the handle down smoothly and let
the sawblade cut the workpiece.
5. When the cutting is nished: Release the power switch and
when the motor has stopped the sawblade can be brought up
to its upper position.
8
Correct Incorrect
18
ENGLISH
Sawing warped workpieces
When sawing at workpieces you should check if the workpiece is warped. If so, turn it as shown in g. 36 or the work-
piece will pinch the blade at the end of the cutting.
Dust Extraction Bag
The saw is provided with a wood chipping bag which can be emptied by opening the zip in the bottom. It is also possible
to attach a chip extractor to the opening.
Changing blades
Only use recommended sawblades. Bent, cracked or otherwise damaged sawblades must be changed immediately.
1. Disconnect the power cable plug.
2. Remove the latch and release the saw head carefully.
3. Move the moveable blade cover out of the way.
4. Press the spindle lock using one hand and turn the blade
with the other hand until the blade locks. Keep the spindle
lock pressed in and use a spanner to loosen the blade bolt
(turn clockwise).
5. Remove the blade bolt and the outer blade ange
completely.
6. Remove the sawblade.
7. Mount the new sawblade in the opposite order.
8. Clean the blade ange and blade bolt before assembly. The
direction of the sawblade should be the same as the arrow
on the cover.
9. Check that the spindle lock has returned and released.
10. Check that all covers have been assembled correctly and
are in good working order before starting the saw.
Warning! When the sawblade has been changed, always check
that the blade moves freely regardless of the saw setting.
Warning!Remove the spanner and check that the spindle lock has returned and released before starting the machine.
Inspection and change of carbon brushes
Warning!Disconnect the power cable plug before checking the carbon brushes.
The carbon brush life expectancy varies depending on how hard the motor is pushed. Check them after 50 hours of use
if the saw is new or if you have replaced the brushes. After the first check inspect them every 10 hours of use until new
brushes are required.
Howtocheckthecarbonbrushes:
1. Remove both the lids (18), one on each side of the motor.
2. The carbon brushes are inside the lid. Pull them out.
3. Check their carbon brush lengths (min. 6 mm).
4. Change both carbon brushes if one of the brushes is shorter
than 6 mm or if a spring or shunt wire is burnt or damaged in
any way.

9
ENGLISH
Troubleshooting of motor problems
1. To avoid the motor from overheating you should clean the motor regularly using compressed air or a vacuum
cleaner to prevent wood chippings and dust from impairing the cooling.
2. Connect the saw to an earthed socket with a 10 A fuse.
3. Release the trigger/power switch immediately if the motor does not start at once. Disconnect the plug, check that
the blade can run freely and try starting the motor again if it ran freely.
4. If the motor stops during cutting: Release the trigger/power switch immediately and disconnect the plug, remove the
workpiece from the blade and try starting again.
5. Check connections, overloading (several connected devices on the same fuse, oodlight etc.), conductive area
(min. 1.5 mm² up to 7 metres, min. 2 mm² when 7 to 15 metres), cable length (not to exceed 15 metres).
Technical data
Motor: 230 V AC, 50 Hz
Rated output: 1050 W
Revolutions, unpressured: 4500 rpm
Sawblade with hard metal teeth. Ø 210 x Ø 25 x 2.8 mm
Number of teeth: 24
Adjustable gradient of sawblade: 0° - 45° to the left
Adjustable cross-cut sawing: - 45° / 0° / + 45°
Lpa (noise level): 96.2 dB (A)
Lwa (noise effect): 109.2 dB (A)
Table: 420 x 160 mm
Max wood dimensions at 90°: 60 x 125 mm
Max wood dimensions at 45°: 60 x 80 mm
Disposal
Follow local ordinances when disposing of this product. If you are unsure about how to dispose of this
product contact your municipality.

10
SVENSKA
Kap- & geringssåg 1050W 210mm
Artikelnumber 18-3073 Modell J1X-KZ2-210-UK
30-9441 J1X-KZ2-210
Läs igenom hela bruksanvisningen före användning och spara den sedan för framtida bruk. Vi reserverar oss för ev. text-
och bildfel samt ändringar av tekniska data. Vid tekniska problem eller andra frågor, kontakta vår kundtjänst (se adress-
uppgifter på baksidan).
Säkerhet
Varning! När du använder detta verktyg ska grundläggande försiktighetsåtgärder iakttas för att minska risken för brand,
elektrisk chock och personskada. Läs alla dessa instruktioner innan du använder produkten och spara dessa instruktioner.
1. Hållarbetsplatsenren.
Belamrade ytor och bord inbjuder till olyckor.
2. Taghänsyntillarbetsmiljön.
Utsätt inte verktygen för regn. Använd inte verktygen i fuktiga eller våta utrymmen. Håll arbetsplatsen väl upplyst.
Använd inte verktygen i närheten av lättantändliga vätskor eller gaser.
3. Undvikelektriskchock.
Undvik kroppskontakt med jordade föremål som t.ex. vattenledningar, element, köksspisar och kylskåp.
4. Hållandramänniskorpåavstånd.
Låt inga människor, speciellt inte barn, som inte deltar i arbetet röra vid verktyget eller dess skarvsladdar. Håll dem
på avstånd från arbetsplatsen.
5. Förvaraverktygetiettsäkertutrymme.
När verktygen inte används, förvara dem i ett torrt låst utrymme utom räckhåll för barn.
6. Överbelastainteverktyget.
Det gör jobbet bättre och säkrare med avsedd matningshastighet.
7. Användrättverktyg.
Pressa inte små verktyg att utföra stora jobb som kräver kraftfulla verktyg. Pressa inte ett verktyg eller en tillsats att
göra ett arbetsmoment som den inte är gjord för; använd t.ex. inte en cirkelsåg för att kapa trädgrenar eller timmer.
8. Bärlämpligklädsel.
Bär inga löst sittande kläder eller smycken, de kan fastna i roterande delar. Halksäkra skor rekommenderas vid
arbete utomhus. Bär hårnät eller liknande om du har långt hår.
9. Bäralltidskyddsutrustning.
Bär skyddsglasögon. Använd också dammlter eller skyddsmask vid dammande arbeten.
10.Användutsugningsutrustning.
Om verktyget är förberett för anslutning av utrustning för utsugning och uppsamling av damm, se till att utrustningen
är ansluten och korrekt använd.
11.Misshandlaintenätsladden.
Ryck inte i sladden, utan dra i stickproppen när du ska ta ur den ur vägguttaget. Se till att nätsladden inte kommer i
kontakt med värme, olja eller vassa kanter.
12.Spännfastarbetsstycketordentligt.
När det är möjligt, använd tvingar eller skruvstäd för att spänna fast arbetsstycket. Det är säkrare än att hålla fast
arbetsstycket med ena handen.
13.Sträckdiginteförlångt.
Se till att du hela tiden står säkert med god balans.
14.Hållverktygenitrim.
Se till att de är rena och eggarna vassa för optimal effekt och ett säkert resultat. Följ manualens rekommendationer
för smörjning och byte av tillbehör. Kontrollera nätsladden regelbundet. Om den är skadad ska den bytas av en
kvalicerad servicetekniker. Syna alla skarvsladdar regelbundet så att de inte är skadade. Se till att maskinens/
verktygets handtag och reglage är torra, rena och helt fria från olja, fett etc.
This manual suits for next models
3
Table of contents
Languages:
Other CO/Tech Saw manuals

CO/Tech
CO/Tech MJ10250IV-UK User manual

CO/Tech
CO/Tech TC-RM-180E User manual

CO/Tech
CO/Tech 92107L-UK User manual

CO/Tech
CO/Tech RS 18 DMF008C-180 User manual

CO/Tech
CO/Tech JFB10-UK User manual

CO/Tech
CO/Tech TC180I-UK User manual

CO/Tech
CO/Tech J1x-JF2-210 User manual

CO/Tech
CO/Tech HF-ZJ-0101 User manual

CO/Tech
CO/Tech M1W-TD2-210E-UK User manual

CO/Tech
CO/Tech 2502W User manual


