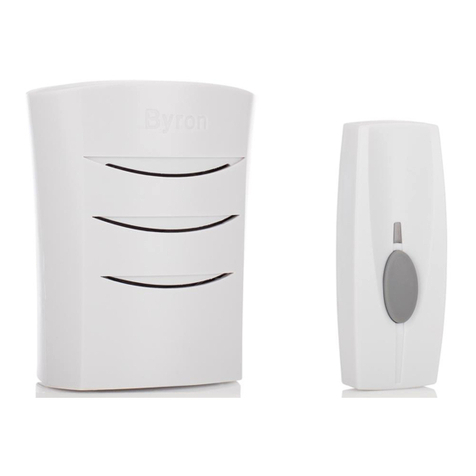
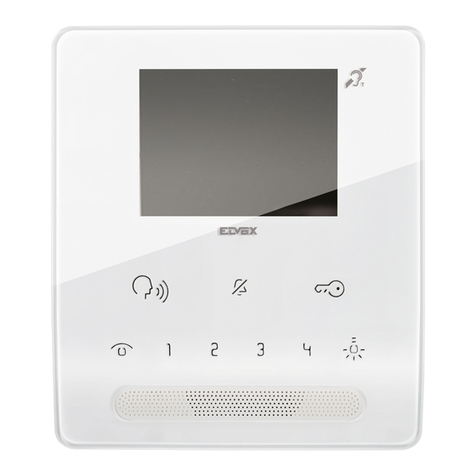
Byron DIC-22815 User manual

DIC-22815

2

DIC-22815
en • 08/03/2021

Table of Contents Byron
4
Table of Contents
1 Safety ..........................................................................................................................................................................................................7
1.1 Installation Safety...............................................................................................................................................................................7
1.2 Operation Safety ................................................................................................................................................................................7
1.3 Battery Safety ....................................................................................................................................................................................7
2 Parts description .......................................................................................................................................................................................8
2.1 What's in the box................................................................................................................................................................................8
2.2 Product overview ...............................................................................................................................................................................8
2.2.1 Indoor unit (monitor)............................................................................................................................................................ 8
2.2.2 Outdoor unit (doorbell) ........................................................................................................................................................ 8
3 Before installation .....................................................................................................................................................................................8
4 Installation..................................................................................................................................................................................................9
4.1 Placing the indoor unit (monitor) ........................................................................................................................................................9
4.2 Mount the outdoor unit (doorbell).......................................................................................................................................................9
4.3 Electrical installation ..........................................................................................................................................................................9
4.3.1 Connecting AC power to the indoor unit (monitor).............................................................................................................. 9
4.3.2 Installing and charging the indoor unit battery .................................................................................................................. 10
4.3.3 Charging outdoor unit battery ........................................................................................................................................... 10
4.3.4 Installing a MicroSD card (Not included)........................................................................................................................... 10
4.3.5 Connecting AC power to the outdoor unit (doorbell) (adapter not included)..................................................................... 10
4.3.6 Connecting a door lock (not included) .............................................................................................................................. 10

Byron Table of Contents
5
4.3.7 Connecting a gate opener (not included).......................................................................................................................... 11
4.3.8 Connecting the external antenna (not included) ............................................................................................................... 11
5 Basic functions ........................................................................................................................................................................................11
5.1 Control buttons.................................................................................................................................................................................11
5.2 Screen icons ....................................................................................................................................................................................11
5.3 Settings menu ..................................................................................................................................................................................12
5.4 Answering a call...............................................................................................................................................................................12
5.5 Pairing the indoor/outdoor units .......................................................................................................................................................12
5.6 Pairing an additional monitor (not included).....................................................................................................................................12
5.7 Image setting ...................................................................................................................................................................................12
5.8 Volume control .................................................................................................................................................................................13
5.9 Ring tone setting ..............................................................................................................................................................................13
5.10 Play back recordings........................................................................................................................................................................13
5.11 Recording videos/photos .................................................................................................................................................................13
5.12 Time setting .....................................................................................................................................................................................14
5.13 Unlock time setting...........................................................................................................................................................................14
6 Cleaning and maintenance .....................................................................................................................................................................14
7 Frequently asked questions ...................................................................................................................................................................14
8 Technical Data .........................................................................................................................................................................................15

Table of Contents Byron
6
9 Environment.............................................................................................................................................................................................16
10 Declaration of Conformity.......................................................................................................................................................................16

Instruction manual
7
1 Safety
• Please read these instructions carefully before installing and
using the product.
• Do not cut the power supply cable to extend it; the device
(transformer) will not work with a longer cable. Do not plug in the
device until all the wiring has been finished.
• Before starting the installation, power off the current.
• Before using the product, make sure that the battery cover is
covered. Do not open the cover during use, unless the battery is
replaced. Only after replacing the battery can the product be
used.
• Only use attachments/accessories specified or provided by the
manufacturer (such as the exclusive supply adapters, batteries,
etc.).
• Outdoor camera shall not be exposed to dripping or splashing,
and direct sunshine.
1.1 INSTALLATION SAFETY
• Keep children and bystanders away while installing the products.
Distractions can cause you to lose control.
• Do not overreach when installing this product. Keep proper
footing and balance at all times. This enables better control in
unexpected situations.
• This product is not a toy. Mount it out of reach of children.
1.2 OPERATION SAFETY
• Do not operate electrically powered products in explosive
atmospheres, such as in the presence of flammable liquids ,
gases, or dust. Electrically powered products create sparks which
may ignite the dust or fumes.
• The warnings, precautions, and instructions discussed in this
instruction manual cannot cover all possible conditions and
situations that may occur. It must be understood by the operator
that common sense and caution are factors which cannot be built
into this product, but must be supplied by the operator.
• Do not expose the Power Adapter of this product to rain or wet
conditions. Water entering the Power Adapter will increase the
risk of electric shock.
• Do not abuse the Power Cord. Never use the cord for unplugging
the plug from the outlet. Keep cord away from heat, oil, sharp
edges or moving parts. Damaged or entangled cords increase
the risk of electric shock.
• The adapter must match the outlet. Never modify the plug in any
way. Unmodified plugs and matching outlets will reduce risk of
electric shock.
1.3 BATTERY SAFETY
• CAUTION: RISK OF EXPLOSION IF BATTERY IS REPLACED
BY AN INCORRECT TYPE. DISPOSE OF USED BATTERIES
ACCORDING TO THE INSTRUCTIONS.
• Disposal of a battery into fire or a hot oven, or mechanically
crushing or cutting of a battery can result in an explosion.
EN

Instruction manual
8
• Leaving a battery in an extremely high temperature surrounding
environment can result in an explosion or leakage of flammable
liquids or gas.
• A battery subjected to extremely low air pressure may result in an
explosion or the leakage of flammable liquid or gas.
2 Parts description
2.1 WHAT'S IN THE BOX
1. Indoor unit (monitor)
2. Outdoor unit (doorbell)
3. Mounting plate (outdoor unit)
4. Battery (indoor unit)
5. Battery (outdoor unit)
6. Micro USB AC adapter (indoor unit)
7. Terminal blocks
8. Manual
9. Screws and plugs
2.2 PRODUCT OVERVIEW
2.2.1 Indoor unit (monitor)
1. Screen
2. Power on/off
3. Power indicator
4. Charge indicator
5. Interface buttons
6. Microphone
7. AC adapter
2.2.2 Outdoor unit (doorbell)
1. Microphone
2. Night sensor
3. Outdoor camera
4. Call button
5. External antenna connection (On the back of the unit)
6. Reset button (On the back of the unit)
3 Before installation
To ensure good communication between the outdoor unit and the
indoor unit, observe the following points:
1. Install the outdoor unit out of reach of rain. Avoid the camera lens
coming into direct contact with sunshine.
2. Do not place the outdoor unit directly on a metal security door, as
the metal will act as a barrier signal. The outdoor unit can be installed
on a nearby wall.
3. Reduce the amount of obstacles between the outdoor unit and the
indoor unit. Obstacles will weaken the signal. When there is an
unavoidable obstruction that affects transmission, reduce the distance
between the units.
• Do not use other products of the same frequency such as a
router, blue tooth device, TV, computer and oven microwave
close to your indoor unit to avoid interference and thus reduce the
communication distance.

Instruction manual
9
• When the outdoor unit is communicating with the indoor unit and
a person stands between the two devices, the communication will
be less fluid.
• When the outdoor unit is communicating with the indoor unit, the
indoor unit should not be placed in a low position or in a corner.
4 Installation
Make sure pin 1 at the back of the outdoor unit is switched to ‘power
on’.
4.1 PLACING THE INDOOR UNIT
(MONITOR)
The indoor unit (monitor) is designed to stand on a table or any flat
surface.
A. Pull out the stand leg on the back of the indoor unit.
B. Pull the antenna on the back of the indoor unit to an upright
position.
C. Place on any flat surface.
4.2 MOUNT THE OUTDOOR UNIT
(DOORBELL)
To mount the outdoor unit, you will need the following tools:
üA suitable screwdriver for the included screws.
üA drill and suitable drill bit for the included screw plugs.
A. Position the provided mounting plate where desired.
B. Mark the screw positions with a pen.
C. Drill the necessary holes.
D. Insert the plugs.
E. Use a knife or sharp object to puncture the cable gland. (Optional,
only when installing the AC Power. Cables are not included.)
F. Pull the required cables through the cable gland. (Optional, only
when installing the AC Power. Cables are not included.)
G. Fasten the mounting plate with the screws.
H. Remove the front cover of the outdoor unit by removing the screw
at the bottom.
I. Attach the outdoor unit to the mounting plate.
J. Fasten the outdoor unit with the supplied screws.
K. Charge the battery (see 3.3.3) and place the battery in the
outdoor unit.
L. Place the front cover and fasten the screw at the bottom of the
outdoor unit to secure the cover.
4.3 ELECTRICAL INSTALLATION
4.3.1 Connecting AC power to the indoor unit
(monitor)
The monitor is portable and can be used on battery power, AC power
or both. When the AC adapter is connected the battery charges until
full and then operates directly from the AC adapter. The AC adapter
used is a standard micro USB charger.
EN

Instruction manual
10
4.3.2 Installing and charging the indoor unit
battery
A. Open the battery cover on the back of the unit.
B. Check the label on the battery for the correct orientation.
C. Insert the battery and place back the battery cover.
D. Insert the micro USB adapter to charge the battery.
E. Charge the battery completely before using the monitor on battery
power alone.
4.3.3 Charging outdoor unit battery
The outdoor unit (doorbell) can be operated on battery or AC power
(AC adapter not included). If operated on battery, it must be removed
in order to re-charge.
A. Remove the screw holding the front cover.
B. Remove the front cover.
C. Press the metal lever and pull out the battery pack.
D. Re-charge the battery by using the micro USB charge adapter
supplied for the monitor.
E. After charging: Insert the battery into the outdoor unit.
F. Place the front cover.
G. Fasten the screw holding the cover in place.
4.3.4 Installing a MicroSD card (Not included)
To record video, a MicroSD card is required.
A. Remove the battery cover and the battery of the indoor unit. (see
section “Installing and charging the monitor battery”)
B. Open the MicroSD card cradle by sliding it. (see marking on cradle
for direction)
C. Insert the MicroSD card into the cradle with pins facing down.
D. Close the cradle and slide it to the closed position. (see marking
on cradle for direction)
4.3.5 Connecting AC power to the outdoor
unit (doorbell) (adapter not included)
The outdoor unit is portable and can be used on battery power or AC
power. A standard micro USB charger can be used as AC adaptor.
To connect the AC terminal blocks, you will need the following tool:
üA small flat head screw driver.
A. ORANGE terminal block: Loosen the terminal screws.
B. With the terminal facing you: Insert the (+) wire on the left and the
(-) wire on the right.
C. Fasten the terminal screws.
D. Connect the terminal block to the outdoor unit.
4.3.6 Connecting a door lock (not included)
It is possible to connect a lock to the outdoor unit that can be opened,
using the monitor. Door locks are sold separately. Article no: DB5005
& DB5005L
To use the door lock, the outdoor unit needs to be powered by the
adapter.
To connect the door lock, you will need the following tool:
üA small flat head screw driver.
Other manuals for DIC-22815
1
Table of contents
Languages:
Other Byron Intercom System manuals

Byron
Byron DIC-24212 User manual

Byron
Byron DIC-24112 User manual

Byron
Byron DIC-22815 User manual

Byron
Byron DIC-25712 User manual

Byron
Byron DIC-24112 User manual

Byron
Byron 765 User manual

Byron
Byron SX304 User manual

Byron
Byron DIC-24312 User manual

Byron
Byron LySonix 3000 User manual

Byron
Byron MP001 Instruction manual

Byron
Byron W255 User manual

Byron
Byron DIC-24102 User manual

Byron
Byron DIC-24122 User manual

Byron
Byron DIC-24615 User manual

Byron
Byron BY206 User manual

Byron
Byron DIC-24512 User manual

Byron
Byron DIC-24712 User manual

Byron
Byron DIC-23312 User manual

Byron
Byron DIC-25312 User manual

Byron
Byron DIC-24712 User manual