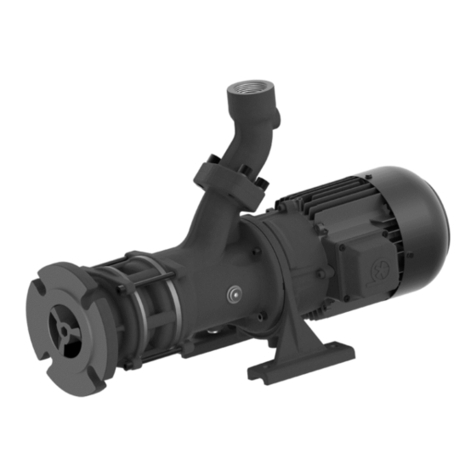
Burcam 300527 User manual

2190 Boul. Dagenais West TEL: 514.337.4415
LAVAL (QUEBEC) FAX: 514.337.4029
CANADA
INSTALLATION
INSTRUCTIONS
MODEL
300527
SUBMERSIBLE
SUMP PUMP
Please read these
instructions
carefully. Failure
to comply to
instructions and
designed
operation of
this system,
may void the
warranty.
Your pump has been
carefully packaged at
the factory to prevent
damage during shipping.
However, occasional
damage may occur due to
rough handling. Carefully
inspect your pump for
damages that could
cause failures. Report
any damage to your
carrier or your point of
purchase.
©2008 BUR-CAM Printed in Canada 310598
WWW.BURCAM.COM

FOR INFORMATION TEL: 514.337.4415 FAX: 514.337.4029
SAFETY INSTRUCTIONS:
This fine pump that you have just purchased is designed from the latest in material and
workmanship.
Before installation and operation, we recommend the following procedures:
CHECK WITH YOUR LOCAL ELECTRICAL AND PLUMBING CODES TO ENSURE YOU
COMPLY WITH THE REGULATIONS. THESE CODES HAVE BEEN DESIGNED WITH
YOUR SAFETY IN MIND. BE SURE YOU COMPLY WITH THEM.
WE RECOMMEND THAT A SEPARATE CIRCUIT BE LEAD FROM THE HOME ELECTRI-
CAL DISTRIBUTION PANEL PROPERLY PROTECTED WITH A FUSE OR A CIRCUIT
BREAKER. WE ALSO RECOMMEND THAT A GROUND FAULT CIRCUIT BE USED.
CONSULT A LICENSED ELECTRICIAN FOR ALL WIRING.
THE GROUND TERMINAL ON THE THREE PRONG PLUGS SHOULD NEVER BE
REMOVED. THEY ARE SUPPLIED AND DESIGNED FOR YOUR PROTECTION.
NEVER MAKE ADJUSTMENTS TO ANY ELECTRICAL APPLIANCE OR PRODUCT WITH
THE POWER CONNECTED. DO NOT ONLY UNSCREW THE FUSE OR TRIP THE
BREAKER, REMOVE THE POWER PLUG FROM THE RECEPTACLE.
YOUR SUMP PIT MUST BE CONSTRUCTED FROM CONCRETE, BRICK, TILE OR MORE
RECENTLYASUMP BASIN MADE FROM PLASTICAND/OR FIBERGLASS. THE MINIMUM
SIZE OF YOUR SUMP PIT MUST BE 18” IN DIAMETER AND NO LESS THAN 25” DEEP
Material required for submersible sump pump application
Submersible sump pump installation
Desired length of 1 1/2” or 1 1/4” of ABS/DWV pipe to link up the pump to the drain line.
1 only 1 1/4” check valve (350353) (Note that this 1 1/4” check valve may also be use
with a 1 1/2” pipe).
18” x 25” sump basin.
1 1/4”-1 1/2” stainless steel clamps (750886).
ABS cement.
2
Tools
Screwdrivers, hacksaw to cut pipe, knife to assist in pipe cutting, round file to smooth pipe
ends, pipe wrench, adjustable wrench to tighten fittings.
NOTICE
This unit is not designed for applications
involving salt water or brine .
Use with salt water or brine will void
warranty.
A
B
C
D
E

FOR INFORMATION TEL: 514.337.4415 FAX: 514.337.4029 3
FEATURES
Non corrosive material.
Stainless steel motor body.
Stainless steel mechanical rotary seal.
Thermal and overload protection.
Piggy back grounded cables
3/4HP, 115VAC, 60Hz, 5.5A.
We recommend that you install your pump in a clean location where there is
adequate room for servicing at a later date. Protection from freezing
temperatures and good ventilation should be considered as well, to provide
the pump an environment for long life. Do not use to pump gas or toxic
fuels. This submersible sump pump is designed to pump water only.
Friction losses in the discharge pipe must be taken into consideration when the
horizontal offset is greater than 50 feet. The discharge pipe should be increased
from 1 1/2” to 2”. This will reduce friction losses and allow the pump to give
maximum performance.
More friction losses must also be taken into consideration when many elbows
and fittings are installed in the discharge line. Each elbows and fittings must be
considered as 1 feet of head.
The float switch of your pump has been pre-set at the factory and does not need
any adjustment.
Never run the pump dry. Damage to the seal may occur. Fill pump pit or sump
basin with water before turning on the power.
Assuming that you have a sump pit located in your basement floor... Your sump pit must be
constructed from concrete, brick, tile or more recently a sump basin made from plastic and/or
fiberglass. The minimum size of your sump pit must be 18” in diameter and no less than 25”
deep. When pit is ready, proceed to next step.
STEP 1
STEP 2
APPLICATION
This submersible sump pump is designed for a
permanent sump installation.
To be used in a residential cottage and
farm application.
CAPACITY:
5’ 4000 USGPH
10’ 3200 USGPH
15’ 2300 USGPH
20’ 1300 USGPH
25’ 300 USGPH
INSTALLATION STEPS
FRICTION LOSS
IN
PIPE NOT
INCLUDED

FOR INFORMATION TEL: 514.337.4415 FAX: 514.337.4029
4
At this step, you have the opportunity to install a 1 1/2” or a 1 1/4” discharge. We recommend
a 1 1/2” ABS/DWV discharge. Install a check valve (350362 in-line 1 1/2” or 350353 1 1/4”
MNPT inlet and 1 1/4” or 1 1/2” outlet) over discharge pipe of your pump and secure it with
stainless steel clamps or glued nipple for ABS/DWV pipe. This check valve will allow easy
access to pump, should service be required.
Install and position your submersible sump pump in the centre of your sump pit or basin and
ensure that there is clearance to allow the mechanical float switch a free working area without
obstructions (pipe, pit’s wall, power cord). The float cord length is factory set and should not
need adjustment. If adjustment is required, the switch cord can be shortened or lengthened.
Install your discharge pipe from check valve to the point of discharge or drain. For installation
over 50 feet of horizontal position discharge pipe, use a 2” pipe to reduce friction loss.
The mechanical switch provided with your pump is supplied with a serial electrical male plug.
Fix the power cord of the pump into the piggy-back receptacle of the switch and plug this one
into electrical grounded outlet. We recommend that a licensed electrician be employed to do
wiring. Permanently ground the motor in accordance to the electrical codes for your area. Do
not use an extension cord to connect your pump to the power source. From your
distribution panel to the receptacle, we recommend a wire gauge not smaller than 14 gauge.
Use tape or tie wrap to fix power cords to discharge pipe.
Fill the sump pit or basin with water to test the operation of your submersible sump pump.
The motor should start when the water level reaches approximetely 3” over your pump.Allow
the pump to go through several “on-off” cycle to assure satisfactory operation. If needed, see
trouble shooting guide in this manual.
Review your installation with typical diagram. Check all connections for leaks.
STEP 5
STEP 3
STEP 4
STEP 6
SUMP PUMP APPLICATION
SEE DIAGRAM ON PAGE 5
STEP 7
STEP 8
Unplug the switch and pump motor power cord. Remove the pump from pit or basin. Remove
trash accumulation and dirt from the pump and float switch. Be sure the float switch operates
freely after cleaning. If tar or paint has been received in the pit or basin, use kerosene to
remove residue from float switch or pump. Do not use strong paint solvents.
Remove the screws that hold the strainer or the base to the bottom of the pump body. Pry
the base off the pump body carefully. Clean the impeller and volute passage way from any
debris wich may have become in contact with these parts. Again, If tar or paint has entered
pump, clean with kerosene. Do not use strong paint solvents. Be sure impeller turns freely
after cleaning.
Check and clean away any debris wich may be clogging the suction inlet, pump discharge,
check valve and discharge line.
Replace screws and return sump pump to sump pit or basin and reconnect to piping.
MAINTENANCE

FOR INFORMATION TEL: 514.337.4415 FAX: 514.337.4029 5
Repair parts may be ordered from your authorized point of sale or from
BUR-CAM PUMPS
SUMP PUMP APPLICATION
STEP 2
Sump pit 18” diameter
X 25” depth
STEP 3
Prepare your choice
of discharge pipe size
and check valve
STEP 4
Install your pump in
centre of pit
STEP 5
Install discharge
pipe
STEP 7
Fill the basin and
test the operation
STEP 8
Review and check
connections for
leaks
REPAIR PARTS
STEP 6
Connect float and
motor power cable
1
3
2
4
7
8
6
9
10
5
300527 2008
# Part Description
1 310585 Nut and bolt for handle
2 310586 Handle
3 310587 Square support screw (2)
4 310588 Handle square support (2)
5 310589 Motor assembly
6 310590 Impeller
7 310591 Impeller lock nut
8 310592 Pump body screws (6)
9 310593 Gasket
10 310594 Pump boby

FOR INFORMATION TEL: 514.337.4415 FAX: 514.337.4029
6
TROUBLE SHOOTING GUIDE CHECKLIST
NEVER MAKE ADJUSTMENTS TO ANY ELECTRICAL APPLIANCE OR PRODUCT WITH THE POWER
CONNECTED. DON’T JUST UNSCREW THE FUSE OR TRIP THE BREAKER, REMOVE THE POWER
FROM THE RECEPTACLE.
Switch is off position
Blown fuse
Tripped breaker
Plug disconnected
Corroded plug
Low water level
Thermal overcharge
Defective switch/float
Defective motor
Improper float position
Jammed impeller
Plugged check valve
Blocked suction/inlet
Discharge leak
Blocked line/pipe
Worn impeller
Defective motor
Defective switch
Float obstruction
Blocked suction/inlet
Turn switch to on position
Replace
Reset
Re-install
Clean prongs
Add water and verify
Cool the motor
Replace
Replace/repair
Check movement
Clean
Clean/replace
Check for debris in pit and clean
Repair
Check for debris or ice
Repair/replace
Replace
Replace
Adjust/check
Check for debris in pit and clean
TROUBLE PROBABLE CAUSE ACTION
Motor does not
run.
Pump does not
shut off.
Pump does not
deliver to full
capacity.
TO THE END CONSUMER
If you have any problems with the product, before advising the store, where you’ve
purchased the pump, please contact us at 514 337-4415 , and ask for our sales
department, and they will be pleased to help you with any questions you might have,
concerning your installation.
Table of contents
Other Burcam Water Pump manuals

Burcam
Burcam 300514W User manual

Burcam
Burcam 506121S User manual

Burcam
Burcam 400505TW User manual

Burcam
Burcam 300735 User manual

Burcam
Burcam 300526 User manual

Burcam
Burcam 503121S User manual

Burcam
Burcam 506518SS User manual

Burcam
Burcam 300910 User manual

Burcam
Burcam 400505H User manual

Burcam
Burcam 101124 User manual
Popular Water Pump manuals by other brands

Sykes AmeriPumps
Sykes AmeriPumps GP100M Operation and maintenance instructions

DUROMAX
DUROMAX XP WX Series user manual

BRINKMANN PUMPS
BRINKMANN PUMPS SBF550 operating instructions

Franklin Electric
Franklin Electric IPS Installation & operation manual

Xylem
Xylem e-1532 Series instruction manual

Milton Roy
Milton Roy PRIMEROYAL instruction manual