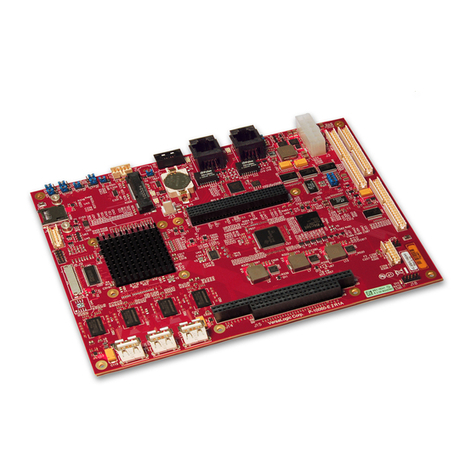
Biostar BIH11-AHB User manual

Dichiarazione di conformità sintetica
Ai sensi dell’art. 2 comma 3 del D.M. 275 del
30/10/2002
Si dichiara che questo prodotto è conforme
alle normative vigenti e soddisfa i requisiti
essenziali richiesti dalle direttive
2004/108/CE, 2006/95/CE e 1999/05/CE
quando ad esso applicabili
Short Declaration of conformity
We declare this product is complying with the
laws in force and meeting all the essential
requirements as specified by the directives
2004/108/CE, 2006/95/CE and 1999/05/CE
whenever these laws may be applied
FCC Information and Copyright
This equipment has been tested and found to comply with the limits of a Class B digital device,
pursuant to Part 15 of the FCC Rules. These limits are designed to provide reasonable protection
against harmful interference in a residential installation. This equipment generates, uses, and can
radiate radio frequency energy and, if not installed and used in accordance with the instructions,
may cause harmful interference to radio communications. There is no guarantee that interference
will not occur in a particular installation.
The vendor makes no representations or warranties with respect to the contents here and
specially disclaims any implied warranties of merchantability or fitness for any purpose. Further
the vendor reserves the right to revise this publication and to make changes to the contents here
without obligation to notify any party beforehand.
Duplication of this publication, in part or in whole, is not allowed without first obtaining the
vendor’s approval in writing.
The content of this user’s manual is subject to be changed without notice and we will not be
responsible for any mistakes found in this user’s manual. All the brand and product names are
trademarks of their respective companies.

BIH11-AHB User’s Manual
2 | Table Of Contents
Table Of Contents
FCC Information and Copyright ............................................................................... 1
Chapter 1: Introduction ........................................................................................... 3
1.1 Before You Start..................................................................................................................3
1.2 Specifications......................................................................................................................4
1.3 Rear Panel Connectors........................................................................................................5
1.4 Motherboard Layout...........................................................................................................6
Chapter 2: Hardware installa
tion
...................................................................................7
2.1 Central Processing Unit (CPU).............................................................................................7
2.2 Install a Heatsink.................................................................................................................9
2.3 Connect Cooling Fans........................................................................................................10
2.4 Installing System Memory.................................................................................................10
2.5 Expansion Slots .................................................................................................................12
2.6 Jumper & Switch Setting...................................................................................................13
2.7 Headers & Connectors ......................................................................................................14

BIH11-AHB User’s Manual
Chapter 1: Introduction | 3
Chapter 1: Introduction
1
�
1 Before You Start
Thank you for choosing our product. Before you start installing the motherboard, please make
sure you follow the instructions below:
•Prepare a dry and stable working environment with sufficient lighting.
•Always disconnect the computer from power outlet before operation.
•Before you take the motherboard out from anti-static bag, ground yourself properly
by touching any safely grounded appliance, or use grounded wrist strap to remove the
static charge.
•Avoid touching the components on motherboard or the rear side of the board unless
necessary. Hold the board on the edge, do not try to bend or flex the board.
•Do not leave any unfastened small parts inside the case after installation. Loose parts
will cause short circuits which may damage the equipment.
•Keep the computer from dangerous area, such as heat source, humid air and water.
•The operating temperatures of the computer should be 0 to 45 degrees Celsius.
•To avoid injury, be careful of:
Sharp pins on headers and connectors
Rough edges and sharp corners on the chassis
Damage to wires that could cause a short circuit
»The package contents may be different due to the sales region or models in which it was sold. For
more information about the standard package in your region, please contact your dealer or sales
representative.
Note

BIH11-AHB User’s Manual
4 | Chapter 1: Introduction
1.2 Specifications
CPU Type
Supports Intel Skylake & Kabylake CPU up to 95W
CPU Socket
Socket 1151
Chipset (PCH)
Intel H110 Express Chipset
Memory
DDR4 2400 LONG-DIMM x 2 Max. 32GB
Display
Intel HD Graphics integrated
Supports dual independent displays (Extended mode)
--By using the DDI to VGA Transmitter(RTD2168-CG) and supports D-Sub 15 pin VGA output
(Max resolution up to 1920x1200@60Hz)
1x HDMI
1x DP++
Dual LAN
INTEL I225-V Gigabit Ethernetx 1
INTEL I219-V Gigabit Ethernetx 1
Audio
REALTEK CODEC ALC897 (support Blu-ray Audio)
SATA
Chipset built-in Serial ATA controller support data transfer rates up to 6.0Gb/s
1x M.2 KEY M socket for SATA SSD 2242,2260,2280 (share with 1x SATA)
USB
Chipset built-in controller support USB 2.0/3.0ports
LPC I/O
ITE IT8625 (Support PECI 3.0)
Expansion Slot
1x PCI-E X16 Slot
1x PCI-E X4 Slot
5x PCI Slot
1x M.2 KEY M socket for SATA SSD 2242,2260,2280 (share with 1x SATA)
Edge Connector
(Rear I/O)
1x PS/2 Keyboard
1x VGA (DB-15)
1x DP++
1x HDMI
2x COM (2 x RS232/RS422/RS485 optional; with jumper select for RI/5V/12V)
4x USB 3.0 connectors
USB3.0 have 5v/5v dual switch jumper,1 jumper to control 2 USB3.0 port
(This function does not support 5V/2A under power off mode.It’s for wake up use. )
2x USB 2.0 connectors2x RJ-45 (Gigabit LAN)
3x Audio Jack (Line in/Line-out / Mic)
On Board Headers /
Connectors
TPM 2.0 chip onboard
TPM IC: SLB9670.
Non-SMT by default (BOM optional)
1x 2*5 pins, 2.54pitch front panel header
1x 2*5 pins, 2.54pitch Digital I/O header
1x 1*3 pins, support 5V/3.3V header for 5V/3.3V DIO switch.
1x 2*5 pins, 2.54pitch front audio for (Line-out & Mic-in)
4x SATA III connector
1x 2*13 pins, 2.54pitch Parallel port box-header
2x 2*5 pins, 2.54pitch 4xUSB 2.0 ports wafer connector
4x 2*5 pins, 4 COM box-header (6 x RS-232 with jumper select for RI/5V/12V )
1x 1*4 pins , CPU PWM-Smart FAN header
1x2*6 pin, 2.54pitch COM switch header
1x2*3 pin, 2.54pitch COM switch header
1x1*3 pin, 2.54pitch clear CMOS Header
2x 1*3 pins, System DC-FAN header
1x 24 pins, ATX power connector
1x 2*4 pins , 12V power connector
1x Buzzer
Digital I/O
Supports 4-in, 4-out (5/3.3V switch by jumper, default 3.3V.)
HW Monitor
CPU/System temperature, CPU Fan speed, Voltage monitoring for VCC, 3.3, 5, 12V...
Board Size
ATX / 305 x 244 mm
Watchdog Timer
Yes (65536 segments)
Power Connector
24 pins ATX Power
Operation Temperature
0oC ~ 60oC
Storage Temperature
-20°C ~ 80°C
Relative Humidity
10% ~ 90% (non-condensing)
OS Driver Support
Windows 7 32/64bits, Windows 8.1 64bits,Windows 10 64bits
Other Features
Wake on RPL/PXE LAN boot ROM
ACPI
Power loss recovery
S3 (enable / disable by BIOS)
Eup: S5 <0.5W
RoHS Compliant
Yes

BIH11-AHB User’s Manual
Chapter 1: Introduction | 5
1
�
3 Rear Panel Connectors
COM1: Serial port Connectors (RS-232/RS422/RS485)
1 5
6 9
COM2: Serial Port Connectors (RS-232)
1 5
6 9
»COM1/2 voltage selection is controlled by JP1/ JP2 setup.
»COM1 (RS-232/422/485) selection is controlled by JSEL1 & JSEL2.
JSEL1
JSEL2
RS-232
RS-422
RS-485
1-2
RS-232
1-3
3-5
3-5
3-4
RS-422
2-4
4-6
4-6
5-6
RS-485
7-9
9-11
9-11
8-10
10-12
10-12
Note
RS-232 (Default)
RS-422*
RS-485*
Pin
Assignment
1
Carrier detect (DCD)
422 TXD-
485 DATA-
2
Received data (RXD)
422 TXD+
485 DATA+
3
Transmitted data (TXD)
422 RXD+
NC
4
Data terminal ready (DTR)
422 RXD-
NC
5
Signal ground (GND)
GND
GND
6
Data set ready (DSR)
NC
NC
7
Request to send (RTS)
NC
NC
8
Clear to send (CTS)
NC
NC
9
*RI, 5V, 12V selected by
(selected by JP1 setting)
NC
NC
Pin
Assignment
Pin
Assignment
1
DCD
2
RXD
3
TXD
4
DTR
5
GND
6
DSR
7
RTS
8
CTS
9
*RI, 5V, 12V selected by (selected by JP2 setting)

BIH11-AHB User’s Manual
6 | Chapter 1: Introduction
1.4 Motherboard Layout
»represents the 1st pin.
Note

BIH11-AHB User’s Manual
Chapter 2: Hardware installation | 7
Chapter 2: Hardware installation
2.1 Central Processing Unit (CPU)
Step 1: Locate the CPU socket on the motherboard
»Remove Pin Cap before installation, and make good preservation for future use. When the CPU is
removed, cover the Pin Cap on the empty socket to ensure pin legs won’t be damaged.
»The motherboard might equip with two different types of pin cap. Please refer below instruction to
remove the pin cap.
Step 2: Pull the socket locking lever out from the socket and then raise the lever up.
Step 3: Remove the Pin Cap.
Note

BIH11-AHB User’s Manual
8 | Chapter 2: Hardware installation
Step 4: Hold processor with your thumb and index fingers, oriented as shown. Align the
notches with the socket. Lower the processor straight down without tilting or sliding the
processor in the socket.
»Ensure that you install the correct CPU designed for LGA1151 socket.
»The CPU fits only in one correct orientation. Do not force the CPU into the socket to prevent
damaging the CPU.
Step 5: Hold the CPU down firmly, and then lower the lever to locked position to complete the
installation.
Note

BIH11-AHB User’s Manual
Chapter 2: Hardware installation | 9
2.2 Install a Heatsink
Step 1: Place the CPU fan assembly on top of the installed CPU and make sure that the four
fasteners match the motherboard holes. Orient the assembly and make the fan cable is closest
to the CPU fan connector.
Step 2: Press down two fasteners at one time in a diagonal sequence to secure the CPU fan
assembly in place. Ensure that all four fasteners are secured.
»Do not forget to connect the CPU fan connector.
»For proper installation, please kindly refer to the installation manual of your CPU heatsink.
Note

BIH11-AHB User’s Manual
10 | Chapter 2: Hardware installation
Pin
Assignment
1
GND
2
12V
3
FAN_TACH
2.3 Connect Cooling Fans
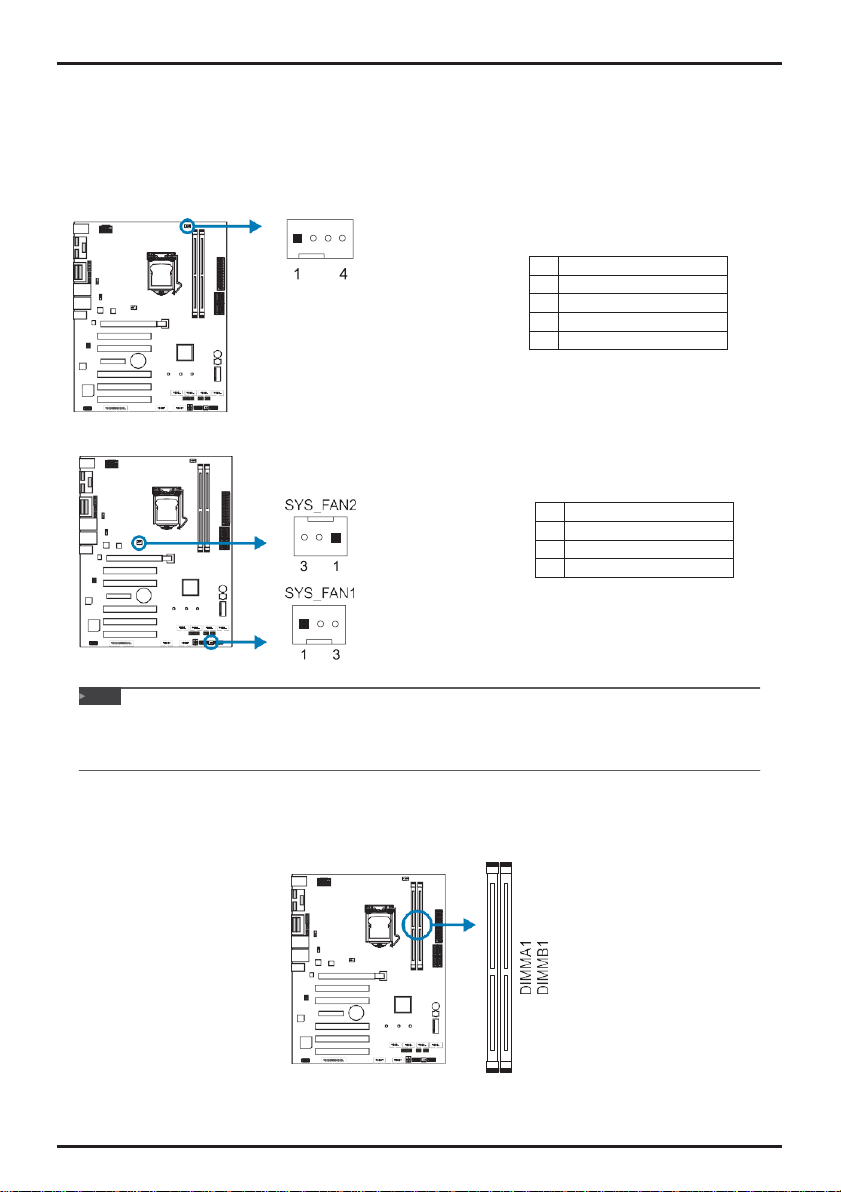
These fan headers support cooling-fans built in the computer. The fan cable and connector
may be different according to the fan manufacturer. Connect the fan cable to the connector
while matching the black wire to pin#1.
CPU_FAN1: CPU Fan Header
Pin
Assignment
1
GND
2
FANPVOUT
3
FAN_TACH
4
FANPWMOUT
SYS_FAN1/2: System Fan Header
»System Fan Headers support 3-pin head connectors. When connecting with wires onto connectors,
please note that the red wire is the positive and should be connected to pin#2, and the black wire is
Ground and should be connected to GND.
2.4 Installing System Memory
DDR4 Modules
Note
Table of contents