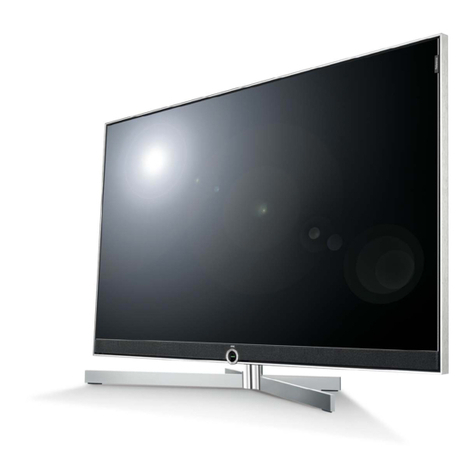
Beko 22WLP530HID User manual

INTEGRATED DIGITAL HD READY COLOUR TELEVISIONS
Operating Instructions
22WLP530HID

TABLE OF CONTENTS
Contents
1 1.Important Information ..................................................... 1
1.1 Cleaning the screen and cabinet... .......................................................1
1.2 Disposing of your TV at the end of service life... ...................................1
1.3-Superior features of your integrated digital television ............................1
1.4-Receiving digital broadcasting channels ..............................................1
1.5-Changing the plug................................................................................1
2 2.Features of your new television ..................................... 2
2.1-Special Features ..................................................................................2
3 3.Important Safety Instructions ......................................... 3
4 4.Start .................................................................................. 6
4.1-Aerial connection .................................................................................6
4.2-Powering on your TV and the initial use ...............................................6
4.3-Batteries ..............................................................................................6
5 5.Your new television ......................................................... 7
5.1-TV Control Panel .................................................................................7
5.2-External Connections ..........................................................................7
5.3-Remote Control ...................................................................................8
6 6.Performing the initial power-on settings ...................... 9
6.1-TV controls ..........................................................................................9
6.2-Turning on the TV and Setting the Channels ........................................10
6.3-Performing Digital Tunings ...................................................................10
6.4-Performing Analogue Tunings ..............................................................13
7 7.Settings of Your New Television .................................... 17
7.1- Sound Menu Settings .........................................................................17
7.2-Picture Menu Settings .........................................................................17
7.3-Features Menu Settings .......................................................................19
8 8.Teletext ............................................................................. 20
9 9.External Equipment Connections: ................................. 22
10.Help and tips .................................................................. 25
11 11.Technical specifications chart ..................................... 26
12.Main UK Transmitter Stations........................................27
13.Guarantee and Service............................................. 28-29

1
1 Important Information
LCD panels are produced with state-of-the-art technology. However, there may be black or
lit spots on the screen under certain circumstances. That does not mean that the product is
faulty.
1.1 Cleaning the screen and cabinet...
After powering off, wipe the screen and the cabinet clean with a soft and dry cloth. We
recommend that you do not use patented polishes or solvents to clean the screen or cabinet
since they may cause damage.
1.2 Disposing of your TV at the end of service life...
The cold cathode fluorescent lamp found in your LCD screen contains a very small amount of
mercury. Once your TV set has completed its physical life, please dispose of it in accordance
with local government regulations or leave it at a recycling centre.
1.3-Superior features of your integrated digital television
This television can receive and process all analogue and digital broadcastings. This television
set has an integrated digital and analogue receiver. The digital receiver unit processes the
signals coming from digital transmitters and can convert them into superior sound and image
qualities. TV Guide (valid for digital broadcastings only) informs you about changes in the
program list briefly and provides program lists of all digital broadcastings for a number of
forthcoming days. You can display detailed information about each program by pressing a
single button if this feature is supported by the broadcasting enterprise. This television has a
comprehensive and user friendly menu configuration.
1.4-Receiving digital broadcasting channels
You will need outdoor or indoor (passive or active indoor antennas used together with its own
power cord) antennas to receive digital broadcastings. Contrary to the analog broadcastings,
all digital broadcastings may not have their own transmission frequency. Instead, various
digital broadcasting channels are gathered in regional or national groups called bouquets.
You can find current transmission data from teletexts of various broadcasting enterprises or
from TV guide or from the internet.
IMPORTANT
The wires in the mains lead are coloured
in accordance with the following code:
Blue - Neutral
Brown - Live
As the colours in the mains lead of this
appliance may not correspond with
the coloured markings identifying the
terminals in your plug, proceed
as follows:
The wire which is coloured blue or
black must be connected to the
terminal which is marked with the
letter N or coloured black.
The wire which is coloured brown or red must be
connected to the terminal which is marked with the letter
L or coloured Red.
No connection is to be made to the Earth terminal of the
plug.
If a 13 Amp (BS1363) Plug is used, fit an ASTA
apporoved 5 A fuse
If your product is fitted with a moulded plug which
requires replacement please cut off and dispose of it
safely, then rewire as shown.
BLUE
(Neutral)
5 A
IMPORTANT
The wires in the mains lead are coloured
in accordance with the following code:
Blue - Neutral
Brown - Live
Yellow/Green - Earth
As the colours in the mains lead of this
appliance may not correspond with the coloured
markings identifying the terminals in your plug,
proceed as follows:
The wire which is coloured green and yellow must
be connected to the terminal which is marked with
the letter E, or by the earth symbol, or coloured
green or green and yellow.
The wire which is coloured blue or black must be
connected to the terminal which is marked with the
letter N or coloured Black.
The wire which is coloured brown or red must be
connected to the terminal which is marked with the
letter L or coloured Red.
If a 13 Amp (BS1363) Plug is used fit an ASTA
approved 5 Amp fuse.
If your product is fitted with a moulded plug which
requires replacement please cut off and dispose of it
safely, then rewire as shown.
5 A
1.5-Changing the plug
The supplied mains cable already has a mains plug fitted, however should you need to
replace it at any time please refer to the approprıatte wiring information below for your
particular cable.

2
2 Features of your new television
We would like this product, which has been manufactured in modern facilities in accordance
with total quality principles, to offer you the best performance. Therefore, we would like you to
read this entire manual carefully before you use your product and keep it for future reference.
2.1-Special Features
• HDMI connection
• HD-Ready
• HDCP feature
• SCART connection
• Audio/Video PHONO inputs
• PC connection
• Component connection through VGA
• S-VHS connection through scart
• Low energy consumption
• Available for cable broadcasts
• Automatic switch-off feature that can be programmed between 15 and 120 minutes
• 10 pages Teletext
• Fasttext
• Toptext (*)
• Digital teletext
• EPG (Electronic Program Guide) feature
• CI slot input
• Software upgrade by air transmission
• 6 Digital Favorite channel lists
• MHEG 1.06
• Automatic new channel search feature
• Sharpness feature in Color Transitions (CTI)
• Sharpness feature and picture resolution (LTI) in black-white transitions
• A clearer Picture made possible with a Digital Comb Filter
• DNR Noise reduction
• Manual fine tuning
• 100 Analog Program memory
• 1000 Digital Program memory
• Returning to the last viewed program by single button (SWAP)
• Infrared remote control equipped with all functions
• Feature of viewing the NTSC broadcast via scart input
• Easy performance of the processes with the advanced menu system
• Panel Lock
• 4:3, 16:9, 14:9 Subtitle, Letterbox, Auto picture formats
• Automatic broadcast detecting system by means of WSS feature
• Renaming, deleting, skipping and relocating the programs.
HDMI, the HDMI logo and High-Definition Multimedia Interface are trademarks
or registered trademarks of HDMI Licensing LLC.
(*): These features are optional and they are not available on all models.

3
MANUAL
3
This symbol is used to warn the user about the “dangerous voltage” contained
inside the TV that may create a risk of electrical shock.
This symbol is used to remind the user important usage and service instructions
supplied with the TV
Important Safety Instructions
• Never install the TV into closed places
such as bookcases or cabinets unless
adequate ventilation is provided.
1) Please READ the operating
instructions before using
the TV for the first time.
2) Please observe the
instructions contained in
the Operating Instructions.
3) Please consider all warnings.
4) MAKE SURE that all
power connections
(extension cables and the
connections between the
TV components) have been
made properly and in accordance with
the manufacturer’s instructions. Before
making or changing the connections,
power off the TV and unplug the mains
connection plug.
5) If you have any doubts regarding the
installation, operation or safety of the
device, please REFER to the retailer.
6) BE CAREFUL with glass panels and
covers on the TV. The screen glass
may break and cause serious injuries if
something hits it.
7) To ensure adequate ventilation, please
leave a clearance area of at least 10 cm
around the television. This clearance
prevents the TV from overheating and
consequently causing damage.
• Using the TV in dusty environments
should also be avoided.
• Never block the slots and openings by
placing the TV on a bed, sofa, pillow or
other similar surfaces.
8) DO NOT COVER the
ventilation openings
of the TV with items
such as newspapers,
table-clothes, curtains,
etc. Overheating causes damage and
shortens the service life of the TV
9) Your TV may be damaged
if you place it under direct
sunshine or close to a
heater. Please abstain
from using the TV in very
hot or humid locations or in places where
the temperature is likely to decrease
below 5°C (41°F). DO NOT PLACE on
or near the TV any hot objects or items
with open flame such as candles or any
night lamps. The high temperature can
melt plastic parts and cause a fire.

4
10) Never operate your
TV close to water.
Operating your TV,
for example, near a
bathtub, washbasin,
wet basement and swimming pool can
cause fire or electric shock.
• Do not allow your
TV to get wet. Never
pour any liquids
onto the TV. Do not
operate your TV if
any solid or liquid substance enters into
it. This can cause electric shock and your
TV may be damaged. Have it checked
immediately by qualified personnel.
• Keep open flame
sources (such as
candles) away from
your TV in order to
avoid risk of fire.
11) DO NOT USE(MODEL
DEPENDANT)
headphones at extremely
high volume levels
since this may cause
permanent loss of hearing.
12) Operate your TV only
in the 230 V 50Hz
voltage range. Use the
mains lead supplied
with the product. If
your TV is a grounded
(Class I) product, then it must be
connected to an earthed socket.
• The socket into which you plug in the
AC power cable must be within easy
reach.
• Unplug the TV in order to disconnect
it from mains power.
13) Make sure that the mains
lead is not stepped on and
that there is no bending
at the plug sections, plug
heads and TV output point.
14) Use only the accessories specified by
the manufacturer.
15) Use only, brackets or
stands specified by the
manufacturer or sold along
with the TV. Place your TV
on a level surface.
16) Unplug the mains lead cable
during thunderstorms or
when you will not use your
TV for a long period of time.
17) Consult authorised
service personnel for
service requirements.
Never attempt to
repair the TV yourself.
Opening the cabinet
can expose you to dangerous voltages
or other hazardous situations. Service is
required in situations such as damage to
the mains lead or its plug, water spills or
substances falling into the TV, the TV is
subjected to rain or moisture, it does not
operate normally or it is dropped.

5
Note 1: This is a Class A product. During
operation, the device can cause radio
interference. In this case the user may have
to remedy this. Please contact your specialist
dealer.
Note 2: Electromagnetic fields can cause
temporary performance degradation. This
can be distinguished as noise in the image.
Note 3: Tighten the screws that are used
to connect the wall mount kit by 1 Nm
(10kgfcm) maximum.
22) For stand fitting and removal please refer
to loose leaf sheet inside tv carton.
18) Wipe the TV cabinet
clean with a soft and dry
cloth. Wipe dust from the
screen gently with a soft
cloth. Stubborn stains
can be cleaned with a
cloth slightly moistened
with soap and lukewarm water. Never
use solvents such as thinner or gasoline
for cleaning. Unplug the mains lead
from the socket when cleaning the TV.
Otherwise, there is the risk of electric
shock.
19) Do not dispose of the
batteries in a fire.
• Do not short circuit,
dismantle, overheat
or burn the batteries.
There is the risk of
explosion if the batteries are not
replaced correctly. Replace only
with the same or equivalent type
batteries.
20) Disposing of the exhausted
batteries:
• Dispose of the exhausted
batteries in accordance with
the local laws and regulations in order to
protect our environment.
21) Do not dispose of your TV
with regular household waste.
Observe local laws and
regulations for disposal.

6
4 Start
Remove your television carefully from its
box. You can keep the packaging of your
television to use in future.
Contents of the box
Power cable (*)
Remote control
2 batteries
Note: The Scart, VGA (*) and PHONO cables
are not supplied with the device.
(*) These features are optional and may not
be available on all models.
4.1-Aerial connection
If you use a 75 Ohm coaxial cable (round
cable) as an antenna cable, connect the
antenna plug directly to the antenna input
located on the TV.
Motorized vehicles, energy lines and
telecommunication lines affect your antenna.
Therefore, be careful to install your antenna
away from these and metal surface in such
a way that it shall not swing. Do not make
your antenna cable longer than required
and do not coil it. Make sure that it is not
crimped passing through a window or door.
Your antenna and cable might be affected
by natural phenomena such as rain, wind,
smoke and humidity over time. Periodically
check your antenna and equipment.
4.2-Powering on your TV and
the initial use
1. Insert the power cable into the appropriate
power supply input located on the back
panel of the LCD TV.
2. Insert the plug of the mains lead , supplied
with the device into the mains socket.
Note 1: Your TV will switch to the stand-by
mode in five minutes if there is no broadcast
signal from aerial.
3. To power on your television, press
any numerical key or P+ or P- keys
on the remote control.
Note: If you are not going to use your
television for a long time, unplug its power
cable from the socket.
Initial power on and performing
settings
To set up your television, read the sections
on the TV controls and making the channel
settings.
4.3-Batteries
Open the lid of the battery compartment
and make sure that you have placed the
batteries in the correct direction. For this
remote control, UM-4, IEC R03 or AAA 1.5 V
batteries are suitable.
Do not throw your old batteries into the fire,
discard them in a dedicated waste area for
this purpose.
Do not mix used batteries with new ones or
different types of batteries together.
The performance of the remote control will
be reduced at a distance of 8 meters from or
at an angle of 30 degrees beyond the centre
of the TV.

7
5 Your new television
5.1-TV Control Panel
or or
Program Up/Down button
Power / Standby button
Volume Up/Down button
Menu/Source button
Stand by indicator
Bright light: TV is in Stand-by
Dimmed light: TV is On
No light: Power Cable is not connected
5.2-External Connections
1-Power input
2-Aerial input
3- Scart input
4- VGA (PC/YPbPr connection input)
5- PC/Comp audio input
6- Audio input L
7- Audio input R
8- Video input
9- HDMI input
10- CI Slot Input
Important Note:
Note 1: RGB input via Scart offers the best picture quality.
Note 2: Above drawing for external connections is representational. Their order and places
on your TV may be different.
Please see Technical Specifications Table on page 26 for the available external connections
on your television.
&& &
& &

8
5.3-Remote Control
Stand-by mode On/Off button
Temporary sound mute (Mute) button
Source menu button
Picture Format selection button
Subtitle selection button (D)
Sound selection button (D)
Numeric buttons
Favorite channel selection button (D)
Page Stop button in Txt mode (Hold)
EPG selection button (D)
Question/Answer button in Txt mode (Reveal)
Information button
Index page button in Txt mode
MENU button
Exit menu button
Return to previous menu button
Up movement button (Menu)
Next page selection button in Txt mode
Down movement button (Menu)
Previous page selection button in Txt mode
Right / Left movement buttons (Menu)
Menu selection confirm
Volume down button
Volume up button
Program forward selection button
Program backward selection button
Red teletext button
Start Digital Teletext
Green teletext button
Yellow teletext button
Blue teletext button
TV/Teletext selection button
Teletext page enlarge button (Double)
Picture Mode selection button
Page update button in Txt mode (Update)
Last viewed program selection button
Sub page button in Txt mode (Sub Page)
Note: In the analog mode when no menu is
open on the screen, Up/Down movement
buttons function as program forward/
backward buttons, and Left/Right
movement buttons perform Volume up/
down functions. (D) : Digital Mode Only
Table of contents
Other Beko TV manuals

Beko
Beko K1 CHASSIS User manual

Beko
Beko 42BLE5520BN User manual

Beko
Beko B32K 580 User manual

Beko
Beko 32WLA530HID User manual

Beko
Beko 28C723IDW User manual

Beko
Beko B32 D 560 B Reference guide

Beko
Beko E1 CHASSIS User manual

Beko
Beko B65 Q 990 A User manual

Beko
Beko B55 D 986 S User manual

Beko
Beko P7 User manual

Beko
Beko INTEGRATED DIGITAL HD READY COLOUR TELEVISIONS... User manual

Beko
Beko B43L 8860 5S User manual

Beko
Beko B50 D 986 S User manual

Beko
Beko B49L 8840 User manual

Beko
Beko 26WLB520HD User manual

Beko
Beko 32WLA520HD User manual

Beko
Beko B55 Q 990 A User manual

Beko
Beko E1 CHASSIS User manual

Beko
Beko B24L 5845 4B User manual

Beko
Beko C7 Series User manual