Avsl PAR56 HIGH POWER 154.032UK User manual
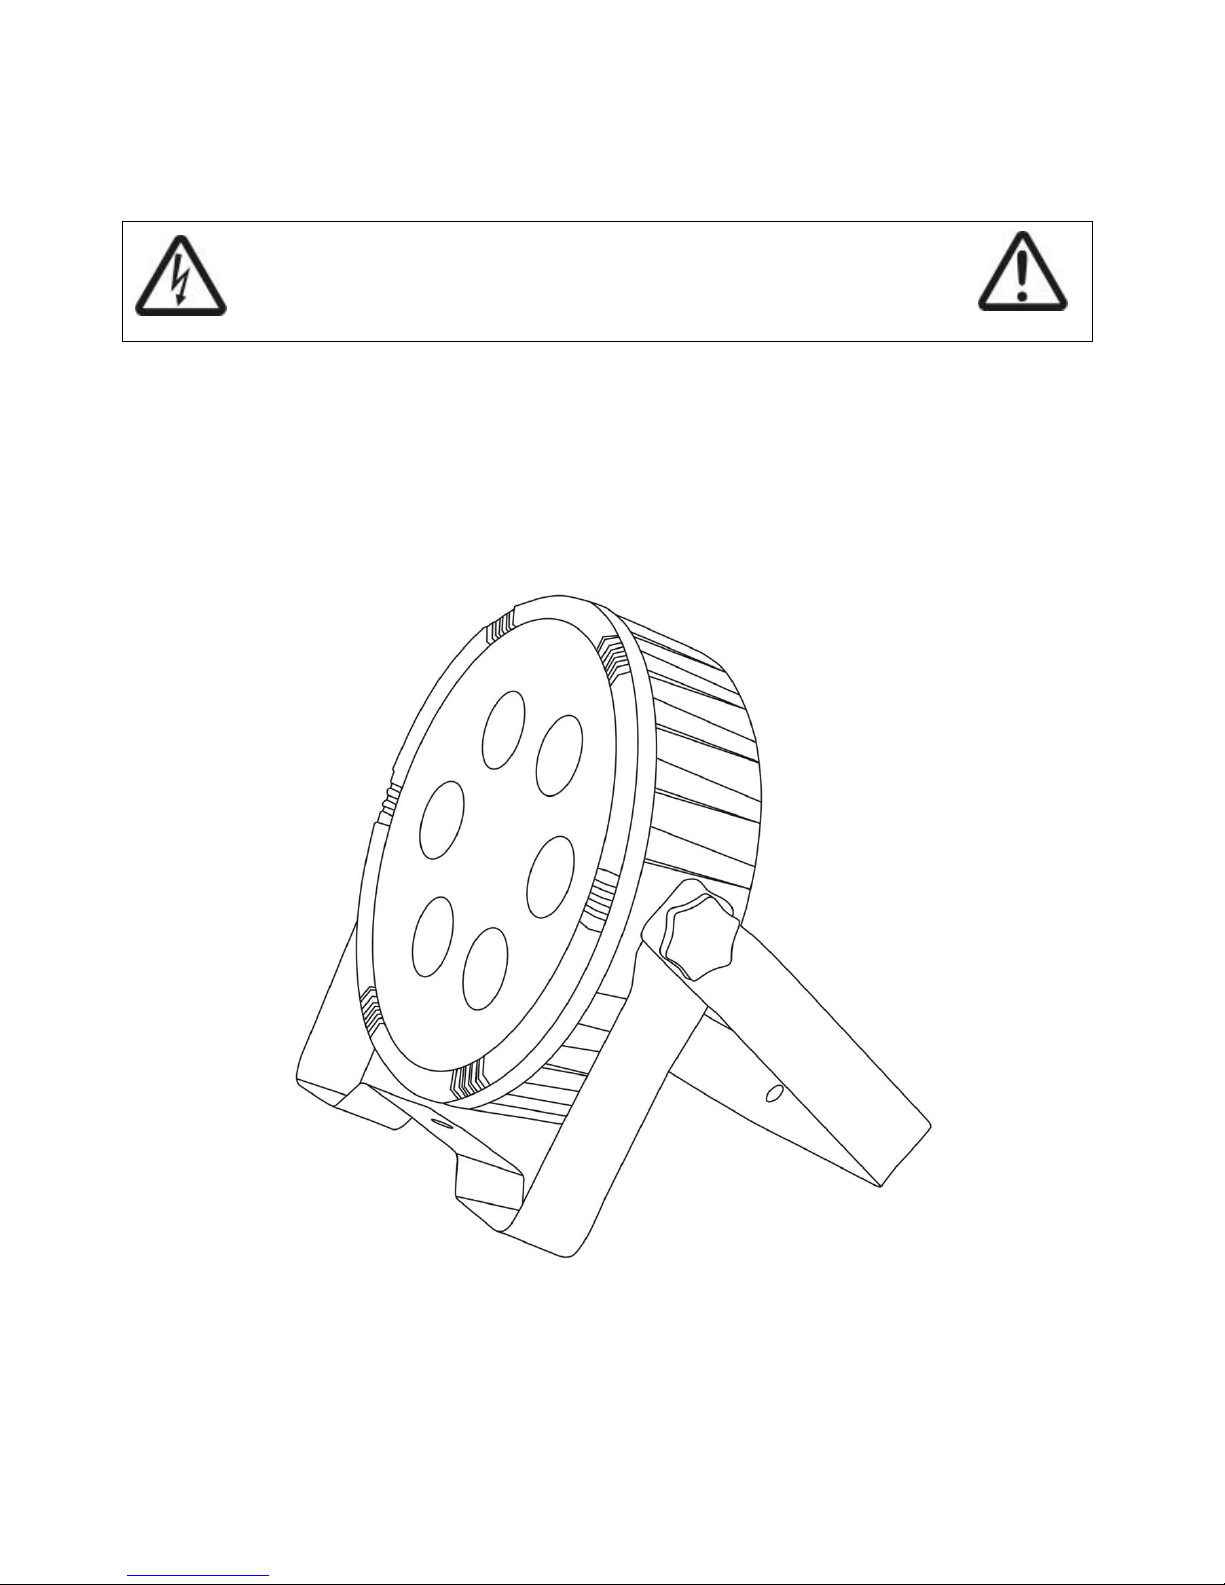
PAR56 HIGH POWER 6-in-1 LED PLASTIC PAR CAN
Item refs: 154.032UK
User Manual
Please do not open cover as it contains high voltage.
This product is not serviceable or repairable by the end user.
Please refer to qualified personnel for service or repair.
Please read this manual thoroughly before use.
Any damage caused by misuse of the product will void the warranty.
A lightweight and compact LED PAR Can fitted with 6 6-in-1 ultra bright LEDs. This unit can be controlled by auto,
sound-to-light, master/slave programs or via DMX. A great value solution for background wash illumination.
To prevent risk of fire or electric shock, do not expose unit to rain or moisture. In case of accidental spillage on the
unit, disconnect the main and allow unit to dry completely. Have unit check by professional personnel to ensure
safety before further use.
Contents
A PAR Can unit with double bracket, UK mains lead and manual. Please check all contents are complete before use,
return to dealer if anything is missing.
Always check the correct voltage and the condition of the IEC lead before connecting to a power outlet.
Always ensure any DMX leads used are in good condition with no short connections or damaged plugs.
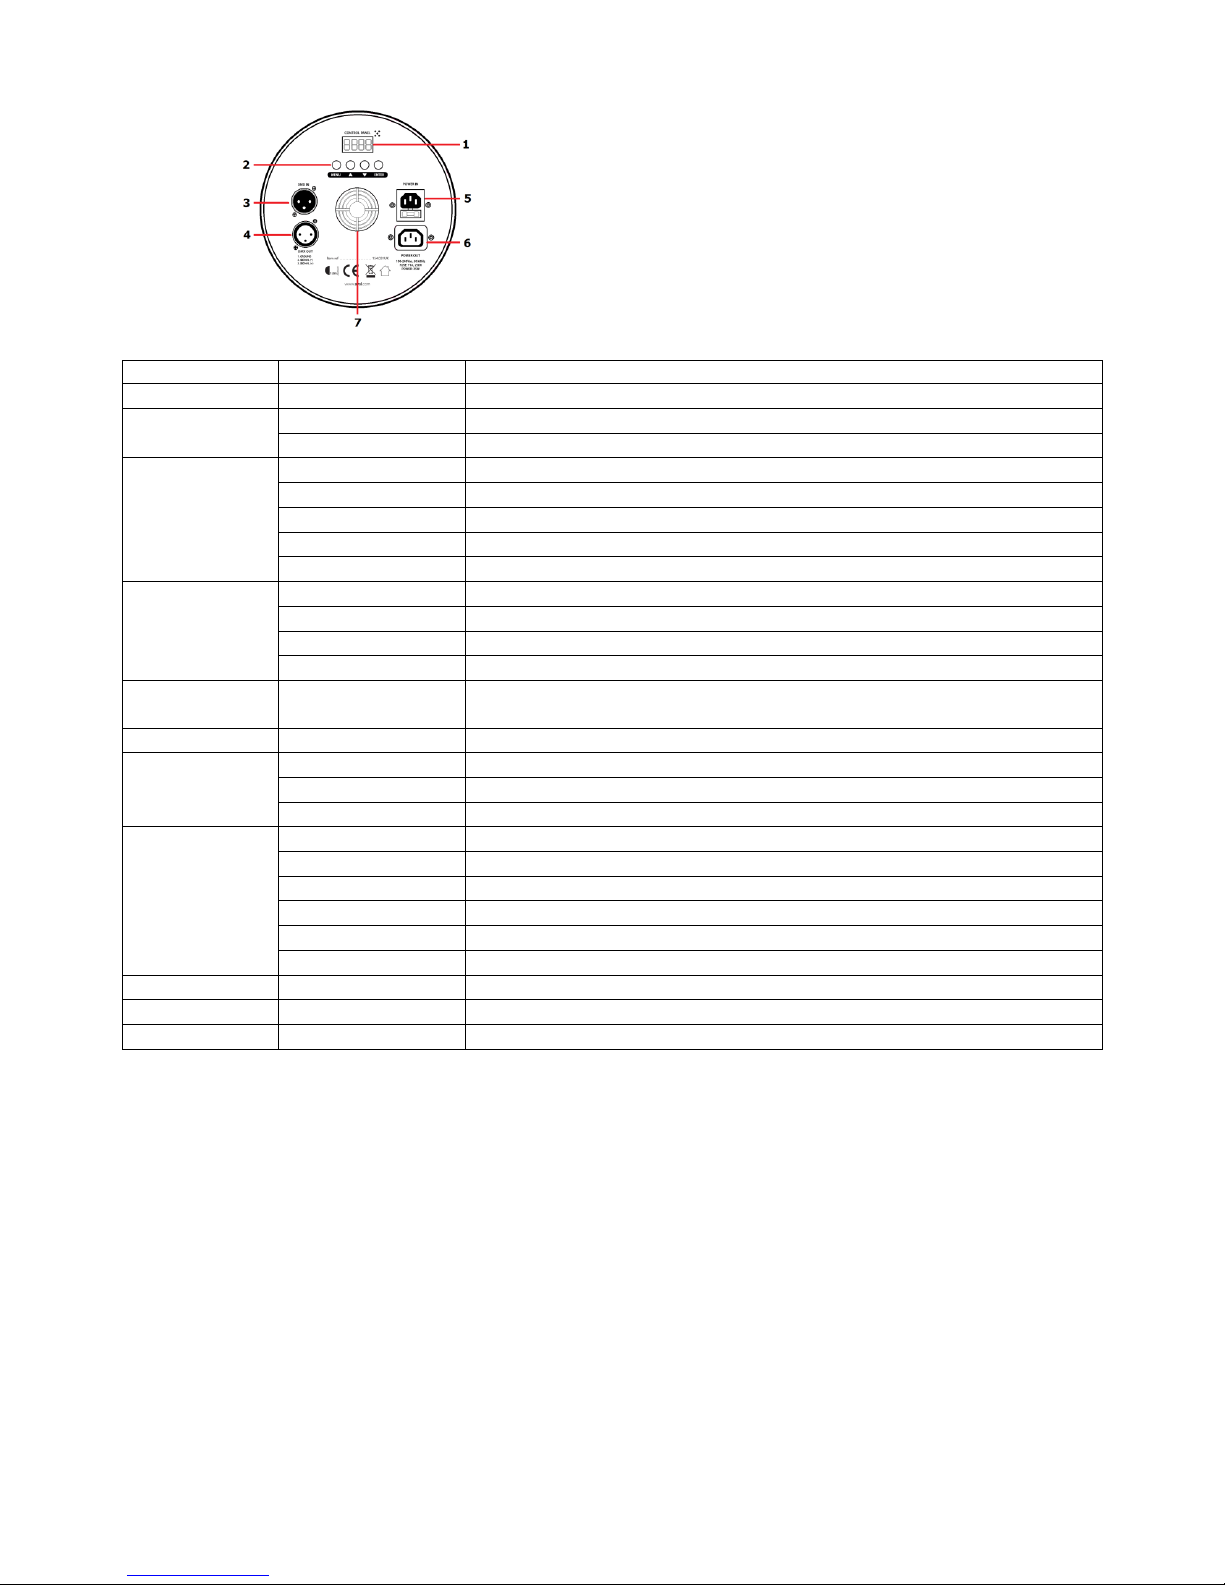
Product Layout
1. 7 segment LCD display
2. 4 button manual control
3. DMX in
4. DMX out
5. IEC power in
6. IEC power out
7. Cooling fan DO NOT OBSTRUCT
Menu
Sub Menu
Description
to
Set DMX start address 1 to 512
Set DMX control mode as 6 channels
Set DMX control mode as 10 channels
Master and slave setting, set unit as master
Master and slave setting, set unit as slave mode 1
Master and slave setting, set unit as slave mode 2
Master and slave setting, set unit as slave mode 3
Master and slave setting, set unit as slave mode 4
Preprogramed auto colour jump show
Sound activating show
Colour scroll show, Speed setting of to
16 pre-set static colour, strobe setting 1 –255, slow to fast
7 segment LCD standby setting, = display off when not use, =
constant display on
Select to toggle normal or inverted display
Balance setting for red colour for show mode
Balance setting for green colour for show mode
Balance setting for blue colour for show mode
Manual colour mixing for red value 0-255
Manual colour mixing for green value 0-255
Manual colour mixing for blue value 0-255
Manual colour mixing for white value 0-255
Manual colour mixing for amber value 0-255
Manual colour mixing for UV value 0-255
Toggle unit self-test through all functions
Display unit in use hours
Unit internal temperature display
Auto
For auto mode, use the 4 button manual control button from the back panel. Choose from the main menu
and then select for auto colour jump, press enter when is displayed to confirm setting and press and hold
menu to enter the auto colour jump mode. For auto colour scroll mode, select following option of to
for speed setting, being fastest to being slowest. Press to confirm setting and press and hold
menu button to enter colour scroll mode.
Sound-to-light
For sound-to-light mode, use the 4 button manual control button from the back panel. Choose from the main
menu and then select select to confirm setting and press enter.
Master/slave:
More than one PAR Cans can be link together via DMX connection to perform mimic or synchronised light show to
a single master unit. To set a unit as master, select from the main menu, choose from the menu, press
yes to confirm and press and hold menu to set the unit as master unit.
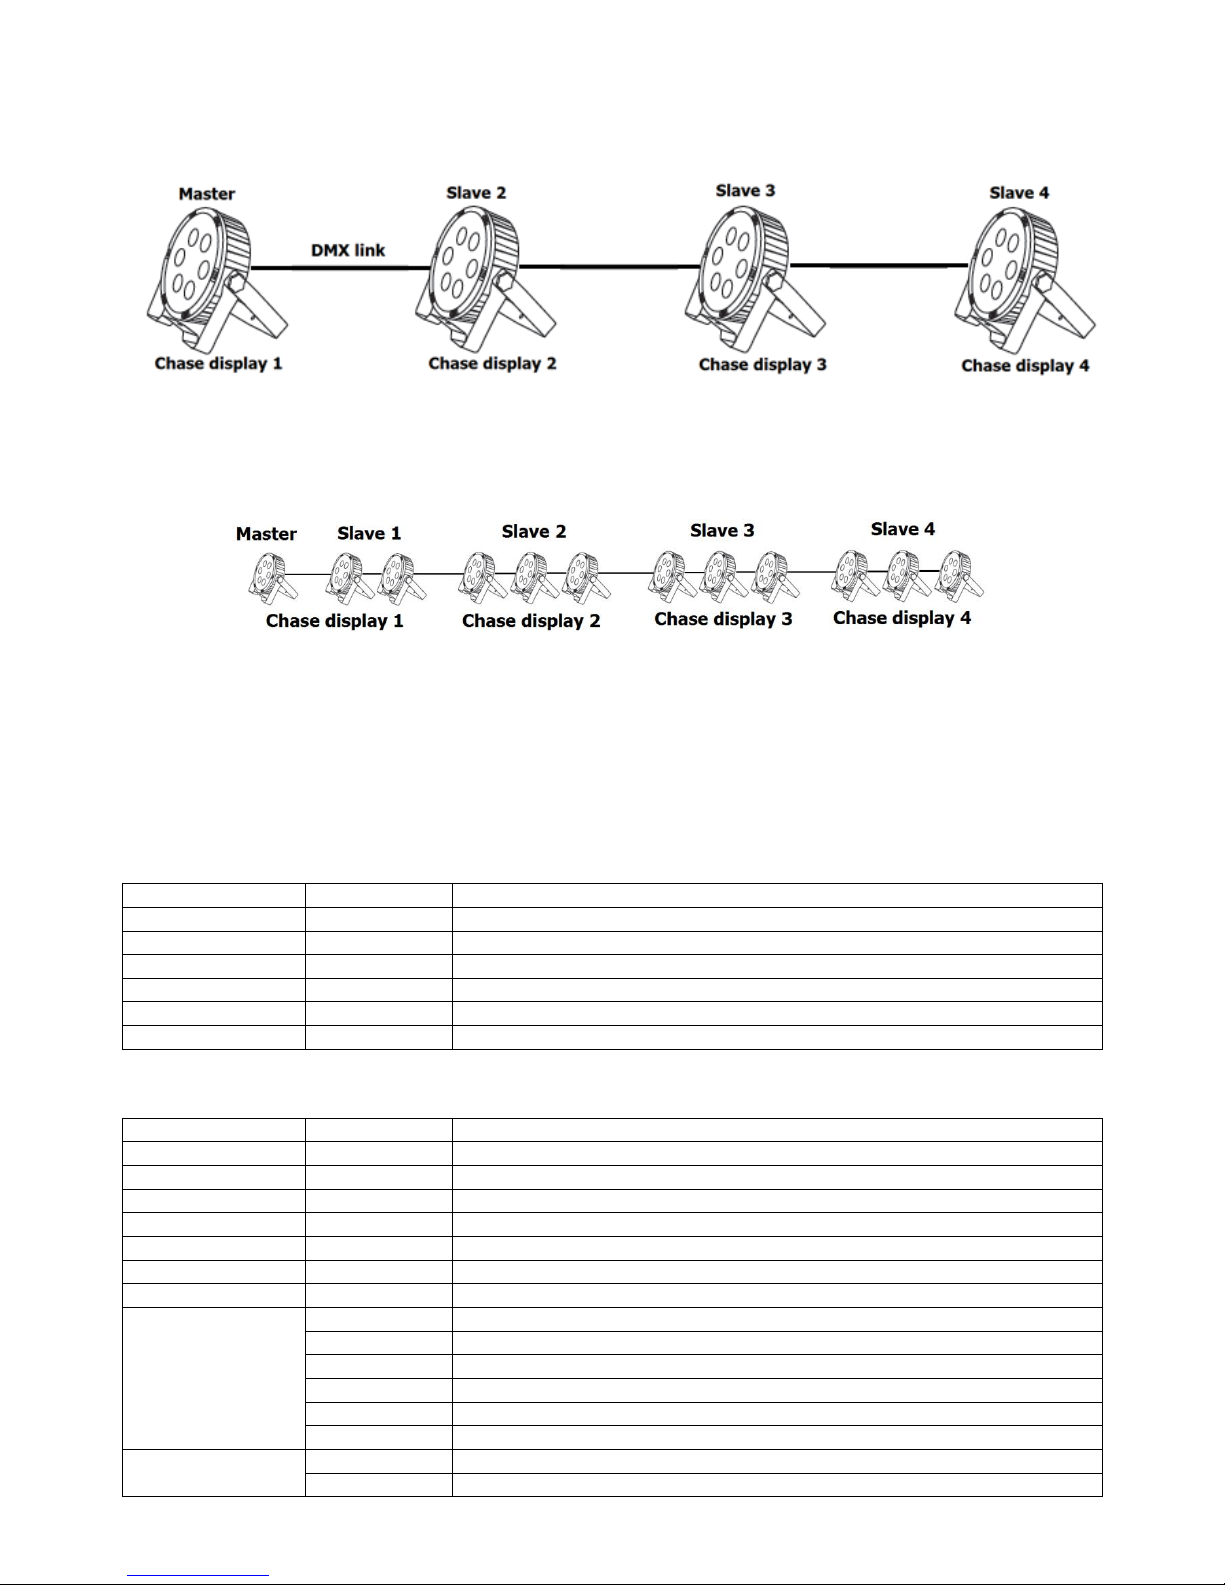
There are four different Slave modes available to set, they are to be set to address the location of the PAR Cans
allowing slave units to perform sequential chase to the main unit. will mimic exactly what the master is
displaying, is for the 2nd chase and and for the 3rd and 4th chase.
More units can be arrayed together to work as group such as below to perform the same light display or sequential
chase. Each group will display the same output in sync with the master unit:
DMX mode
To control the PAR can via DMX, simply connect the DMX signal source to the DMX in of the unit via a balanced
XLR lead. Extra fixtures can be controlled by the same DMX signal by looping through the DMX output. Ensure the
correct DMX start address is set from the option on the manual control. Two different channel modes (6 or 10)
can be set from .
DMX Value Reference
6 channel mode
DMX Channel
DMX Value
Function
Channel 1
000-255
Red LED dimmer, 0-100%
Channel 2
000-255
Green LED dimmer, 0-100%
Channel 3
000-255
Blue LED dimmer, 0-100%
Channel 1
000-255
White LED dimmer, 0-100%
Channel 2
000-255
Amber LED dimmer, 0-100%
Channel 3
000-255
Ultra violet LED dimmer, 0-100%
10 channel mode
DMX Channel
DMX Value
Function
Channel 1
000-255
Red LED dimmer, 0-100%
Channel 2
000-255
Green LED dimmer, 0-100%
Channel 3
000-255
Blue LED dimmer, 0-100%
Channel 4
000-255
White LED dimmer, 0-100%
Channel 5
000-255
Amber LED dimmer, 0-100%
Channel 6
000-255
Ultra violet LED dimmer, 0-100%
Channel 7
000-255
Master dimmer 0-100%
Channel 8
000-007
N/A
008-099
Strobe speed slow to fast
100-149
Strobe speed fast to slow
150-199
Slow fade in, fast off, speed slow to fast
200-245
Fast on, slow fade off, speed slow to fast
246-255
Strobe at highest speed
Channel 9
000-007
N/A
008-255
Auto mode
Channel 10
000-007
N/A
008-199
Speed setting for auto mode on channel 6, slow to fast
200-255
Sound activation mode
Troubleshooting
No power (mains)
Check mains voltage is correct and outlet is switched on
Check IEC lead and fuse (if fuse continually blows, refer to your dealer)
No LED display
Press any control panel button and check LED setting in menu
No light output
Check control panel mode settings (standby, slave, DMX)
Check DMX settings from controller (dimmer levels, blackout etc.)
No strobe output
Check strobe settings on control panel or from DMX controller
Unresponsive to DMX
Check that unit is in DMX mode and ensure DMX address remains lit to confirm receiving DMX signal
Check DMX controller is not set to black out
Check DMX controller is on correct fixture/page
Check master dimmer value
Check correct DMX address is set
Check DMX connection and leads
Overheating/
cutting out
Ensure that the unit is not too close to a heat source
This product is classed as Electrical or Electronic equipment and should not be disposed with other household or commercial
waste at the end of its useful life. The goods must be disposed of according to your local council guidelines.
Errors and omissions excepted.
Copyright© 2015. AVSL Group Ltd.
www.avsl.com
Table of contents
Other Avsl Floodlight manuals


