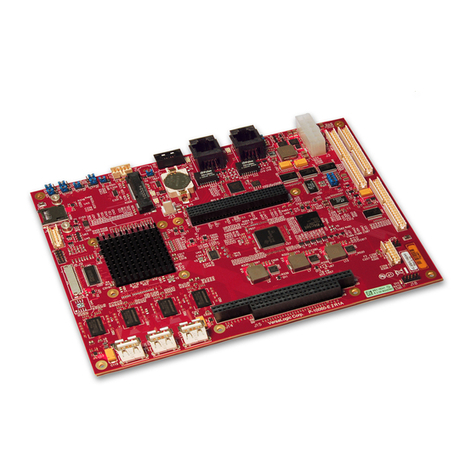
Avnet MAAXBOARD User manual

MaaXBoard
(AES-MC-SBC-IMX8M-G)
Android User Manual
V1.0

MaaXBoard-Android-UM-V1.0
http://www.avnet.me/maaxboard 2
Copyright Statement:
The MaaXBoard single board computer (partnumber: AES-MC-SBC-IMX8M-G) and its related
intellectual property are owned by Avnet Manufacturing Services.
Avnet Manufacturing Services has the copyright of this document and reserves all rights. Any part
of the document should not be modified, distributed or duplicated in any approach and form without
the written permission issued by Avnet Manufacturing Services.
Disclaimer:
Avnet Manufacturing Services does not take warranty of any kind, either expressed or implied, as
to the program source code, software and documents provided along with the products, and
including, but not limited to, warranties of fitness for a particular purpose; The entire risk as to the
quality or performance of the program is with the user of products.
Regulatory Compliance:
MaaXBoard single board computer has passed the CE & FCC certification.

MaaXBoard-Android-UM-V1.0
http://www.avnet.me/maaxboard 4
Catalog
Revision History ........................................................................................................................................... 3
Chapter 1 Introduction............................................................................................................................. 7
1.1 Package Content....................................................................................................................7
1.2 Feature List............................................................................................................................. 8
Chapter 2 Quick Start.............................................................................................................................. 9
2.1 Select Image...........................................................................................................................9
2.2 Boot from SDCard..................................................................................................................9
Chapter 3 Feature Configuration & Introduction....................................................................................11
3.1 Software version....................................................................................................................11
3.2 Developer options.................................................................................................................12
3.2.1 Enable Developer options............................................................................................. 12
3.2.2 Common Important Options..........................................................................................13
3.3 USB Debug........................................................................................................................... 14
3.3.1 Enable USB Debugging................................................................................................14
3.3.2 Connect to device .........................................................................................................15
3.3.3 Start and Connect ADB.................................................................................................16
3.3.4 Issuing ADB Commands...............................................................................................16
3.3.5 Issue shell commands...................................................................................................16
3.3.6 Install an app.................................................................................................................17
3.3.7 Uninstall an app ............................................................................................................ 17
3.3.8 Copy files to/from a device............................................................................................18
3.4 Button ...................................................................................................................................19
3.4.1 PWR..............................................................................................................................19
3.4.2 BACK & HOME............................................................................................................. 20
3.4.3 Virtual Button.................................................................................................................20
3.5 Display.................................................................................................................................. 21
3.5.1 Displayer .......................................................................................................................21
3.5.2 Display Settings ............................................................................................................22
3.6 Touch Screen........................................................................................................................ 23
3.7 Audio.....................................................................................................................................24

MaaXBoard-Android-UM-V1.0
http://www.avnet.me/maaxboard 5
3.7.1 Audio Devices ...............................................................................................................24
3.7.2 Play Audio .....................................................................................................................25
3.7.3 Volume Adjustment .......................................................................................................27
3.8 Camera................................................................................................................................. 28
3.8.1 MIPI-Camera.................................................................................................................28
3.8.2 USB Camera................................................................................................................. 29
3.9 ETH....................................................................................................................................... 30
3.10 Wi-Fi .....................................................................................................................................32
3.10.1 Enable and Disable Wi-Fi ............................................................................................. 32
3.10.2 Connect the Wi-Fi Network........................................................................................... 34
3.10.3 Delete the network........................................................................................................ 35
3.10.4 Wi-Fi Hotspot.................................................................................................................36
3.11 Bluetooth 4.2 ........................................................................................................................ 37
3.11.1 Start Bluetooth ..............................................................................................................37
3.11.2 Scan and Connect the Bluetooth Devices....................................................................39
3.12 LED....................................................................................................................................... 40
3.13 UART....................................................................................................................................40
3.13.1 UART1...........................................................................................................................40
3.13.2 UART2...........................................................................................................................41
3.14 Storage.................................................................................................................................42
3.15 USB 3.0 Interface.................................................................................................................42
3.15.1 USB Host....................................................................................................................... 42
3.15.2 USB Device...................................................................................................................44
Chapter 4 Burn or update the system Image........................................................................................ 47
4.1 Burn the System Image to SD Card under Windows OS.................................................... 47
4.2 Burn the System Image to SD Card underAndroid OS.......................................................48
4.3 Update System Image in eMMC..........................................................................................48
Chapter 5 Appendix...............................................................................................................................49
5.1 Hardware..............................................................................................................................49
5.2 Software................................................................................................................................49
5.3 Android Develop................................................................................................................... 49
Chapter 6 Technical Support and Warranty.......................................................................................... 50

MaaXBoard-Android-UM-V1.0
http://www.avnet.me/maaxboard 6
6.1 Technical Support.................................................................................................................50
6.2 Warranty Conditions...............................................................Error! Bookmark not defined.
Chapter 7 Contact Information................................................................Error! Bookmark not defined.

MaaXBoard-Android-UM-V1.0
http://www.avnet.me/maaxboard 7
Chapter 1 Introduction
1.1 Package Content
The content of software release package is subject to the actual release sources. For the file structure
and instructions, refer to the following table:
Release Folder tree
01Doc
Description
MaaXBoard-Android-ReleaseNote-Vxx.pdf
Release Note
MaaXBoard-Android-UserManual-Vxx.pdf
User Manual
MaaXBoard-Android-DevelopmentGuide-Vxx.pdf
Development Guide
01AndroidSourceCode
Description
Readme.txt/xx.tar.gz
Git Library path or Source Code package
02AndroidShipmentImage
Description
MaaXBoard-AndroidShipmentImage-Vxxx.img
Android system image file
03AndroidTools
Description
xxx.sh
Shell script to generate Android Image, etc.

MaaXBoard-Android-UM-V1.0
http://www.avnet.me/maaxboard 8
1.2 Feature List
U-Boot version: 2018.03
Kernel version: 4.14.78
Evaluation image Android P(9)
Development based on NXP i.MX 8M
Micro SD boot
1 Gigabit Ethernet (RJ45)
2 USB 3.0 can work in Host & Device mode
2 UART (TTL) include debug port
External interfaces (I2C, UART, SPI, SAI and GPIO)
WIFI & BLE 4.2
MIPI-DSI Display
HDMI Display and Audio
MIPI camera and USB Camera
Bluetooth audio
USB audio

MaaXBoard-Android-UM-V1.0
http://www.avnet.me/maaxboard 9
Chapter 2 Quick Start
The default version of MaaXBoard supports boot up from SD Card only. To burn the OOB image to SD
Card, refer to Chapter 4. For the hardware connection and accessories details, please check the QSG.
2.1 Select Image
The Android system image support HDMI and MIPI screen, before booting up the board, select different
image file according to the screen used. For example:
MIPI-DSI screen: MaaXBoard-AndroidShipmentImage-SDcard-MIPI-V1.0.2r03.img
HDMI screen: MaaXBoard-AndroidShipmentImage-SDcard-HDMI-V1.0.2r03.img
2.2 Boot from SDCard
Install the Serial Communication software (e.g. PUTTY), select the corresponding port number,
baudrate as 115200, data bits as 8, stop bits as 1, parity as none.
Connect the debug interface to PC with USB to TTL converter. Pin 6, 8 and 10 of J10 to the GND,
RXD and TXD pin of the USB to TTL converter. (optional)
Connect displayer:(Choose one from following)

MaaXBoard-Android-UM-V1.0
http://www.avnet.me/maaxboard 10
◼Connect HDMI displayer to J9, users may need to connect USB mouse and keyboard as well.
◼Connect MIPI-DSI screen to J16
Insert the SD card (with pre-burned image) into the card slot J2.
Powered the board with a 5V, 2A, Type-C interface power (to J4).
When the system start up, the screen will show the Android boot up GUI.
After the boot, the screen will display theAndroid lock screen wallpaper.
Slide up to unlock the screen and enter HOME page.
Other manuals for MAAXBOARD
2
This manual suits for next models
1
Table of contents
Other Avnet Single Board Computer manuals

Avnet
Avnet MaaXBoard Mini User manual

Avnet
Avnet MAAXBOARD User manual

Avnet
Avnet Ultra96-V1 Installation manual

Avnet
Avnet MaaXBoard Nano User manual

Avnet
Avnet MaaXBoard AES-MC-SBC-IMX8M-G Instructions for use

Avnet
Avnet Reach Further Ultra96-V2 User manual

Avnet
Avnet ZUBOARD 1CG User manual

Avnet
Avnet SMARC MSC SM2S-IMX8M User manual

Avnet
Avnet MAAXBOARD User manual

Avnet
Avnet MaaXBoard Mini User manual