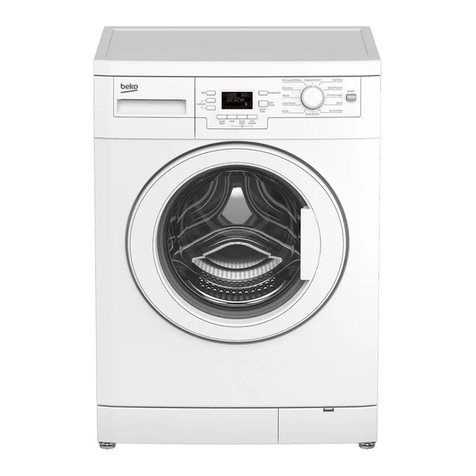
AEG LFE7C1412B User manual

USER
MANUAL
EN User Manual
Washing Machine
LFE7C1412B

CONTENTS
1. SAFETY INFORMATION.............................................................................................3
2. SAFETY INSTRUCTIONS.............................................................................................4
3. INSTALLATION............................................................................................................5
4. PRODUCT DESCRIPTION...........................................................................................9
5. CONTROL PANEL..................................................................................................... 10
6. DIAL AND BUTTONS................................................................................................12
7. PROGRAMMES .........................................................................................................15
8. BEFORE FIRST USE................................................................................................... 19
9. SETTINGS...................................................................................................................19
10. DAILY USE................................................................................................................20
11. HINTS AND TIPS..................................................................................................... 24
12. CARE AND CLEANING.......................................................................................... 26
13. TROUBLESHOOTING.............................................................................................30
14. CONSUMPTION VALUES.......................................................................................33
15. TECHNICAL DATA..................................................................................................34
16. ACCESSORIES.........................................................................................................35
FOR PERFECT RESULTS
Thank you for choosing this AEG product. We have created it to give you
impeccable performance for many years, with innovative technologies that help
make life simpler features you might not find on ordinary appliances. Please
spend a few minutes reading to get the very best from it.
Visit our website for:
Get usage advice, brochures, trouble shooter, service information:
www.aeg.com/webselfservice
Register your product for better service:
www.registeraeg.com
Buy Accessories, Consumables and Original spare parts for your appliance:
www.aeg.com/shop
CUSTOMER CARE AND SERVICE
Always use original spare parts.
When contacting our Authorised Service Centre, ensure that you have the
following data available: Model, PNC, Serial Number.
The information can be found on the rating plate.
Warning / Caution-Safety information
General information and tips
Environmental information
Subject to change without notice.
www.aeg.com
2

1. SAFETY INFORMATION
Before the installation and use of the appliance,
carefully read the supplied instructions. The
manufacturer is not responsible for any injuries or
damages that are the result of incorrect installation or
usage. Always keep the instructions in a safe and
accessible location for future reference.
1.1 Children and vulnerable people safety- Gulf
Market
•This appliance is not intended for use by persons
(including children) with reduced physical, sensory or
mental capabilities, or lack of experience and
knowledge, unless they have been given supervision
or instruction concerning use of the appliance by a
person responsible for their safety.
•Children should be supervised to ensure that they do
not play with the appliance.
•Keep all packaging away from children and dispose of
it appropriately.
•Keep detergents away from children.
•Keep children and pets away from the appliance when
the door is open.
•If the appliance has a child safety device, this should
be activated.
•Children shall not carry out cleaning and user
maintenance of the appliance without supervision.
1.2 General Safety
•Do not change the specification of this appliance.
•Do not exceed the maximum load of 10 kg (refer to
the "Programme chart" chapter).
•The operating water pressure at the water entry point
from the outlet connection must be between 0.5 bar
(0.05 MPa) and 8 bar (0.8 MPa).
•The ventilation opening in the base must not be
covered by a carpet, mat, or any floor covering.
ENGLISH 3

•The appliance must be connected to the water mains
using the new supplied hose sets, or other new hose
sets supplied by the Authorised Service Centre.
•Old hose sets must not be reused.
•If the mains power supply cable is damaged, it must
be replaced by the manufacturer, its Authorised
Service Centre or similarly qualified persons to avoid
an electrical hazard.
•Before any maintenance operation, deactivate the
appliance and disconnect the mains plug from the
socket.
•Do not use high pressure water sprays and/or steam
to clean the appliance.
•Clean the appliance with a moist cloth. Use only
neutral detergents. Do not use abrasive products,
abrasive cleaning pads, solvents or metal objects.
•Only for use in air-conditioned environments.
2. SAFETY INSTRUCTIONS
2.1 Installation
• Remove all the packaging and the
transit bolts.
• Keep the transit bolts in a safe place.
If the appliance is to be moved in
future they must be reattached to lock
the drum to prevent internal damage.
• Always take care when moving the
appliance as it is heavy. Always use
safety gloves and enclosed footwear.
• Do not install or use a damaged
appliance.
• Follow the installation instruction
supplied with the appliance.
• Do not install or use the appliance
where the temperature can be less
than 0°C or where it is exposed to the
weather.
• The floor area where the appliance is
to be installed must be flat, stable,
heat resistant and clean.
• Make sure that there is air circulation
between the appliance and the floor.
• Do not install the appliance directly
over the floor drain.
• Adjust the feet to have the necessary
space between the appliance and the
flooring.
• Do not install the appliance where the
appliance door cannot be fully
opened.
• Do not put a container to collect
possible water leakage under the
appliance. Contact the Authorised
Service Centre to ensure which
accessories can be used.
2.2 Electrical connection
• The appliance must be earthed.
• Always use a correctly installed
shockproof socket.
• Make sure that the parameters on the
rating plate are compatible with the
electrical ratings of the mains power
supply.
• Do not use multi-plug adapters and
extension cables.
• Make sure not to cause damage to
the mains plug and to the mains
cable. Should the mains cable need
to be replaced, this must be carried
out by our Authorised Service Centre.
www.aeg.com
4

• Connect the mains plug to the mains
socket only at the end of the
installation. Make sure that there is
access to the mains plug after the
installation.
• Do not touch the mains cable or the
mains plug with wet hands.
• Do not pull the mains cable to
disconnect the appliance. Always pull
the mains plug.
• This appliance complies with the
E.E.C. Directives.
2.3 Water connection
• Do not cause damage to the water
hoses.
• Before connection to new pipes,
pipes not used for a long time, where
repair work has been carried out or
new devices fitted (water meters,
etc.), let the water flow until it is clean
and clear.
• Ensure that there are no visible water
leaks during and after the first use of
the appliance.
• Do not use an extension hose if the
inlet hose is too short. Contact the
service centre for the replacement of
the inlet hose.
• You can extend the drain hose to
maximum 400 cm. Contact the service
centre for the other drain hose and
the extension.
2.4 Use
WARNING!
Risk of injury, electrical
shock, fire, burns or damage
to the appliance.
• This appliance is for household use
only.
• Follow the safety instructions on the
detergent packaging.
• Do not put flammable products or
items that are wet with flammable
products in, near or on the appliance.
• Make sure that all metal objects are
removed from the laundry.
• Do not wash fabrics which are heavily
soiled with oil, grease or other greasy
substances. It can damage rubber
parts of the washing machine.
Prewash such fabrics by hand before
loading them into the washing
machine.
• Do not touch the glass door while a
programme is in operation. The glass
can get hot.
2.5 Disposal
WARNING!
Risk of injury or suffocation.
• Disconnect the appliance from the
mains electrical and water supplies.
• Cut off the mains electrical cable
close to the appliance and dispose of
it.
• Remove the door catch to prevent
children or pets from becoming
trapped in the drum.
• Dispose of the appliance in
accordance with local requirements
for the disposal of Waste Electrical
and Electronic Equipment (WEEE).
3. INSTALLATION
WARNING!
Refer to Safety chapters.
3.1 Unpacking
WARNING!
Remove all the packaging
and the transit bolts before
installing the appliance.
WARNING!
Use the gloves.
1. Remove the external film. If
necessary, use a cutter.
ENGLISH 5

2. Remove the cardboard top and the
polystyrene packaging materials.
3. Remove the internal film.
4. Open the door and remove the
polystyrene piece from the door seal
and all the items from the drum.
5. Carefully put down the appliance
with the rear side on it.
6. Put the front polystyrene packaging
element on the floor under the
appliance.
Make sure not to
damage the hoses.
7. Remove the polystyrene protection
from the bottom.
1
2
8. Pull up the appliance in vertical
position.
9. Remove the three bolts by using the
key supplied with the appliance.
10. Pull out the plastic spacers.
www.aeg.com
6

11. Put the plastic caps, that you find in
the user manual bag, in the holes.
We recommend that you
keep the packaging and the
transit bolts for any
movement of the appliance.
3.2 Positioning and levelling
1. Install the appliance on a flat hard
floor.
Make sure that carpets do
not stop the air circulation
below the appliance.
Make sure that the
appliance does not touch
the wall or other units.
2. Loosen or tighten the feet to adjust
the level.
WARNING!
Do not put cardboard, wood
or equivalent materials
below the appliance feet to
adjust the level.
x4
The appliance must be level and stable.
A correct adjustment of the
appliance level prevents the
vibration, noise and the
movement of the appliance
when in operation.
3.3 The inlet hose
1. Connect the water inlet hose to the
back of the appliance.
2. Position it toward left or right
depending on the position of the
water tap.
20O
20O
45O
45O
Make sure that the inlet hose
is not in vertical position.
3. If necessary, loose the ring nut to set
it in the correct position.
4. Connect the water inlet hose to the
cold water tap with 3/4" thread.
ENGLISH 7

CAUTION!
Make sure that there are no
leaks from the couplings.
Do not use an extension
hose if the inlet hose is too
short. Contact the service
centre for the replacement
of the inlet hose.
3.4 Water drainage
The drain hose should stay at a height of
not less than 60 cm and not more than
100 cm.
You can extend the drain
hose to maximum 400 cm.
Contact the authorized
service centre for the other
drain hose and the
extension.
It is possible to connect the drain hose in
different ways:
1. Make a U shape with the drain hose
and put it around the plastic hose
guide.
2. On the edge of a sink - Fasten the
guide to the water tap or to the wall.
Make sure that the plastic
guide cannot move when
the appliance drains.
Make sure that the drain
hose end is not immersed in
the water. There may be a
return of dirty water into the
appliance.
3. To a stand pipe with vent-hole -
Insert the drain hose directly into a
drain pipe. Refer to the illustration.
The end of the drain hose
must always be ventilated ,
i.e. the inner diameter of the
drain pipe (min. 38 mm -
min. 1.5") must be larger
than the external diameter
of the drain hose.
4. If the end of the drain hose looks like
this (see the picture), you can push it
directly into the stand pipe.
www.aeg.com
8

5. Without the plastic hose guide, to
a sink spigot - Put the drain hose in
the spigot and tighten it with a
clamp. Refer to the illustration.
Make sure that the drain
hose makes a loop to
prevent particles going into
the appliance from the sink.
6. Position the hose directly to a built-
in drain pipe in the room wall and
tighten it with a clamp.
4. PRODUCT DESCRIPTION
4.1 Special features
Your new washing machine meets all
modern requirements for an effective
treatment of laundry with low water,
energy and detergent consumption and
respectful of fabric care.
• The ProSense technology detects
the laundry load size defining the
programme duration in 30 seconds.
The washing programme is tailored to
the laundry load and the type of fabric
without consuming more time, energy
and water than necessary.
• The steam has a quick and easy way
to refresh the clothes. The gentle
steam programmes remove odours
and reduce creases in dry fabrics so
they need little ironing.
The Plus Steam option, finishes every
cycle with gentle steam that relaxes
the fibres and reduces fabric creasing.
Ironing will be easier!
• Thanks to the Soft Plus option, the
fabric softener is uniformly spread out
in the laundry and deeply penetrates
the fabric fibres favouring a perfect
softness.
ENGLISH 9

4.2 Appliance overview
1 2 3 9
5
6
7
4
10
8
11 12
1Worktop
2Detergent dispenser
3Control panel
4Door handle
5Rating plate
6Drain pump filter
7Feet for levelling the appliance
8Drain hose
9Inlet hose connection
10 Mains cable
11 Transit bolts
12 Hose support
5. CONTROL PANEL
5.1 Control panel description
23
6
12 11 10 8
1
4
5
7
9
13
www.aeg.com10
Table of contents
Other AEG Washer manuals


AEG
AEG LAVATHERM 76375AH1 User manual

AEG
AEG LAVAMAT 54600 Operation manual

AEG
AEG L 60260 TL1 User manual

AEG
AEG LAVAMAT 62600 Operation manual

AEG
AEG LAVATHERM 5127AC User manual

AEG
AEG LFR6114O4V User manual

AEG
AEG LFR7184N2V User manual

AEG
AEG L9FEA966C User manual

AEG
AEG L 60060 TL User manual

AEG
AEG LF6ES8431A User manual


Popular Washer manuals by other brands

Tricity Bendix
Tricity Bendix AW 1000 W Operating & installation instructions

Panasonic
Panasonic NA-F60L5WRB operating instructions

GE
GE WSLP1500 Dimensions and installation information

Electrolux
Electrolux EWF1284EDW Service manual

Bosch
Bosch WAN2829BSN User manual and installation instructions

LG
LG TV2516DV3B owner's manual