AEG MRC 4143 User manual
43
50
58
66
Instruction Manual
Instrukcja obsługi/Gwarancja
Használati utasítás
Інструкція з експлуатації
Руководство по эксплуатации
73
GB Clock Radio
PL Radio z zegarem
HÓrás rádió
UA Годинник із радіо
RUS Радиочасы
UHRENRADIO
MRC 4143

Język polski
Spis treści
Przegląd elementów obłsugi.......Strona 3
Instrukcja obsługi............................Strona 50
Dane techniczne.............................Strona 56
Ogólne warunki gwarancji............Strona 56
Usuwanie..........................................Strona 57
Magyarul
Tartalom
A kezelőelemek áttekintése..........Oldal 3
Használati utasítás...........................Oldal 58
Műszaki adatok................................Oldal 64
Hulladékkezelés...............................Oldal 65
Українська
Зміст
Огляд елементів управління..... стор. 3
Інструкція з експлуатації ............ стор. 66
Технічні параметри ..................... стор. 72
Русский
Содержание
Обзор деталей прибора.............. стр. 3
Руководство по эксплуатации.... стр. 73
Технические данные ................... стр. 79
English
Contents
Overview of the Components....... Page 3
Instruction Manual............................ Page 43
Technical Data................................... Page 49
Disposal.............................................. Page 49
Inhalt
2
Overzicht van de bedieningselementen
Liste des différents éléments de commande
Indicación de los elementos de manejo
Elementi di comando
Overview of the Components
Przegląd elementów obsługi
A kezelőelemek áttekintése
Огляд елементів управління
Обзор деталей прибора
Übersicht der Bedienelemente
3
English 43
Instruction Manual
Thank you for selecting our product. We hope that you will enjoy use of the appliance.
Read the operating instructions carefully before putting the appliance into operation and
keeptheinstructionsincludingthewarranty,thereceiptand,ifpossible,theboxwiththe
internal packing. If you give this device to other people, please also pass on the operating
instructions.
Safety Instructions
Caution!
• Not suitable for children under 3. Small parts may break off and be swal-
lowed.
• Toavoidtheriskofreoranelectricshock,youshouldnotexposethedevicetorainor
moisture.Consequently,donotusethedeviceintheimmediatevicinityofwater-for
examplenearabathtub,aswimmingpoolorinadampcellar.
• Donotusethedeviceinextremelyhot,cold,dustyordampplaces.
• Onlyusethedeviceforprivateuseandtheintendedpurpose.Thisdeviceisnot
intended for commercial use.
• Ensurethatthepowercordisnotkinked,trappedorbroughtintocontactwithheat
sources.
• Ensurethatthepowercorddoesnotpresentatrippinghazard.
• Nevertouchthepowerplugorthecablewithwethands.
• Thepowercordmustalwaysbeeasilyaccessible.
• Alwaysinsertbatteriesthecorrectway.
• Donotcoverupanyventilationopeningswithobjectssuchasnewspapers,table-
cloths, curtains, etc.
• Thisapplianceshallnotbeexposedtodrippingorsplashingwaterandthatnoobject
filled with liquids such as vases shall be placed on apparatus.
• Exposedignitionsourcessuchasburningcandlesmaynotbeplacedontothedevice.
• Neveropenthehousingofthedevice.Incorrectrepairscanconstituteaconsiderable
risk for the user. Should the device become damaged, in particular the mains supply
cable,donotoperatethedeviceanylonger,butratherhaveitrepairedbyanexpert.
Check the mains supply cable regularly for damage.
• Forsafetyreasonsabrokenordamagedmainsleadmayonlybereplacedbyan
equivalent lead from the manufacturer, our customer service department or a similary
qualified person.
English
44
• Ifthedeviceisnotusedforalongerperiod,removetheplugconnectorfromtheplug
socket or take out the batteries.
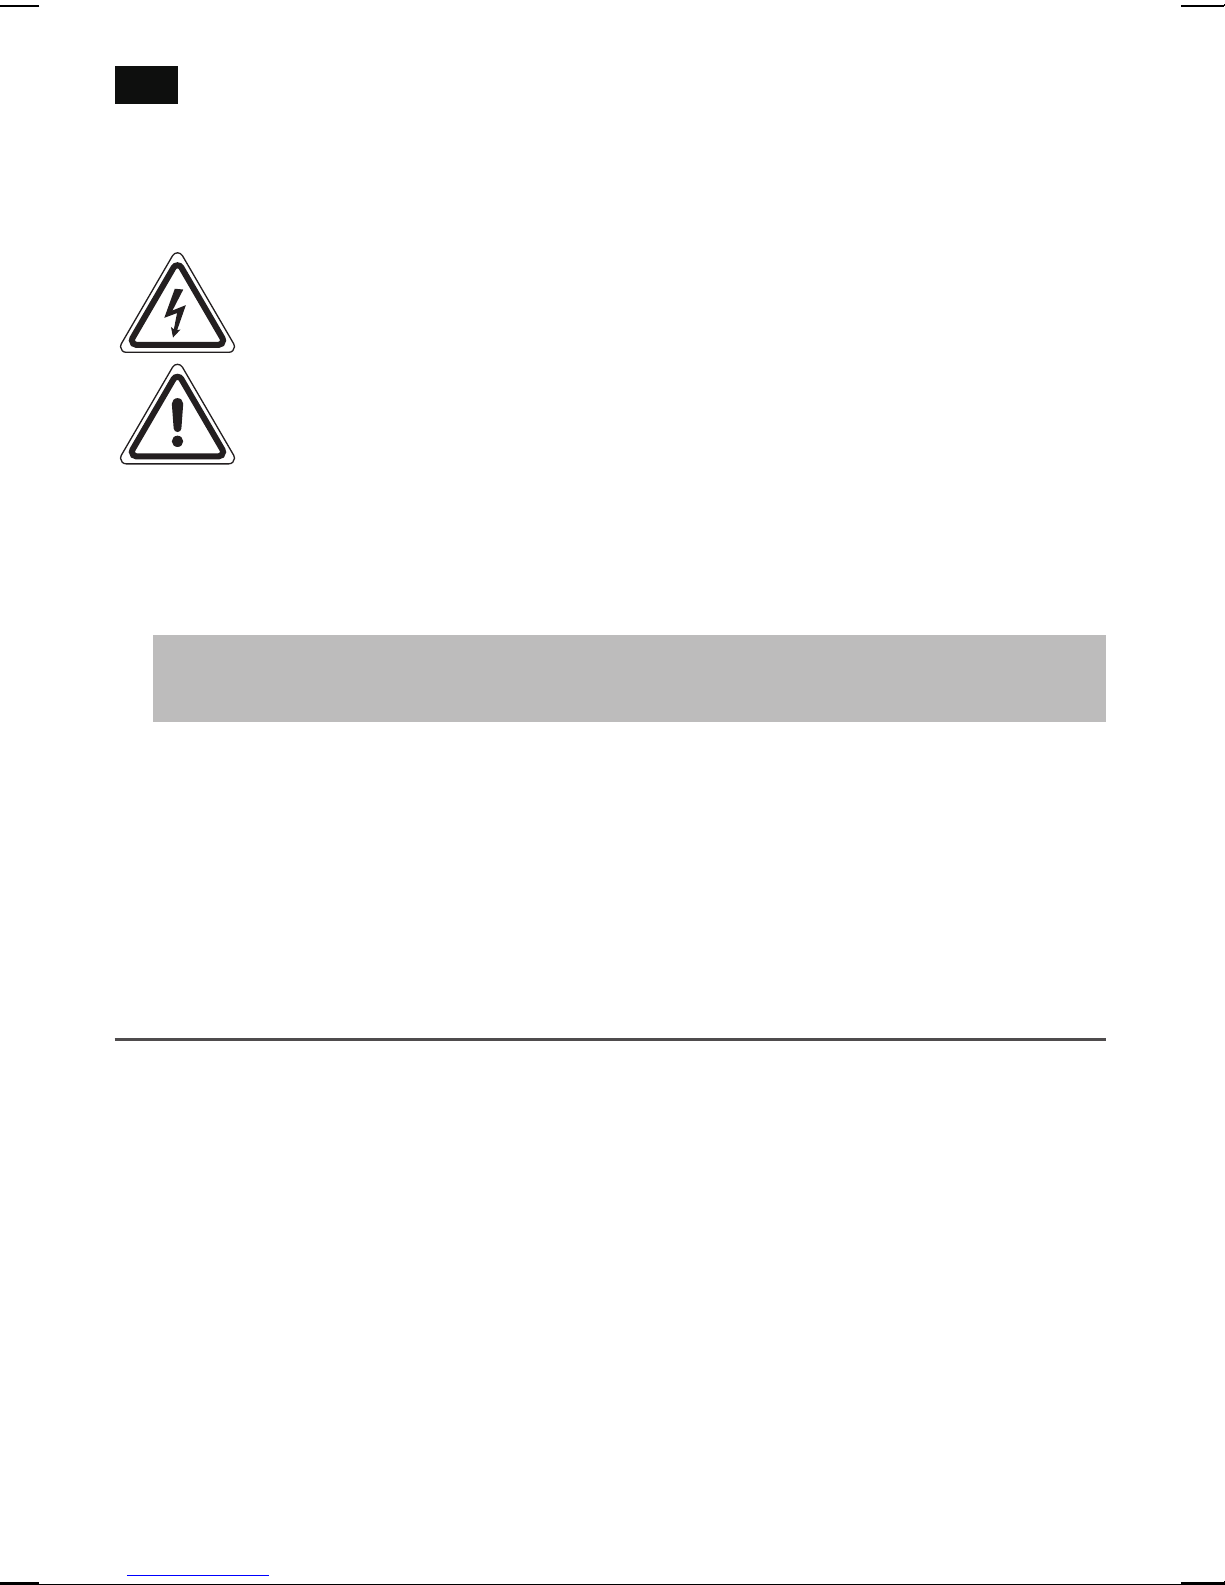
These symbols may be found on the machine and are intended to indicate the following:
The lightning symbol should advise the user of parts in the inside of the
device which carry dangerously high voltage levels.
Thesymbolwithanexclamationmarkshouldadvisetheuserofimportant
operation or maintenance instructions in the accompanying documentation.
Children and Frail Individuals
• Inordertoensureyourchildren’ssafety,pleasekeepallpackaging(plasticbags,boxes,
polystyrene etc.) out of their reach.
CAUTION:
Do not allow small children to play with the foil. There is a danger of suffocation!
• Thisdeviceisnotintendedtobeusedbyindividuals(includingchildren)whohave
restricted physical, sensory or mental abilities and/or insufficient knowledge and/or
experience,unlesstheyaresupervisedbyanindividualwhoisresponsiblefortheir
safety or have received instructions on how to use the device.
• Childrenshouldbesupervisedatalltimesinordertoensurethattheydonotplaywith
the device.
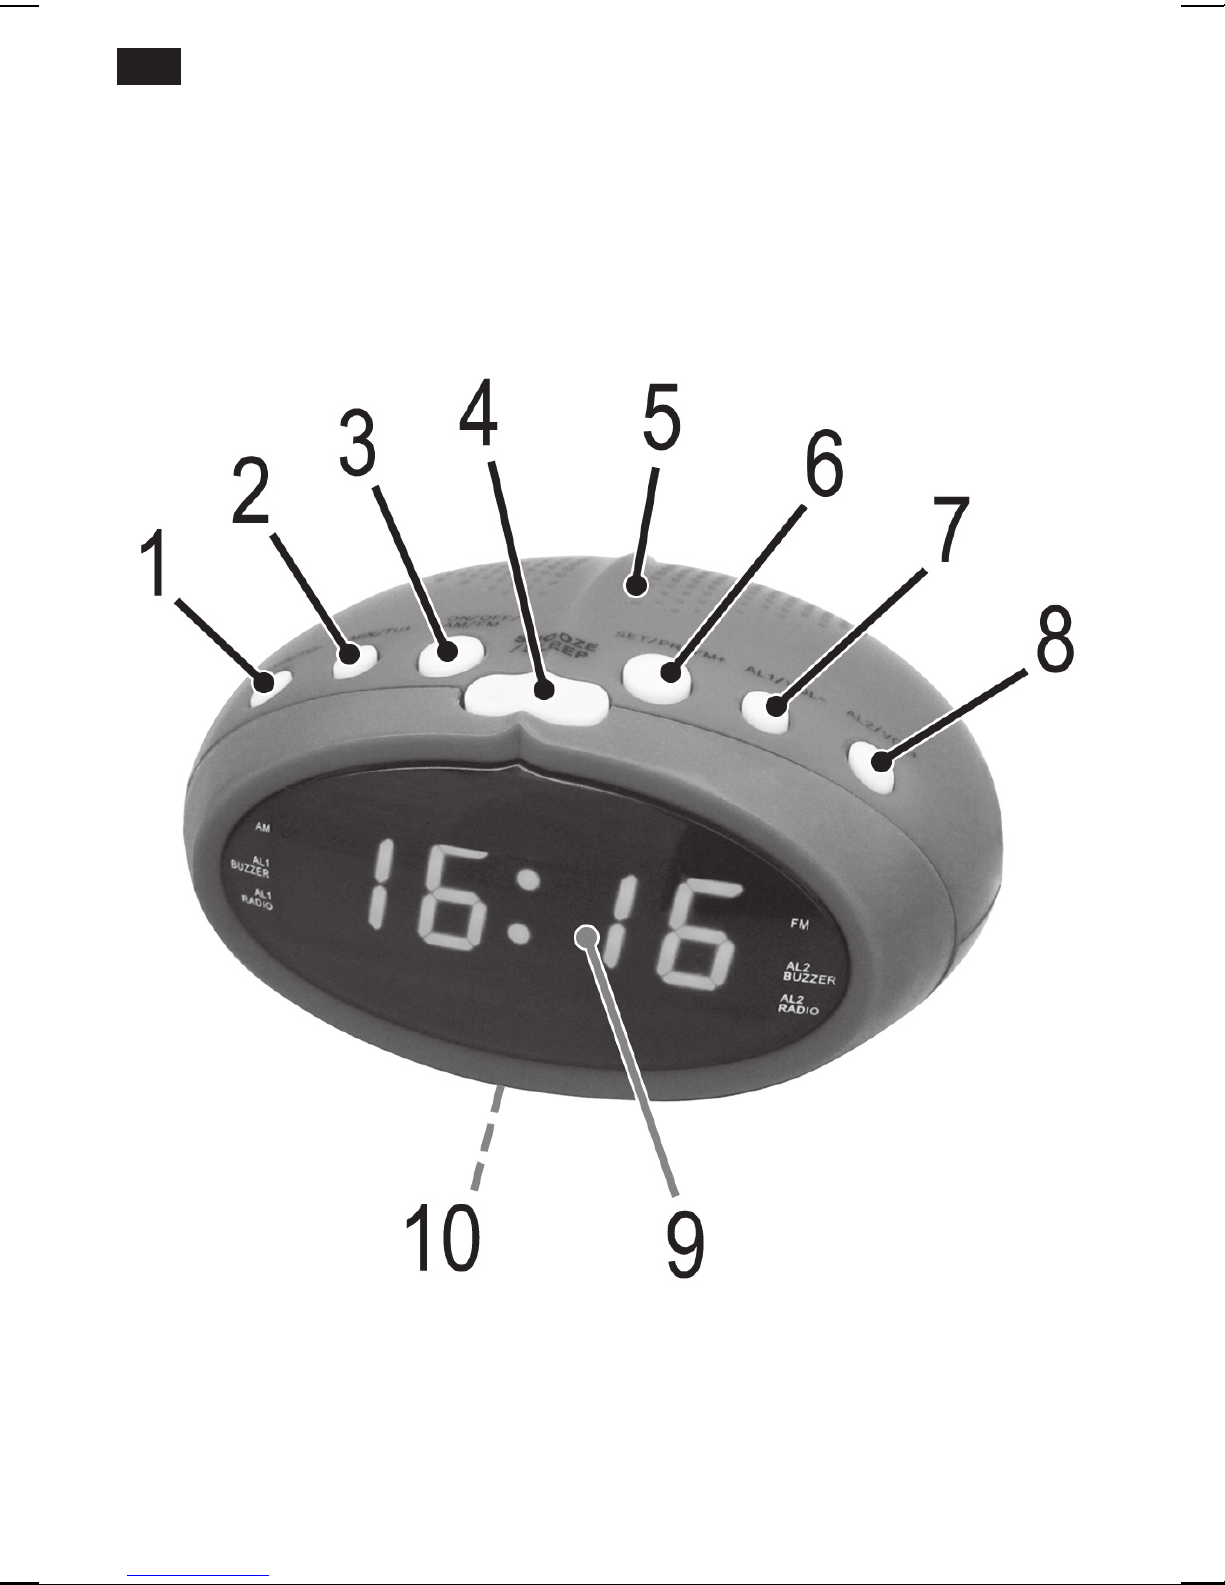
Overview of the Components
1 HOUR/TU-button
2 MIN/TU+ button
3 ON/OFF / AM/FM button
4 SNOOZE/SLEEP button
5 Speaker
6 SET/PRE/M+ button
7 AL1/VOL-button
8 AL2/VOL+ button
9 Display
10 Battery compartment (power reserve)

English 45
Rear (not shown)
Mains supply cable
Dipole antenna
Start-up of the device/Introduction
• Chooseasuitablelocationforthedevice.Suitablewouldbeadry,level,non-slip
surface.
• Sensitivesurfacessuchasthedisplayarepossiblyprotectedwithfoil.Removethese
foils.
Power supply
• Payattentiontothemainsvoltage!Thetypeplateliststhecorrectvoltageforyour
device.
• Inserttheplugintoaproperlyinstalledpowersocket.
• Ifthedeviceisnotusedforalongerperiodoftime,themainsplugmustbepulled
from the power socket.
Inserting the power reserve battery
(not supplied)
If there is a power cut or the mains plug has been removed from the power socket, the
settings will be retained if the power reserve batteries are inserted.
1. Open the battery compartment on the underside.
2. Connect a 9 V, E compound battery to the supply connection. Please ensure the cor-
rect polarity.
3. Close the battery compartment again.
CAUTION:
• Donotexposethebatteriestohightemperaturesordirectsunlight.Neverthrow
batteries into the fire. There is a danger of explosion!
• Batteriesmayleakandlosebatteryacid.Ifthedeviceisoutofuseforlongperiods,
remove the battery.
• Non-rechargeablebatteriesmaynotbecharged.
• Chargeablebatteriesmayonlybechargedunderadultsupervision.
• Chargeablebatteriesmustberemovedfromthetoybeforetheyarecharged.
• Batteriesmustbeinsertedwiththecorrectpolarity.
• Spentbatteriesmustberemovedfromthetoy.

English
46
CAUTION:
• Batteriesarenottobedisposedoftogetherwithdomesticwastes.Disposeofthe
used batteries at the relevant collection bin or at your dealer’s.
• Theterminalsmaynotbeshort-circuited.
Switching the device on/ off
Switching on: Press the ON/OFF / AM/FM button.
Switchingoff: PresstheON/OFF/AM/FMbuttonforapprox.3seconds.
Time
Setting the time (in time mode)
1. Ifthetimedisplaydoesnotash,holddowntheSET/PRE/M+buttonforapprox.
2seconds.Thetimedisplaystartstoash.
2. SetthetimewiththeHOUR/TU-andtheMIN/TU+button.
3. Confirm the setting with the SET/PRE/M+ button.
NOTE:
If you do not press any button within 3 seconds, the settings are adopted automatically.
Listening to the radio
Scanning stations
1. Press the ON/OFF / AM/FM button to switch on the radio.
2. Select the required frequency band by repeatedly pressing the ON/OFF / AM/FM but-
ton.AdotlightsuponthedisplaynexttoFM(frequencymodulation)orAM(medium
wave).
3. ControlthevolumewiththeAL2/VOL+ortheAL1/VOL-button.
4. IfyoupresstheMIN/TU+ortheHOUR/TU-buttonbriey,thedevicewillscantothe
nextradiostation.
NOTE:
If there is interference on the received station, try to improve the reception by changing
the position and by unwinding or winding the antenna.
Presetting radio stations
1. Search for a station as described in “Scanning stations”.

English 47
2. PresstheSET/PRE/M+button.Thepre-setlocationwillbedisplayed.Selectthepre-
setlocationwiththeMIN/TU+ortheHOUR/TU-button.
3. Press the SET/PRE/M+ button to store the station.
Recalling preset radio stations
Whileinradiooperation,repeatedlypresstheSET/PRE/M+button.Onepre-setlocation
after the other will be called up.
Alarm function
General information
• Youmaynowsetthealarmtimesintimemode.
• You’dliketobewokenupbyradio?Setthecorrectvolumeandthestationaheadof
time.
• Whenthealarmtimeisreached,adotashesnexttoAL1BUZZERorAL1RADIOor
AL2 BUZZER or AL2 RADIO.
Setting the Alarm Time
1. First select how you want to be woken:
• PresstheAL1/VOL-buttononcetobewokenbythebuzzer.Thedotnexttothe
alarmtimetext“AL1BUZZER”ashes.
• PresstheAL1/VOL-buttonagaintobewokenupbythelastsetradiostation.The
dotnexttothealarmtimetext“AL1RADIO”ashes.
• Ifyoupressthebuttonagain,thedotonthedisplaygoesoutandthealarmfunc-
tion is deactivated.
2. SetthealarmtimewiththeHOUR/TU-andtheMIN/TU+button.
3. ConrmyourinputwiththeAL1/VOL-button.
NOTE:
If you don’t press any button within about 3 seconds, the settings are adopted auto-
matically.
Tosetthesecondalarmtime,repeattheabovestepseachwiththeAL2/VOL-button.
Shutting off of the alarm signal
To switch off the alarm signal until the following day, press the ON/OFF / AM/FM button.

English
48
Activating/deactivating the alarm time
InTimemode,repeatedlypresstheAL1/VOL-ortheAL2/VOL+button,untilthedoton
thedisplaynexttothealarmtimetextgoesout.
Snooze function (SNOOZE)
Theautomaticallysetalarmsignalcanbeshutoffforapprox.9minuteswiththeSNOOZE/
SLEEPbutton.Thedotnexttothealarmtimetextashesonthedisplay.
Delayed shut-off
Wouldyouliketofallasleepwithradiomusic?
1. Switch the radio on and press the SNOOZE/SLEEP button. 90 (minutes) appears on
the display.
2. Press the SNOOZE/SLEEP button repeatedly to reduce the time in steps of 10.
• TheOFFsettingwilldeactivatethefunction.
• Todisplaythestillremainingtime,brieypresstheSNOOZE/SLEEPbutton.For
technical reasons, the activated function cannot be shown permanently on the display.
Cleaning
CAUTION:
• Donotdiptheapplianceinwater.
• Donotuseawirebrushorotherabrasiveobjects.
• Donotuseanycausticorabrasivecleaningagents.
• Removetheplugbeforecleaning.
• Cleantheappliancewithaslightlyhumidclothwithoutanyadditives.
Troubleshooting
Symptoms Cause Solution
The unit cannot be
operated.
The unit is blocked and
“hangs”.
Pullthemainsplugforapproxi-
mately 5 seconds. Then connect
the unit again.
English 49
Technical Data
Model: .....................................................................................................................................MRC 4143
Power supply:...........................................................................................................220-240V~,50Hz
Power consumption:.........................................................................................................................5W
Protection class:......................................................................................................................................II
Battery power reserve: .............................................................................. 1x9V,typeE-Block,R61
Net weight:....................................................................................................................approx.0.26kg
Radio section
Frequency ranges:................................................................................................FM87.5~108MHz
................................................................................................AM522~1620kHz
We reserve the right to make technical and design changes in the course of our ongoing
product development.
This device has been tested according to all relevant current CE guidelines, such as
electromagnetic compatibility and low voltage directives, and has been constructed in
accordance with the latest safety regulations.
Disposal
Meaning of the “Dustbin” Symbol
Protect our environment: do not dispose of electrical equipment in the domestic waste.
Please return any electrical equipment that you will no longer use to the collection points
provided for their disposal.
This helps avoid the potential effects of incorrect disposal on the environment and human
health.
This will contribute to the recycling and other forms of reutilisation of electrical and elec-
tronic equipment.
Information concerning where the equipment can be disposed of can be obtained from
your local authority.
Table of contents
Languages:
Other AEG Clock Radio manuals


