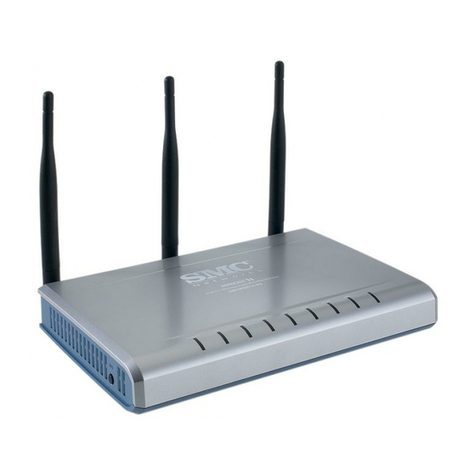
Abocom WR5503 User manual

802.11 b/g/n
compliant Router
User’s Manual

Federal Communication Commission
Interference Statement
This equipment has been tested and found to comply with the limits for a Class B digital device,
pursuant to Part 15 of the FCC Rules. These limits are designed to provide reasonable protection
against harmful interference in a residential installation. This equipment generates uses and can
radiate radio frequency energy and, if not installed and used in accordance with the instructions,
may cause harmful interference to radio communications.
However, there is no guarantee that interference will not occur in a particular installation. If this
equipment does cause harmful interference to radio or television reception, which can be
determined by turning the equipment off and on, the user is encouraged to try to correct the
interference by one or more of the following measures:
Reorient or relocate the receiving antenna.
Increase the separation between the equipment and receiver.
Connect the equipment into an outlet on a circuit different from that to which the receiver is
needed.
Consult the dealer or an experienced radio/TV technician for help.
Warning: Changes or modifications to this unit not expressly approved by the party responsible
for compliance could void the user authority to operate the equipment.
This device complies with Part 15 of the FCC Rules. Operation is subject to the following two
conditions: (1) this device may not cause harmful interference, and (2) this device must accept any
interference received, including interference that may cause undesired operation.
The user’s manual or instruction manual for an intentional or unintentional radiator shall caution the
user that changes or modifications not expressly approved by the party responsible for compliance
could void the user’s authority to operate the equipment.
CAUTION:
1.To comply with FCC RF exposure compliance requirements, a separation distance of at least 20 cm
must be maintained between the antenna of this device and all persons.
2.This Transmitter must not be co-located or operating in conjunction with any other antenna or
transmitter
For product available in the USA/Canada market, only channel 1~11 can be operated. Selection of
other channels is not possible.

Table of Content
CHAPTER 1: INTRODUCTION..............................................................................1
Features.........................................................................................................................................1
Physical Details...........................................................................................................................1
CHAPTER 2: ABOUT OPERATION MODES.......................................................4
Operation Modes........................................................................................................................4
Router Mode ................................................................................................................................4
Access Point Mode.....................................................................................................................5
Converter Mode..........................................................................................................................5
CHAPTER 3: CONFIGURATION...........................................................................6
Hardware Connection...............................................................................................................6
Login...............................................................................................................................................6
Setup Wizard.............................................................................................................................10
Status...........................................................................................................................................16
Network.......................................................................................................................................17
Wireless.......................................................................................................................................27
Firewall........................................................................................................................................39
Administration ..........................................................................................................................46
CHAPTER 4: PC CONFIGURATION .................................................................55
Overview.....................................................................................................................................55
Windows Clients.......................................................................................................................55
Macintosh Clients.....................................................................................................................63
Linux Clients..............................................................................................................................63
Other Unix Systems.................................................................................................................64
Wireless Station Configuration...........................................................................................64
APPENDIX A: TROUBLESHOOTING.................................................................66
Overview.....................................................................................................................................66
General Problems.....................................................................................................................66
Internet Access.........................................................................................................................66
Wireless Access ........................................................................................................................67
APPENDIX B: ABOUT WIRELESS LANS..........................................................69
BSS (Basic Service Set)..........................................................................................................69
Channels......................................................................................................................................69
Security........................................................................................................................................69
Wireless LAN Configuration.................................................................................................70

Chapter 1: Introduction
1
Chapter 1:
Introduction
The 802.11b/g/n Wireless Router supports 4 ports 10/100M Ethernet for LAN and 1 port 10/100M
Ethernet interface for WAN. With the advanced MIMO technology, it can support the data
transmission rate 6 times more (up to 300 Mbps) and the coverage 3 times more than IEEE 802.11b/g
devices. The Wireless Router enables your whole network sharing a high-speed cable or DSL Internet
connection. With it, you can share a high-speed Internet connection, files, printers, and multi-player
games at incredible speeds, without the hassle of stringing wires. It also offers easy configuration for
your wireless network at home and presents wireless network of high functionality, security, and
flexibility.
Features
1. Support 4 ports 10/100M Ethernet for LAN and 1 port 10/100M Ethernet interface for WAN.
2. Clock rate up to 400MHz.
3. Support the IEEE 802.11n/b/g standard, high speed data rate up to 300Mbps, two transmit and two
receive path(2T2R)
4. Supports WPS (Wi-Fi Protected Setup) with physical push button.
5. High security with build-in Security: WEP 64/128, WPA, WPA2, 802.1x and 802.11i.
6. Support Client, AP, WDS, AP+WDS mode.
7. Advanced Quality of Service (QoS), WMM.
8. Easy web broswer configuration for home user setup.
Physical Details
Top LEDs
LED Behavior
LED Printed Color Behavior Indication
Power PWR
Green ON Power on
OFF Power off
Internet WAN
Green
ON Internet link / active
OFF Internet function off
Blinking Internet traffic transmitting

Chapter 1: Introduction
2
WPS WPS
Green
ON WPS setup successfully
OFF WPS is disabled
Blinking WPS is enabled to make
a connection
Wireless
LAN WLAN Green
OFF WLAN off
ON WLAN link / active
Blinking WLAN traffic transmitting
LAN Green
OFF LAN function off
ON LAN link / active
Blinking LAN traffic transmitting
System SYS
Green
ON System is ready to login
web server
OFF System is not ready to
login web server
Blinking System is set to factory
default
Ports and Buttons
Ports and buttons
Ant. 1
Ant. 2 Install the appending antennas here.
Reset
zPress 2 seconds, the LED will be off.
zKeep on pressing reset button 2~5 seconds, the system
will reboot automatically.
zKeep on pressing the reset button more than 5 seconds,
the Wireless Router will set all setting back to factory
default.
LAN 1-4
Use standard LAN cables (RJ45 connectors) to connect your
PCs to this port. If required, any port can be connected to
another hub. Any LAN port will automatically function as an
"Uplink" port when necessary.

Chapter 1: Introduction
3
WAN Connect the ADSL or Cable Modem here with RJ45 cable. If
your modem came with a cable, use the supplied cable,
otherwise, use a standard LAN cable (RJ45 connectors).
DC 5V Connect the supplied power adapter here.
Side Panel
WPS
WPS
To enable the WPS function press the physical WPS button on
the Wireless Router once, then the LED will start to flash.
Please make a connection with other WPS supported device
within 2 minutes.

4
Chapter 2: About
Operation Modes
This device provides operational applications with Router, AP and Converter modes, which are
mutually exclusive.
This device is shipped with configuration that is functional right out of the box. If you want to change
the settings in order to perform more advanced configuration or even change the mode of operation,
you can MANUALLY switch to the mode you desired by the manufacturer as described in the
following sections.
Operation Modes
You have to MANUALLY switch the bar into the mode you preferred, Router, AP or Converter modes,
then the device will reboot automatically into the mode you have selected.
Router Mode
In this mode, the device is supposed to connect to internet via ADSL/Cable Modem. The NAT is
enabled and PCs in LAN ports share the same IP address to ISP(Internet Service Provider) through
WAN port. The connection type can be setup in PPPoE, DHCP client, PPTP client, L2TP client or
static IP.
The wireless connection will be set up from a point-to-point LAN into a point-to-multipoint WAN.
This device connects all the stations (PC or notebook with wireless function) to a wireless network. All
stations can have the Internet access if only the device has the Internet connection.

Chapter 2: About Operation Modes
5
Access Point Mode
When acting as an Access Point (AP), this device connects all the stations (PC/notebook with wireless
network adapter) to a wireless network. All stations can have the Internet access if only the Access
Point has the Internet connection.
Converter Mode
If set to Converter mode, a device connects to each other through an access point or a base station
(gateway or router.) This device can work like a wireless station when it’s connected to a computer
directly, so that the computer can send packets from wired end to wireless interface.

6
Chapter 3:
Configuration
Hardware Connection
Step 1. Connect one end of the Ethernet cable to the LAN port (1~4) of the Wireless Router,
another end to your PC or notebook.
Step 2. Connect Ethernet cable one end to the WAN (Internet) port of the Wireless Router, the
other end to the ADSL or cable modem.
Step 3. Finally, connect the Wireless Router with a power to an outlet.
Login
1. Start your computer and make sure the connection by an Ethernet cable between your computer
and the Wireless Router.
2. Start your Web Browser.
3. In the Address box, enter the IP address of the Wireless Router, as in this example, which uses the
Wireless Router's default IP address: http://192.168.1.254

Chapter 3: Configuration
7
4. After connected successfully, the following screen will show up. Simply enter the username
"admin" and password "password" to login.
After login successfully, please click the Setup Wizard item that provides a primary configuration of
this device. You may enter each screen to change the default settings step by step.
Table of contents
Other Abocom Wireless Router manuals

Abocom
Abocom CAS2047 User manual

Abocom
Abocom WR5560 User manual

Abocom
Abocom Bluetooth USB Dongle UBT3KH User manual

Abocom
Abocom WR5210 User manual

Abocom
Abocom Wireless Router FSW410 User manual

Abocom
Abocom CAS4047 User manual

Abocom
Abocom WR404 User manual

Abocom
Abocom WR254 User manual

Abocom
Abocom WR5204U User manual

Abocom
Abocom WR5201 User manual

Abocom
Abocom UBT4KH User manual

Abocom
Abocom 802.11b/g Portable Router WAP2102 User manual

Abocom
Abocom WR254E User manual

Abocom
Abocom ARM914 User manual

Abocom
Abocom WAP2101 User manual

Abocom
Abocom WR104 K User manual

Abocom
Abocom ARM804 User manual

Abocom
Abocom WAP5502 User manual

Abocom
Abocom BUD210 User manual

Abocom
Abocom WR5201 User manual