Worlde W8850 User manual
WELCOME
To the happy family of satisfied electronic musical instrument owners! To get the most out
of the many features and functions of the keyboard, please be sure to read carefully this
manual and keep it at hand for future reference.
MAIN FEATURES
Strong multifunctional LCD system with large-scream display, which makes selecting and
editing parameters much easier.
153 different kinds of voices, including 4 voices of Chinese folk instruments( Trichord,
Gu-Zheng, Erhu, Suona)
Almost including 100 popular accompaniment styles in the world. Each rhythm has its
own intro and main (A, B two types), variation and ending.
32 types of commonly-used voices and 32 types of commonly-used styles for rapid choice.
With 9 groups of percussion instrument and a special-effec-voice group, including a
group of Chinese traditional percussion instrument.
Song Recording function can record one accompaniment track and two melody tracks.
Soft LCD back light makes the piano more luxurious.
Be able to synthesize certain digital effects like the reverb chorus and 3 D stereo effect,
which could create various sound field effects.
Be able to record one user song..
Beautiful demo songs, making great contributions to lifting your performance level.
Memory Bank can reserve at most 8 panel parameter settings and each setting can be
recalled whenever you want.
Minus Channel Mode and Repeated Playback function are excellent for teaching and practising.
MIDI function makes his instrument able to connect to any other standard MIDI system.

Safety Precautions P. 2
Control Panel & Terminals P. 3
Preparations P. 5
* Setting Up P. 5
* Connections
Earphone and Audio output P. 6
MIDI input/output P. 8
Listening to the Demo Songs
P. 9
P. 11
* Selecting and Playing a Voice P. 11
P. 1 3
* Touch Response P. 1 4
* Dual Voice P. 1 4
* Harmony/Echo P. 1 5
* Sustain P. 1 5
* Sostenuto P. 1 5
* Soft P. 1 5
* Transpose P. 1 6
* Pitch Bend P. 1 6
P. 1 7
* Using Number Effect P. 1 7
* Changing the Reverb Effect P. 1 7
P. 1 7
* Changing Chorus Effect P. 1 8
Chorus Style P. 1 8
* Sustain P. 1 8
Using Auto Accompaniment
P. 1 9
Playing the Piano
Percussion
Number Effect
Reverb Style
CONTENT
* Selecting Accompaniment Mode P. 1 9
* Single Finger Mode P. 1 9
* Fingered Mode P. 2 0
* Selecting the Style P. 2 1
* Setting the Tempo P. 2 1
* Starting the Accompaniment P. 2 2
* Stopping the Accompaniment P. 2 4
* Sync Stop P. 2 4
Registration Memory P.25
* Register Panel Setting P. 2 5
* Recalling the Registered Panel Setting
P. 2 6
Song Recording P.27
* Recording a User Song P. 2 8
* Accompaniment Track Recording P. 2 9
* Melody & ACMP Tracks Playback P. 2 9
Practice Function P.30
* Minus Channel Mode P. 3 0
* Repeated Playback P. 3 1
Whole Function P.32
MIDI Functions P.33
MIDI Interface P. 3 4
Remote Passage P. 3 4
Connect to a Personal Computer P. 3 5
Appendix
* Voice List P. 3 6
* Style List P. 3 8
* Drum Set Table P. 3 9
* Technique Specifications P. 4 0
1

SAFETY PRECAUTIONS
2
Locations:
Avoid exposure to sunlight.
Do not place the item in or near overheated places like car or oven for a long time.
Do not place the item in places of moisture, dirty and vibrated.
Do not place the item near facilities with strong electromagnetic such as television and radio.
Avoid strong crash and scratches with hard object.
Turn off the power supply when not in use. If the item is not in use for a long time, please plug
out the power supply cable to avoid any accident.
Cut the power supply if any of the followings occur:
Power supply cable is damaged.
Fluid is splashed into/onto the item.
Thundering.
When cutting the power supply, plug out the power socket, rather than pull the cable.
When connecting to an external power supply, mind the maximum rated power.
Clean the item with soft and clean cloths. Few amounts of neutral cleanser could be used, but
never use solvents which would damage the finishing of the piano, such as alcohol, benzene,
paint, or diluent.

CONTROL PANEL & TERMINALS
!!
RECORDbutton .... .............P.25 MEMORYbutton .................... P.23
+Control Board
!!
TracksandClearbuttons ........P.25 M1~M4buttons .................... P.23
POWER Switch ........................ P. 7
AUTO ACCOMPANIMENT ......... P.17 TOUCH ...........................P.12
!Sync Start/Stop ............... P.22
MASTER VOLUME dial .............. P. 7
!STYLE button ..........................P.19
Intro/Ending button .................P.22
!
DEMO button .......................... P. 7 Main A/B ................................P.22
VOICE button ........................ P.9
!SyncStop button . ......................P.22
EFFECT !FingeredChordbutton ........... P.22
!PITCH BEND roller ................. P.14
REVERB button ..................... P.15 !Start/Stopbutton ......................P.22
!DUAL button ........ ............P.12
!SUSTAIN button ...................P.13 ACMP Volume button ....................P.22
LCD screen ............................... P.11 TEMPO button ..............................P.19
Number buttons[0-9] and [+/YES], [+/YES], [-/NO] buttons.................... P.19
[-/NO] buttons ........................P.13 FUNCTION button ......................P.29
SONG MEMORY ............ ............. P.25 REGISTRATION MEMORY ........ P.23
1
2
3
3
17
26
7
12 14
1
8
13 9
15
10
11
11
5
3
16
4
×¢
²á
´æ
´¢
°é
×à
·ç
¸ñ
B
A
Òô
¡¡
É«
B
A
ÑÝʾ
Óë
Ч¹û
ÀÖ
Çú
´æ
´¢
1
2
3
4
5
6
7
8
9
10
11
12
13
14
15
16
17
8 beat 1 Blues 1 Vienna Waltz Chacha1
16 beat 2 Ball Jazz1 Swing Salsa
Rock 80s Twist Country 1 Manbo
Ball Rock Slow Rock Polka Latin
Quick Step Rock N’Roll Bossa 1 Fox Trot
Disco Samba 1 Rumba Tango
Bank Sync Stop Sync Start
M1 M2 Intro Start Chord
Pause
Registration
Memory
Ending Stop A-B repeat
M3 M4 Main A Main B
Fill-in/REW Fill-in/FF
SELECT
and
PLAY
ACMP VOLUME TEMPO
+/YES
-/NO
Dual Record Song NO Touch
Demo Reverb Track1 Track2 Track3
Sustain Track4 Track5 Chord
Clear
Grand Piano Harpsichord Church Organ Cello
Honky-Tonk Elec.Piano1 Percussive Organ Violin
Trumpet Orchestral Harp Flute Oboe
Trombone Banjo Pan Flute Bassoon
Acoustic Guitar Electric Bass Pizzicato Strings Clarinet
Overdriven SCO-FI Ensemble1 Ensemble2
FUNCTION

4
External Terminals
Foot Pedals
Soft Pedal........................................P. 15
Sostenuto Pedal ..............................P. 15
Sustain Pedal ..............................P. 8. 15
2121
1919
2020 2222
2323
1818
2929
2727
2828
2727
2828
2929
NOTICE:
In W8850, there is no complimentary pedal, however in W8850A and W8850B,
all the pedals stated above will be there.
DC Adapter Jack..............................................................P. 6
Soft / Sustain Pedal Jack ................................................P. 15
Sostenuto Pedal Jack ...................................................P. 15
MIDI OUT .................... ..................................................P. 8
MIDI IN ..........................................................................P. 8
Headphone Jack..............................................................P. 6
USB Jack ........................................................................P. 7 ..
Audio Out L .....................................................................P. 7
Audio Out R.....................................................................P. 7
1818
1919
2020
2121
2222
2323
2424
2525
2626
W8850 W8850A W8850B
Only for W8850B
2424
2525
2626

PREPARATIONS
5
1
2
3
4
Setting Up
1. Fasten the left and right feet
to the pedal rack with 2 bolts
(M6x60).
2. Fasten the shelter board to
the left and right feet with 4
bolts and screws(M6x60).
3. Place the body onto the plank
and fix it with 4 zinc-gilded
screws at each side as shows
in the illustration.
4. Connect the cable of foot
pedals with the illustration.
1
2
1. Fasten the left and right feet to
the pedal rack with 2bolts
(M6x60).
2. Place the body onto the plank,
and fix it with 4zinc-gilded
screws at each side as shows
in the illustration.
W8850
W8850A W8850B

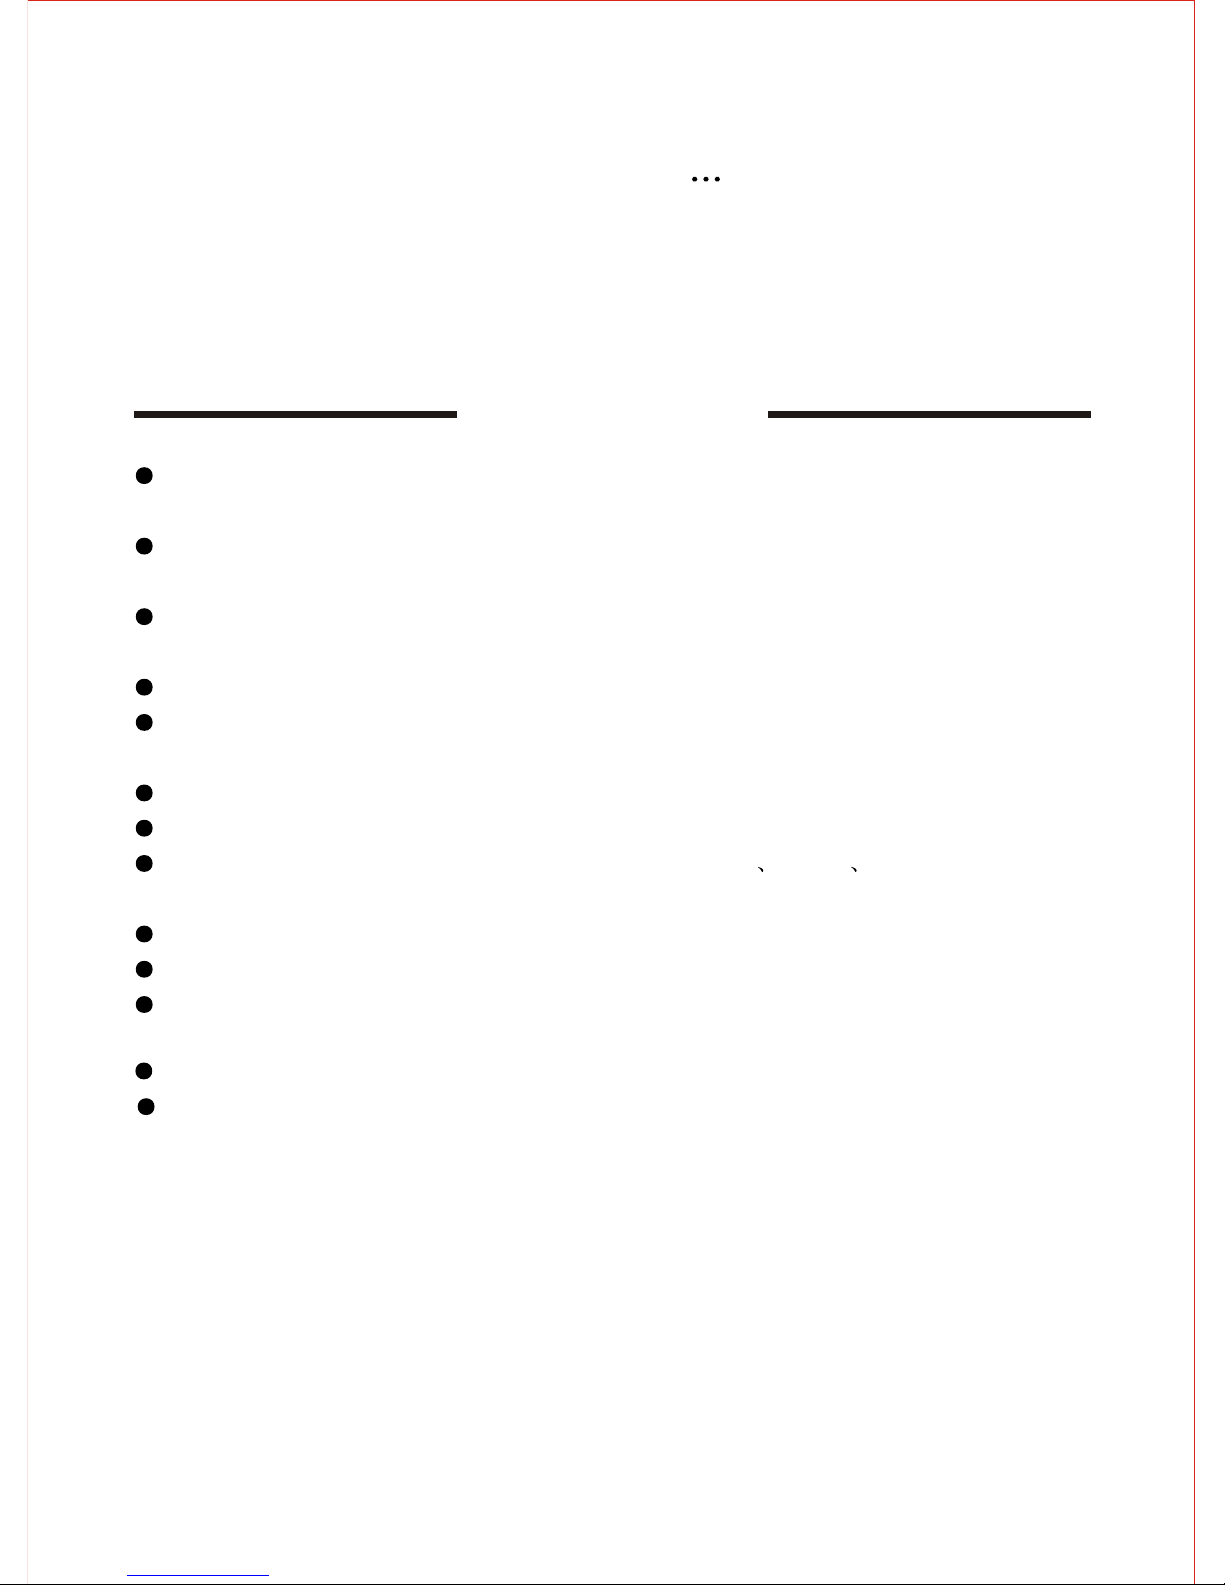
Put a standard earphone to connect the keyboard's
PHONE plug. While connection is made, you may only
hear the sound inside the earphone and practice the
music without disturbing the others. This plug can
also be connected to the speaker to have a stereo
system.
Earphone and Audio output
PHONES/
OUTPUT
Stereo system
6
Powersupply
Pleaseuse external power supply.
This instrument can use F J-E148 Adapter by
connecting the output terminal of the adapter with DC
15V power input jack and the input terminal with
alternating current power.
DC15V
AC Adapter PlugAC Adapter Plug
-
+
FJ-EI48
POWER SUPPLY CONVERTOR
It is applied to USB 1.1, connecting to the PC
could provide power supply.
XP, MAC SOX.
Compatible with main pro audio and sequence
softwares such as CAKEWALK and SONAR.
Compatible with
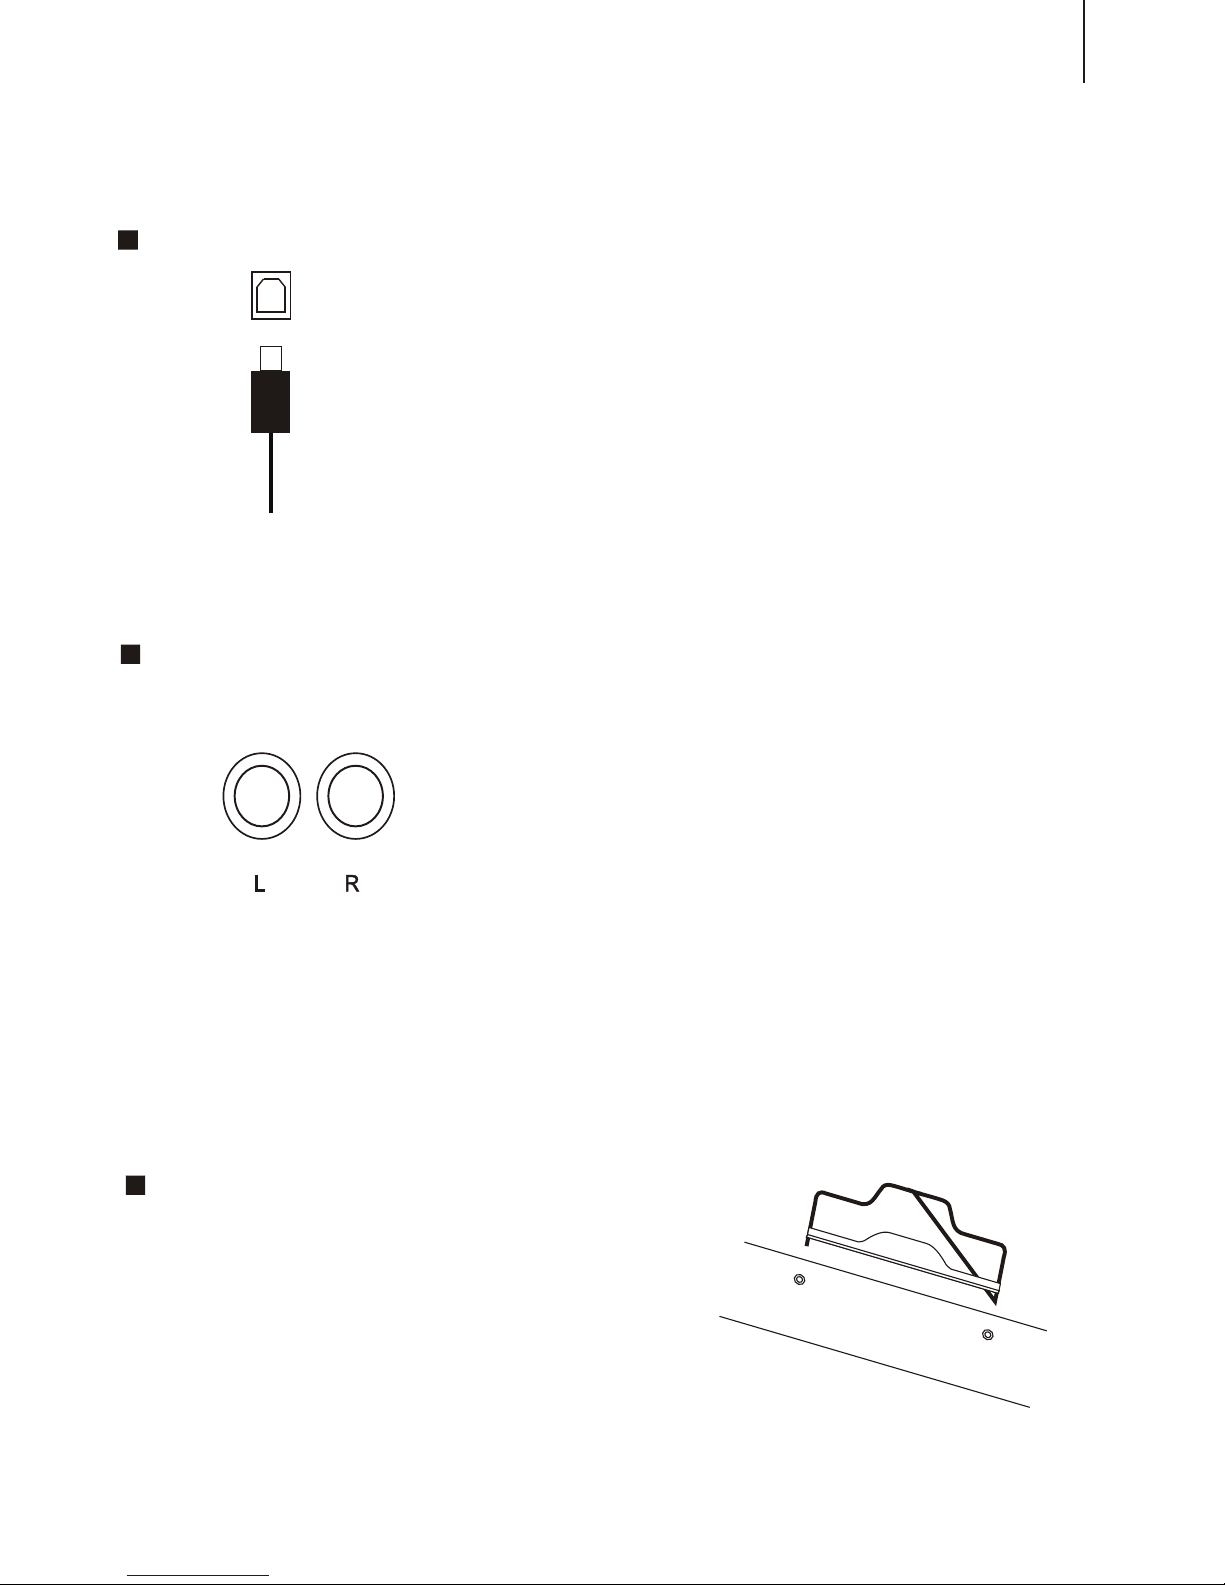
This interface could input signal into external
amplifier, and connect with external stereo
amplification system, forming an amplification
system to amplify the sound. This function is
designed for stage performance.
The difference with earphone is: the sound from
this output is the primary sound that has not been
processed, while the sound from earphone is
processed.
7
ONLY FOR W8850B
Music Stand
You can add one music stand to this instrument.
USB INTERFACE
AUDIO OUT

SUSTAIN PEDALSUSTAIN PEDAL
The sustain pedal can connect to the sustain interface,
press this pedal, when your finger release from the key,
the very key will have a prolonged sound effect.
There are three pedals with this item, sustain pedal,
sostenuto pedal, and soft pedal. You can connect the
pedal to the relative interface
NOTICE:
Please do not press the sustain pedal when connecting it to
the piano or turning on the power supply, otherwise, the
polarity of the pedal will be reversed, which means when
pressing the pedal, there is no sustain, but when releasing
the press, there is sustain. If this incident happens, turn off
the piano and repeat the operation will just do.
Receive MIDI Data from the outside devices connected
(e.g. Sequencer )
MIDI OUT
Send MIDI Data of this keyboard
MIDI OUT
MIDI IN
MIDI input/output
MIDI IN
8

LISTENING TO THE DEMO SONGS
*. Listen to the Music of the Memory
After installation, you may play this keyboard. Just experience its excellent
performance. There are four demos.
1. Tune on the POWER
2. Adjust the MASTER VOLUME dial to 1 / 4 circle. You can also adjust it during
the playback
. It's always a good idea to set the keyboard volume at a relatively low level before
playing.
3. Press the [DEMO] button
MINMIN MAXMAX
MASTER VOLUMEMASTER VOLUME
POWER
Press the [DEMO] button, this piano will play the music automatically. The name
of the first song will appeared on the screen. The songs will be played in order
And circularly before being stopped.
DEMO
9
This manual suits for next models
2
Table of contents
Other Worlde Musical Instrument manuals


