Watseka XP ELECTRIC EXPRESS 2015 User manual

WATSEKA® PRODUCTS LLC
WATSEKA® XP ELECTRIC EXPRESS®
®


WARNING
• Before riding, please read carefully & understand this owner’s manual and all of it’s content.
• Always wear protective gear, including but not limited to, helmet, reflective clothing, riding gloves.
• Always obey all state & local traffic laws relevant to the operation of bicycles & electric assisted bicycles.
• Watseka
®
bicycles are not meant for use on public roadways.
• Always maintain your bike to insure longevity & safety.
• It is not recommended that your bicycle be ridden in severe weather (i.e. rain, snow).
• Watseka
®
bicycles are not meant for extreme riding or jumping.
•
If at any time assistance is needed, contact
Watseka® Bicycle Supply
or your local bicycle repair shop.
WARNING
Serious injury, death & property damage can result from the improper use, control, alteration, or maintenance of your Watseka® XP Electric
Express®. The bicycle operator must excercise good judgement in the use, control, alteration, parts selection, installation & maintenance of the
Watseka® XP® Electric Express. Watseka® Products LLC has no control over the judgement of others and assumes no responsibility or liability
of any nature for the failure of others to use good judgement.
COPYRIGHT WATSEKA® PRODUCTS LLC 2015 REV 5/27/15

WATSEKA® ELECTRIC EXPRESS
DISTRIBUTED BY WATSEKA® PRODUCTS LLC.
Failure to read and comply with this document completely may Void Warranty.
WATSEKA® XP ELECTRIC EXPRESS® WARRANTY:
Watseka® XP Electric Express® bicycles are guaranteed to the original purchaser to be free of manufacturing defects in materials and
workmanship for a period of 90 days from the original date of purchase.
Merchandise that fails to conform to these conditions will be replaced by Watseka® Bicycle Supply if the parts are returned to Watseka®
Bicycle Supply by the purchaser within the specified warranty period or within 10 days thereafter. Cost associated with removing or
installation of bicycle replacement parts are not covered under this warranty. This warranty covers Watseka® bicycle parts only and no
other associated expenses.
In the event that any warranty service is required, the original purchaser must call or write Watseka® Bicycle Supply immediately with the
problem. Many problems can be rectified by a telephone call and need no further course of action. Merchandise that is suspected of being
defective must not be replaced by an End User without prior authorization from Watseka® Bicycle Supply. If it is deemed necessary for
Watseka® Bicycle Supply to make an evaluation to determine whether the part was defective, it must be packaged properly to prevent further
damage and be returned prepaid to Watseka® Bicycle Supply. You must include a copy of the original invoice and a detailed letter outlining
the nature of the problem. You must also outline how the part was used and the circumstances at the time of failure. If, after an evaluation
has been made by Watseka® Bicycle Supply and the part was found to be defective, replacement will be granted at Watseka® Bicycle Supply’s
discretion. Bicycles that have been modified in any way from the original purchased configuration will void the warranty.
ADDITIONAL WARRANTY PROVISIONS:
1. Watseka® Bicycle Supply shall have no obligation in the event a Watseka® bicycle part is modified by any other person or organization.
2. Watseka® Bicycle Supply shall have no obligation in the event an Watseka® bicycle part becomes defective in whole or in part as a result of
improper installation, improper maintenance, improper use, abnormal operation, or any other misuse or mistreatment of the bicycle & related
parts.
3. Watseka® Bicycle Supply shall not be liable for any consequential or incidental damage resulting from the failure of a Watseka® bicycle
part, the breach of any warranties, the failure to deliver, delay in delivery, delivery in non-conforming condition, or for any other breach of
contract or duty between Watseka® Bicycle Supply and a customer.
(636) 931-3377 • TOLL FREE 1-844-WATSEKA (928-7352)

General Specifications
• “Low Step” frame design (non gender specific)
• Steel front and rear fenders
• Rear seat w/springs, quick-tilt lever, adjustable seat height
• Telescopic front suspension
• Center stand w/locking mechanism
• 26” x 1.95” Kenda tires front & rear
• 6-speed Shimano gears with easy thumb shift technology
• Throttle type speed control and smart pedal assist
• “V-Style” front brake
• Strap/drum rear brake
• Removable cargo basket w/removable top
• Rear cargo rack w/spring loaded cargo keeper
• 250 watt rear drive brushless motor
• Rechargeable 36V/9Ah AGM battery pack
•
Comes with 2 ignition keys
•
Electrical system will not function without the key for
safety and theft purposes
•
Battery pack cannot be removed without the key
•
Battery can be charged in the bike (plug-in located near ign key)
•
Power indicator on handlebars
•
Headlight switch
•
Horn switch
•
Push button taillight (no brake function)
•
Top speed is approx. 14 mph, depending on rider weight & terrain
•
16-18 average mile range per charge
•
Total weight = 72lbs
•
Offered in black only
Before starting the assembly process of your Watseka® XP Electric Express®,
please take a moment to view our instructional videos on YouTube. They have
been put there to help aid you through the assembly process & to familarize you
with the features of your new bicycle. YouTube/Watseka Bikes

ASSEMBLY OF THE WATSEKA® XP ELECTRIC EXPRESS®
TOOLS NEEDED:
8mm wrench
10mm wrench
15mm wrench
Phillips screwdriver
6mm allen wrench
CAREFULLY UNPACK YOUR BICYCLE & ALL RELATED PARTS
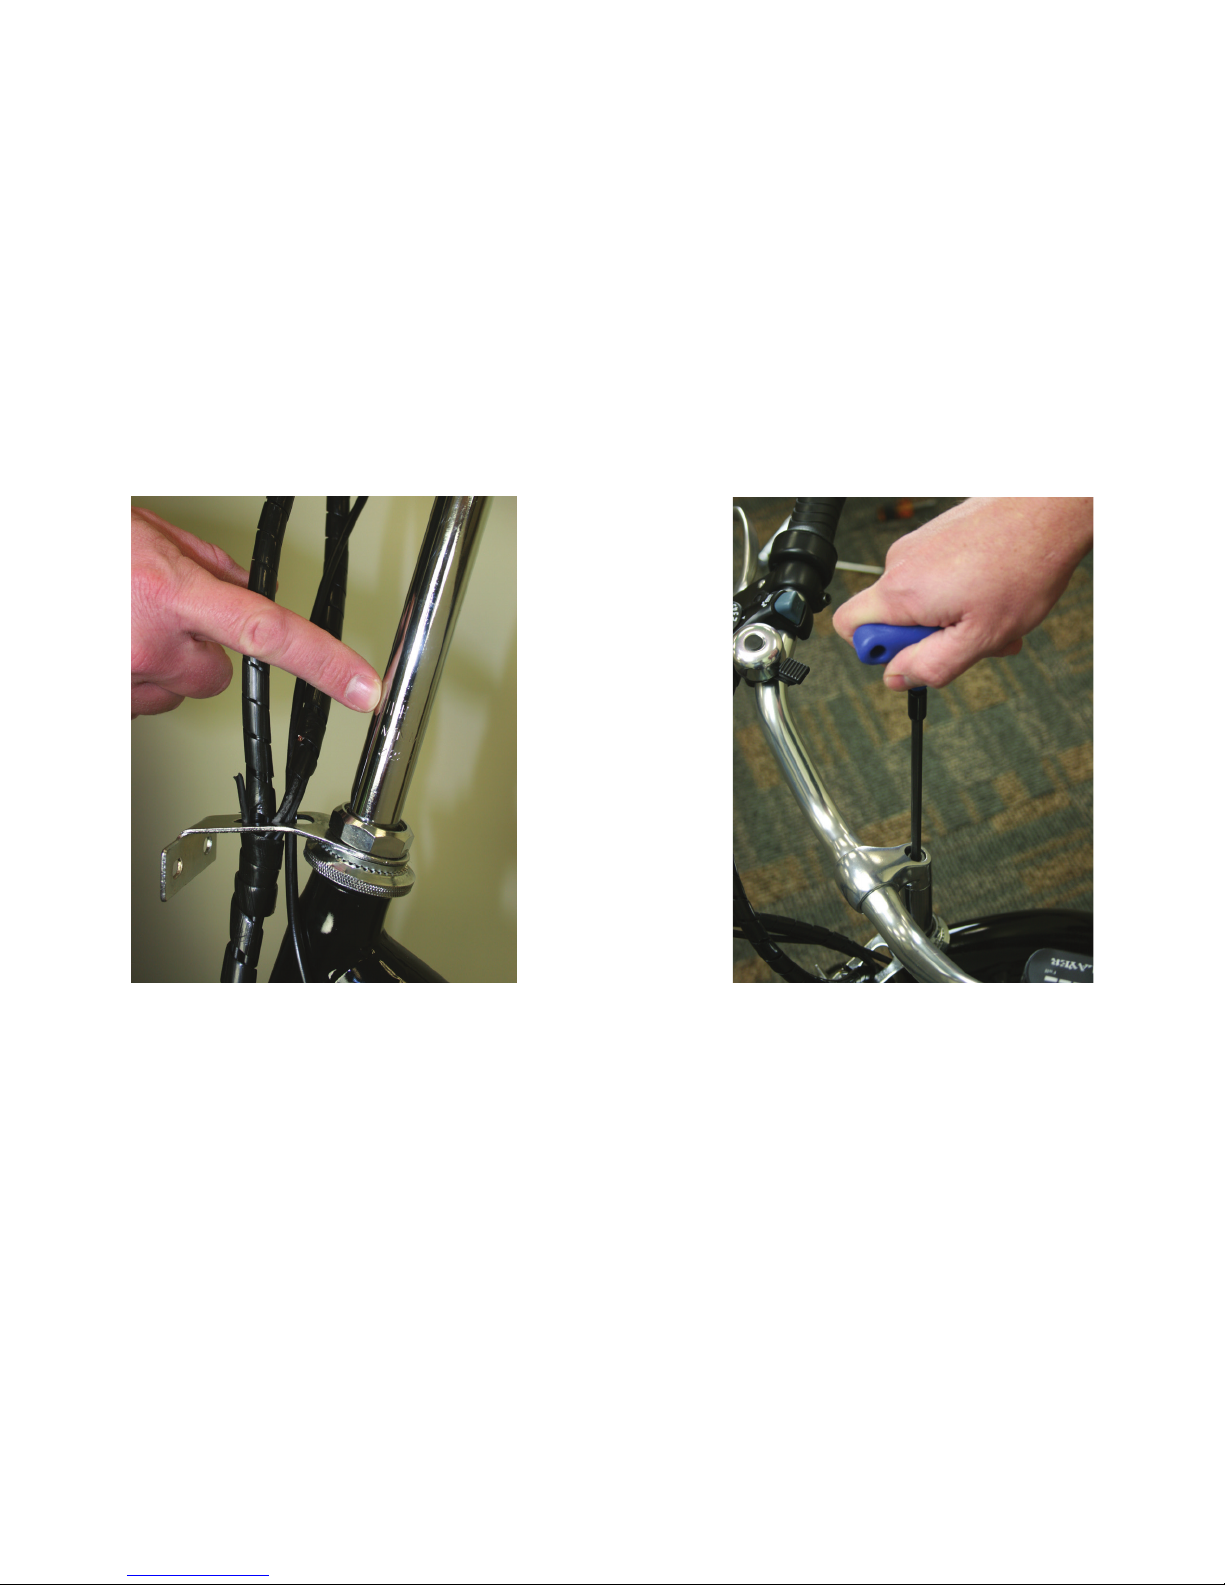
Install the handlebar assembly. When installing make sure
insertion mark is inserted into the frame neck until no longer
visible. This is the minimum depth the handlebar stem should
be installed.
1. Tighten the handlebar clamp & handlebar stem. Verify
the handlebar clamp & stem cannot move once they
have been tightened.
6mm allen wrench
2.
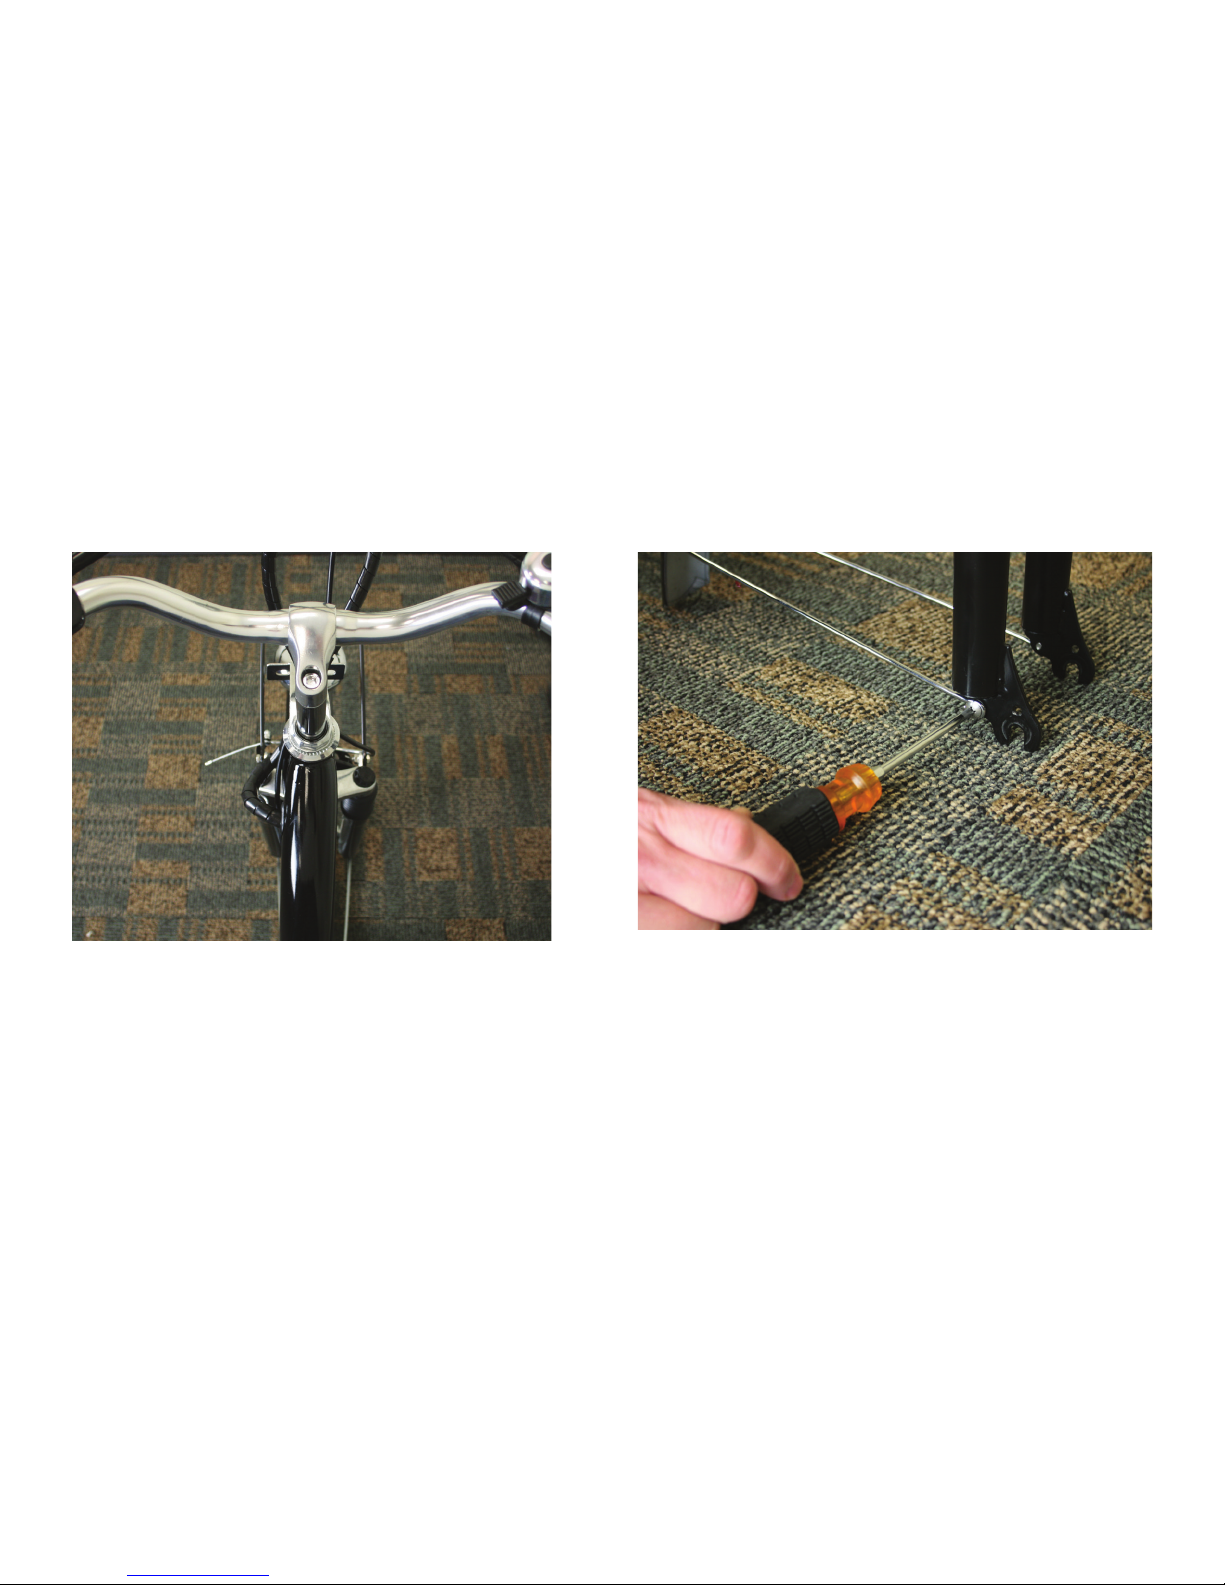
Install the front fender lower supports to the lower
fork legs.
Phillips screwdriver
4.
Make sure handlebar is mounted 90 degrees in
relation to the front wheel.
3.
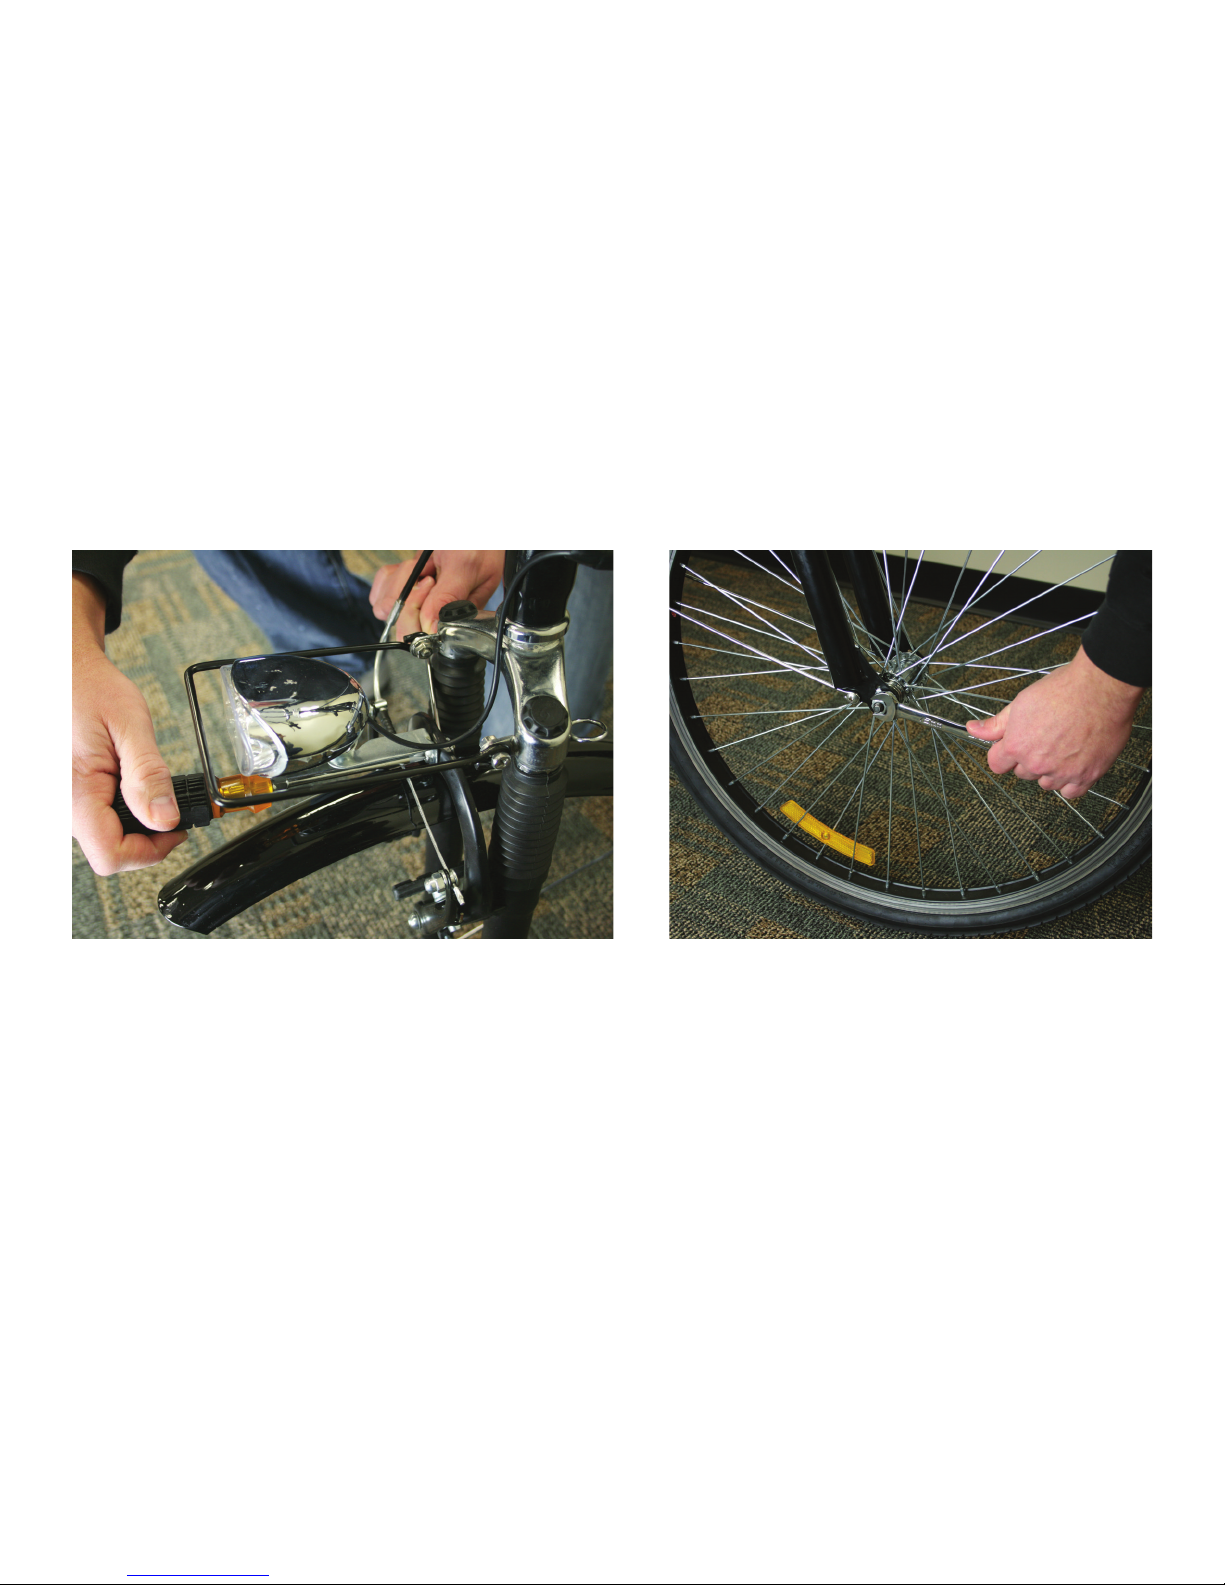
Install top fender mount and front light to
the front “V” brake.
Phillips screwdriver
10mm wrench
5. Install the front wheel. Before tightening
the axle nuts, go to step 7.
6.
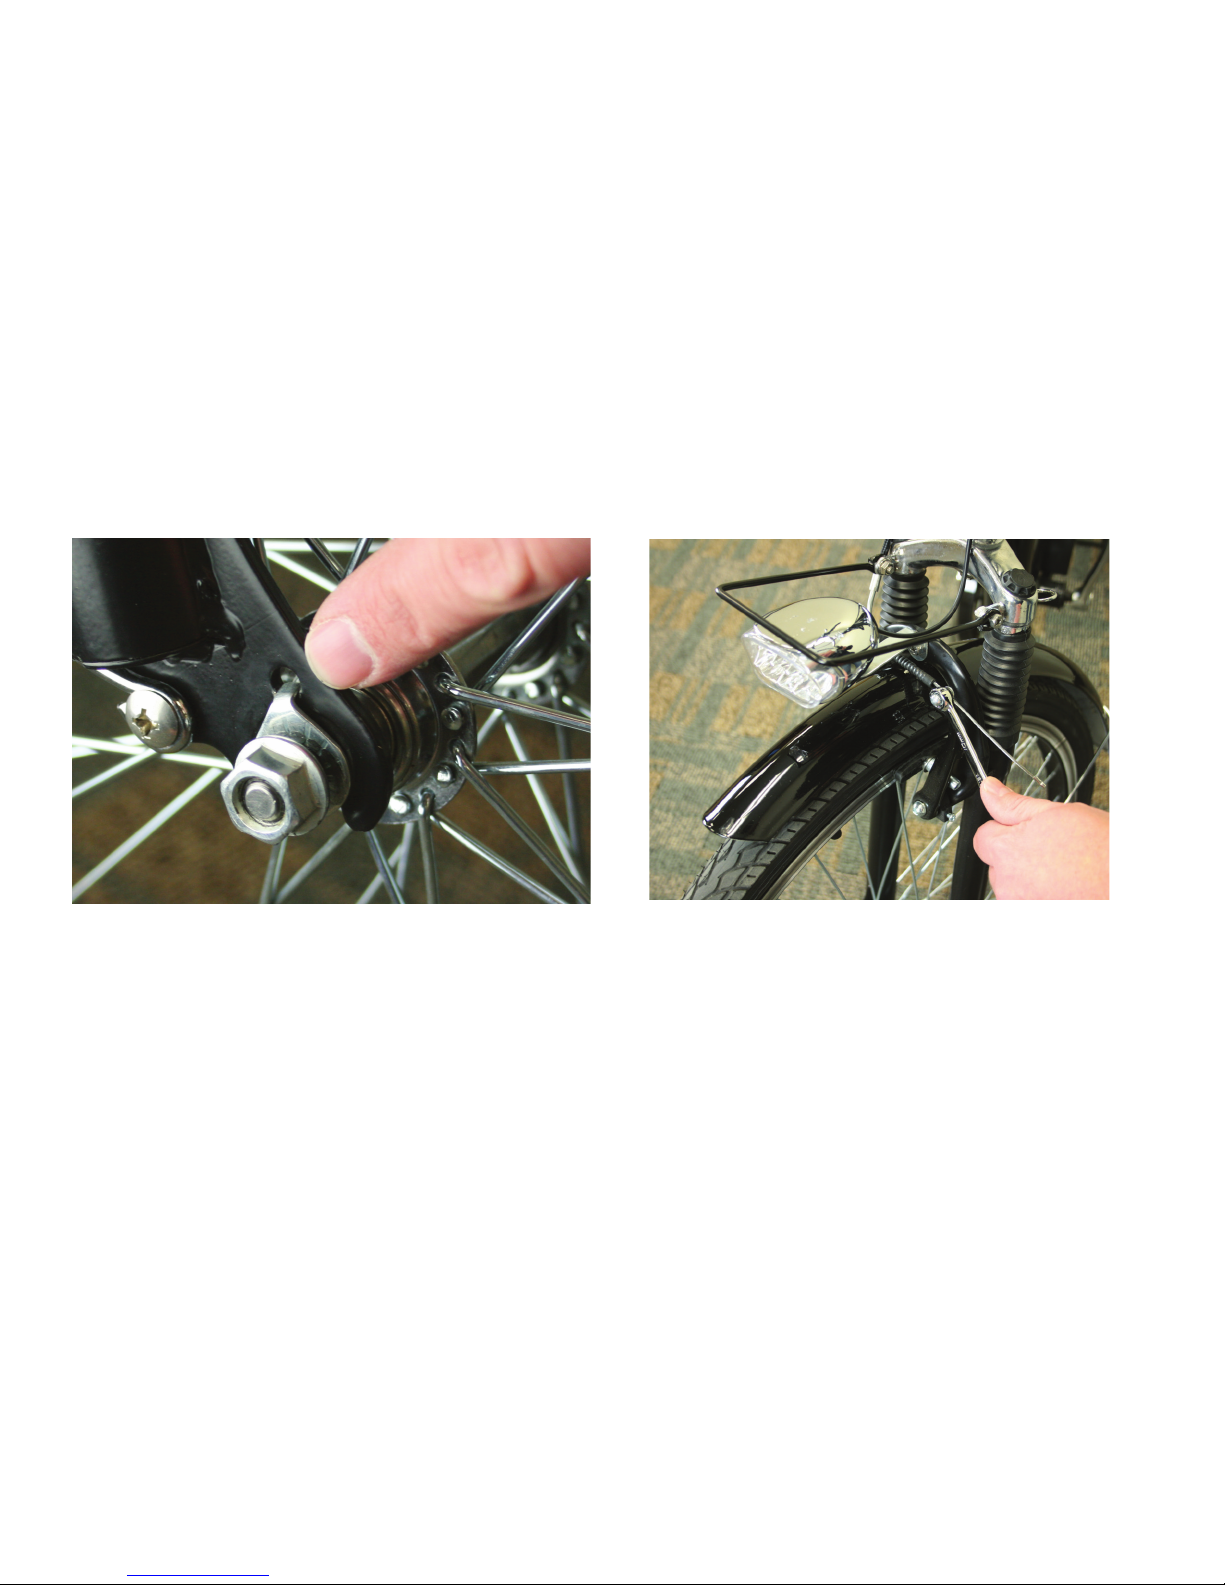
Make sure the safety tabs on each side of the front
axle go into the fork legs as shown before tightening
the front axle nuts.
15mm wrench
7. Adjust the front brake. Once adjusted, verify free
movement & that the brake pads contact the rim when
the brake lever is pulled. Shim brake pads if necessary to
make contact with the rim.
10mm wrench
8.
Table of contents


