Votek UT-6301 User manual

User’s Guide
UT-6301
RS232/RS485/422 To TCP/IP Converter Module
2003
- 1 -

- 2 -
【Table of Content】
1. Getting to Know your UT-6301……………………………………….………..….…...1
1.1 Introduction
1.2 Main features
1.3 Applications for UT-6301……………………….…………………………………......2
2. Hardware Installation & Initial Setup………………………………………..…….3
2.1 Hardware Installation
2.2 LED status……………………………………………………………………….………4
2.3 Initial Setup
2.3.1 Installing the TCP/IP Protocol……………………….………..……............5
2.3.2 Fixed IP Addresses Configuration……………………………………..........7
2.3.3 Configure your UT-6301………………………….…..……………………........9
3. UT-6301 Configuration Setup………………………………………………………....10
3.1 Operation mode
3.2 IP Configuration…………………………………………...………………………......12
3.3 Serial Type……………………………………………………………………………...14
3.4 Dynamic DNS…………………………………………………………………..……...15
4. UT-6301 Management Setup………………………...………………………………...16
4.1 Device Admin
4.2 Device Status…………………………………………………………………………...18
4.3 E-Mail Alert………………………………………………………………..….………....18
4.4 Backup and Restore……………………………………………………………….....19
4.5 Upgrade Firmware
4.6 Ping…………………………………………………………………………………….….20
5. Troubleshooting…………………………………………………………………….…….21
Appendix B: DDNS
Appendix C: Glossary…………………………………….………………………….…….28
Appendix D: Finding the MAC Address and IP Address
for Your Ethernet
Adapter…………………………………………………………………….……………............31

- 3 -
Copyright by UTEK Technology Co., Ltd., all rights
reserved.
The information in this document has been carefully checked and is believed to be correct
as of the date of publication. UTEK Technology Co., Ltd. reserves the right to make changes
in the product or specification, or both, presented in this publication at any time without
notice.
UTEK assumes no responsibility or liability arising from the specification listed herein.
UTEK makes no representations that the use of its products in the manner described in this
publication will not infringe on existing or future patents, trademark, copyright, or rights of
third parties. Implication or other under any patent or patent rights of UTEK Technology Co.,
Ltd grants no license.
All other trademarks and registered trademarks are the property of their respective holders.
1. Getting to Know your UT-6301
1.1 Introduction
The UT-6301 is a RS232/RS485/RS422 to TCP/IP converter integrated with a robust system and network
management features designed for industrial equipment to be accessed and controlled via Intranet or Internet.
By integrating RTOS (Real Time Operating System) and complete TCP/IP protocol stack capability, UTEK’s
UT-6301 provides not only a robust and high performance system to make your device connecting to Network,
but also ease installation and Internet access.
The UT-6301 Web Configurator is a breeze to operate and totally independent of the operating system platform
you use.
1.2 Main features
The following are the main features of UT-6301
TCP/UDP server/client support
The UT-6301 support four types of connection: TCP server, UDP server, TCP client and UDP client, user can
select one of types to meet application requirement.
DHCP Client
DHCP (Dynamic Host Configuration Protocol) client obtains the TCP/IP configuration at start-up from a
centralized DHCP server, which means it can get IP address, an IP default gateway and DNS server.
PPP Over Ethernet
PPPoE is a protocol for connecting remote hosts to the Internet over DSL connection by simulating dial-up
connection.
Dynamic DNS
With dynamic DNS support, you can have a static hostname alias for a dynamic IP address, allowing the host to
be more easily accessible from various locations on the Internet.

Auto-negotiating 10/100Mbps Ethernet
The Ethernet interface automatically detects if it is on a 10 or a 100 Mbps Ethernet.
Full Network Management via Web
This feature allows you to access or manage device through IE or Netscape on any platform. The firmware also
can be upgraded via Web browser.
Backup and Restore configuration
This feature allows you to backup system configuration to a file and restores it, for the security issue, the file
which backup from system is an encryption format.
Alarm Generation
With SMTP client support, you can set system to trigger alarm message via e-mail or SMS (Short Message
System) to your mobile phone.
1.3 Applications for UT-6301
- 4 -
Figure 1 Standalone UT-6301’s application through Internet
Figure 2 Socket-Type UT-6301’s application through Internet

2. Hardware Installation & Initial Setup
2.1 Hardware Installation
- 5 -
2.2 LED status
LED Color(s) Activity Desc.
Off Power OFF
Red Blinking Booting/System Self-Test
PWR Red
Red On Device Ready
Off No Ethernet Link
LAN
Link Yellow Green On Ethernet Link established
RXD
Yellow ON Signal indication data receive
TXD
Green ON Signal indication data send
2.3 Initial Setup
Use this section to set up your computer to assign it a static IP address in the 192.168.168.1 to
192.168.168.254 range with a subnet mask of 255.255.255.0. This is necessary to ensure that your computer
can communicate with your UT-6301.
Your computer must have an Ethernet card and TCP/IP installed. TCP/IP should already be installed on
computer using Windows 98/2000/XP and later operating systems.
Note: Connect a computer to UT-6301 Ethernet port directly should be with crossover Ethernet cable, if
both connect to hub/switch should be with straight-through Ethernet cable.
2.3.1 Installing the TCP/IP Protocol
If you are not sure whether the TCP/IP Protocol has been installed, follow these steps to check, and if
necessary, install TCP/IP onto your PCs.
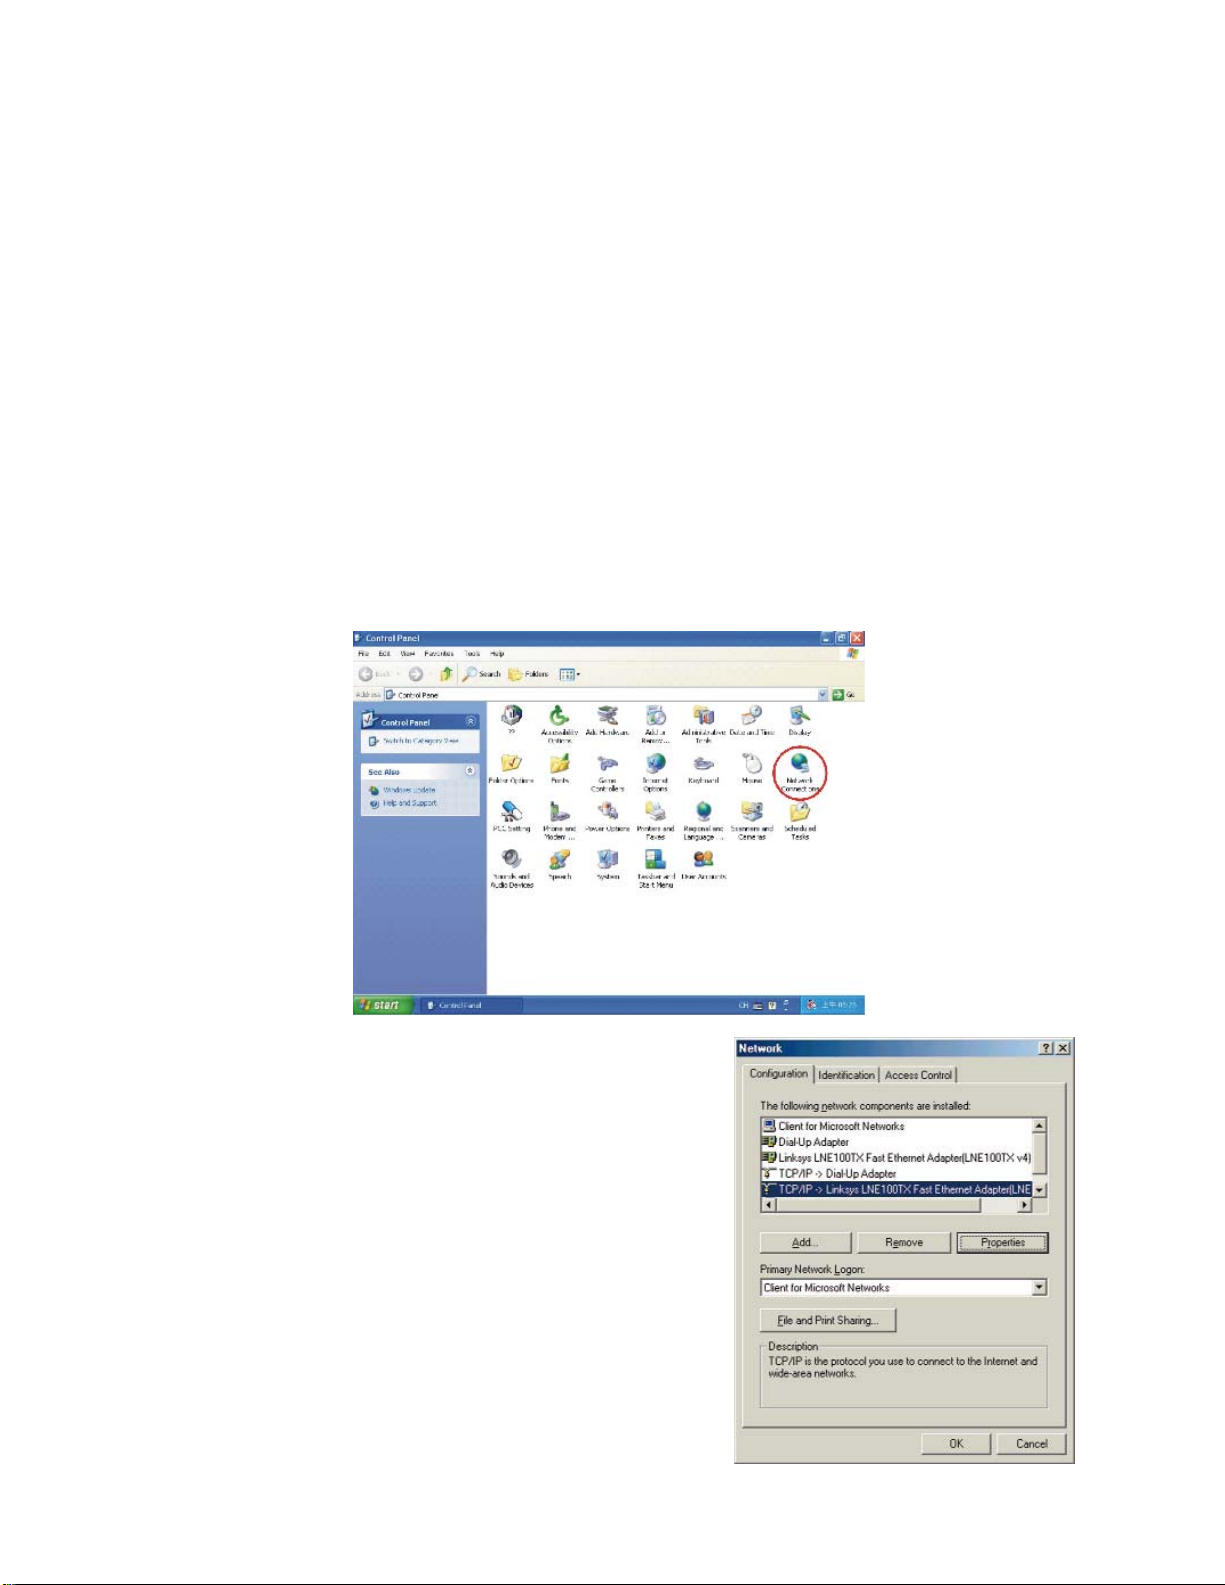
Step 1:Click the “Start” button. Choose “Settings”, then “Control Panel”. Double-click the “Network
Connections” icon. Your Network window should appear as follows:
Step 2:
For Windows 98 and Millennium
On the “Configuration” tab (if using Windows 98
and Millennium PCs), select the TCP/IP line for the
applicable Ethernet adapter. Do not choose a
TCP/IP entry whose name mentions
PPPoE, VPN. If the word TCP/IP appears by itself,
select that line. Click the Properties button.
- 6 -

Important:
For Windows 2000 & Windows XP Setting, you will find that they differ with Windows 98/ME/NT slightly. See the
following for reference.
For Windows XP and Windows 2000
Click the “Local Area Connection” icon on the lower right hand side of your desktop screen.
In the “Local Area Connection Status” window, click the “Properties” button then your Network window will
appear.
There are two tabs, “General” ”Support”,in the Network window.
Step 3:Check whether the TCP/IP Protocol has already been installed onto your computer’s Ethernet card.
Note that TCP/IP Protocol can be installed for a computer’s Dial-Up Adapter as well as for the Ethernet card.
*If yes, go to section 2.3.2.
*If no, click the “Install” button.
Step 4:Double-click “Protocol” in the Select Network Component Type or highlight “Protocol” then click
“Add”.
- 7 -
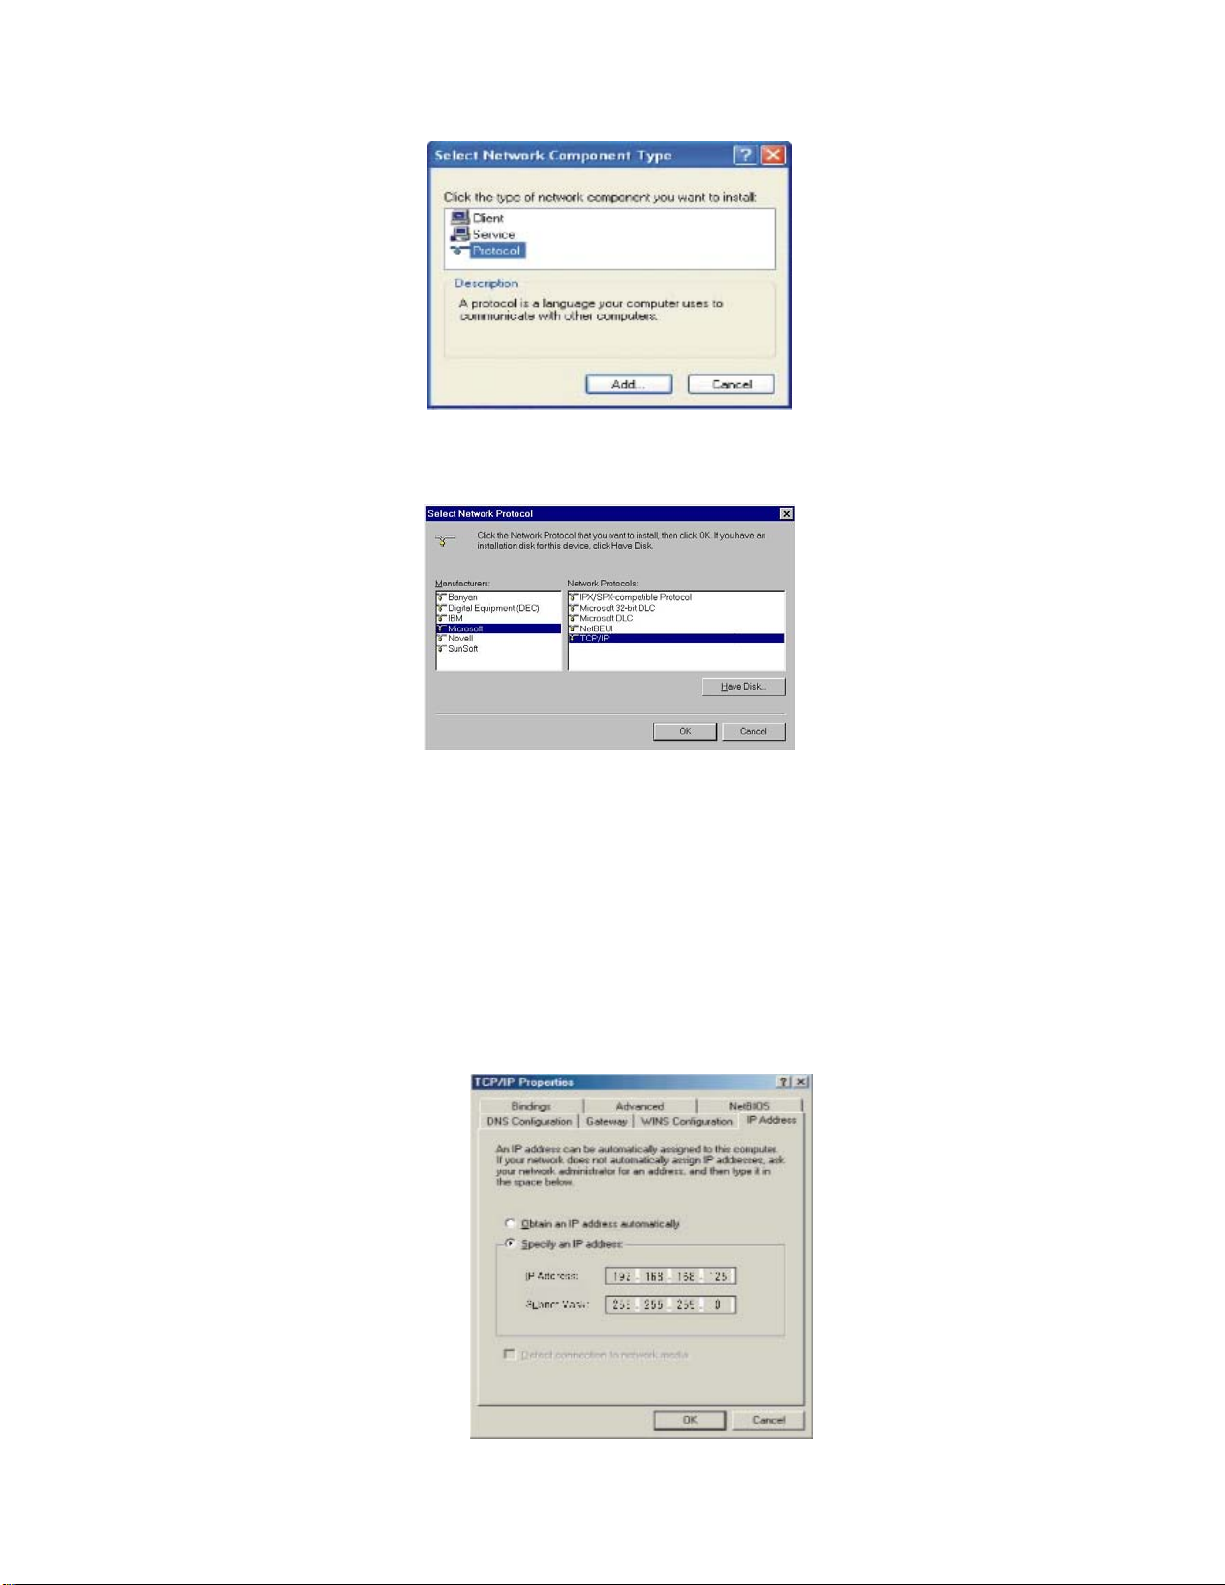
Step 5:Highlight “Microsoft” under the list of manufacturers. Double-click “TCP/IP” from the list on the right
or highlight “TCP/IP” then click “OK” to install TCP/IP.
Step 6:After a few seconds, you will be returned to the Network window. The TCP/IP Protocol should now be
on the list of installed network components (see 3 above).
2.3.2 Fixed IP Addresses Configuration
For Windows 98 and Millennium
Step 1:To set up computers with fixed IP Addresses, click the “Properties”button. The TCP/IP Properties
window consists of several tabs. Choose the “IP Address” tab as shown below.
Step 2:Select “Specify an IP address” and enter “192.168.168.xxx” (the default value of UT-6301 is
192.168.168.125) in the “IP Address” location (where xxx is a number between 1 and 254 used by the
High-Performance UT-6301 to identify each computer), and the default “Subnet Mask” “255.255.255.0”. Note
that no two computers on the same LAN can have the same IP address.
- 8 -

For Windows XP and Windows 2000
Step 1:Make sure the box next to Internet Protocol (TCP/IP) is checked. Highlight
Internet Protocol (TCP/IP), and click the Properties button
Step 2:Select “Specify an IP address” and enter “192.168.168.xxx” (the default value of 450M is
192.168.168.125) in the “IP Address” location (where xxx is a number between 1 and 254 used by the
High-Performance UT-6301 to identify each computer), and the default “Subnet Mask” “255.255.255.0”. Note
that no two computers on the same LAN can have the same IP address.
Click “OK”. to complete the TCP/IP installation.
- 9 -

2.3.3 Configure your UT-6301
Step 1:Open your web browser and type http://192.168.168.125 in the browser’s address box. This address is
the factory set IP Address of your UT-6301. Press “Enter”.
Step 2:The “Username and Password required” prompt box will appear. Typing “admin”(default username)
in the Username field and typing “admin” (default password) in the Password field. Click “OK”. The setup
screen will then appear.
Step 3:It is highly recommended you change the default username and password when you login successfully
first time.
Step 4:Setup the Operation Mode for TCP/IP connection and Serial Type for connecting with your device.
Note: Don’t forget click Apply button to save your changing when you complete your configuration
setting each time, the UT-6301 will restart automatically in 10 seconds with your new setting.
- 10 -
Table of contents
Other Votek Media Converter manuals


