UTStarcom F1000 Series User manual

Are you
ready to join
the telephone
revolution? This
Quick Start Guide
has everything you
need to get your
Vonage phone service
working with the
UTStarcom F1000 WiFi
handheld phone. Take a look
at the equipment, follow the
simple instructions and you'll be
talking in no time at all.
F1000 Series
s
s
s
S i s
Series
F1000 Series
e i s
Series
F1000 Series
F1000 Series
F1000 Series
1000 Series
F1000 Series
eses
e
eries
F1000 Series
eries
e
ii
i
riesries
r
1
1
F1000 Series
1
1
F
FF
F
0
0
0
0
0
0
e
e
e
e
i
i
F1000 Series
i
i
000 Series
s
es
eries
S
0
00 Series
000 Series
ies
ries
1
F1000 Series
0
0
0
e
e
i
www.utstar.com
D

Getting to know your F1000 Handset
Y
Antenna
Earpiece
LCD screen
Left soft key
Talk key
Number keypad
* key / Switch key
Microphone
# key / Lock key
Power key
Right soft key
Soft key function
display area
Display indicators
Earphone socket
4-way
navigation key
I.

Your handset's keys and navigation
Switch the phone on and off, end a call or
return to standby mode.
Key in "#" or pause symbol "P" (by pressing
and holding the key) or lock the keypad.
Enter numbers and characters.
Key in " " or change the text input method.
Scroll through menu lists and move
the cursor.
Scroll up and access the Received Log.
Scroll down and access the Missed Log.
Access the custom functions menu.
Access the current profile menu.
Perform the function shown in the soft key
function display area directly above the soft key.
Make or receive a call; access the Dialled Log
in standby mode.
Key Function
_
II.
I
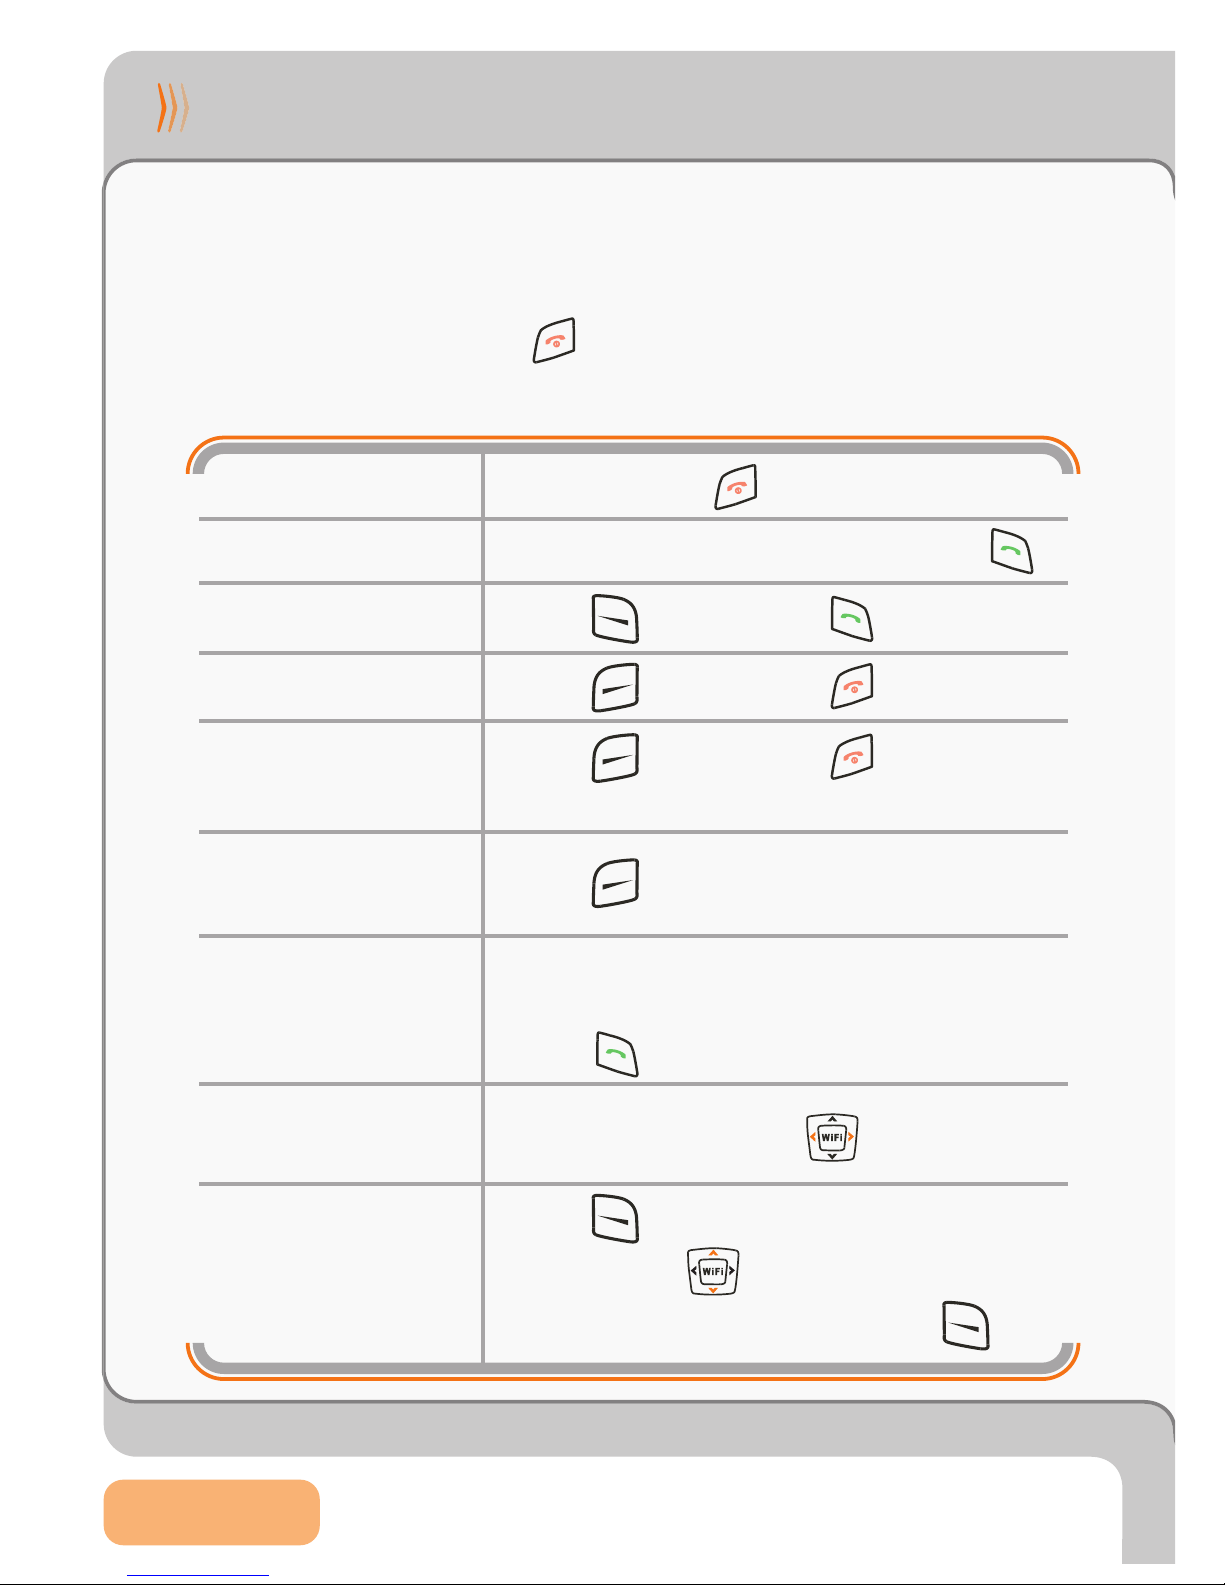
How do I...
Turn phone on/off
Many of these operations need to be performed while in standby
mode (when Menu is the left soft key function). When the phone
is idle,it enters Screen Saver mode (Clock displayed). To return
to standby mode,press .
You can make a call and use speed dial from either mode.
Make a call
Answer a call
Press and hold .
Key in the phone number and press .
Press (Answer)or .
End a call
Reject a call
Clear a keypad
entry
Use speed dial
Adjust listening
volume
Access menu
options
Press (Hangup)or .
Press (Clear) .
While on a call,press .
Press (Menu)to access the main
menu. Press to reach the desired
submenu/option,and then press (Ok).
Press (Hangup)or .The call will
go to voice mail.
Press and hold the speed dial key to
display the phone number and then
press .
III.

How do I...
Turn Vibration
on/off
Set Time Zone
and DST
Press and hold until the indicator
appears/disappears.
Press (Menu). Scroll to Tools and press
(Ok). Scroll to TimeZone or DSTSetting
and press (Ok). Scroll to the desired
option and press (Ok). The phone's
date and time is provided by the network.
Lock/Unlock
keypad
Press and hold until the indicator
appears/disappears.
WARNING: Prior to making or receiving calls, the WiFi phone must be
connected to a Wireless Access Point and registered with the Vonage
Network. If you purchased this WiFi phone from a retail store, you need to
activate your device at www.vonage.co.uk/activate.See Section 3,
"Connecting to a Wireless Network"for detailed instructions.
Adjust ringvolume
Press . Scroll to RingVolumeand
press (Ok). Scroll to Highor Low
and press (Ok).
IV.
I

How do I...
0
Phonebook
options:
Add a contact
Under the Phonebook submenu:
Select Add Entry; followscreen prompts.
Delete a contact
Edit a contact
Search
phonebook
Assign a speed
dialkey
Call Log options:
Select Delete Entry; followscreen prompts.
Contact namemust alreadybein the
Phonebook. Select Speed Dial; press to
get to the desired key(1-9); press (Set);
scroll to the desired name; press (Ok).
Under the Call Log submenu:
Viewmissed
call log
Viewreceived
call log
Select Missed Log. Press to browse.
Select Received Log. Press
to browse.
Viewoutgoing
call logSelect Dialled Log. Press to browse.
Select Search;scroll to name; press
(Details); press (Option);select Edit;
followscreen prompts.
Select Search; key in the firstletter(s)of
the name; press to scroll.
V.
01
02
03
03
04
05
07
09
09
Contents
1. Overview
2. Insert the Battery
3. Connecting to a Wireless Network
3.1 Connecting to Open Access Points
3.2 Connecting to Protected or Specific
Access Points
3.3 Finding and Saving the Access Point
3.3.1 Using Net Search
3.3.2 Entering SSIDs Directly
3.4 Tips for Alphanumeric Entry
3.5WebConfiguration
4. Initial Provisioning of F1000 WiFi
Phone
5.Troubleshooting
08
05
06
VI.
V

Page 01
1Overview
The UTStarcom F1000 Handheld is a wireless Voice
over IP (VoIP) telephone that, when coupled with the
Vonage VoIP phone service, combines the benefits of
Internet telephone service with mobility. This guide
covers how to configure and use your F1000 to make
VoIP phone calls via the Vonage service. You can make
and receive calls as long as you are within range of a
wireless access point. See the F1000 Handbook for
more information on all features.
Note: Before using your F1000 Handheld, you should have
high-speed Internet access, a wireless router and a Vonage
phone account set up.
HELPFUL HINT:If you purchased this WiFi phone froma retail store,
you need to activate your device at www.vonage.co.uk/activate
2
Internet

Page 02
P
2Insert the Battery
IMPORTANT:Use ONLY the UTStarcom
rechargeable battery supplied with your
new phone!
1. Remove battery from packaging.
2. Remove the battery cover. With the
back of the phone facing you, press the
battery cover release button and lift the
cover off in the direction of the arrow.
3. Install the battery. Connect the cord of the
new battery by firmly inserting the
connector into its place. Do not reverse
the connector.
4. Replace the battery cover until it clicks
into place.
The F1000 comes partially charged, so the
phone can be used immediately. Please
refer to the "Charge the Battery"section of
the F1000 Handbookfor instructions on fully
charging the battery.
4
Black
Yellow
Red
3
2

Page 03
3Connecting to a Wireless Network
Your F1000 WiFi phone has been pre-configured to provide the
Vonage service via any available open wireless Access Point (AP)
connected to the Internet. If you want to use a specific AP or your
AP is protected by encrypted access, refer to Section 3.2.
3
When you turn on the F1000, it searches for
available APs, selects the AP with the best signal
and attempts to connect to it. You will see the
message "Connecting to APname" while the
phone is attempting to connect.
Note: When the F1000 is used for the first time and has
successfully connected to an AP, it will need to be
provisioned. Please refer to Section 4.
Once connected (and provisioned if this is the first
time you are using your F1000), you will see the
message "Registering via APname". When the
Vonage screen appears displaying your phone
number, you are ready to make and receive calls.
Note: If the WiFi phone cannot connect to an AP, it will
keep searching and wear down your battery. Verify Open
AP availability. If not found, turn off the phone until you are
within range of an AP.
3.1 Connecting to Open Access Points
3
Other manuals for F1000 Series
7
Table of contents


