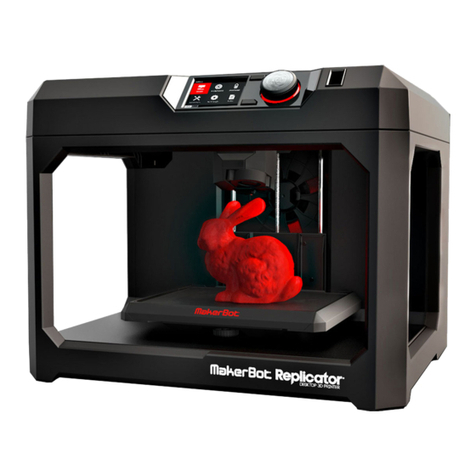
twotrees SK1 User manual

Note: The picture is for reference only, the actual product shall prevail
Max Printing
Speed
Max
Acceleration
Nozzle
Temperature
Printing Size
254*254*254
TEL: +0086-0755-23987110
Http: www.twotrees3d.com
E-mail: [email protected]
Facebook: https://www.facebook.com/twotrees3d
Address: Room 402, Building 11, No.9 Qilin Road, Nankeng Community,
Bantian Street, Longgang District, Shenzhen, Guangdong, China, 518000
23111702

A LETTER TO A CLIENT
Dear Customer:
Thank you for choosing our brand.
We have always been customer-oriented, continuous innovation, the pursuit of excellence, so that
everyone can have a rich experience in the use of the process.
I hope you enjoy your time with the two trees.
If you have any questions, please feel free to contact our customer service of each purchase plat-
form.
Other contact channels are:
Website: www.twotrees3d.com
We will contact you within 24 hours.
Wish you a happy life!
The Two Trees team

01
MATTERS NEEDING ATTENTION
1. After unpacking, please remove the corresponding fixation of XYZ axis according to the instructions to avoid
damage caused by forced movement of the machine.
2. Confirm whether the voltage gear of the machine is matched before starting the machine to avoid damage
to the machine power supply due to the mismatch of voltage gear.
3. The printer has 110VAC / 230VAC and other high voltage power interfaces. Do not use any other power cord
other than the one provided. Use approved power cords and sockets to ensure power cords are not damaged.
4. Do not place the printer in a large vibration or other unstable environment, the machine shake will affect the
printer print quality. It is recommended to place it in a well-ventilated and low-dust environment to avoid over-
heating of the machine.
5. Risk of scalding: Do not touch the nozzle and hot bed when the printer is working to prevent high tempera-
ture scalding. After printing, timely using the residual temperature of the nozzle to clean the consumables up
on the nozzle with the help of tools, and do not touch the nozzle with your hands directly during cleaning to
prevent scalding.
6. When the machine is running, please stay away from the parts in operation, and avoid poking your fingers or
other objects into the inside of the running printer to prevent injury.
7. Adult supervision: ensure that children do not have access to the machine, so as not to cause personal acci-
dents.
8. Do regular product maintenance: regularly in the case of power failure, use dry cloth to clean the printer
body, wipe dust and bonded printing materials, please lubricate and maintain the guide rail regularly.
9. In case of emergency, please turn off the power directly.
CATALOGUE
About your printer
Function definition
Machine parameters
Accessories list
Removal of limits
The machine assembly
01
02
03
04
05
06
Kind Tips
After the filament exits the extrusion head, it is recommended that you cut off the unfolded part of the
filament to prevent deformation of the filament from affecting the feeding of the filament. Thank you for
your understanding!

01 EN02
ABOUT YOUR PRINTER
X-axis
stepper motor
Chassis
power supply
Y-axis
stepper motor
Lead screw
Rigid coupling
Filament
rack
Power
interface
Main board
Towing chain
module
Extructor
4.3-inch touch
screen
PEI magnetic
steel plate
Line guide
rail
Lead screw
Rigid
coupling
FUNCTION DEFINITION
Serial
number Interface Function definition
Internet
Interface
USB3.0
Interface
USB2.0
Interface
Screen
Interface
WiFi
antenna Receive 2.4GHz WiFi signal
Power
Interface Connect AC power supply
Connect USB flash drive
Connect wireless card
Connect PC
Ethernet port for network
cable connection
Connect USB flash drive
Connect wireless card
Connect PC
Used to expand other
screen sizes,
RJ11 type interface
66

MACHINE PARAMETERS
Model :SK1
Color: Black
Nozzle Number :1
Print size :254x254x254mm
Printing accuracy :±0.1mm
XY axis accuracy :0.0025mm
Z-axis accuracy :0.0025mm
Maximum speed :700mm/s
Maximum acceleration :20000mm/s
Nozzle temperature (Max.) : 300℃Power parameters: 230V/110V 350W
Best working environment :20℃-40℃Motion structure :Core XY
Printing mode: USB / LAN / Wifi-2.4G HZ
Firmware type :Klipper Open source
Nozzle diameter: 0.4mm
Filament diameter: 1.75mm
Print file format: G-code
Supported system :MacOS\Windows\Linux
Hot bed temperature (Max.) : 100℃Software language: Chinese \ English \
Spanish \ German \ French \ Russian \
Display screen: 4.3-inch IPS capacitive
touch color screen (480*272)
Filament :PLA \ PETG \ ABS \ ASA \ TPU \ PC \ UltraPA
Slicing software :Ultimaker Cura, Prusaslicer,
Lycheeslicer, Simplify3D, etc
Working environment: Temperature: 5-40℃;
Humidity: 20-60% RH
03
MachineX1 EN04
ACCESSORIES LIST
Accessory box X1
Half round head screw
M3*6X2
Half round head screw
M4*8X2
Filament rackX1
Screen holder X1
Screen X1
WiFi antenna

REMOVING THE LIMIT SWITCH BLOCK
OF XY LINEAR GUIDE
1. Install WiFi antenna
THE MACHINE ASSAEMBLE
05 EN06

2. Install the filament rack
Half round head screw M4*8X2
Filament rack X1
THE MACHINE ASSEMBLE
07
3. Install the 4.3-inch screen module
THE MACHINE ASSEMBLE
a. Install the Screen holder X1
Half-round head screws M3*6X2 EN08

LETTRE À NOS CLIENTS
Cher client :
Nous vous remercions sincèrement de nous avoir choisi.
Nous avons toujours été orientés vers nos clients, en innovant constamment et en recherchant
l’excellence, afin que chacun puisse avoir une expérience enrichissante en utilisant nos produits.
Nous espérons que vous passerez de bons moments avec Two Trees.
Si vous avez des questions, n’hésitez pas à contacter notre service clientèle sur chaque plateforme
d’achat.
Les autres moyens de contact sont les suivants:
Site web : www.twotrees3d.com
Courriel après-vente : service@twotrees3d.com
Demande de renseignements : info@twotrees3d.com
Nous vous contacterons dans les 24 heures.
Nous vous souhaitons une vie heureuse !
L’équipe Two Trees
THE MACHINE ASSEMBLE
b. Before installation, insert the reserved screen cable into the terminal block, and
then push the screen assembly along the chute into the corresponding slot of the
bracket, then the installation is complete.
09

ATTENTIONS
I. Après l’avoir sorti de l’emballage, veuillez retirer les différentes fixations correspondant aux axes XYZ tout en
suivant les instructions, afin d’éviter tout endommagement de la machine à cause d’un mouvement forcé.
II. Confirmez que l’engrenage de tension de la machine est bien adapté avant de mettre la machine en marche,
d’éviter tout endommagement de l’alimentation de machine à cause de l’inadéquation de l’engrenage de
tension au démarrage.
III. L’imprimante possède des connexions d’alimentation 110VAC / 230VAC et d’autres connexions d’alimenta-
tion à haute tension. N’utilisez pas d’autre cordon d’alimentation que celui fourni. Utilisez un cordon d’alimenta-
tion et une prise de courant reconnus et assurez-vous que le cordon d’alimentation n'est pas endommagé.
IV. Ne placez pas l’imprimante dans un environnement vibrant ou instable, les secousses de la machine affect-
eront la qualité d’impression de l’imprimante. Il est recommandé de la placer dans un environnement bien
ventilé et peu poussiéreux afin d’éviter une surchauffe de la machine.
V. Risque de brûlure : ne touchez pas la buse ni le lit chauffant lorsque l'imprimante fonctionne, afin d’éviter les
brûlures dues à la température élevée, après l'impression, nettoyez les consommables sur la buse à l’aide d’un
outil tout en profitant de la température résiduelle de la tête d'impression, ne touchez pas directement la buse
avec la main lors du nettoyage pour éviter les brûlures.
VI. Lorsque la machine est en marche, ne vous approchez pas des pièces en fonctionnement et ne mettez pas
vos doigts ni d’autres objets à l’intérieur de l’imprimante en marche afin d’éviter toute blessure.
VII. Surveillance par adulte: Veillez à ce que les jeunes enfants n’aient pas accès à la machine afin d’éviter tout
accident corporel.
VIII. Effectuez régulièrement un entretien du produit, en cas de coupture d’alimentation, nettoyez l’imprimante
avec un chiffon sec, essuyez la poussière et les matériaux d’impression collés, veuillez lubrifier et entretenir
régulièrement le rail de guidage.
IX. En cas d’urgence, il faut couper directement l’alimentation.
TABLE DES MATIÈRES
À propos de la machine
Fonctions
Paramètres de la machine
Liste des accessoires
Suppression des limites
Assemblage de la machine
10
11
12
13
14
15
Conseils aimables
Une fois le filament sorti de la tête d'extrusion, il est recommandé de couper la partie dépliée du filament
pour éviter que la déformation du filament n'affecte l'alimentation du filament. Merci pour votre com-
préhension!

À PROPOS DE VOTRE IMPRIMANTE
Moteur
pas-à-pas à
l’axe X
Alimentation
du châssis
Moteur
pas-à-pas à
l’axe Y
Vis
Accouplement
rigide
Support des
consommables
Connecteur
d’alimentation
carte mère
Assemblage de
la chaîne
d’entraînement
Tête d'impression
Écran tactile de
4,3 pouces
Tôle d'acier
magnétique PEI
Rail
Vis
Accouplement
rigide
10 FR11
FONCTIONS 66No. Ports Fonctions
Port Internet
Port USB3.0
Port USB2.0
Port Écran
Antenne
Wi-Fi Recevez un signal WiFi 2,4 GHz
Connexion d’une clé USB \Connexion
d’une carte LAN sans fil \Connexion d’un
PC
Port Ethernet pour la connexion
d’un câble réseau
Connexion d’une clé USB \Connexion
d’une carte LAN sans fil \Connexion d’un
PC
Pour l’extension d'écrans
différents, interface de type RJ11
Port
Alimentation
Raccordement de l’alimentation
en courant alternatif
Table of contents
Languages:
Other twotrees 3D Printer manuals