TV Ears Digital System User manual

TV Ears Digital System
Installation Guide

1. Read all instructions completely and heed all warnings. Install in accordance with TV Ears,
Inc.’s instructions.
2. Keep these instructions in a safe place for future reference.
3. Do not use or submerge TV Ears products near water, moisture, or other liquids.
4. Clean with a dry cloth.
5. Do not install near any heat sources such as radiators, heat registers, stoves, or other
apparatus (including ampliers) that produce heat.
6. For safety purposes, do not deface the prongs on the AC adapters. If the provided plug
does not t into your outlet, purchase the correct adapter or consult an electrician for
replacement of the obsolete outlet.
7. Protect the power cord from being walked on or pinched particularly at plugs,
convenience receptacles, and the point where the cord exits from the transmitter.
8. TV Ears recommends using a surge protector to protect your TV Ears from power surges.
9. Only use attachments and accessories specied by TV Ears, Inc. with your TV Ears system.
10. Refer all servicing to qualied service personnel. Servicing is required when the TV Ears
product has been damaged in any way, such as power-supply cord or plug is damaged,
liquid has been spilled or objects have fallen into the TV Ears product, the TV Ears product
has been exposed to rain or moisture, does not operate normally, or has been dropped,
cracked, or broken.
Warning: To reduce the risk of re or electric shock, do not expose the TV Ears product to rain
or moisture. The TV Ears product should not be exposed to dripping or splashing liquids. Do
not place objects lled with liquid such as vases on or near the TV Ears product.
Warning: Keep batteries out of reach of children. Discard the battery faceplate (leave batteries
installed in faceplate) appropriately and carefully. If swallowed, call:
US: The National Button Battery Ingestion Hotline: 202-625-3333
Canada: Battery Ingestion Hotline: 416-813-5900
Warning: The magnetic eld emitted by the TV Ears speakers is minimal. When used as
indicated, TV Ears headsets should not cause magnetic interference with pacemakers or
internal debrillators. The magnetic eld strength of the speakers is less than 1 Gauss when
within1 inch (3 cm) of the pacemaker or internal debrillator. It is recommended that the user
keep the ear tips at least an inch away from any pacemaker or internal debrillator. If you have
concerns, we recommend you contact your physician.
Safety Instructions
1

Important Safety Instructions
Included in Box
Ideal TV Ears Set Up
Installation instructions
Step 1 | Connect the Transmitter to Your TV
Step 2 | Place and Power the Digital Transmitter
Step 3 | Charging the Headset
Alternative Methods of Installation
Option 1 | Digital Audio
Option 2 | AIK - Power Microphone
Option 3 | AIK - Headphone Jack Adapter
Using the System | Using the Headset
Maintenance and Replacement Parts
Frequently Asked Questions
Warranty and Guarantee Information | Contact Information
Manufacturer Declarations
Technical Specications
Table of Contents
1
3-4
5-6
7
7
8
9
10
10
11
12
13
14
15
16
17
18
2

Included in Box
3
TV Ears Digital Transmitter
TV Ears Headset
Optical Cord
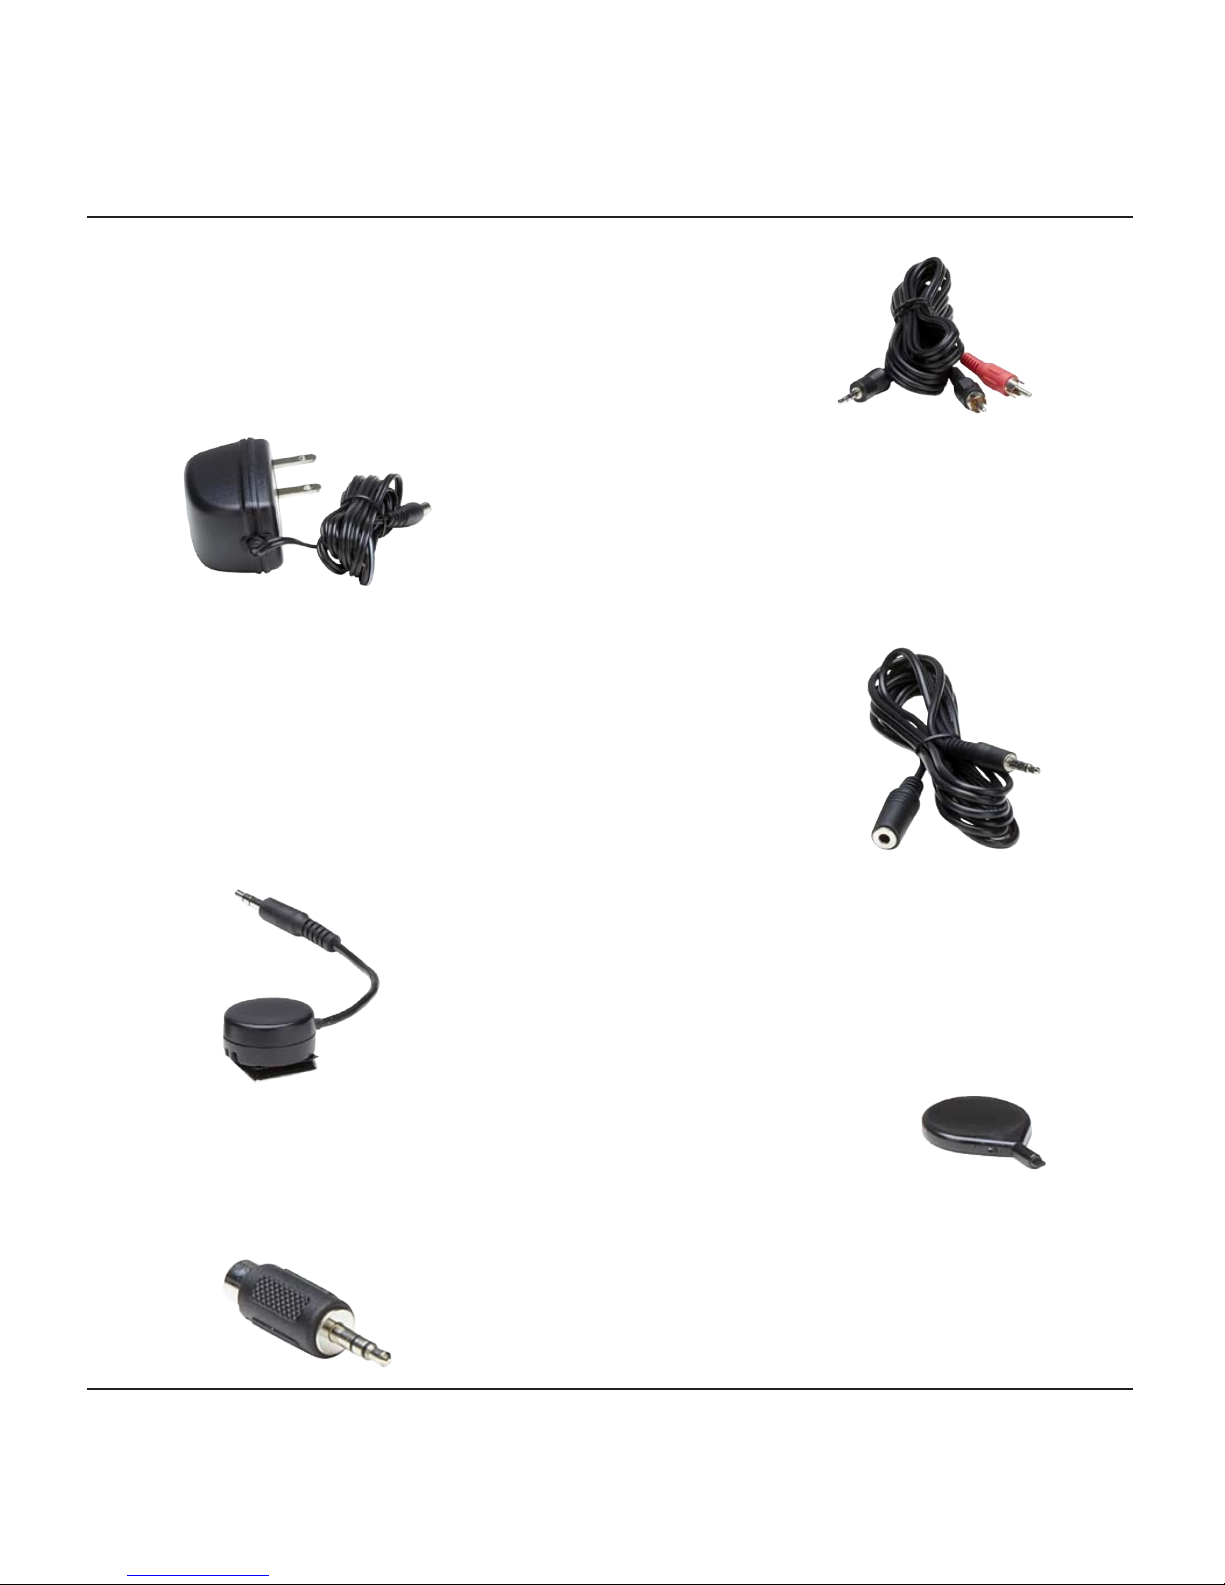
Included in Box
4
Audio Cord
AC Adapter
Microphone Extension Cord
Microphone
Balance Tool
Headphone Jack Adapter
Ideal TV Ears Set Up
5
6
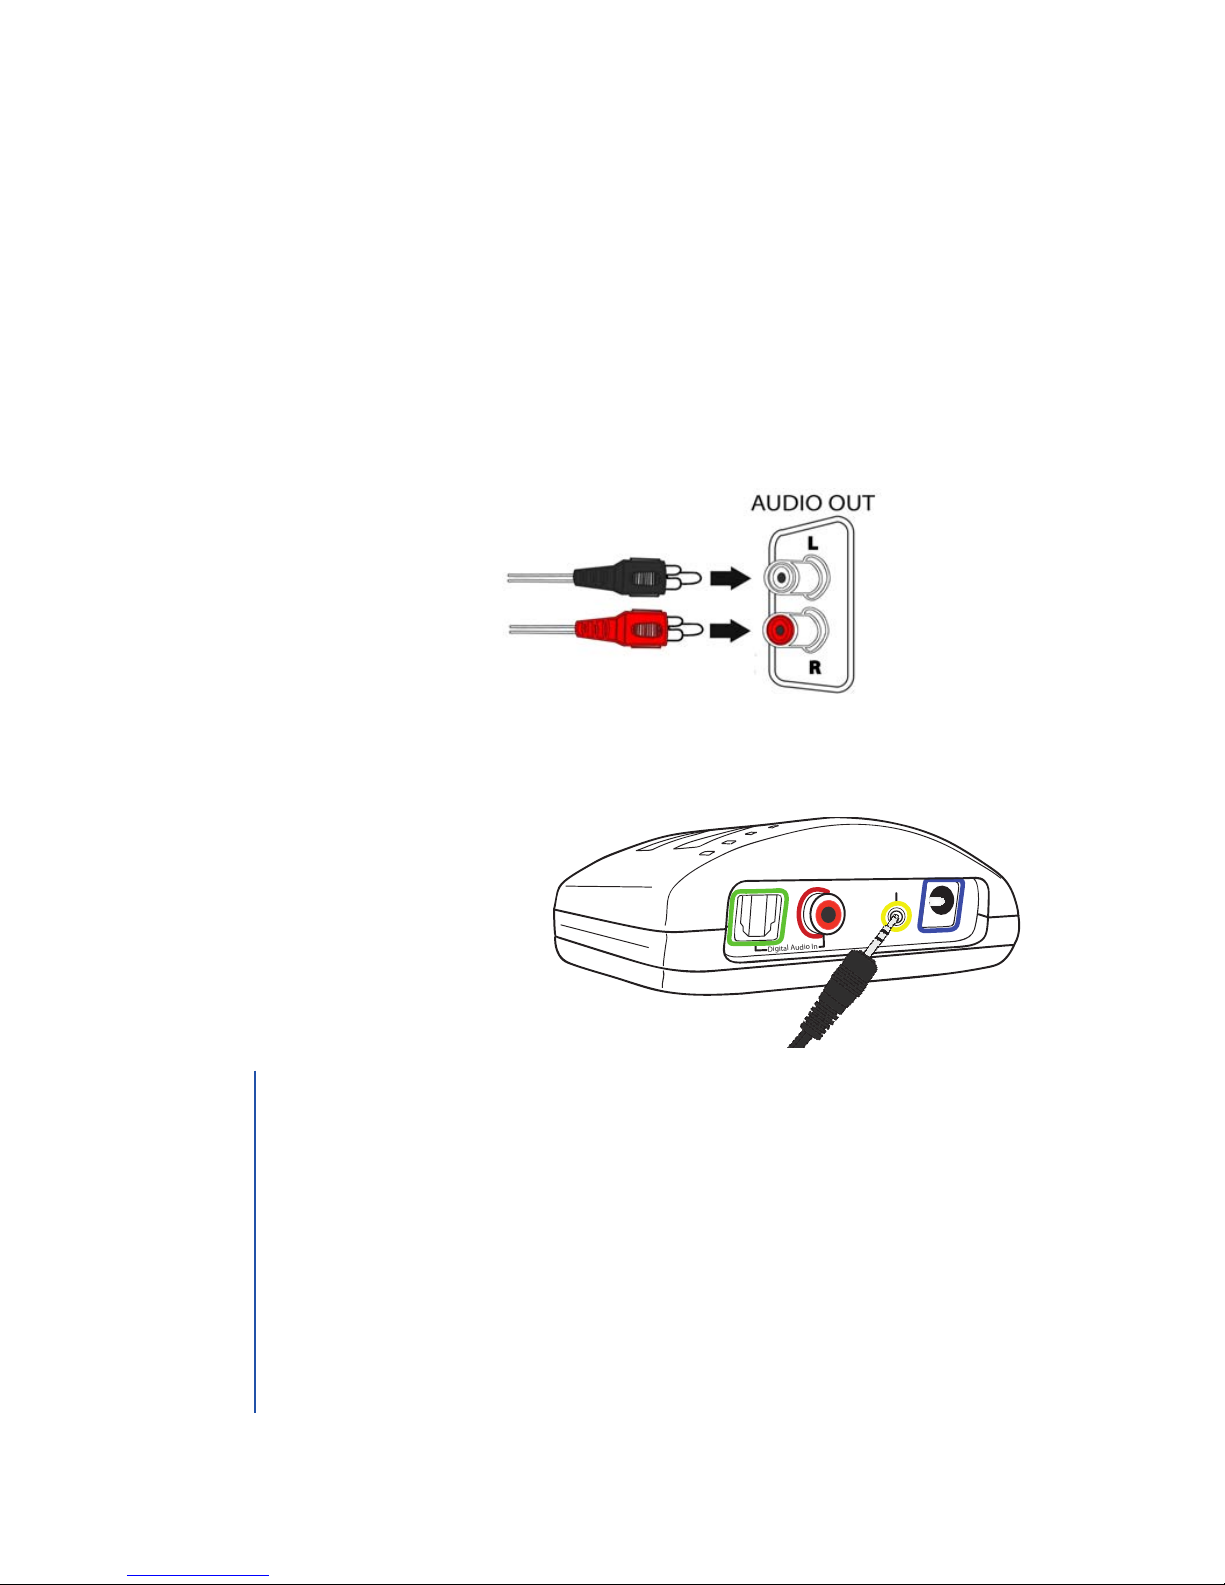
Installation | Step 1
Connect the Transmitter to your TV
Analog Audio
1. Plug the dual end of the audio cord (red and black male plugs)
into the analog (RCA) audio out ports on the back of the
television, satellite, or cable box.
2. Plug the single end of the audio cord into the port labeled
Analog Audio In on the back of the TV Ears transmitter.
Digital Audio In
Analog Audio In
12
V
7
1. Ports on the front of TVs are usually audio in ports and will not
send sound to your TV Ears.
2. Fixed/Variable Audio Setting: audio out ports may be marked
xed or variable/xed or L& R. A xed audio out setting will allow
the television volume to work independently from the TV Ears
headset. The television volume can be on mute or at a low level
while the TV Ears’volume can be turned up.
• Consult your television manual / manufacturer to manually
program the television to FIXED audio if currently set to
VARIABLE audio.
TIP
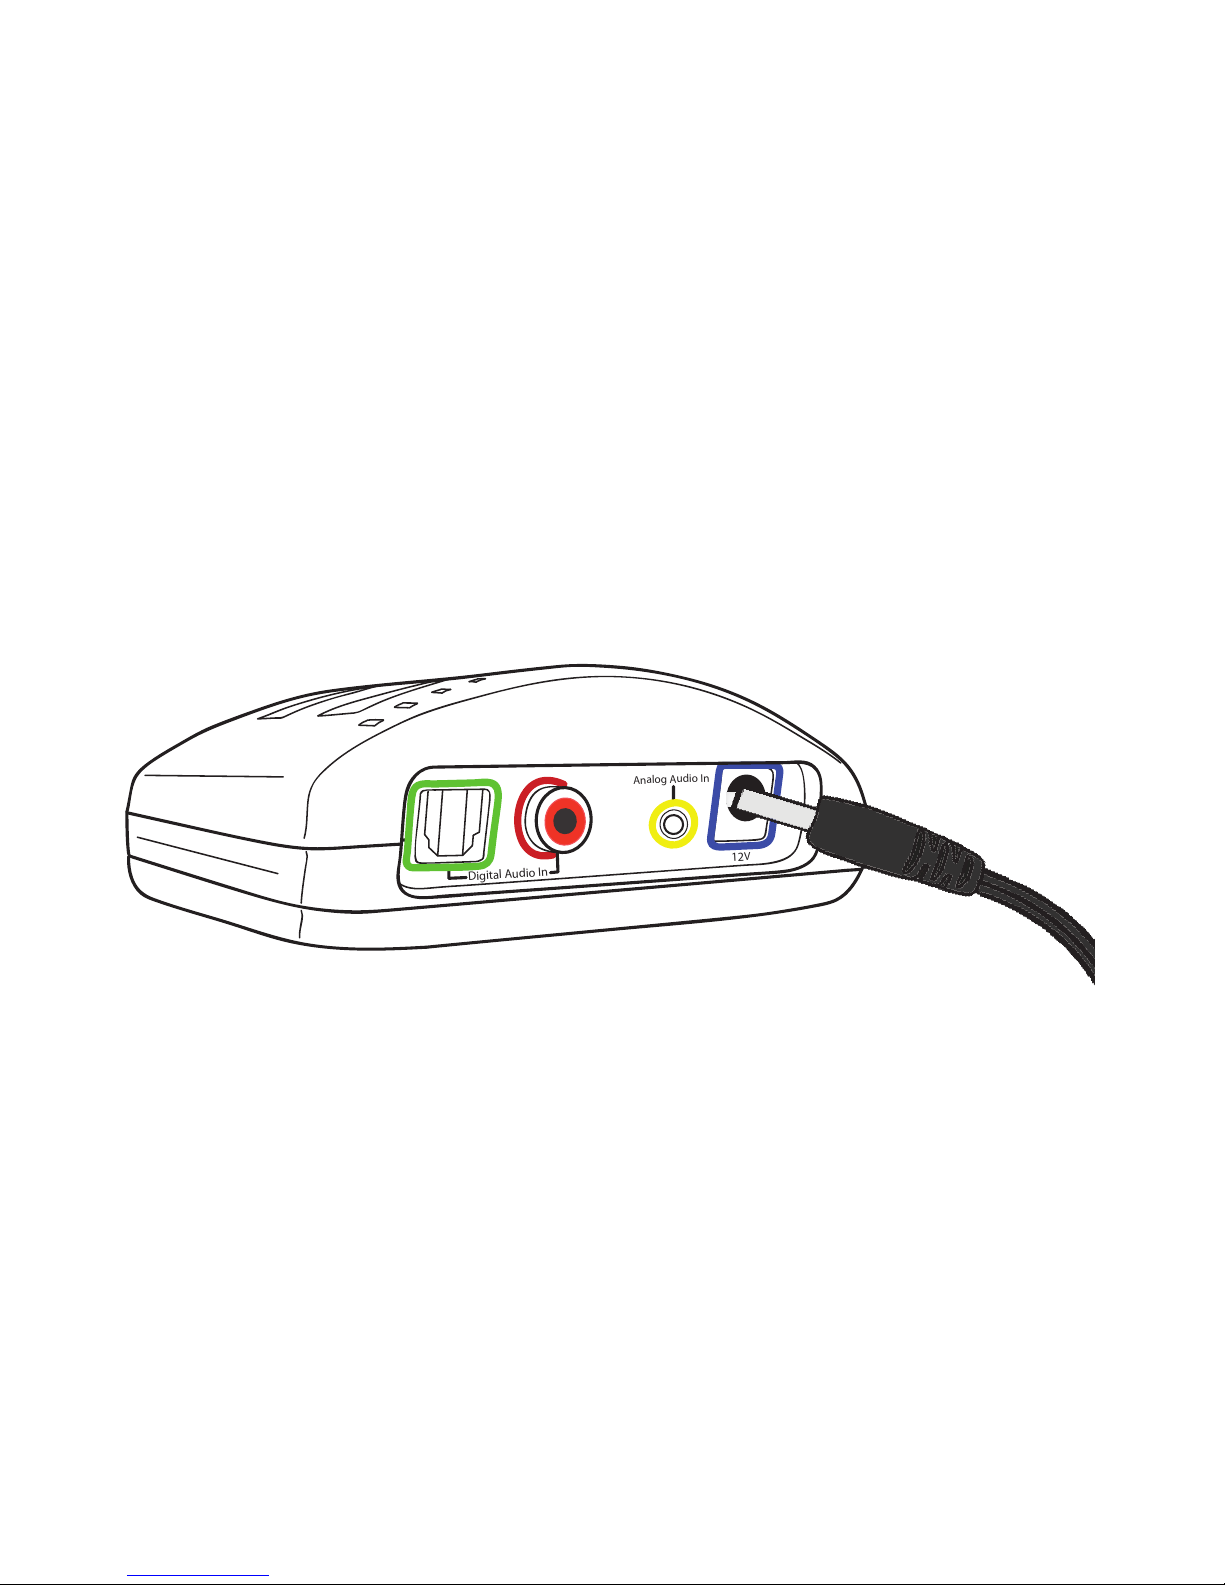
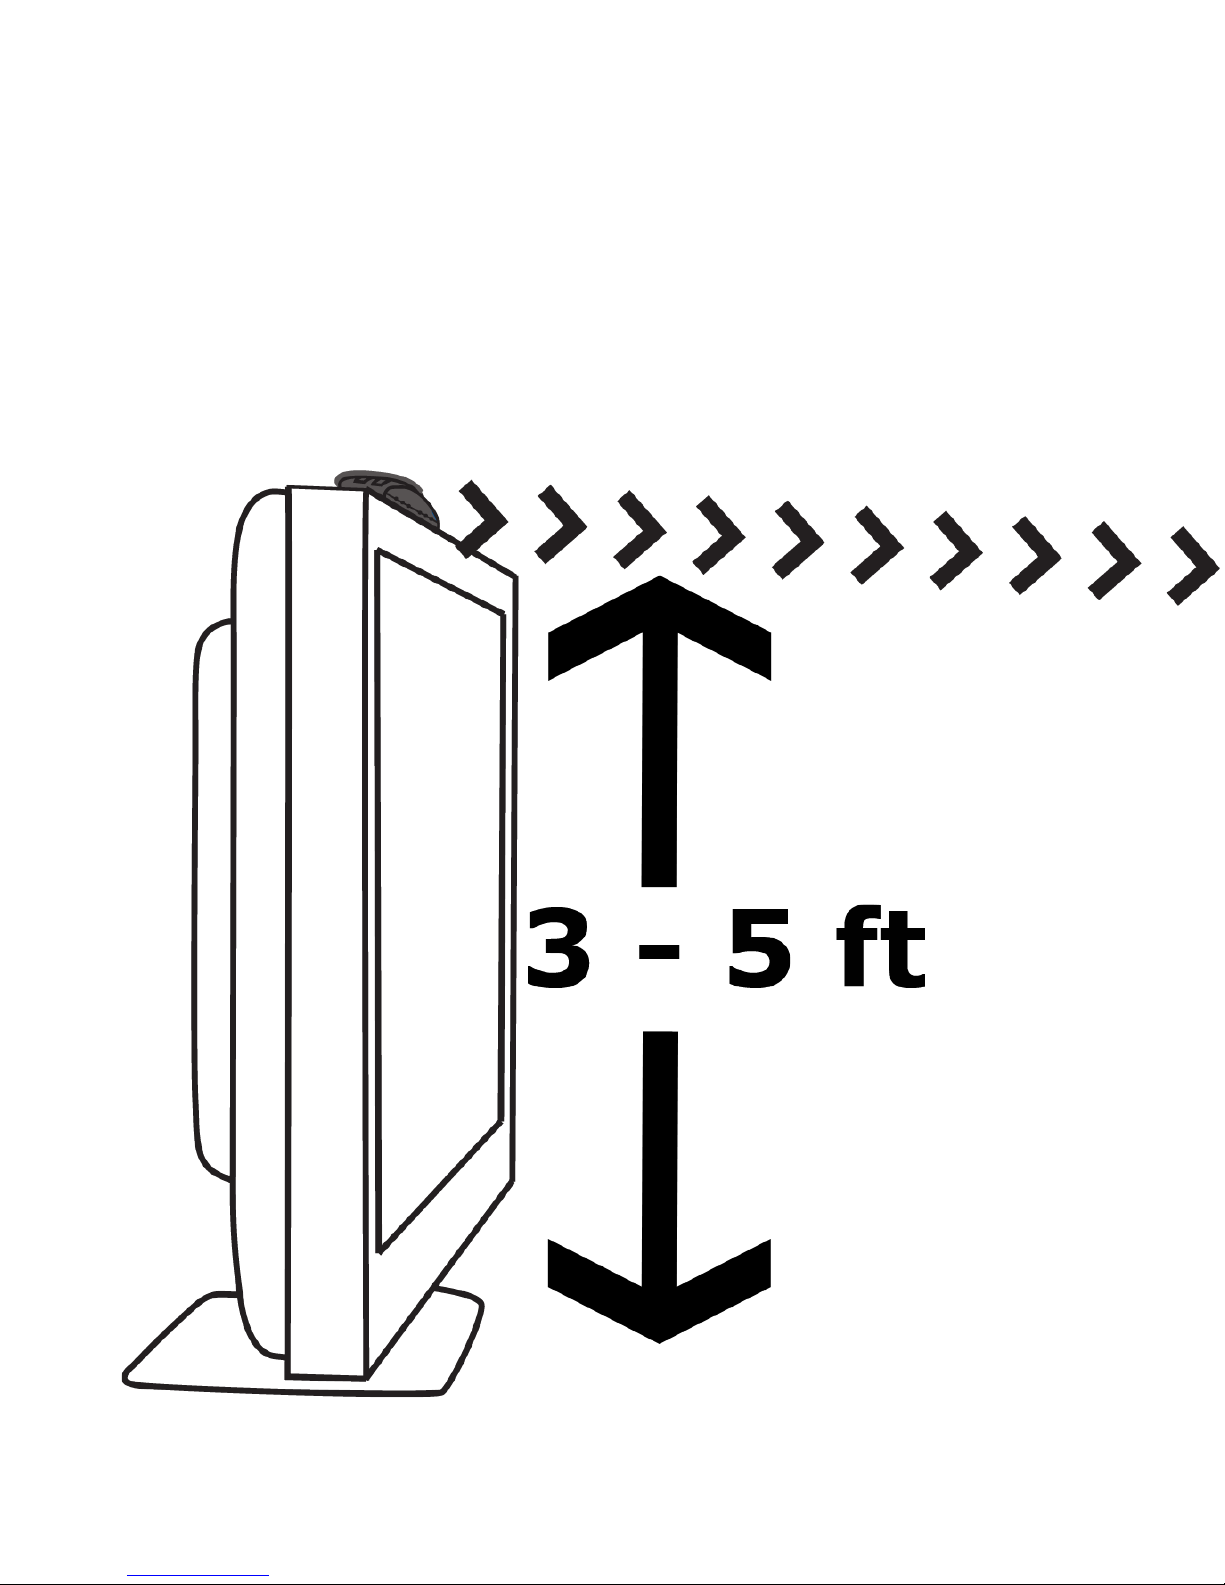
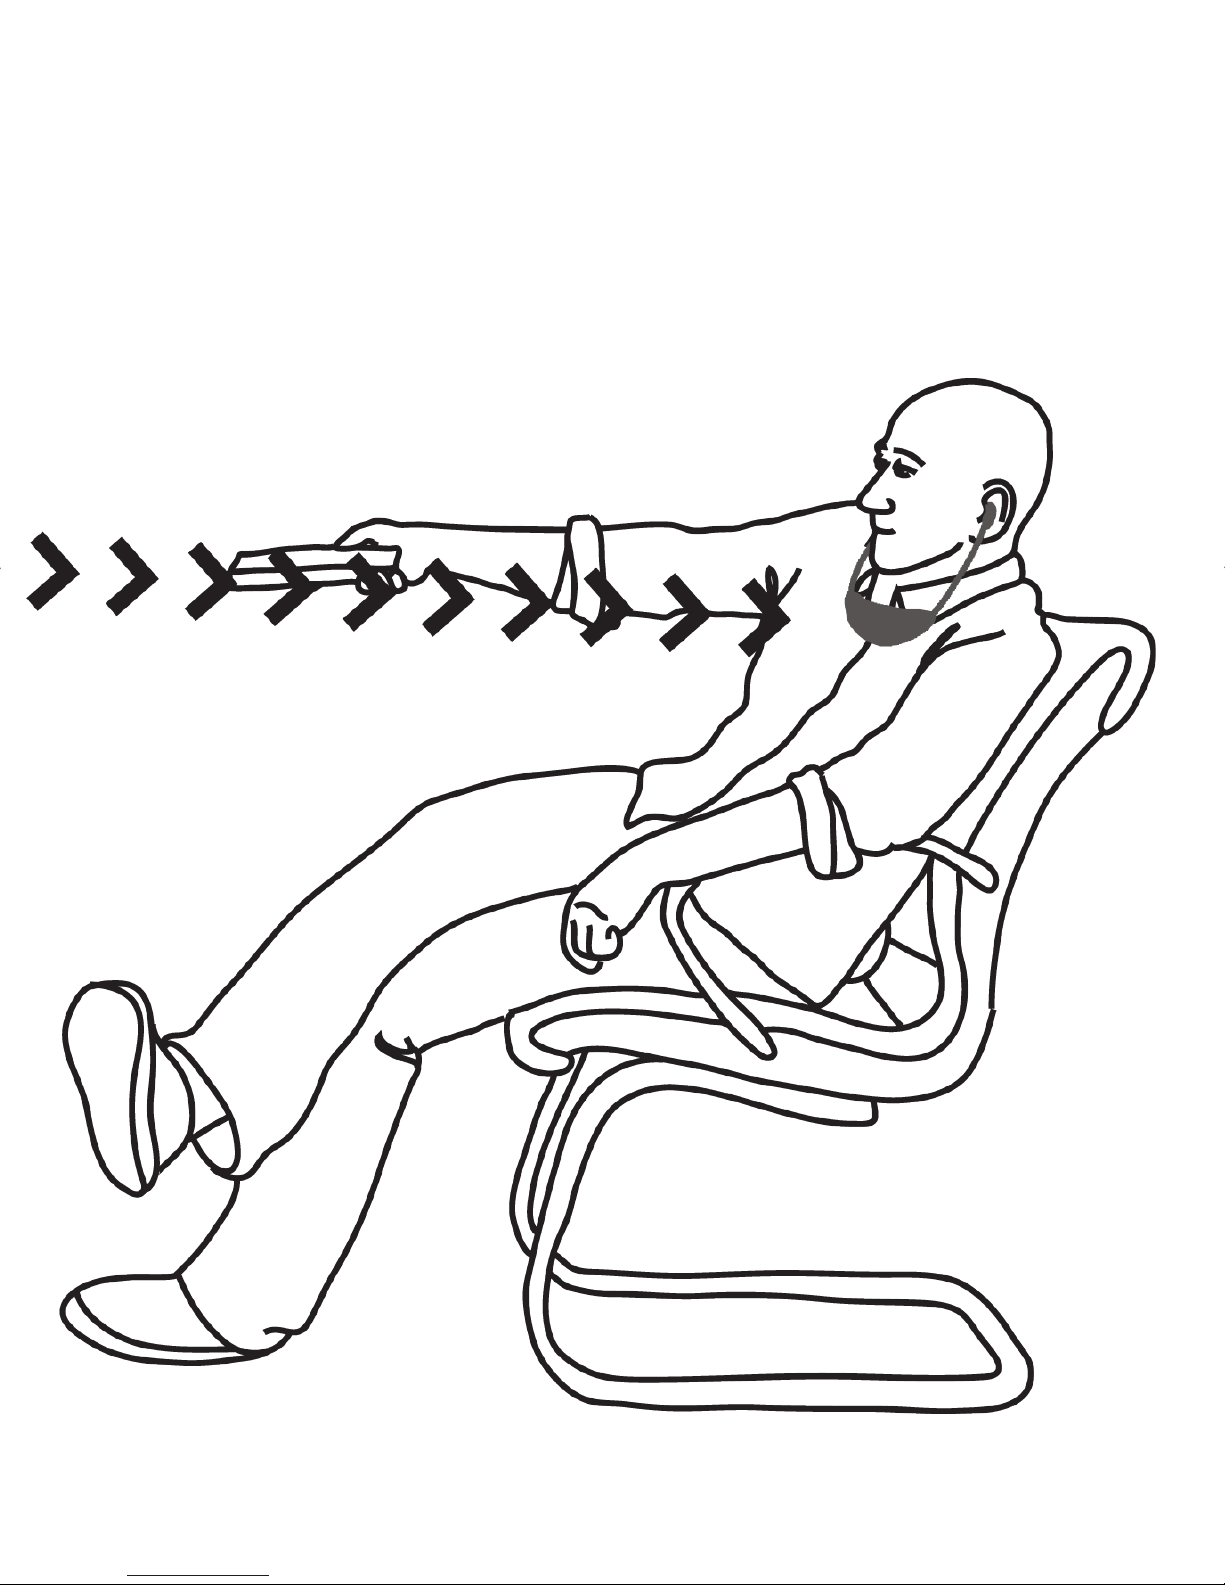
Installation | Step 2
Place and Power the Digital Transmitter
The infrared diodes must be in direct line of sight with the headset
so the headset can receive the infrared signal.
1. Place the transmitter on a at surface 3 - 5 feet o the ground.
Point it towards the seating area where the headset will be used.
2. Then plug the end of the AC adapter into the ports labeled 12V
on the back of the transmitter.
3. Plug the AC adapter into a standard electrical outlet or surge
protector.
Digital Audio In
Analog Audio In
12
V
8

Installation | Step 3
Charging the Headset
Each headset comes pre-charged with enough battery power for at
least 10 minutes of use. The headset will last around 6 - 8 hours on
a full charge, but will decrease as the volume reaches higher levels.
A fully exhausted battery will take between 8 - 10 hours to charge
completely. The 1 hour“Quick Charge” feature will rapidly charge a
partially drained battery suciently for typical use, which is around 2
to 4 hours.
1. Turn the headset volume knob to the o position. You will hear
and/or feel a click when it has been turned all the way into the o
position.
2. Place the headset in the transmitter-charging cradle facing
forward.
3. Check to see that the charging lights illuminate. The left charging
light will illuninate if there is a headset in the front cradle and
the right charging light will illuninate if a headset is in the rear
charging cradle.
We recommend storing the headset in the charging cradle of
the transmitter when not in use to avoid damaging the headset.
Remember, the headset needs to be turned o when not being used
and it cannot be over-charged.
9
This manual suits for next models
1
Table of contents
Other TV Ears TV Accessories manuals


