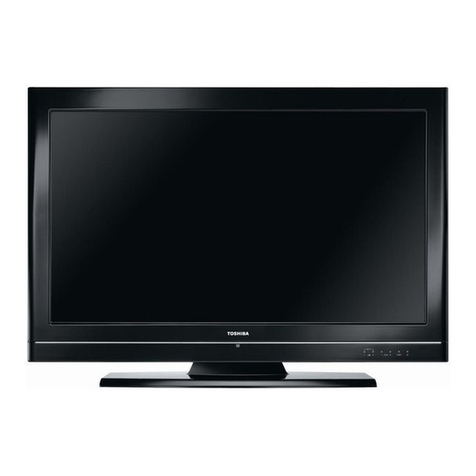
TTE Technology L32HDF11 User manual

NA HD F11/F10
NA RCA L32HDF11
\\tclking-hzoa0\ \ \ 3\ \
: , BOM
SK2009-12-066R0
72-32F116-E001A
2009.12.18
(BRAND NAME)
B.O.M.
i)
ii)
iii)
iv)
(SCALE)
(SIZE)
(COLOUR) :
:
:
TCL
ODF
ODF DATE:
1:1
42
(TYPE OF JOB.):
QA
²¿Æ·²¿IQC PE
²É¹º²¿
Ïã¸Û
(TO):
CUSTOMER
Silk Screen Printing
Wash Printing
Four-Colour Printing
¹¤³Ì²¿
Spraying Paint
Plastic Colour
TCL
Others
²É¹º²¿ ²É¹º²¿ ²É¹º²¿
PMC
A5
--
PREPARED BY CHECKED BY: REVIEWED BY:
/
CHECKED BY
H3-32F116Q-USA0WAA

1
LCD FLAT PANEL HDTV
user’sguide
connections
remote 10
5
menus 20
FAQs 32
warranty 38
contents
For use with models: L32HDF11/L32HDF10
/L26HDF11/L26HDF10
Need assistance?
visit our website at www.rca.com/tv
or call 1-877-794-7977

2
Important Information
WARNING
To reduce the risk of re or electric shock, do not
expose this product to rain or moisture. This product
should not be exposed to dripping or splashing. No
objects lled with liquids, such as vases, should be
placed on the component.
This symbol indicates that this product contains mercury. Special disposal of this product for environmental
reasons may be required under the laws applicable to your jurisdiction. For disposal or recycling information,
please contact your local authorities or the Electronic Industries Alliance: www.eiae.org.
Refer to the identication/rating label located on the back panel of your product for its proper operating voltage.
FCC regulations state that changes or modications to this unit not expressly approved by the party responsible for
compliance could void the user’s authority to operate the equipment.
Cable TV Installer: This reminder is provided to call your attention to Article 820-40 of the National Electrical Code
(Section 54 of the Canadian Electrical Code, Part 1) which provides guidelines for proper grounding and, in particular,
species that the cable ground should be connected to the grounding system of the building as close to the point of
cable entry as practical.
Important: This television is a table model and is designed to sit on a rm, at surface. Don’t place the TV on soft
carpeting or a similar surface, as the ventilation slots on the bottom of the unit may be blocked, resulting in reduced
lifetime from overheating. To assure adequate ventilation for this product, maintain a spacing of 4 inches from the top
and sides of the TV receiver and 2 inches from the rear of the TV receiver and other surfaces. Also, make sure the
surface or stand is of adequate size and strength to prevent the TV from being accidentally tipped over, pushed off,
or pulled off. This could cause personal injury and/or damage to the TV. Refer to the Important Safety Instructions on
the next page.
The power button (followed by the power symbol) on this TV and your remote control puts the TV into a very
low-power standby mode but will not completely shut the power off. In order to shut the power off, you will need to
disconnect the power cord from your outlet. Therefore, you should make sure the TV is installed in a way that allows
you to disconnect the power cord when desired.
Product Registration
Please ll out the product registration card (packed separately) and return it immediately. For US customers: Your
RCA Consumer Electronics product may also be registered at www.rca.com/television. Registering this product
allows us to contact you if needed.
Product Information
Keep your sales receipt to obtain warranty parts and service and for proof of purchase. Attach it here and record the
serial and model numbers in case you need them. These numbers are located on the product.
Model No. ______________________ Serial No.______________________________________
Purchase Date __________________ Dealer/Address/Phone ___________________________
Caution: To reduce the risk of electric shock, do not remove cover (or back). No user serviceable parts inside.
Refer servicing to qualied service personnel.
This symbol indicates "dangerous voltage"
inside the product that presents a risk of
electric shock or personal injury.
This symbol indicates important
instructions accompanying the product.
This symbol indicates that this product incorporates
double insulation between hazardous main voltage
and user accessible parts. When servicing, use only
identical replacement parts.
The TV is unstable if it is not properly attached to
the base or mounted to the wall. Please follow the
base or wall mounting instructions provided in the
User’s Guide to ensure your safety.
WARNING
CAUTION
RISK OF ELECTRIC SHOCK.
DO NOT OPEN

3
Important Safety Instructions
1. Read and follow all instructions.
2. Do not block any ventilation openings. Install in accordance with the manufacturer’s instructions.
3. Do not install near any heat sources such as radiators, heat registers, stoves, or other apparatus
(including ampliers)that produce heat.
4. Do not negate the safety purpose of the polarized or grounding-type plug. A polarized plug has
two blades with one wider than the other. A grounding type plug has two blades and a third
grounding prong. The wide blade or the third prong is provided for your safety. If the provided
plug does not t your outlet, consult an electrician for replacement of the obsolete outlet.
5. Protect the power cord from being walked on or pinched particularly at plugs, receptacles, and
the point where it exits from the component.
6. Do not use this component near water.
7. Only use the attachments/accessories specied by the manufacturer.
8. Clean only with dry cloth.
9. Use only with the cart, stand, tripod, bracket, or table specied by the manufacturer, or sold with
the component. When the TV is placed on a cart, use caution when moving the cart to avoid
injury from tip-over.
10. Unplug this component during lightning storms or when unused for long periods of time.
11. Refer all servicing to qualied service personnel. Service is required when the component is
damaged in any way, such as power supply cord or plug damage, liquid spilled on or objects
falling onto the component, rain or moisture exposure, abnormal operation, or if the component
has been dropped.
12. If an outside antenna or cable system is connected to the product, be sure the antenna or
cable system is grounded so as to provide some protection against voltage surges and built-
up static charges. Section 810 of the National Electrical Code, ANSI/NFPA No. 70-1984 (Section
54 of Canadian Electrical Code, Part 1) provides information with respect to proper grounding of
the mast and supporting structure, grounding of the lead-in wire to an antenna-discharge unit,
size of grounding conductors, location of antenna-discharge unit, connection to grounding
electrodes, and requirements for the grounding electrode. See following example:
ANTENNA LEAD IN WIRE
GROUND CLAMP
GROUNDING CONDUCTORS
(NEC SECTION 810-21)
GROUND CLAMPS
POWER SERVICE GROUNDING
ELECTRODE SYSTEM
(NEC ART 250, PARTH)
ELECTRIC SERVICE
EQUIPMENT
ANTENNA DISCHARGE
UNIT(NEC SECTION 810-20)

4
Important Information ...........................2
Important Safety Instructions ...............3
Chapter 1 I Connection and Setup
Before Initial Setup .................................5
Protect Against Power Surges .............5
Safety Information ..............................5
Avoid Audio Interference ....................5
Avoid Direct Light ................................5
Check Supplied Parts ..........................5
Removing and Installing the Table Stand ... 6
Mounting Your TV to the Wall ..................7
Side Panel Buttons ..................................8
Explanations of Jacks ..............................8
A. Side Panel .......................................8
B. Rear Panel .......................................9
Remote Control Buttons ..........................10
Antenna/Cable Connection......................11
External Componnent Connection...........12
A. HDMI Connection(Best)...................13
B. HDMI/DVI Connection (PC
Connection Via DVI) ......................13
C. Component Video
Conncetion(Better) .........................14
D. Composite Video
Conncetion(Good)...........................14
Plugging In the AC Power Cord ...............15
Putting Batteries in the Remote ...............15
Completing the Initial Setup.....................16
A. Turn on the unit................................16
B. Selecting Language .........................16
C. Setting TV Location .........................16
D. Setting Time Zone ...........................16
E. Auto Channel Scan ..........................17
Chapter 2 I Understanding the Basics
Turning your TV on or off .........................18
Selecting the video input sourece............18
Selecting a channel .................................18
Adjusting the volume ...............................18
Screen Format .........................................19
Channel Banner.......................................19
Chapter 3 I Using the TV menu
Using the menu system ...........................20
Picture Menu ...........................................20
Sound Menu ............................................21
Setup Menu .............................................22
A. Signal Type ......................................22
B. Channel Scan ..................................23
C. Channel Skip ...................................23
D. Channel Edit ....................................23
E. Input Skip.........................................24
F. Input Labels......................................24
G. Closed Caption................................24
H. Time Setup ......................................24
I. Reset All ............................................26
Parental Controls and V-Chip ..................26
A. Enter V-Chip Password ...................26
B. Channel Block .................................27
C. Button Block ....................................27
D. V-chip ..............................................27
E. Input Block .......................................29
F. Change Pasword..............................29
G. Reset Pasword ................................29
Language Menu.......................................29
USB Menu ...............................................30
USB Connection ......................................31
Chapter 4 I Using the TV menu
Frequently Asked Questions (FAQs) .......32
Troubleshooting .......................................33
V-Chip Rating Explanations .....................36
TV Specication.......................................37
Limited Warranty .....................................38
Care and Cleaning...................................41
Table of Contents

5
Before Initial Setup
Protect Against Power Surges
• Connect all components before you plug any power cords into the wall outlet or power strip.
NEVER plug your TV into an outlet that is controlled by a wall switch.
• Turn off the TV before you connect or disconnect any cables.
• Make sure all antennas and cables are properly grounded. Refer to the Important Safety
Instructions.
Safety Information
• Protect components from overheating.
• Don’t block ventilation holes on any of the components. Arrange the components so that air can
circulate freely.
• Don’t stack components.
• If you place the component in a stand, make sure you allow adequate ventilation.
• If you connect an audio receiver or amplier, place it on the top shelf so the heated air from it won’t
harm other components.
Avoid Audio Interference
• Position cables properly; insert each cable rmly into the designated jack.
• If you place components above the TV, route all cables down one side of the back of the TV instead
of straight down the middle.
• If your antenna uses 300-ohm twin lead cables, do not coil the cables.
• Keep twin lead cables away from audio/video cables.
Avoid Direct Light
Don’t place the TV where sunlight or room lighting is directed toward the screen. Use soft or indirect
lighting.
Check Supplied Parts
Check that the following parts were packed with your product.
Chapter 1 Connections and Setup
Graphics contained within this publication are presentation only.
REMOTE CONTROL
PART # RC198
2 AAA BATTERIES
POWER CORD
CABLE
MANAGEMENT
MENU
CLEAR
INPUT
GO BACK
INFO
VOL CH
MUTE
RC198
FORMAT
F AV
MEDIA
GUIDE
Replacing your remote
If you need to replace your
remote, call 1-800-257-7946.
A shipping and handling fee,
and the appropriate sales
tax, will be charged upon
ordering. Please have your
Visa or MasterCard ready.

6
For models L32HDF10/L32HDF11
Chapter 1 Connections and Setup
Removing and Installing the stand
Your TV comes with the table stand attached on the back of the TV. If you do not want to mount your
TV to the wall, install the table stand by following the instructions below.
Step 2
Remove the table stand from the TV
back cabinet by removing the size M8
screw with a screwdriver.
TV with table stand attached.
Step 1
Place the plastic bag off the TV and
place it on a table or other at surface.
Place the TV set face down on the TV
bag.
Step 3
Secure the table stand to the TV
cabinet from the bottom of the TV
by tightening the M8 screw with a
screwdriver.

7
For models L26HDF10/L26HDF11
Chapter 1 Connections and Setup
If you want to mount your TV to the wall, rst remove the table stand from the TV’s back cabinet as
shown above:
Step 2
Remove the table stand from the TV
back cabinet by removing the three
size M4 st-screws with a screwdriver.
TV with table stand attached.
Step 1
Place the plastic bag off the TV and
place it on a table or other at surface.
Place the TV set face down on the TV
bag.
Step 3
Secure the table stand to the TV
cabinet from the bottom of the TV
by tightening the the three size M4
st-screws with a screwdriver.
Mounting Your TV to the Wall
The VESA number is the horizontal and vertical measurement of the mounting holes. For example,
200x100 refers to fact that the mounting measurements are 200mm horizontally and 100mm vertically.
Follow the directions included with the wall mount to mount the TV to the wall.
Caution: Your wall mount must be able to bear a minimum of ve times the TV’s net weight to avoid causing damage.
To mount your TV to the wall, purchase a VESA wall
Models L26HDF11/L26HDF10/L32HDF11
/L32HDF11
Purchase a VESA 200 x100, Size M4 screw

8
CH+/-
Press to select channels stored in the channel list and
external input, or move up ( ) or / down ( ) through the
menu items.
VOL+/-
Press to increase / decrease the volume, or move right ( ) or
/ left ( ) through the menu items.
MENU
Brings up the TV Main Menu.
(POWER)
Turns the TV on and off.
Explanation of Jacks
A. Side Panel
(USB) Allows you to connect a compatible mass storage
device with a USB jack
HDMI INPUT 2
Lets you connect a component, such as a digital cable box,
with an HDMI output for the best picture quality.
Side Panel Buttons
If you cannot locate your remote, you can use the side panel buttons on your TV to operate many TV
features.
VOL
Chapter 1 Connections and Setup
HDMI INPUT 2

9
ANTENNA/CABLE INPUT
Lets you connect a coaxial cable to receive the signal from your antenna, cable, or cable box.
AUDIO/VIDEO INPUT (VID)
Lets you connect a component that has composite video jacks, such as a VCR or DVD player.
• L AUDIO Provides left audio connection when using the VIDEO INPUT jack. The left audio
connectors are usually white. For mono audio sources, be sure to use the left AUDIO INPUT.
• R AUDIO Provides right audio connection when using the VIDEO INPUT jack. The right audio
connector is usually red.
COMPONENT INPUT Let you connect a component that has component video jacks, such as a DVD
player.
• CMPT Y Pb Pr (Component Video) Provides good picture quality because the video is separated
into three signals. Use three video-grade or component video cables for the connection.
• When using CMPT Y Pb Pr, make sure you connect left and right audio cables to the L and R
AUDIO jacks shared with AUDIO/VIDEO INPUT (VID). For mono audio sources, be sure to use the
left AUDIO INPUT.
DIGITAL AUDIO OUTPUT (coaxial) Use a digital coaxial cable to connect your TV to a compatible
audio receiver.
HDMI INPUT 3 Lets you connect a component, such as a digital cable box, with an HDMI output for
the best picture quality. (not available for models L32HDF10/L26HDF10)
HDMI/DVI INPUT 1 (High-Denition Multimedia Interface/Digital Visual Interface) Provides an
uncompressed digital connection that carries both video and audio data by way of an integrated mini-
plug cable. Since HDMI technology is based on Digital Visual Interface (DVI), the jack on the back of
your TV is also compatible with DVI components.
• DVI AUDIO INPUT (used for DVI only) Provides audio connection when using the HDMI/DVI
INPUT 1 jack for DVI.
Note: If using a DVI component, remember to connect the audio cable because the DVI cable carries
only the picture signal, not the sound.
Y
Pb
Pr
VIDEO
DIGITA L
AUDIO
OUTPUT
(COAXIAL)
ANTENNA/CABLE
INPUT
AUDIO/VIDEO
INPUT (VID)
L
AUDIO
R
HDMI/DVI
INPUT 1
L
AUDIO OUTPUT
R
COMPONENT
INPUT (CMPT)
DVI AUDIO
INPUT
Y
Pb
Pr
VIDEO
DIGITA L
AUDIO
OUTPUT
(COAXIAL)
ANTENNA/CABLE
INPUT
AUDIO/VIDEO
INPUT (VID)
L
AUDIO
R
HDMI INPUT 3
HDMI/DVI
INPUT 1
L
AUDIO OUTPUT
R
COMPONENT
INPUT (CMPT)
DVI AUDIO
INPUT
B. Rear Panel
For models L32HDF11/L26HDF11 For models L32HDF10/L26HDF10
Chapter 1 Connections and Setup
This manual suits for next models
3
Table of contents