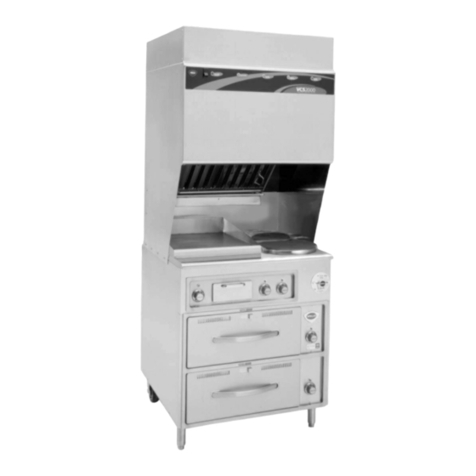
True MD-2B User manual

Model: MD-2B
User Guide
Mini Duo Burner

Table of Contents
I. Important Safety Information 1-3
II. Control Panel Overview 4
III. Specifications & How to Use
IV. Notes on using your Cooktop
5
• Operating the Keys 5
• Stand by Mode 5
•Lock 5
•Switch off the Lock 5
• Readiness Mode 6
•Menu On 6
• Power Sharing 7
• Set Timer Mode 7
8
8-9
• Hot Surface Indicator 7
7
V. Compatible Cookware
VI. Cleaning and Maintenance
VII. Counter Installation Instruction 10-11
VIII. Troubleshooting 12-13
Thank you for purchasing the True Induction Mini Duo burner unit. Please read the entire instruction manual
prior to using your unit. If you have any questions regarding the True Induction Cooktop, please visit
TrueInduction.com or call: 1-877-862-7049
Fill out the following information for future reference
Note: The serial and model numbers may be found on the serial plate located under the cooktop.
Brand
Purchase Date
Model Number
Serial Number
Purchased From
Invoice Number
True Induction
MD-2B

•
even with the built-
•
only be performed by a qualified person.
•While cooking fat or oil on the cooktop may ignite. There is a risk of burning and fire; therefore, never leave the
cooktop unaended at anyme.
• When the unit is on, do not touch outside the control panel as the surface may contain residual heat.
• To protect against electric shock, do not immerse cord plugs or cooker in water (or other liquid substances).
• When using any electric appliance around children, close supervision is required.
•
manner. Read the seller’s guidelines for warranty repairs and returns.
• Do not cook on a broken or damaged cooktop as spillovers may penetrate surface and create a risk of electric shock.
•
•
• Do not let the cord dangle over the edge of a table or counter. Keep the cord away from hot surfaces.
• Do not place cooktop on or near: hot gas, electric burner, or heated oven.
•
• Do not store and temperature-
sprays, etc.
•
•
•
• The cord should be arranged so that it will not drape over the countertop or tabletop where it can be pulled on by
children or tripped over.
• Do not use with empty pans/pots.
• Do not use cooktop for another use than directed by the manufacturer.
• Wear proper apparel -
• In case of appliance failure, immediately disconnect the appliance from the main power source and contact the
manufacturer.
1
• Do not place metallic objects such as knives, forks, spoons, lids, cans or aluminum foil on the cooktop.
:

•
• It is important to be aware that the unit’
•When possible, Unplug the cooktop from the outlet when not in use and before cleaning. Allow to cool before
performing any maintenance or repairs.
•-
heated surface.
• Do not store items of interest to children in cabinets above the range or on the backguard of a range - children climbing
on the range to reach items could get seriously injured.
•
• Do not repair or replace any part of the appliance unless specifically recommended in the manual. All other services
should be referred to a qualified technician.
or other bulking cloth.
• Use only dry potholders - Moist or damp potholders on hot surfaces may result in burns from steam. Do not use a towel
• Use proper cookware size - Choose
cookware is necessary to operate properly.
•-
the manual. Improper use of these liners may result in a risk of electric shock or fire.
•
•
Do not use steam cleaners or high
-
pressure cleaners to clean the cooktop, as this may result in electric shock.
• Do not touch cooking zones or areas near units - Cooking zones may be hot even though they are dark in color. Areas
2
This product should not be thrown away as household waste. Instead it should be handed over to the applicable
this product, please contact your local city office, your household waste disposal service or the store where you
purchased the product.
SAVE THESE WARNINGS
:
of undersized cookware will
serious injury. Compable

II. Control Panel Overview:
1.
2.
3.
Right Cooking Zone
4. Le touch control panel
5.
Ceramic - Glass
Right touch control panel
Diagram make look different from actual product.
1
2
4
5
3
6
78
910 11
12
6. Power Opon Display
7. Lower power key
8. Raise power key
9. Cooking zone ON/OFF Key
10.Timer control key
11.Child safety lock
Power Buon
12.
3
Power
Menu-On
Timer Lock
POWER
Temp Time
-- +
UU
Power
Timer
Temp Time
-- +
Menu-On
Lock
POWER
Power
Menu-On
Timer Lock
POWER
Temp Time
-- +
Surface remains hot after use. Do not touch!
Attention: Le dessus reste chaud pres usage!
by true
INDUCTION
Le Cooking Zone

4
Power 1800
Voltage 120V / 60Hz
Power Range 100W - 18
10
Max Time 180 minutes
Material Glass Ceramic Top / Metal Body
Unit Measurements 20.5” width x 14” length x 2” height
Countertop or Drop-in
Installs Over Built-in Oven Yes
20” x 13 3/4”
Stand by Mode
In the lock mode, press “Lock” key, the unit will make a “beep” sound once and lock light will turn off, indicang the
lock has deacvated. The unit is now on standby mode.
Lock
Acvang the Child Safety Lock during cooktop use: Child Lock prevents acvaon of any sensor key,
except for the “POWER” key to turn off the cooktop.
A. Manual: Press the Lock key to acvate the funcon. The unit will make a “beep” sound and the
indicator light will turn on above the Lock key. The controls are now locked.
B. Automac: The inducon cooktop will automacally enter into Lock mode when the power is turned off.
Switch Off the Lock
While in Lock mode, press the Lock key to deacvate the funcon. The indicator light will turn off.
Upon inserng the power plug into an electric socket, all inducon cooktop will make a “beep”
sound once, and all the digital lights on the cooktop will blink once, then the indicator light will turn
on above the “Lock” key, indiccang the unit enters into the standby and lock mode.
Menu-On
Lock
POWER
:

Turning Off Unit:
POWER
III. Specificaons & How to Use:
When use of the cooktop is complete, press the “POWER” key. “POWER” light will turn off, indicang the
unit is now on the standby mode. Please do not pull the power plug unl the cooling fan has stopped.
Menu On
5
Place cookware on the cooktop. Please select from the Power Seng or Temperature Seng to begin cooking.
Temperature Seng Mode: This funcon cooks at temperature sengs.When the unit is in the Readiness mode, or
in the power mode, press the “Menu On” key to select “Temp” mode. The “Temp” indicator light is lit up and the
digital display shows “460” F, indicang that the cooktop has entered the temperature seng mode. if the user
wants to adjust the temperature level, please press the “-” or “+” key to adjust the temperature seng. To stop
cooking, please press the “POWER” key. Temperature levels: 120℉、150℉、180℉、210℉ 、 260℉ 、300℉ 、
360℉ 、 420℉ 、460℉.
Power Seng Mode: This funcon cooks at power (waage) sengs. When the unit is in the Readiness mode, or in
the set temperature mode, press the “Menu-On” key to select the “Power” mode. “Power” indicator light is lit up,
and the digital display show “5”, indicang that the cooktop has entered power seng mode, if the user wants to
adjust the power level please press the “-” or “+” key. If the user wants to set the mer for the unit to shut off
automacally, please refer to the Set Timer method. To stop cooking, please press “Power” key. Heang power level
sengs:
NOTE: This funcon is equipped with safeguards against parching. The unit might shut off automacally when this
funcon is used for frying, srfrying, grilling and other high temperature cooking formats.
Readiness Mode
While in the standby mode, press the “ON/OFF” key, it will make a “beep” sound once, indicang that the inducon
cooktop funcons are ready to use. The unit will automacally return to standby mode if heang zone is not turned
on within 30 seconds.

III. Specificaons & How to Use:
6
To Cancel Timer: While in mer status, press “Timer” key, the digital display shows countdown me. Then press
“+” or “-” key unl the digital display reads “00” and mer display will blink for 10 seconds and then go off. The mer
is no longer acve.
Hot Surface Indicator
After using any of the cooking zones, the cooktop will remain hot. Even after turning o the
entire unit, the surface of the cooktop will remain hot for some time. The display for the cooking
zones will show how an “H”to warn the user that the surface is hot to touch. Wait unl the “H” is no
longer displayed to clean the unit. You may turn the unit back on even if the “H” is displayed.
●This appliance will get hot during use and will remain hot for a me aer use.
● Never heat empty cookware. This can damage both the cookware and the appliance.
● Remember to turn off cooktop aer use.
● Keep unit away from a gas range or other heat source. If the surrounding temperature is too hot, the cooktop will
stop heang.
● Make sure to wipe off water from the boom of the pot before heang.
● Use cauon when boiling water. During the boiling process, hot water may splash out.
IV. Notes on Using your Cooktop
Power Sharing
When both burners are on, one of the two burners would not have a power level higher than level 7. Both of them
together would not be more than level 10. If only one burner is on, the heang zone can maintain its full heat seng,
but when operang both burners, their combined total is level 10, meaning that when operang the two burners at
the same me, they will self adjust levels accordingly. When you increase the power of one side, the power output of
the other side will reduce automacally (i.e. one side is at 6, the other burner automacally reduces
power to level 4, creang a total max 10 seng).
Set Timer Mode
The automac mer sengs range from 1 minute to 99 minutes. (NOTE: there is no “seconds” and “hours”
display, only minutes). when the unit is in the cooking mode press the “Timer” key. The “Timer” indicator light is lit
up, indicang the cooktop has entered Set Timer Mode, the digital display reads “00” and blinking. Press “+” or “-”
key to set the desired number, once the Timer is set and neither the “+” nor the “-” key is pressed for 10 seconds, the
Minute Timer begins the countdown and the mer reaches “00” the cooktop will sound “beep” and the specific
heang element will shut off automacally.

materials.
Check your cookware’s retail box for the
technology, grab a magnet and see if it
your magnet stays on then your cookware
cooktop!
V I. Cleaning and Maintenance:
manual. Use a ceramic cooktop cleaner on the glass cooktop. To maintain and protect the surface of your glass
cooktop, follow these steps:
Before
makes cleanup easier.
1. Daily use of ceramic cooktop cleaner will help keep the cooktop looking new.
2.
3.
4. Use a dry cloth or paper towel to remove all cleaning residue. No need to rinse. Never run the cooktop under
water.
NOTE:
The following are not -resistant
glass, ceramic, copper, aluminum pan/pots,
round-
base less than 5 inches.
7
UU
Power
Timer
Temp Time
-- +
Menu-On
Lock
POWER
Power
Menu-On
Timer Lock
POWER
Temp Time
-- +
Surface remains hot after use. Do not touch!
Attention: Le dessus reste chaud pres usage!
by true
INDUCTION
V. Compable Cookware:

Cleaning Burned-on Residue:
WARNING: Damage to the glass surface may occur if you use scrub pads or any other type of abrasive cleaning
materials.
1. Allow the cooktop to cool.
2. Spread a few drops of the ceramic cooktop cleaner on the burned residue area.
3. Using the included ceramic cooktop cleaning pad, rub the residue area, applying pressure as needed.
4. If any residue remains, repeat the steps listed above.
5.
cleaner and a paper towel.
Cleaning heavy burned-on residue:
1. Allow the cooktop to cool.
2. Used a single-edge razor blade scraper approximately at a 45 degree angle against the glass surface, and scrape
offthe residue.
3.
residue area. Use the cleaning pad to remove any remaining residue.
4.
cleaner and a paper towel.
Metal Marks and Scratches:
Be careful not to slide pots or pans across the cooktop surface. It will leave behind metal markings. These marks are
removable using the ceramic cooktop cleaner along with the cleaning pad for ceramic cooktops.
permanent.
NOTE:
manufacturer for assistance.
8
V I. Cleaning and Maintenance:
Table of contents
Other True Cooktop manuals