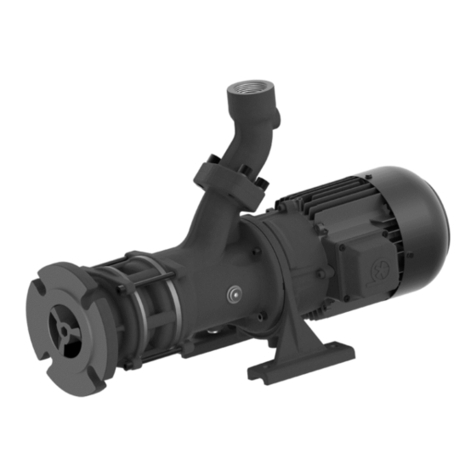
Tri-Clover C-Series User manual

CSM-97
Tri-Clover®
C-Series Centrifugal Pump
Models C114 • 216 • 218 • 328 • 4410
Service & Installation Manual

2

3
CONTENTS
Thank you for purchasing a Tri-Clover Product!
This manual contains installation, operation, cleaning and repair instructions, with parts lists, for the
C-Series close coupled pumps manufactured by Tri-Clover Inc., Kenosha, Wisconsin. It also
provides a troubleshooting chart to assist in determining pump malfunction.
READ THIS MANUAL
carefully to learn how to service and reconfigure these valves.Failure to do
so could result in personal injury or equipment damage.
SAFETY
IMPORTANT SAFETY INFORMATION .......................................................................................... 4
INTRODUCTION
DESCRIPTION................................................................................................................................ 5
INSTALLATION
INSTALLATION GUIDELINES ........................................................................................................ 6
PIPING HINTS ................................................................................................................................ 7
MAINTENANCE
TYPE D OR F SEALS EXTERNAL BALANCED............................................................................. 8
TYPE E WATER COOLED BALANCED DOUBLE SEAL ............................................................. 13
STUB SHAFT ON MODEL CC4410 PUMPS ................................................................................ 16
TROUBLESHOOTING
TROUBLESHOOTING GUIDELINES ........................................................................................... 17
PARTS LIST

4
IMPORTANT SAFETY INFORMATION
SAFETY
DANGER
WARNING
Indicates an imminently hazardous situation which, if not
avoided,
will
result in death or serious injury. The word
Danger is used in the most extreme cases.
Indicates a potentially hazardous situation which, if not
avoided,
may
result in minor or moderate injury. May
also be used to alert against an unsafe operating or
maintenance practice.
CAUTION
Indicates a potentially hazardous situation which, if not
avoided,
could
result in death or serious injury.
!
Safety is very important!
DO NOT attempt to modify any Tri-Clover product.
To do so could create unsafe conditions and
void all warranties.
DO NOT place any Tri-Clover product in an application where general
product service ratings are exceeded.
The following DANGER, WARNING, AND CAUTION signs and their meanings are used within these
instructions.
Safety labels are placed on every pump. Do not remove any labeling on any Tri-Clover product.
Immediately replace any label that is missing.
WA R N I N G
ROTATING SHAFT
DO NOT OPERATE
WITHOUT GUARD IN PLACE
Part Number 38-241

5
INTRODUCTION
DESCRIPTION
The “C” series close coupled pumps are made up of two sections, power or drive section and the
liquid end or pump section.
The pump is mounted to the frame of the drive motor by means of an adapter, and is coupled to the
motor shaft by a stainless steel stub shaft. The impeller mounts on the stub shaft and is retained by
one of two methods. The casing is clamped to the adapter, greatly simplifying removal, and also
permitting positioning of the discharge outlet through 360°. The external, balanced seal assures long
seal life. The drive motor is mounted on a frame having adjustable legs providing simple installation
and leveling.
WARNING
Before servicing pump, disconnect electrical power
source.

6
INSTALLATION
INSTALLATION GUIDELINES
UNPACKING EQUIPMENT
Check the contents and all wrapping when unpacking your equipment. Inspect all parts for damage
that may have occurred during shipping. Report any damage to the carrier.
LOCATION AND INSTALLATION
The pump unit should be located as near as possible to the
liquid source and in a position where the suction piping can be
short and direct with a minimum number of elbows and fittings.
It should also be readily accessible for inspection and cleaning.
The pump unit as received from the factory is ready for
installation. To install it, attach a hoist if necessary, loosen the
setscrews in the adjusting leg brackets, and individually adjust
the legs until the pump unit is level. Tighten the setscrews.
Attach the suction and discharge piping. Be sure suction and
discharge piping is properly supported to avoid any strain on the
pump casing.
AdjustableLeg
Bracket
MotorFoot
Setscrew
FigureOne

7
INSTALLATION
PIPING HINTS
GENERAL
This section provides some do’s and don’ts of piping which will aid in obtaining the maximum
efficiency and service from your pump.
Piping should be independently supported at both the suction inlet and discharge outlet. Care should
be taken that piping is properly aligned and does not put any strain on the pump casing. The piping
should have as few bends as possible.
SUCTION PIPING
The suction piping should be short and follow a direct route with a minimum number of elbows and
fittings. Elbows should be located as far as possible from the suction inlet to prevent head loss due to
increased friction. Excessive friction losses in the suction line could result in pump cavitation, causing
poor performance, noise, vibration, damage to equipment, and possible damage to product.
Whenever practical the diameter of the piping at the suction inlet should be increased in size. An
eccentric tapered reducer should be used in lieu of a concentric tapered reducer to prevent air
pockets from forming and impairing pump efficiency. In turn, the eccentric reducer may be placed at
the inlet of the pump and should be positioned so the straight side is up.
A horizontal suction pipe must have a gradual rise to the pump. A high point in the suction line will
form an air pocket and prevent proper pump operation. All joints in the suction line should be air tight,
to prevent air leakage which can reduce pump capacity and efficiency.
DISCHARGE PIPING
Position of the pump discharge is preferably either vertical or top horizontal. The discharge piping
should be short and direct with a minimum number of elbows and fittings. Elbows should not be used
at the discharge outlet as the friction encountered would be increased, resulting in head loss. It is
advisable to increase the pipe diameter at the discharge outlet to prevent head loss. However, use
of a larger discharge pipe than recommended may reduce the total pump head, but increase the
pump volume, which can cause pump vibration due to overload. Use of a discharge pipe smaller
than the pump discharge outlet increases the total pump head but decreases the volume. If a
reducer is required on the outlet port of the pump and the discharge is vertical a concentric reducer
should be used. If the discharge is horizontal an eccentric reducer should be used and should be
positioned so the straight side is down.
LOCATING VALVES
In suction lift applications where the lift is not very high, it may be desirable to install a foot valve, to
facilitate priming, and to prevent draining off of the liquid back to the source.
A throttling valve should be installed in the discharge piping to provide a means of throttling pump
volume.

8
MAINTENANCE
TYPE D OR F SEALS EXTERNAL BALANCED
DISASSEMBLY, CLEANING (GENERAL)
It is necessary to disassemble parts of the pump for cleaning and sanitizing. For Tri-Clover pumps
equipped with the “Groove-In-Shaft” design (types D, DG, or F seals only), it is not necessary to
disassemble if used in Clean-In-Place installation.
The extent of disassembly will depend on the application, and the type of seal used in your pump. To
disassemble, disconnect the suction and discharge piping. Remove seal guard assembly with a
wrench of appropriate size. Turn the wing nut on the clamp assembly until tension on the clamp
saddle is relieved. Open the saddles and remove the casing. At this point the disassembly varies
depending on the impeller retaining system applicable to your pump.
For floating retainer models
Push back on the impeller and center the retainer in the stub shaft. Slide the impeller forward and
remove it. Do not try to remove retainer before removing impeller as this will cause damage to the
retainer, shaft and impeller.
For threaded shaft models
Remove cotter pin and turn castellated nut in counterclockwise direction. Remove washer's and
impeller.
For both models
1. Rotate the backplate until the backplate pins clear the pins in the adapter and remove the
backplate.
2. Remove the casing gasket.
Note:
Protect the sealing surface of the backplate against nicks and scratches while removing,
cleaning and reassembling.
3. Remove the carbon seal, o-ring seal, seal cup, and spring.
DG/FG CLAMPED IN SEAT
1. Remove four bolt/screws from backplate. Inspect DG seat insert, gland ring, and gaskets for
damage or wear, and replace as required.
Note:
#80P outboard and #80R inboard gaskets are NOT INTERCHANGEABLE. #80R (thicker)
gasket MUST be inboard-between backplate and seal seat. Care must be taken to protect
the sealing face of the backplate for D and F seals and the seal seat for DG seals from nicks
and scratches.
2. Remove the carbon seal and o-ring seal. Examine and replace as necessary.
WARNING
Before servicing pump, disconnect electrical power
source, carefully relieve all pressure and drain all
fluids from pump and connected piping.

9
MAINTENANCE
REPAIR
It is recommended that periodic inspection of all parts of the pump be made to prevent malfunctions
caused by worn or broken parts. Disassembly for repair is the same procedure as for cleaning.
Note:
Protect the sealing surface of the backplate against nicks and scratches while removing,
cleaning and reassembling.
1. For D and F seals, examine the backplate sealing surface carefully for any defects that will
shorten seal life.
2. Remove the carbon seal, o-ring seal, cup and spring. Remove the drive collar by loosening set
screws and sliding collar off the stub shaft.
3. The balanced seal is designed for outside application. Sealing of the process fluid along the shaft
is accomplished by action of the process pressure on an o-ring seal installed in a groove in the
carbon seal. The same action pressurizes the o-ring groove and augments the spring tension in
keeping a tight joint at the sealing faces. The location or width of the sealing face controls the
balancing of the seal.
4. Carefully inspect the o-ring seal and carbon seal for signs of abrasions, cuts or other wear that
would cause leakage. When the extension of the carbon seal face extends less than1/32" from the
body, it is advisable that the carbon seal be replaced.
5. Remove the cascading water attachment if included. Remove the rubber shaft deflector by prying
it gently from the rear, while sliding it forward. Examine the deflector for tearing, loose fit, or other
defects that would allow fluid leakage into the motor along the armature shaft.
6. Remove the bolts securing the adapter to the motor frame and remove the adapter. Loosen the 4
set screws securing the stub shaft to the motor armature. Remove the stub shaft by prying from
the back with a flat bar. The stub shaft is a tight fit but can be removed by evenly applying
pressure around the periphery of the shaft with the pry bar.
7. Examine the stub shaft sealing surface for nicks or scratches which can cause excessive o-ring
seal wear or leaking.
8. Attach a hoist to the motor if necessary, and remove the bolts securing the motor to the adjusting
leg brackets. Remove the set screws securing the adjustable legs and remove the legs.
Note:
The metal displaced by the set screws on the adjustable legs makes it necessary to tap the
legs out with a soft hammer. Rough spots should be filed down prior to reassembly.
9. Inspect casing clamp for damage or wear and replace as required. Inspect the adjusting legs,
adjusting leg brackets, adapter and casing and replace if necessary. Motor maintenance, repair
and wiring are not covered in this manual. For specific information contact the motor
manufacturer.

10
REASSEMBLY
1. Assemble the adjusting legs to the adjusting leg brackets, and assemble the brackets to the
motor. Level the motor by individually adjusting the legs and locking them in place with the set
screws.
2. Install the adapter to the motor, with the drain cavity at the bottom. Insert the four bolts securing
the adapter to the motor. Tighten the bolts securely.
3. Assemble the stub shaft to the motor armature shaft. Do not tighten set screws.
4. Install the backplate by rotating it until the pins in the backplate engage the pins in the adapter
bracket.
For floating retainer models
Rotate the shaft until the floating pin hole is in a horizontal position. Insert the floating retainer, center
it in the shaft, and slide the impeller on the shaft. Hold the impeller tight against the shoulder on the
shaft and rotate the shaft one-fourth turn until the floating retainer drops and engages the impeller.
For threaded shaft models
Slide the impeller on the shaft and replace washer and castellated nut and cotter pin.
For both models
1. Assemble the clamp to the adapter, and install the casing.
2. Push the stub shaft onto the motor shaft until the impeller strikes the inside front face of the
backplate. Locate the stub shaft on the motor shaft allowing 1/16" (1.5mm) maximum clearance
between the rear face of the impeller and the inside face of the backplate. Tighten the four set
screws on the stub shaft. Remove casing, impeller, impeller pin and backplate.
3. Slide the rubber deflector on the shaft until it seats the groove in the shaft.
Note:
If the deflector cannot be forced on with the fingers, a blunt instrument can be used to provide
additional force at the I. D. of the deflector.
4. Slide drive collar onto stub shaft, and locate per setting instructions in next section. Assemble the
spring, seal cup, o-ring seal and carbon seal, and install as a unit, taking care that slot in seal cup
is aligned with pin in drive collar. Gentle finger pressure will overcome o-ring resistance on the
shaft.
Note:
Do not lubricate seal with any type of oil or grease. The seal faces are lubricated by product
being pumped.
For floating retainer models
Install the backplate by rotating it until the pins in the backplate engage the pins in the adapter.
Rotate the shaft until the floating pin hole is in a horizontal position. Insert the floating retainer, center
it in the shaft, and slide the impeller on the shaft. Hold the impeller tight against the shoulder on the
shaft and rotate the shaft one-fourth turn until the floating retainer drops and engages the impeller.
For threaded shaft models
Install the backplate by rotating it until the pins in the backplate engage the pins in the adapter. Slide
the impeller on the shaft. Install washer's and thread the castellated nut to the shaft in a clockwise
direction until impeller hub contacts shaft shoulder. Use a combination of washers if needed to
ensure that the castellated nut is tight on the impeller before inserting and securing cotter pin.
MAINTENANCE

This manual suits for next models
9
Table of contents
Other Tri-Clover Water Pump manuals
Popular Water Pump manuals by other brands

Sykes AmeriPumps
Sykes AmeriPumps GP100M Operation and maintenance instructions

DUROMAX
DUROMAX XP WX Series user manual

BRINKMANN PUMPS
BRINKMANN PUMPS SBF550 operating instructions

Franklin Electric
Franklin Electric IPS Installation & operation manual

Xylem
Xylem e-1532 Series instruction manual

Milton Roy
Milton Roy PRIMEROYAL instruction manual