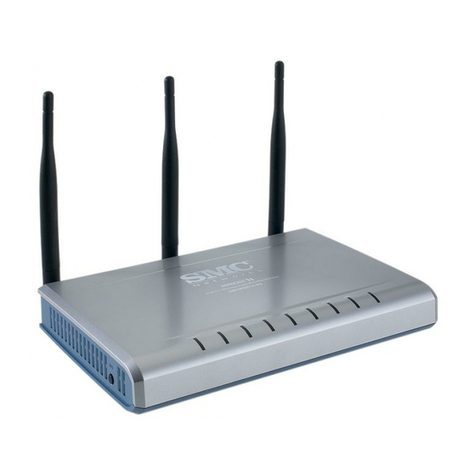
Toto Link wireless N router User manual

User Manual
Wireless-N ADSL2+ Modem Router

1
Table of Contents
1. ABOUT THIS GUIDE...................................................................................................................3
1.1 Navigation of the User’s Guide............................................................................................................. 3
2. PRODUCT OVERVIEW ..............................................................................................................3
2.1 Introduction............................................................................................................................................ 3
2.2 Features .................................................................................................................................................. 3
2.3 Panel Layout .......................................................................................................................................... 4
2.3.1 Front Panel ........................................................................................................................................................4
2.3.2 Rear Panel .........................................................................................................................................................4
3. HARDWARE INSTALLATION...................................................................................................5
3.1 Hardware Installation ........................................................................................................................... 5
3.2 Check the Installation............................................................................................................................ 5
3.3 Set up the Computer.............................................................................................................................. 6
4. CONNECTING TO INTERNET..................................................................................................7
4.1 Accessing Web page............................................................................................................................... 7
4.2 Changing Password............................................................................................................................... 9
4.3 Status....................................................................................................................................................... 9
4.4 Operation Mode................................................................................................................................... 10
4.5 Network .................................................................................................................................................11
4.5.1 WAN Interface.................................................................................................................................................12
4.5.1.1 Static IP....................................................................................................................................................13
4.5.1.2 DHCP Client ............................................................................................................................................13
4.5.1.3 PPPoE.......................................................................................................................................................14
4.5.2 LAN Interface..................................................................................................................................................15
4.5.3 Static DHCP Settings.......................................................................................................................................17
4.5.4 VLAN Settings................................................................................................................................................17
4.6 Wireless Setting.................................................................................................................................... 18
4.6.1 Wireless Status ................................................................................................................................................18
4.6.2 Wireless AP.....................................................................................................................................................18
4.6.3 Multiple SSID .................................................................................................................................................20
4.6.4 Wireless Repeater............................................................................................................................................21
4.6.5 Advanced Settings...........................................................................................................................................22
4.6.6 Wireless WDS Settings....................................................................................................................................24
4.6.7 Wireless WPS Settings....................................................................................................................................25
4.6.8 Access Control.................................................................................................................................................26
4.6.9 Schedule..........................................................................................................................................................26
4.8 Firewall................................................................................................................................................. 27
4.8.1 IP Filtering.......................................................................................................................................................28

2
4.8.2 Port Filtering ...................................................................................................................................................29
4.8.3 MAC Filtering.................................................................................................................................................29
4.8.4 URL Filtering ..................................................................................................................................................30
4.8.5 Port Forwarding...............................................................................................................................................31
4.8.6 DMZ................................................................................................................................................................31
4.9 Management......................................................................................................................................... 32
4.9.1 DDNS..............................................................................................................................................................32
4.9.2 Time Zone Setting ...........................................................................................................................................32
4.9.3 Denial-of-Service ............................................................................................................................................33
4.9.4 Upgrade Firmware...........................................................................................................................................34
4.9.5 Reload Factory Settings...................................................................................................................................34
4.9.6 Password..........................................................................................................................................................35
4.9.7 Schedule Reboot..............................................................................................................................................35
4.9.8 Reboot Router..................................................................................................................................................35

3
1.ABOUTTHISGUIDE
Thank you very much for purchasing the wireless N router. This guide will introduce the
features of this router and tell you how to connect, use and configure the router to access
Internet. Please follow the instructions in this guide to avoid affecting the router’s
performance by improper operation.
1.1 Navigation of the User’s Guide
Product Overview: Describes the router’s function and its features.
Hardware Installation: Describes the hardware installation and settings on user’s
computer.
Connecting to Internet: Tells you how to connect your computer to Internet successfully
by the router.
Advanced Settings: Lists all technical functions including Wireless, TCP/IP Settings,
Firewall and System of the router.
2. PRODUCT OVERVIEW
2.1 Introduction
This is a wireless router which integrates with internet-sharing router, 4-port switch and
firewall all-in-one. Multiple encryptions including wireless LAN 64/128-bit WEP, WPA/WPA2
and WPA-mixed security are supported by the router. The VLAN function also makes
amazing interactive entertainment experience of IPTV be achieved easily. The IP, Port,
URL and MAC address filtering function also makes it easy for user management. In view
of the above, it will allow you to connect your network wirelessly in an easy and secure way
better than ever. It is really a high performance and cost-effective solution for home and
small offices.
2.2 Features
¾Complies with IEEE 802.11n/g/b standards for 2.4GHz Wireless LAN.
¾Supports DHCP, Static IP, PPPoE broadband functions.
¾Provides three operation modes: Gateway, Repeater Bridge and Repeater WISP.
¾Connects to secure network easily and fast using WPS (one-button).
¾Provides 64/128-bit WEP, WPA/WPA2 and WPA-Mixed security.
¾Supports VLAN function.
¾Supports IP, Port, MAC, URL filtering and Port Forwarding.
¾QoS function allocates network bandwidth reasonably.

4
2.3 Panel Layout
2.3.1 Front Panel
The front panel of this router consists of 8 LEDs, which is designed to indicate connection
status.
POWER This indicator lights blue when the router powered on, otherwise it is off.
CPU This indicator blinks blue when router powered on.
WLAN This indicator blinks blue when there are wireless devices connected and
transmitting data to the router.
On When the WAN port is connected successfully the indicator lights blue.
Blink During transmitting or receiving data through the WAN port the indicator
blinks blue.
WAN
Off There is no device linked to the WAN port.
On When the LAN port has a successful connection, the corresponding
indicator lights blue.
Blink During transmitting or receiving data through the LAN port the
corresponding indicator blinks blue.
1/2/3/4
LAN
Off There is no device linked to the LAN port.
2.3.2 Rear Panel
The figure below shows the rear panel of this router.

5
DC IN The Power socket is where you will connect the power adapter.
WAN This port is where you will connect with the cable to access Internet.
1/2/3/4 LAN This port connects the router to local PC.
RST-WPS
Button
Press for about 2~3 seconds, the system LED indicator keep solid light, it
means WPS working, while press for about 10 seconds, all LEDs blinks
quickly, the device will restore to factory default settings.
3.HARDWAREINSTALLATION
3.1 Hardware Installation
For those computers you wish to connect with Internet by this router, each of the computers
must be properly connected with the router through provided Ethernet cables.
1. Connect the Modem to ADSL Filter using RJ11 network cable, LINE port to LINE port.
2. Connect the ADSL’s LAN port to Router’s WAN port using RJ45 network cable.
3. Connect your PC to any one of router’s LAN port.
4. Plug the Power Adapter into the router and then into an outlet.
5. Turn on your computer.
6. Check and confirm that the Power & LAN LED on the router are ON.
3.2 Check the Installation
The control LEDs of the router are clearly visible and the status of the network link can be
seen instantly:
1. With the power source on, once the device is connected to the broadband modem, the

6
Power, WPS, LAN, WLAN and WAN port LEDs of the WLAN Router will light up indicating
a normal status.
2. When the WAN Port is connected to Internet successfully, the WAN LED will light up.
3. When the LAN Port is connected to the computer system, the LAN LED will light up.
3.3 Set up the Computer
The default IP address of the router is 192.168.1.1, the default Subnet Mask is
255.255.255.0. Both of these parameters can be changed as you want. In this guide, we
will use the default values for description.
Connect the local PC to the LAN port on the router. There are then two ways to configure
the IP address for your PC.
Configure the IP address manually
Configure the network parameters. The IP address is 192.168.1.xxx (“xxx” range from 2 to
254). The Subnet Mask is 255.255.255.0 and Gateway is 192.168.1.1 (router’s default IP
address).
Obtain an IP address automatically
Set up the TCP/IP Protocol in Obtain an IP address automatically mode on your PC.
Now, you can run the Ping command in the command prompt to verify the network
connection between your PC and the router. Open a command prompt, and type in ping
192.168.1.1, then press Enter.
Figure 3-1 Successful Ping command
If the result displayed is similar to the figure 3-1, it means that the connection between your
PC and the router has been established.

7
Figure 3-2 Failure Ping command
If the result displayed is similar to the figure 3-2, it means that your PC has not connected to
the routersuccessfully. Please check it following below steps:
1. Is the connection between your PC and the router correct?
If correct, the LAN port on the router and LED on your PC’s adapter should be lit.
2. Is the TCP/IP configuration for your PC correct?
Since the router’s IP address is 192.168.1.1, your PC’s IP address must be within the range
of 192.168.1.2 ~ 192.168.1.254, the Gateway must be 192.168.1.1.
4.CONNECTINGTOINTERNET
This chapter introduces how to configure the basic functions of your router so that you can
surf the Internet.
4.1 Accessing Web page
Connect to the router by typing 192.168.1.1 in the address field of web browser. Then press
Enter key.
Then below window will pop up that requires you to enter valid User Name and Password.

8
Enter admin for User Name and Password, both in lower case letters. Then click OK
button or press Enter key.
Now you will get into the web interface of the device. The Main screen will appear.
Now you have logged into the web interface of the router. First, you will see the Easy Setup
page.
Note: If the above screen does not prompt, it means that your web-browser has been set to using a
proxy. Go to Tools menu>Internet Options>Connections>LAN Settings, in the screen that
appears, cancel the Using Proxy checkbox, and click OK to finish it.

9
4.2 Changing Password
Now, we recommend that you change the password to protect the security of your router.
Please go to Management—Password to change the password required to log in your
router.
User Name: type in the name that you use to login the web interface of the router.
New Password: new password is used for administrator authentication.
Confirm Password: new password should be re-entered to verify its accuracy.
4.3 Status
This page shows the current status and some basic parameters of the device.
Note: password length is 8 characters maximum, characters after the 8th position will be truncated.
Table of contents
Other Toto Link Wireless Router manuals

Toto Link
Toto Link T10 User manual

Toto Link
Toto Link N600R User manual

Toto Link
Toto Link N300RH User manual

Toto Link
Toto Link CP150 User manual

Toto Link
Toto Link A2004NS User manual

Toto Link
Toto Link N300RH User manual

Toto Link
Toto Link Wireless-N Broadband Router User manual

Toto Link
Toto Link N200RE User manual

Toto Link
Toto Link N300RU User manual

Toto Link
Toto Link G150R User manual