Tenda I-WL-O3 User manual

i
1 Product Overview

ii
1 Product Overview
Copyright Statement
© 2015 Shenzhen Tenda Technology Co., Ltd.All rights reserved.
Tenda is a registered trademark legally held by Shenzhen Tenda Technology Co., Ltd. Other brand
and product names mentioned herein are trademarks or registered trademarks of their respective
holders. Copyright of the whole product as integration, including its accessories and software,
belongs to Shenzhen Tenda Technology Co., Ltd. No part of this publication can be reproduced,
transmitted, transcribed, stored in a retrieval system, or translated into any language in any form or
by any means without the prior written permission of Shenzhen Tenda Technology Co., Ltd.
Disclaimer
Pictures, images and product specifications herein are for references only. To improve internal
design, operational function, and/or reliability, Tenda reserves the right to make changes to the
products without obligation to notify any person or organization of such revisions or changes.
Tenda does not assume any liability that may occur due to the use or application of the product
described herein. Every effort has been made in the preparation of this document to ensure
accuracy of the contents, but all statements, information and recommendations in this document
do not constitute the warranty of any kind, express or implied.

iii
1 Product Overview
Conventions
Thank you for choosing Tenda! Please read this user guide before you start. This user guide
instructs you to install and configure theAP.
Typographical conventions in this User Guide:
Item
Presentation
Example
Button
Bold
“Click the Save button” can be simplified as
“Click Save”.
Menu
Bold
“The menu Basic” can be simplified as Basic.
Continuous Menus
>
Click Wireless > Basic
Symbols in this User Guide:
Item
Meaning
Note
This format is used to highlight information of importance or special
interest. Ignoring this type of note may result in ineffective
configurations, loss of data or damage to device.
Tip
This format is used to highlight a procedure that will save time or
resources.

iv
1 Product Overview
Contents
1 Product Overview ........................................................................................................................1
Package Contents..........................................................................................................................1
Hardware Description...................................................................................................................2
Front View.................................................................................................................................2
Rear View..................................................................................................................................3
Label .........................................................................................................................................4
2 Quick Installation Guide.............................................................................................................5
Step 1: Connect an Ethernet Cable to theAP................................................................................5
Step 2: Install theAP.....................................................................................................................5
Step 3: Connect the PoE Injector..................................................................................................6
Step 4: Quick Setup theAP...........................................................................................................6
AP Mode...................................................................................................................................7
Station (Client) Mode................................................................................................................9
Universal Repeater Mode........................................................................................................11
WISP Mode.............................................................................................................................14
Repeater + P2MP Mode..........................................................................................................16
Router......................................................................................................................................22
3 Advanced Settings......................................................................................................................25
Status...........................................................................................................................................25
Quick Setup.................................................................................................................................27
Network.......................................................................................................................................27
How to Change the LAN IPAddress......................................................................................27
How to Configure DHCP Server Settings...............................................................................29
How to View DHCP Client Info..............................................................................................30
How to Clone MACAddress ..................................................................................................31
Wireless.......................................................................................................................................32
How to Configure Basic Wireless Settings.............................................................................32
How to Configure Advanced Wireless Settings......................................................................34
How to Filter Access to Your Network ...................................................................................36
Advanced....................................................................................................................................37
How to Set LAN Rate.............................................................................................................37
How to Diagnose Your Network.............................................................................................38
How to Reboot Your AP Regularly.........................................................................................41
How to Log in to Web UI in a More Secure Way ...................................................................42
How to Configure the Idle Timeout........................................................................................42
How to Configure SNMP Settings..........................................................................................43
How to ManageYour Device via Telnet .................................................................................43
How to Enable the UPNP Settings..........................................................................................44
How to Prioritize Your Network Bandwidth Usage................................................................44

v
1 Product Overview
How to Visit the Intranet Resource from the Internet by Configuring Port Forwarding
Settings....................................................................................................................................45
How to Filter InternetAccess via MAC Addresses.................................................................47
How to Configure DDNS Settings..........................................................................................49
How to Manage the Device Remotely....................................................................................51
Tools............................................................................................................................................52
How to Configure System Time for Your Device...................................................................52
How to Reboot your AP Manually..........................................................................................53
How to Reset Your AP ............................................................................................................54
How to Upgrade Your AP .......................................................................................................54
How to Backup and Restore Your AP’s Configurations..........................................................55
How to Change Your Login Account......................................................................................56
How to View the History of Your AP’s Actions ......................................................................58
Appendix........................................................................................................................................59
1 Configure PC ...........................................................................................................................59
Windows 8 ..............................................................................................................................59
Windows 7 ..............................................................................................................................61
Windows XP ...........................................................................................................................63
2 Connect to Your WiFi...............................................................................................................65
Windows 8 ..............................................................................................................................65
Windows 7 ..............................................................................................................................66
Windows XP ...........................................................................................................................68
3 FAQs........................................................................................................................................70
4 Safety and Emission Statement................................................................................................70

1
1 Product Overview
1 Product Overview
Tenda O3 is an advanced and high-performance long-range wireless access point which is suitable
for long-range data transmission and video surveillance, especially in WISP CPE solutions.
Equipped with built-in 12dBi directional dual-polarized antenna, it offers high data transmission
of up to 5km on 2.4GHz band with maximum transmission power of 800mW. With waterproof
housing and flexible mounting design, it applies to different harsh environments and provides
reliable, secure and wide wireless coverage.
Package Contents
If any item is incorrect, missing, or damaged, please contact your dealer for immediate
replacement.

2
1 Product Overview
Hardware Description
Front View
Item
Port / Button
Description
1
GND
With the included grounding screw, attach a copper wire here to
provide proper surge and lightning protection for your device.
2
RST
Pressing and holding the reset button for over 7seconds restores
this device to factory defaults.
3
LAN
A 100Mbps LAN port for connecting the Ethernet device such as
a switch, a computer, etc.
4
PoE LAN/WAN
This port provides power over an Ethernet connection via the PoE
injector. And it works interchangeably as a WAN port in Router
mode and a LAN port in other modes.
5
/
Cable access hole cut-outs

3
1 Product Overview
Rear View
LED
Status
Description
SYS
Off
Malfunction occurs or the device is not powered on.
Blinking
The device is working properly.
PoE
WAN/LAN
Off
There is no device linked to this port.
Solid
There is a device linked to this port but no data transmission.
Blinking
Data transmission is occurring on this port.
LAN
Off
There is no device linked to this port.
Solid
There is a device linked to this port but no data transmission.
Blinking
Data transmission is occurring on this port.
Bridge
Off
1) Working in AP or Router mode
2) Failed to connect to remote AP
Solid
Bridged to the remoteAP successfully
4
1 Product Overview
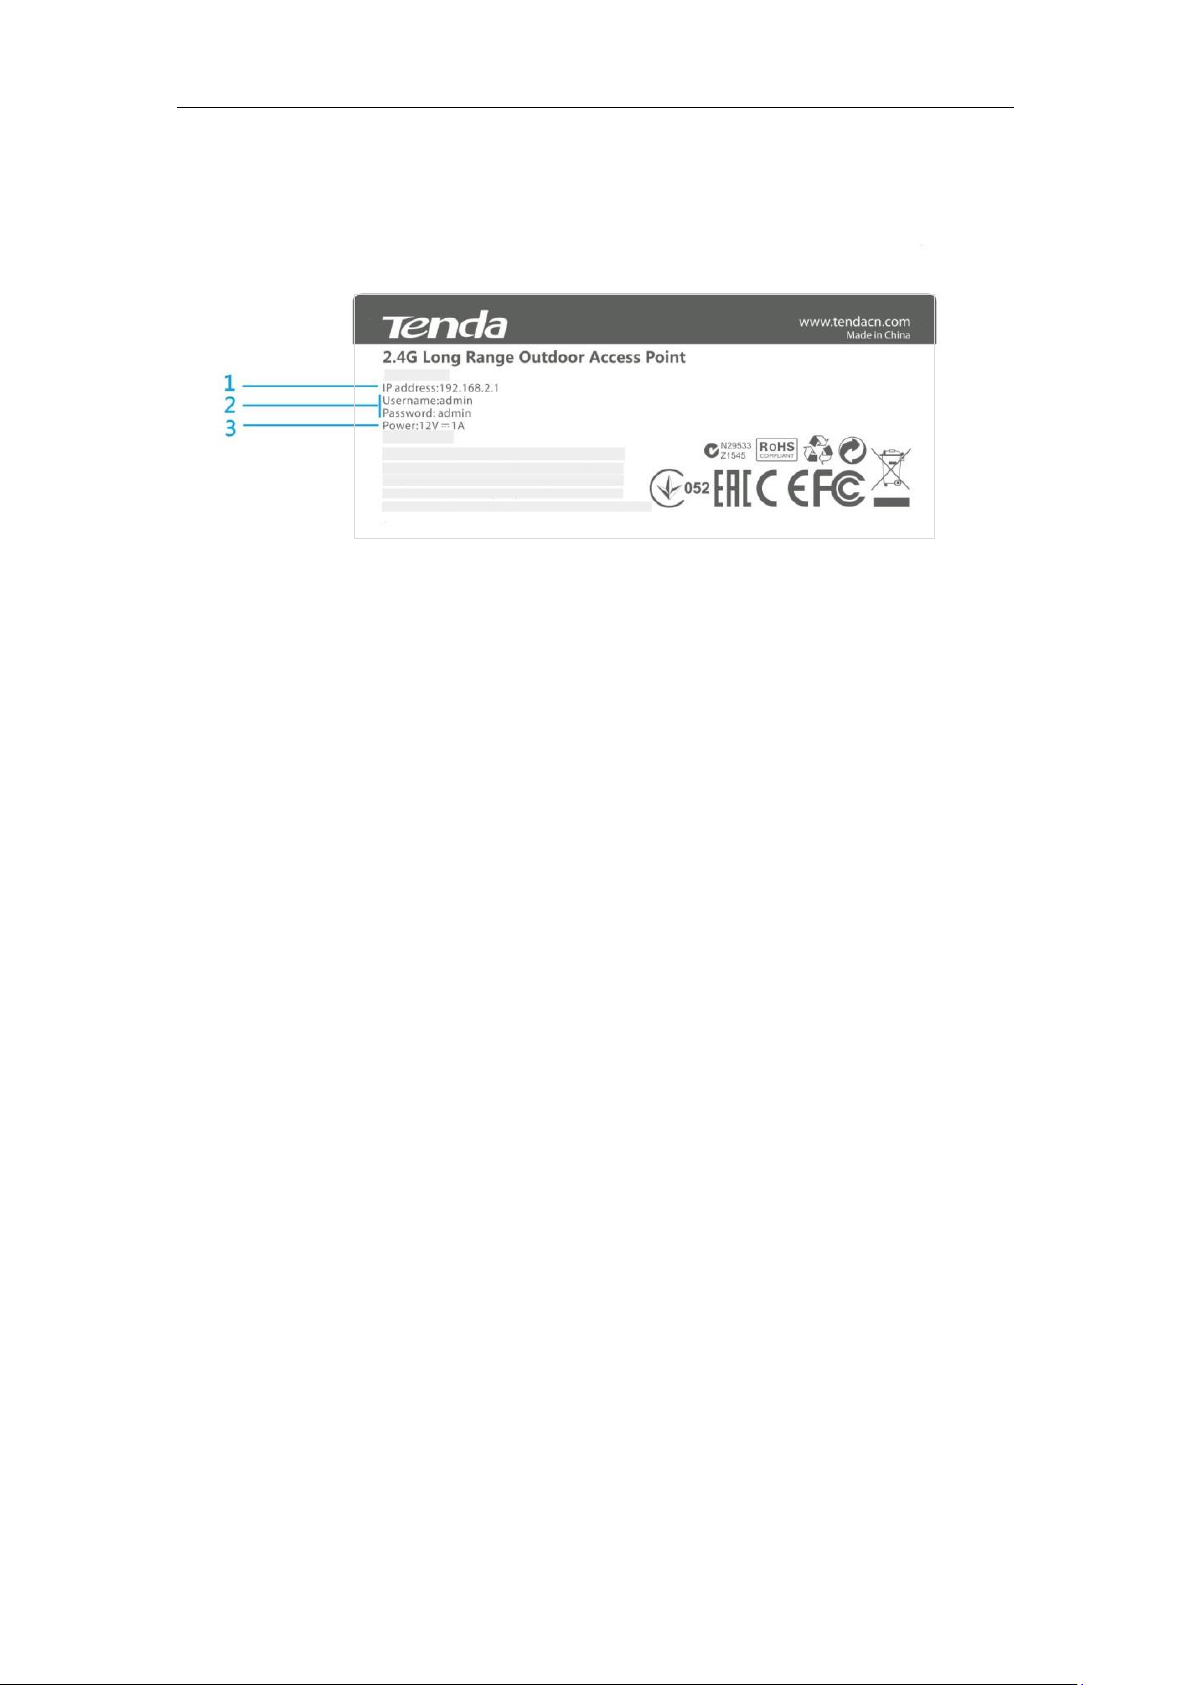
Label
1. IPAddress: Default login IP address for web login of this device.
2. Default login user name and password (admin for both).
3. Power specification of this device.

5
2 Quick Installation Guide
2 Quick Installation Guide
Step 1: Connect an Ethernet Cable to the AP
❶Slide the bottom cover of theAP down to expose the ports.
❷Connect an Ethernet cable (≤ 60m), which will be connected to the PoE injector, to the PoE
LAN/WAN port of your AP.
❸Gently replace the cover by sliding it up until it clicks into place.
Step 2: Install the AP
Set up the AP in an outdoor location, usually
on the roof, and thread plastic wraps through
grooves underneath the brackets. Then
attach the device firmly to a solid pole.
This manual suits for next models
1
Table of contents
Other Tenda Wireless Access Point manuals


 installation guide")
