Tenda TX12 Pro User manual

AX3000 Dual Band Gigabit Wi-Fi 6 Router
RX12 Pro/TX12 Pro
Quick Installation Guide
• Wireless router x 1
• Power adapter x 1
• Ethernet cable x 1
• Quick installation guide x 1
Package contents
Please read this guide before you start with the quick setup upon the first use.
This guide instructs how to install and connect the device. For more information such as the
description of symbols displayed on relevant materials, please visit www.tendacn.com.


CONTENTS
01 / English
08 / Deutsch
11 / Español (Mexico)
14 / Čeština
17 / Italiano
20 / Français
23 / Magyar
26 / Polski
29 / Română
32 / Nederlands
35 / Türkçe
38 /
한국어
���
41 / Español
44 / Português
47 / Български
50 /
53 / Slovenščina
56 /
59 / Bahasa Indonesia

English
01
Scenario1: Set up the device as a router
I.Connect the router
The "new router" and "router" in this guide refer to the router in the package.
Step 1: Import your PPPoE user name and password into the new router
(Optional)
1.Power on your original and new routers.
2. Connect the WAN port of the original router to a LAN port (1,2 or IPTV/3)
of the new router using an Ethernet cable.After the LED indicator of the
new router blinks fast for 8 seconds, the PPPoE user name and password
are imported to your new router.
3.Remove the original router.
Step 2: Connect the WAN port of the router
Tips
This function is only applicable when the connection type of the original router is
PPPoE,except for PPPoE of some special ISPs or PPPoE connection set up manually
with VLAN information.
Note
If you use the modem for internet access, please power off the modem
first before connecting the WAN port of the router to the LAN port of
your modem.
1. Ensure that the router is powered on.
2. Connect the WAN port of the router to the LAN port of your
modem or the Ethernet jack using an Ethernet cable.
Power source New router
Original router
WAN
Power source
RST WPS WAN 12IPTV/3POWER
1 2 IPTV/3
Ethernet cable
RST WPS WAN 12IPTV/3POWER
Modem
Internet
Or
Ethernet jack
Ethernet cable
Power source
WAN

English
02
II.Connect the router to the internet
1.Download the Tenda WiFi App onto your mobile device by scanning the QR
code or searching for Tenda WiFi in Google Play or App Store. Then install
the Tenda WiFi App.
2.Connect the mobile phone to the WiFi network of the router. The SSID and
password can be found on the bottom label of the router.
3.Run the Tenda WiFi App and follow the onscreen instructions to connect the
router to the internet. After the router is connected to the internet,its LED
indicator lights solid green.
Method 1: Setup through Tenda WiFi App
TendaWiFi
Tenda_XXXXXX
Settings
Done.
• To access the internet with:
- Wired devices: Connect to the LAN port of your router.
- Wireless devices: Connect to your WiFi network using the WiFi
name and password you set.
• If you want to manage the network remotely, tap on the App
home page and use your account to log in.
12345678
www.tendacn.com
Made in China
Serial No.
SSID
Pin No.
MAC
AX5700 Tri-Band Gigabit Wi-Fi 6E Router
Model: RX27 Pro
IP Address: 192.168.0.1
Input: 12V 2A
FCC ID: V7TRX27P
Tenda_XXXXXX
SSID:
Tenda_XXXXXX

English
03
Method 2: Setup through web UI
1.Connect the client to the router.
Method 1: Connect the wireless client such as a mobile phone to
the WiFi network of the router.The SSID and password
can be found on the bottom label of the device.
Method 2: Use an Ethernet cable to connect the computer to the
1, 2 or IPTV/3 port of the router.
2. Start a browser on the client (computer used as an example) and
enter tendawifi.com in the address bar to access the web UI.
Then, click Start Now.
Tips
If you cannot log in to the web UI,refer to Q1 in FAQ.
Faster,Safer,Smoother, Smarter
English
Start Now
Welcome to use Tenda router
tendawifi.com
Scan to download Tenda WiFi
app
Manage your router easily
Ten da _ XXXXXX
Setting
WiFi-enabled device
12345678
Serial No.
SSID
Pin No.
MAC
Tenda_XXXXXX
SSID:
Tenda_XXXXXX
Or
RST WPS WAN 1 2 IPTV/3POWER
Wired device
Ethernet cable Ethernet cable
1 2 IPTV/3

English
04
4.Set the WiFi name, WiFi password and login password for the
router.Click Next.
3.The router detects your connection type automatically.
− If you have imported your PPPoE user name and password into
the router,click Next.
− If you did not import your PPPoE user name and password into
the router,select the ISP Type based on your region and ISP
and enter required parameters (if any).Then, click Next.
Next
Detection succeeded. Recommended internet connection type: PPPoE
Select this type if you access the internet using the PPPoE account and PPPoE password.
ISP Type Normal
English
Internet access is a few steps away!
Internet Connection Type PPPoE
PPPoE Username Enter the user name from your ISP
PPPoE Password Password from your ISP
Detect Internet
Connection Type
WiFi Settings CompleteInternet Settings
23 4
Tips
The WiFi password is used to connect to the WiFi network,
while the login password is used to log in to the web UI of the
router.
Next
English
Internet access is a few steps away!
Set WiFi password to router login password
Not encrypted
WiFi Name Tenda_XXXXXX
WiFi Password •••••••••
Detect Internet
Connection Type
WiFi Settings Complete
Previous
Internet Settings
34

English
05
To access the internet with:
- Wired devices: Connect to the LAN port of your router.
- Wireless devices: Connect to your WiFi network using the WiFi
name and password you set.
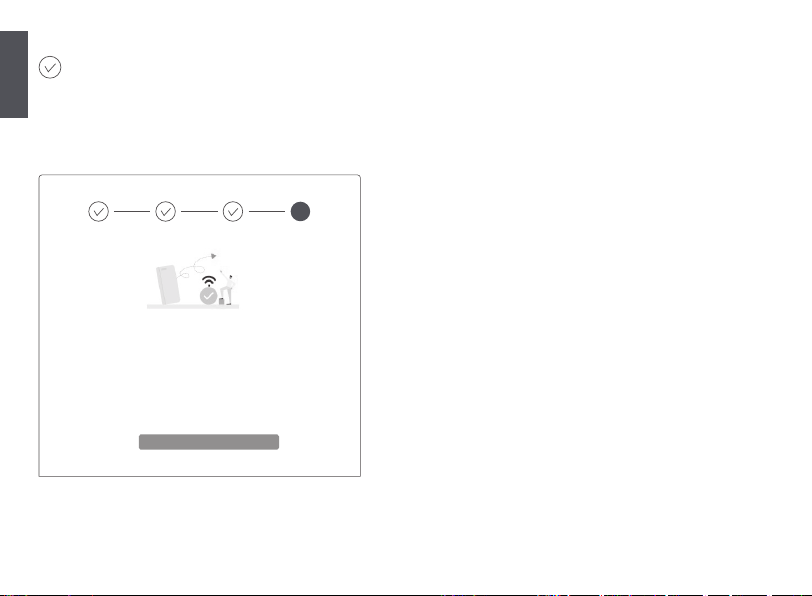
Done.
Detect Internet
Connection Type
WiFi Settings Complete
Complete
Configuration completes.You can access the internet now
Current WiFi network is cut off.Please connect to the new WiFi network
WiFi Name
Tenda_XXXXXX
WiFi Password
Login Password
Internet Settings
4

English
06
II Relocate the router
Scenario 2: Set up as an add-on node
I Add the router to an existing network
1.Place the router in an elevated and open position within 3 meters from your
existing node.
2. Use the power adapter to connect the router to a power source, and wait until
its LED indicator blinks green slowly.
3.Press the WPS button of the router for about 3 seconds.The LED indicator
blinks green fast.Within 2 minutes, press the MESH/WPS button of the node
of the existing network for 3 seconds to negotiate with this router.
When the LED indicator of the router lights solid green,the networking is
successful and the router becomes a secondary node in the network.
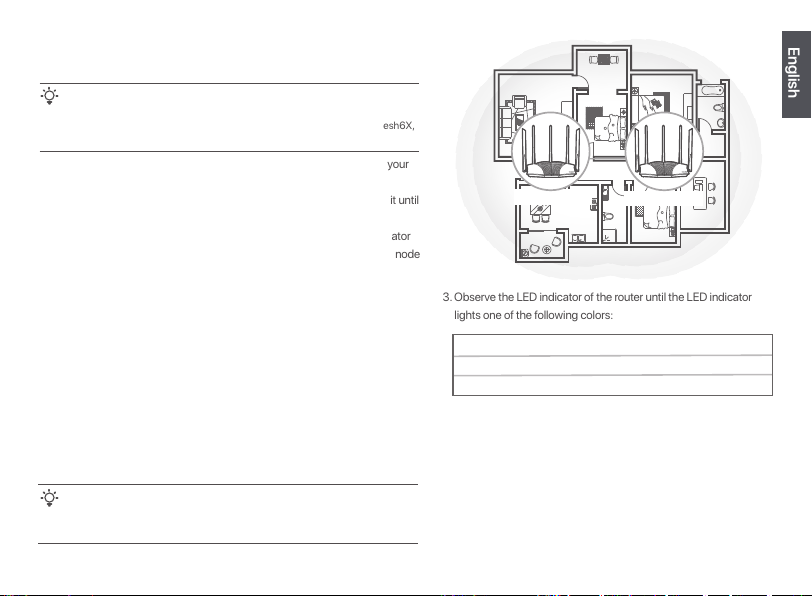
3.Observe the LED indicator of the router until the LED indicator
lights one of the following colors:
4.If the router's LED indicator blinks red slowly,relocate it by repeating
the preceding steps to get an optimal connection quality.
Done.
To access the internet with:
- Wired devices: Connect to the LAN ports of your nodes.
- Wireless devices: Connect to your WiFi network using the WiFi
name and password of your existing WiFi network.
1.Refer to the following relocation tips to locate the router to a proper position:
• Ensure that the distance between any two nodes is less than 10 meters.
• Keep your nodes away from electronics with strong interference,such as
microwave ovens,induction cookers,and refrigerators.
• Place the nodes in a high position with few obstacles.
2.Power on the router again till the LED indicator blinks green slowly.
Tips
• Please ensure that the router has never been used.If not, reset it first.
• Currently,RX12 Pro/TX12 Pro can be networked with the same model,Mesh6X,
Mesh12X,RX27 Pro, or TX27 Pro.
Tips
If the LED indicator of router keeps blinking green slowly for more than 3 minutes,
relocate the router and move it closer to the primary node.
Solid green Networking succeeds.Excellent connection quality.
Solid orange Networking succeeds. Fair connection quality.
Solid red Networking succeeds.Poor connection quality.
Original node Add-on node

English
07
LED indicators Jack,ports and buttons
After the router is powered on for about 40 seconds,the system completes startup. The
status of the LED indicator is shown in the following table.
Node Type
Primary node
Secondary
node
LED indicator
Status Description
Solid green
Blinking green
fast
Blinking green
fast
Blinking red
slowly
Solid green
Solid orange
Solid red
The router is pending for or performing WPS
negotiation or Mesh networking.
The router failed to connect to the internet.
Networking succeeds. Good connection quality.
Networking succeeds. Fair connection quality.
Networking succeeds. Poor connection quality.
Networking by the WPS button or performing
WPS negotiation.
Blinking green
slowly Waiting to connect to another node.
Blinking red
slowly The router failed to connect the internet.
The system is starting up,or the router is already
connected to the internet.
Description
Jack/Port/
Button
Power jack.
Please use the included power adapter to connect this jack to a
power source for power supply.
Reset button.
When the router is working normally,hold the button down using a
needle-like item (such as a pin) for about 8 seconds, and then release
it when the LED indicator blinks red fast.The router is reset.
10/100/1000 Mbps auto-negotiation WAN port.
Used to connect to a modem or the Ethernet jack using an Ethernet
cable for internet access.
After the router is connected to an existing network as a secondary
node, this WAN port is used as a LAN port.
10/100/1000 Mbps auto-negotiation LAN port.
Used to connect to computers,switches or game machines, etc.
POWER
WPS
RST
1, 2
10/100/1000 Mbps auto-negotiation LAN/IPTV port.
It is a LAN port by default.When the IPTV function is enabled, it can
only serve as an IPTV port to connect to a set-top box.
IPTV/3
WPS/Mesh button.
• WPS: When it is used as a WPS negotiation button,you can
connect to the WiFi network of the router without entering the
WiFi password.
Method: Short press the button (for about 1 second),and the
LED indicator blinks fast. Within 2 minutes, enable the WPS
function of the other WPS-supported device to establish a
WPS connection.
• Mesh: When it is used as a Mesh networking button,you can
extend your network with another device that supports the
Mesh function.
Method: Press this button for about 3 seconds. The LED
indicator blinks green fast,which indicates the device is
searching for another device to form a network.Within 2
minutes, press the MESH/WPS button of another device for 1 to
3 seconds to negotiate with this device.
WAN Tips
RST WPS WAN 1 2 IPTV/3POWER
LED
indicator

This manual suits for next models
1
Table of contents
Languages:
Other Tenda Network Router manuals