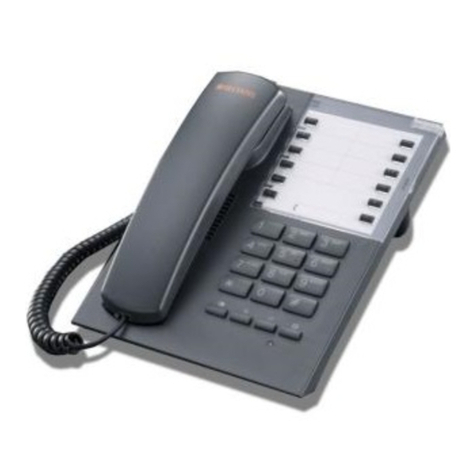
Tecdesk 1000V User manual

Tecdesk 1000V
User Manual
English
Fixed Wireless Phones
tecdesk.com

INTRODUCTION 1
PACKAGE CONTENTS 2
GETTING TO KNOW YOUR PHONE 3
ALPHANUMERIC KEYPAD 5
GETTING STARTED 6
SETTING UP 6
BASIC FUNCTIONS 7
CUSTOMISING YOUR SOUNDS 8
CUSTOMISING YOUR SETTINGS 9
SPECIFICATIONS 13
TROUBLESHOOTING 14
LEGAL INFORMATION 15
HEALTH AND SAFETY 17
RF/ SAR INFORMATION 17
DECLARATION OF CONFORMITY 20
CONTENTS

1
INTRODUCTION
Thank you for purchasing the Tecdesk 1000V Desk Phone. This phone is designed for use with GSM 900/1800 and UMTS 900/2100 MHz
networks. You will require a valid SIM card from your network operator. Please refer to your network operator for more information.
Safety Instructions
Please read the following instructions carefully before starting to use the Tecdesk 1000 Desk Phone.
• Always read the safety instructions carefully.
• Keep this manual for future reference.
• Keep the phone away from humidity.
• Place the phone on a reliable at surface before setting it up.
• If any of the following situations arise, have the unit checked by a service technician.
– Exposure to moisture.
– Droppage and damage.
– Obvious signs of breakage.
• Do not place the phone in a damp room at a distance of less than 1.5m from a water source. Keep water away from the device.
• Do not use the device in environments where there are risks of explosions.
• Maintain the desk phone in an environment-friendly manner.

2
B. USB data cable C. User manual
User Manual
D. Quick start-up guide
Quick
Start-Up
Guide
PACKAGE CONTENTS
Please check the box includes the following components. If there are any items missing please contact your supplier.
A. Tecdesk 1000V
E. AC/DC power
adaptor
F. Ni-MH rechargeable
battery
G. Allen key

3
GETTING TO KNOW YOUR PHONE
1. Handset/receiver
2. Speaker
3. [ ] Dial button
4. [ ]
CCancel button
5. [ ] Up/Volume + button
6. [ ]
OK OK/Enter button
7. LCD screen
8. Jack for receiver cable
9. Alphanumeric keypad
10. [ ] Down/Volume - button
11. [ ] Power ON/OFF/End button
12. M1 - M6 Memory buttons
13. Screw for battery cover
14. Battery compartment cover
15. Jack for receiver cable
16. Security slot (Optional)
17. Micro USB data cable port
18. Power adaptor/charger port
110
11
12
13
14
15
5 6
7
8
16 17 18
3
4
9
2

4
STANDBY MODE
Signal bar
Signal bar
Date Time
Battery indicator
Battery indicator
Network
MAIN MENU

5
Button Lowercase (abc) Uppercase (ABC)
1., ? ! - _ @ 1 . , ? ! - _ @ 1
2 abc2 ABC2
3 def3 DEF3
4 ghi4 GHI4
5 jkl5 JKL5
6 mno6 MNO6
7 pqrs7 PQRS7
8 tuv8 TUV8
9 wxyz9 WXYZ9
0 [SPACE] 0
# Toggle between: numerical / lowercase / uppercase / predictive text
* + and special character selection
ALPHANUMERIC KEYPAD
Refer to the table below when using the alphanumeric keypad. When entering usernames or passwords, you can press the button to
toggle between numbers (123), lowercase characters (abc), and uppercase characters (ABC).

6
GETTING STARTED
SETTING UP
Follow the steps below to install the Desk phone.
- Connect the receiver to the device with the curly cord.
- Remove the battery cover with the Allen key then remove the battery and insert an appropriate SIM card into the device.
- Insert the battery into the battery compartment, ensuring the polarity on the battery matches the polarity of the connectors and the
cover is positioned correctly and secured into place.
- Connect one end of the power adaptor to the Power adaptor/ charger port. Plug the power adaptor into a mains power outlet. The
battery level indicator will stop moving when the device is fully charged.
- When the phone is powered up for the rst time, the default language will be in English. Please refer to the “LANGUAGE”section of
the manual to select an alternative language.
CHARGING THE UNIT
When the battery level is low, there will be a warning tone, a low battery message will be displayed and the empty battery icon will
ash. Plug the power adaptor into the unit to start charging. The battery level indicator will ash during charging mode and once it has
charged, the full battery icon will appear. Charging a completely at battery may take 2 to 3 hours.
POWERING ON/OFF
Press the [ ] button for 2 seconds and the phone will turn ON. The backlight will illuminate and automatically search for a network
operator. When the operators name is shown on the screen, press the [ OK ] button again for 2 seconds. When prompted to INSERT
CODE input the PIN code“2580” and press the [ OK ] button to conrm. The phone is now in Standby mode and is ready to be used. To
turn OFF the device, press the [ ] button for 2 seconds.
Note:
If the power source and battery is connected to the device and there is no SIM card inserted in the device the LCD will display“no SIM
card”. If the SIM card is damaged or your network is not authorised to be used on the device the LCD will display“PLEASE INSERT USIM
Card”. For further information please contact your network operator. Always ensure the device is switched OFF before removing the SIM
card. This will prevent damage to the SIM card and data loss. Do not place the SIM card near any electromagnetic surfaces or
environments and avoid touching the metal connectors on the SIM card. For further information please contact your network operator.

7
BASIC FUNCTIONS
MAKING A CALL
In Standby mode, use the alphanumeric keypad to input the contact number. Press the [ C ] button to delete an incorrect entry.
Press the [ ] button to make a call. To terminate a call replace the handset back on to the main unit.
ANSWERING A CALL
During an incoming call, pick up the receiver to answer the call.
REJECTING AN INCOMING CALL
During an incoming call, press the [ ] button to reject the call.
ADJUSTING THE VOLUME
During an active call, the volume can be adjusted by pressing the [ ][ ] buttons.

8
CUSTOMISING YOUR SOUNDS
In Standby mode press the [ OK ] button to enter into the MAIN MENU to access the “SOUNDS”, “SETTINGS” and “CONTACTS”. Use the
[ ][ ] buttons to toggle between the 3 options and select “SOUNDS” with the [ OK ] button. In the “SOUNDS”submenu, you can set
the “RINGTONE”, “VOLUME”, “KEYTONE” and “WARNING TONE”. Use the [ ][ ] button to toggle between the options and press the
[ OK ] button to make the selection.
RINGTONE
Press the [ OK ] button to bring up the “RINGTONE” option. Use the [ ][ ] buttons to toggle between the ringtones. Press [ OK ]
button to select a ringtone. Press the [ OK ] button on “PLAY” to preview the ringtone and“SELECT” to save it.
VOLUME
Press the [ OK ] button on the “VOLUME”option. Use the [ ][ ] buttons to increase or decrease the volume. Press the [ OK ] button
to save the setting.
KEYTONE
Press the [ OK ] button to enter into the“KEYTONE”option. Use the [ ][ ] button to toggle between the “ON”or “OFF”options to
enable or disable the keypad tone. Press the [ OK ] button on your choice to save the setting.
WARNING TONE
Press the [ OK ] button to enter into the“WARNING TONE” option. Press the [ OK ] button to save the setting.
Table of contents
Other Tecdesk Telephone manuals

Tecdesk
Tecdesk 5500i User manual

Tecdesk
Tecdesk 5 User manual

Tecdesk
Tecdesk Smart 5500 User manual

Tecdesk
Tecdesk 3500 User manual

Tecdesk
Tecdesk 1000 User manual

Tecdesk
Tecdesk Smart 5500 User manual

Tecdesk
Tecdesk Connect 100 User manual

Tecdesk
Tecdesk 8000 User manual

Tecdesk
Tecdesk 3500 User manual

Tecdesk
Tecdesk Smart 5500 User manual