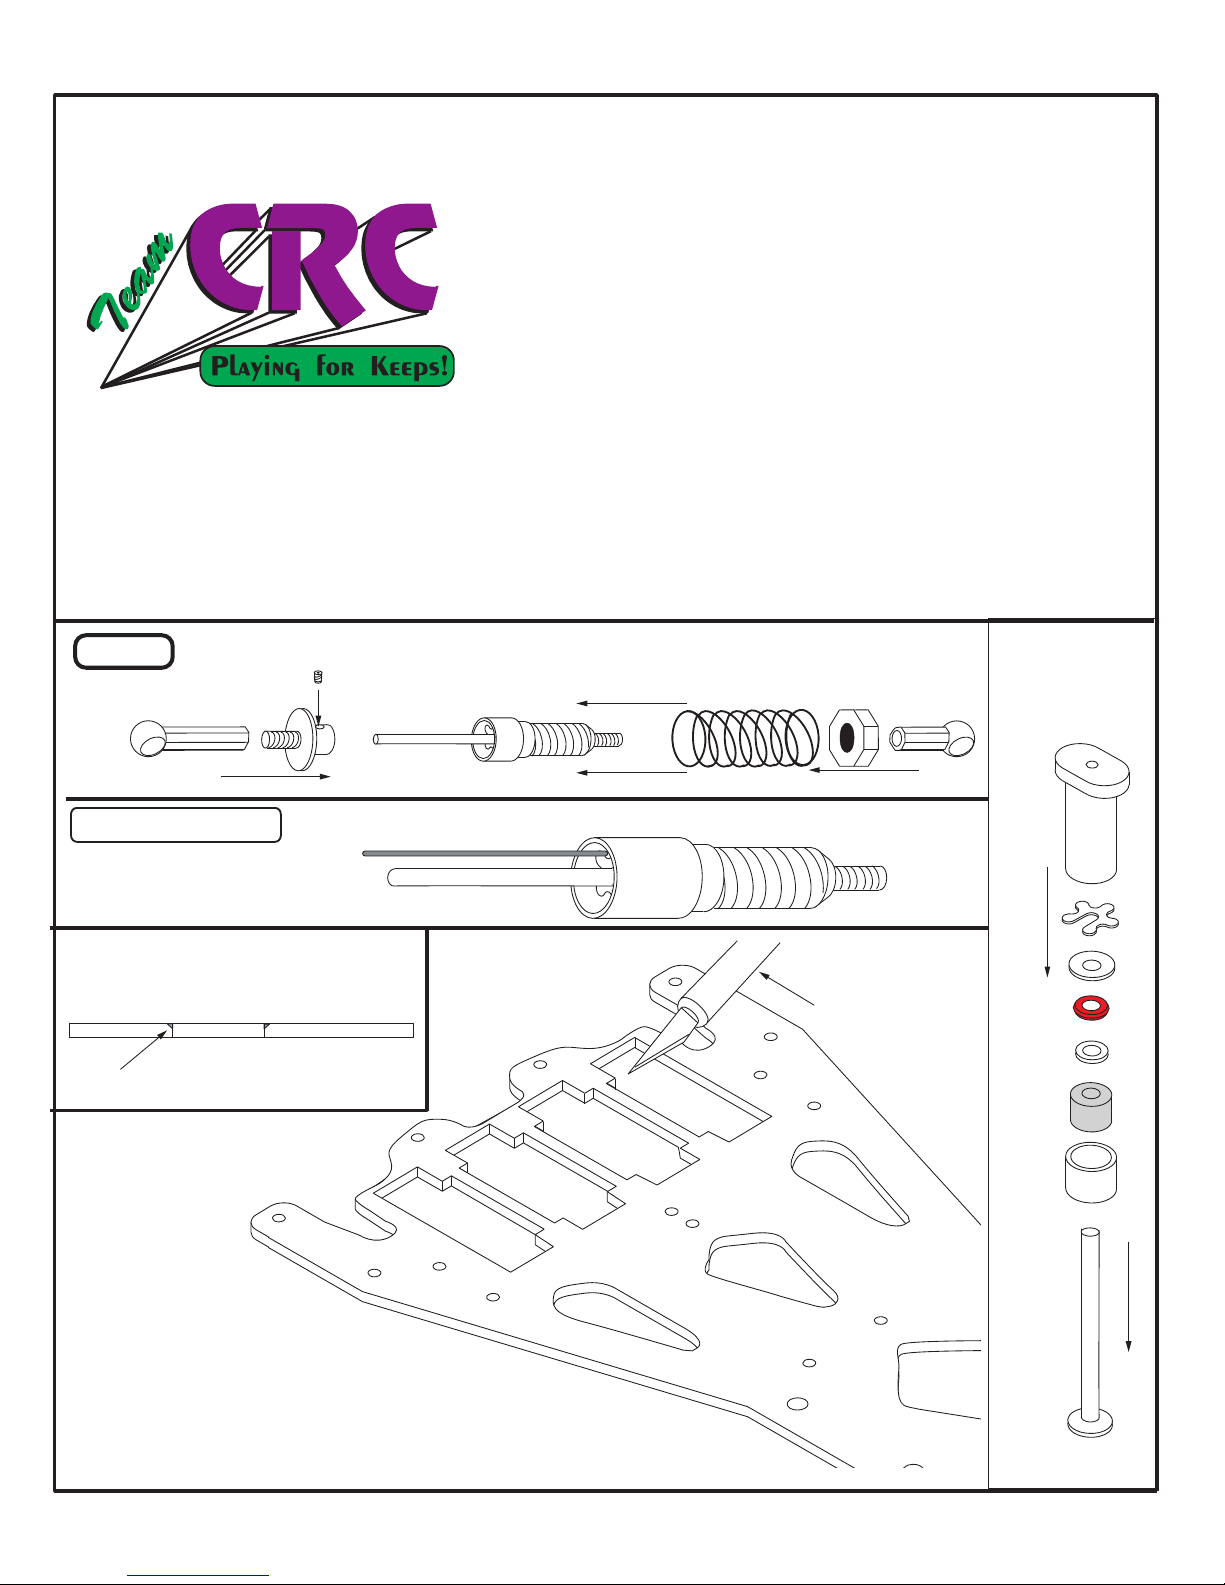
1) Find the Damper tubes in Bag #4. Clean the aluminum tubes with a cotton swab to ensure there is no aluminum filings in the tube.
2) Assemble by threading the 2-56 studs into the black plastic ball cups. Thread in fairly deep with only about 1/8" of the thread protruding. Now, thread
one ballcup into the aluminum tube and the other into the black delrin plunger. Using Losi Hydra fluid, cover the plunger with fluid, filing the slots
with fluid. Be sure the vent hole is clear. Insert the plunger in the tube and wipe the excess fluid. The tubes are now ready to install.
3) At this time, do not install the damper tubes. We will do that later. The tubes are shown here for illustration purposes only. They snap on the balls.
Bag "2", Bag "4" and Bag "7"
Battery Hook
4) Bag #7. Install the battery hook standoffs as shown below. The countersunk washer catches the
O-ring retainer that secures the battery.
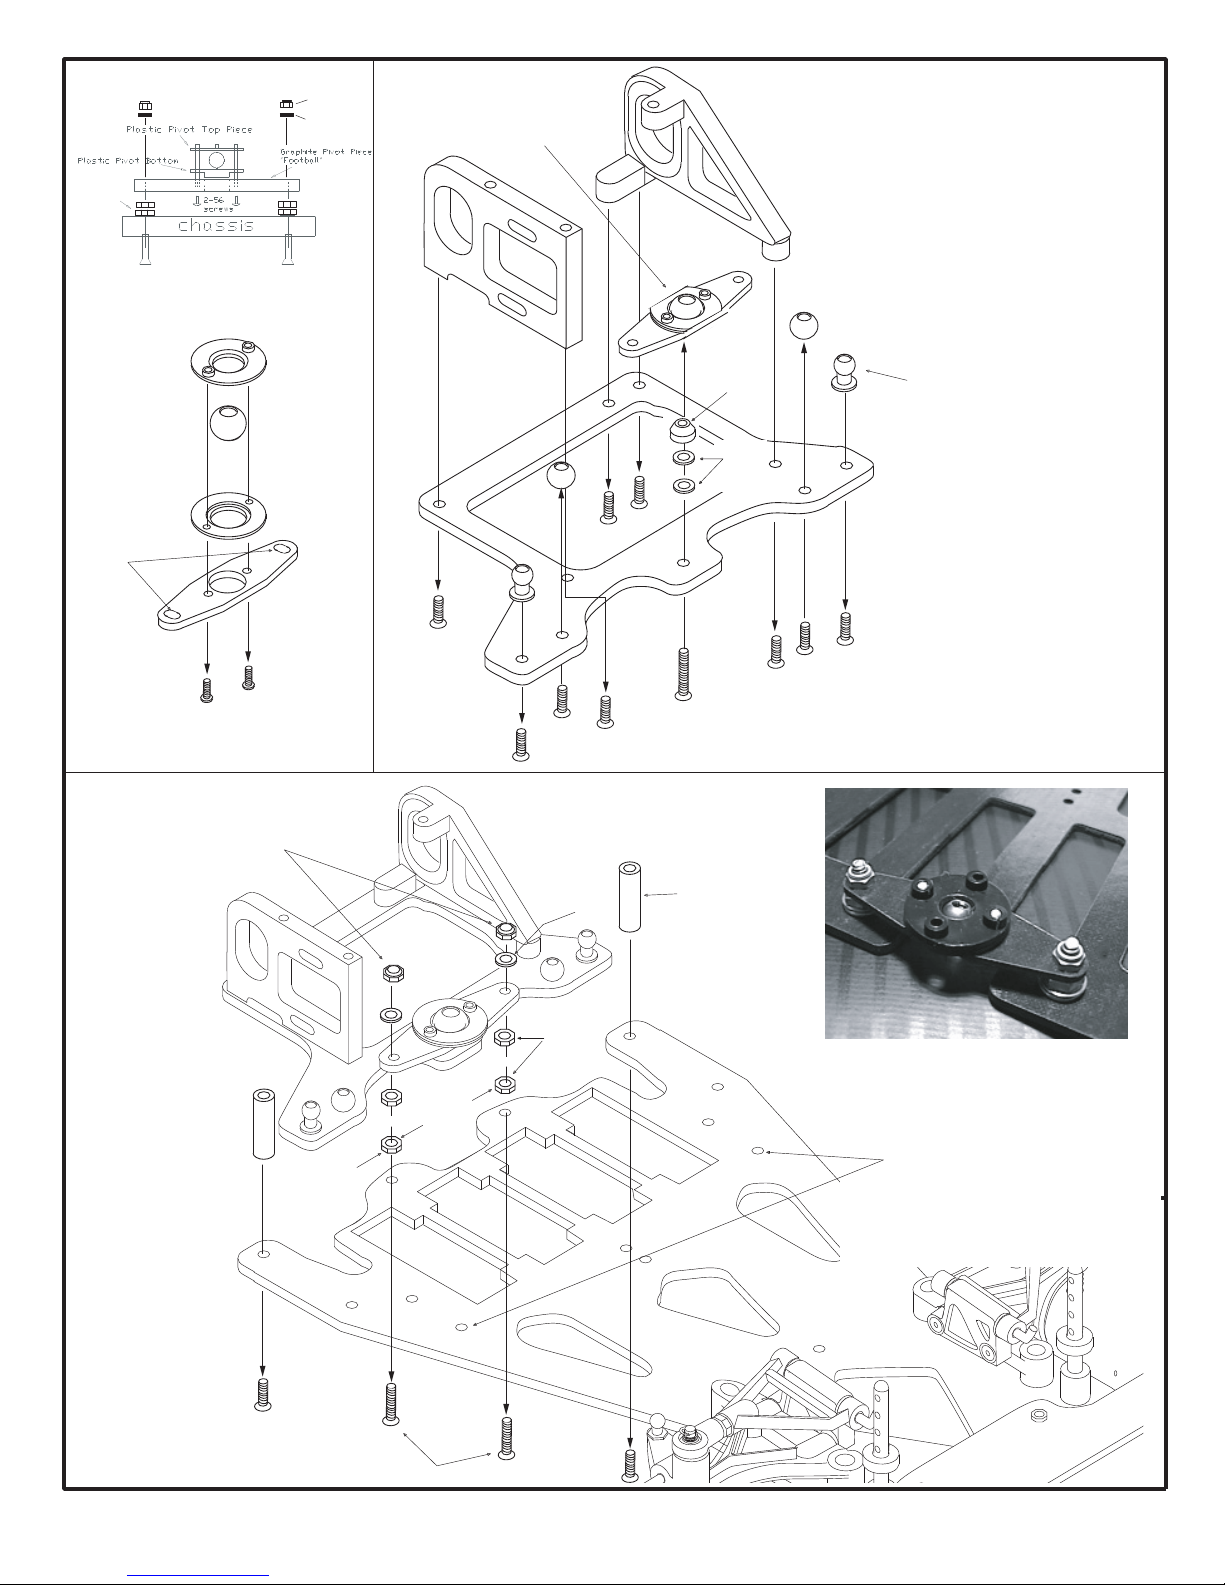
5) For the next step, which is the 1-piece link installation, remove
the top tweak brace so that the pivot plate (football shaped
piece) is exposed from the top. Do this by removing the 2
button head screws that are right behind the body mounts.
6) Be sure the 2 aluminum locknuts on top of the
pivot plate are loose. Notice that the pivot plate
"floats" or moves slightly on the 2 screws. This
"floating" allows the links to "free up". This
ensures that the rear pod plate pivots
freely on the links and center
pivot ball. This is a crucial step
when setting up the Carpet Knife.
7) To begin the link installation, secure
the hex-pivot balls to the chassis with the
screws provided in Bag "2". Tighten the
pivots firmly using a 3/16" nut driver. Hold the
screws from underneath the chassis, but
TIGHTEN the balls from above with the nut
driver. If you try to tighten from underneath, you
will strip out the head of the screw. Use the larger
nut driver to tighten as this larger surface will not
strip as easy.
Use short
screws for
batt hook.
Bag "2" One-piece links
1) With the top Tweak brack removed, locate the football shaped
graphite part. Be sure the 2 exposed top locknuts are loosened slightly.
2) Snap the 2 links on the balls as shown. They should rock freely on
the pivot balls. Do NOT install the center shock yet, if you have
already, remove the center shock.
3) Place the car on a flat surface. A smooth table or desk should do.
Be sure that the rear bottom plate and chassis are in a straight
line, flat against the table. Keep the car flat on the table for
step 4.
4) Now, slowly tighten the 2 locknuts that secure the pivot
plate (football shaped part). Snug them down firmly.
5) Pick up the car and check the pivoting action of
rear lower plate. Rotate the rear plate from side-to-
side. It should move free without binding or "clicking".
If it does not, repeat steps 1-4. The handling of the
Carpet Knife hinges (pun intended!) on the free
movement of this rear plate. Be sure that the rear
links and rear plate are free and not binding.
6) Snap the center shock on the 2 balls as shown. With the
car suspended in the air, see that the rear pod is level or droops
slightly (viewed from the side). Extend (loosen) the black plastic ball
cups to lengthen the shock. Cut the ballcup or tighten it to shorten
the length of the shock. This will effect the droop of the rear plate.
Hex
pivot ball
From Bag "S"
5
Rotate
IMPORTANT! - If the links bind or drag, free them up by popping
them on and off a few times. This will loosen them so that they rock
freely when popped on. In severe cases, squeeze the plastic link with
pliers while they are popped onto the metal hex-balls. You can also
polish the balls slightly with a polishing compound.
Middle Hole!!!