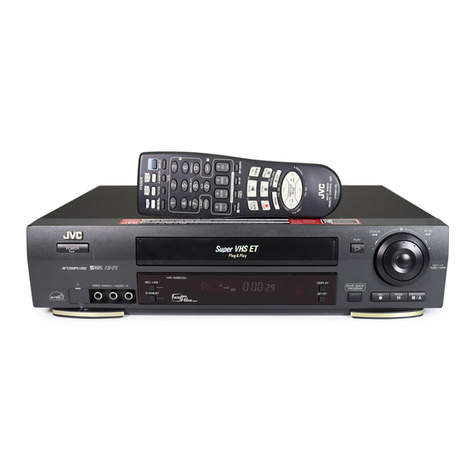
Teac MV-6094 User manual

Thanks for buying a TEAC. Read this manual carefully to get the best performance
from your new TEAC products.
CAUTION:
Use of controls or adjustments or performance of procedures other than those
specified herein may result in hazardous radiation exposure.
MV-6094
6HEAD HIFI VIDEO CASSETTE RECORDER
OWNER’S MANUAL
This appliance has a serial number located on the rear
panel. Please record the model number and serial
number and remain for your records.
model number
serial number
PAL
WARNING - DANGEROUS VOLTAGE INSIDE
WARNING - TO PREVENT FIRE OR SHOCK HAZARD, DO NOT EXPOSE
THIS UNIT TO RAIN OR MOISTURE.
DVST7D1D-RB/H(148*210) 01.4.6 11:28 AM ˘`27

TEAC CORPORATION
3-7-3, Nakacho, Musashino-shi, Tokio 180-8550, Japan
Phone : (0422) 52-5081
TEAC AUSTRALIA PTY., LTD. A.B.N. 80 005 408 462
HEAD OFFICE 106 Bay Street, Port Melbourne, VIC 3207
Phone : (03)9644-2444
NSW OFFICE Unit 4, 175-179 James Ruse Drive, Rosehill, NSW 2142.
Phone : (02)8845-1122
QLD OFFICE 335 Montague Road, West End, QLD 4101.
Phone : (07)3844-9060
WA OFFICE 273 Great Eastern Highway, Belmont, WA 6104.
Phone : (08)9479-6522
SA OFFICE Cnr, Burbridge & Marion Roads, Cowandilla, SA 5033.
Phone : (08)8234-1044
TEAC TOTAL CARE
info@teac.com.au
or visit our website at http://www.teac.com.au
Freecall telephone 1-800-656-700 between Monday to Friday-EST 9am to 5pm
[New Zealand: TOLL FREE 0508 347328, 8am to 4:30pm]
DVST7D1D-RB/H(148*210) 01.4.6 11:28 AM ˘`28

Precautions
Please keep the video machine's guarantee card and receipt safe for warranty purposes.
◆Read carefully through this manual to familiarize yourself with this
high-quality video recorder.
◆Make sure the rating of your household electricity supply matches
that shown on the back of the video recorder.
◆Refer to this chapter and the "Initial installation" chapter to help you
install and adjust your video recorder.
Do not ...
... expose the video recorder to high levels of humidity and heat, to
avoid the risk of fire and electric shock.
...
open the video recorder. Have a qualified technician carry out repairs.
... connect the video recorder to the power supply if you have just moved
it from a cold to warm environment. This can result in condensation
inside the recorder and cause serious damage to the machine and
cassettes. Wait around two hours to allow it to reach room
temperature.
Make sure ...
... the recorder is placed on a steady, flat surface.
... the recorder should be placed at least 10cm apart from the other
home appliances or the obstacles to get sufficient ventillation.
... you clean the recorder only with a soft, lint-free cloth; do not use
aggressive or alcohol-based cleaning agents.
... you disconnect the power supply if the recorder appears to be
working incorrectly, is making an unusual sound, has a strange smell,
has smoke emitting from it or liquids have got inside it. Have a
qualified technician check the recorder.
... you disconnect the power supply and aerial if you will not be using
the recorder for a long period or during a thunderstorm.
◆
This apparatus shall not be exposed to dripping or splashing and no objects
filled with liquids, such as vases, shall be placed on this apparatus.
For your own safety!
◆There are no components in this video recorder you can
service or repair yourself.
◆Do not open the case of the video recorder. Only allow
qualified personnel to repair or service your set.
◆This video recorder is designed for continuous operation.
Switching it off does not disconnect it from the mains
(stand-by). To disconnect it from the mains, you have to
unplug it.
◆Recording any copyright protected material may infringe a
copyright.
AUTOSET
CH.
OP EJECT
WORTH
knowing
DVST7D1D-RB/H(148*210) 01.4.13 3:20 PM ˘`1

Contents
1
WORTH
knowing
Before doing anything with the machine, please read the
chapter "Initial installation".
◆On the following pages, the pictures show the buttons you press on the remote control to perform the
function, and what you should see in the On Screen Display or machine display (if present).
Controls
The remote control unit ................................................................................................. 2
The machine, On screen display ................................................................................... 3
Initial installation
Connecting up the video recorder, Fitting the remote control’s batteries ................... 4
Setting up the video recorder ....................................................................................... 5
OSD (On Screen Display) ON & OFF .............................................................................. 7
Playing cassettes
Playing back ...................................................................................................................8
Still, Variable picture search, Variable slow motion,
Accessing new recordings (index scan), CM Skip ........................................................ 9
Recording cassettes
Simple recording ......................................................................................................... 10
One touch recording (OTR) .......................................................................................... 11
More functions
Normal timer recording ............................................................................................... 12
Timer Review – changing and erasing, Setting time and date .................................. 13
Clock/Counter display, Remaining time and Cassette length,
Accessing counter zero position, Resetting the counter to zero ............................... 14
Menu languages, Child lock, Cassettes, and ... .......................................................... 15
The Hi-Fi system, What you can listen to.....................................................................16
Choice of sound output.................................................................................................17
Tuning in new stations
Tuning .......................................................................................................................... 18
Station names ............................................................................................................. 19
Sorting programme locations, Clearing programme locations ................................... 20
Connections and copying
To the TV via antenna cable (if you are not using a RCA cable) ................................ 21
Copying, Assembling ................................................................................................... 22
Appendix
Brief instruction for experienced users ................................................................. 23/24
Before you ask a specialist ......................................................................................... 25
Index, Technical data .................................................................................................. 26
DVST7D1D-RB/H(148*210) 01.4.13 3:20 PM ˘`1

2
The remote control unit
The buttons to
use are marked
on the following
pages.
CONTROLS
30°
max. 7 m.
30°
TV/VCR
PR
PR MENU
EJECT
PAL/SEC
A.SEL
AV
SP/LP
INDEX
123
456
789
0
30
A
OPERATE
REC/
OTR
RC-795 REMOTE CONTROL UNIT
◆
The remote control is the principle means of control, but the main playback and record
functions are also available on the front of the machine.
◆
Press any button to turn on the power.
operate on/off
this button is not available for this set
this button is not available for this set
a button for selecting input sources for recording:
TV stations – input sockets
You can select the external line by using “00”, “AV”, or
“PR+/-“ button. (refer to page 22)
clock/counter on-screen display
CM skip button to cue the tape for 30 seconds
to eject the cassette
the variable slow motion button
this button is not available for this set
to search the beginnings of records (index)
a button that doubles the maximum recording time for
very long recordings
the record or OTR button
(One Touch Recording means: each time you press the
button recording is extended by 30 minutes)
pause (record), still (playback)
playback start
playback stop
rewinding/fast forwarding a cassette from stop, or
picture search backwards/forwards from playback mode
number buttons to select programmes (stations) or to
type in numbers
the menu controls, programme (station) selection (PR +/–)
to select the sound output (if available)
OPERATE
TV/VCR
AV
30
REC/
OTR
EJECT
SP/LP
PR
PR MENU
A.SEL
PAL/SEC
INDEX
123
456
789
0
these buttons are not available for this set
DVST7D1D-RB/H(148*210) 01.4.13 3:20 PM ˘`2

The machine
3
CONTROLS
◆
Press any button to turn on the power.
operate on/off
playback stop and ejecting the cassette
programme (station) selection
recording or OTR
(One Touch Recording means: each time you press the button recording is extended by
30 minutes)
rewinding / fast forwarding a cassette from Stop, or picture search backwards /
forwards from playback mode.
playback start
front input sockets for connecting a stereo camcorder (left/right channels)
On screen display
MAIN MENU
example
The menus show you
which button to press for
the next step.
In addition, some other
functions appear on
screen temporarily.
REW SP PR04 EURO
The video’s menu system
gives you easy-to-understand
access to the less used
functions such as tuning to
stations, clock setting and
more.
“Tape Control” Menu
appears only when a tape is
in the VCR.
*
2x
MENU
PR
TIMER PROGRAM
PR PRESET
VCR SETUP
TAPE CONTROL
PR+/-:SELECT
OK:CONFIRM MENU:END
VCR SETUP
CLOCK SET
LANGUAGE SET
RF OUTPUT SET
16:9 SET
OSD ON/OFF
PR+/-:SELECT
OK:CONFIRM MENU:END
*Though the ”16:9 Set” is displayed on the screen, this function is not available for this set.
STEREO ON
DVST7D1D-RB/H(148*210) 01.4.16 11:0 AM ˘`3

Connecting up the video recorder
4
TV/VCR
PR
PR MENU
EJECT
PAL/SEC
A.SEL
AV
SP/LP
INDEX
123
456
789
0
30
A
OPERATE
REC/
OTR
RC-795 REMOTE CONTROL UNIT
Place your video
◆
horizontally on a flat, steady base so that air can circulate around it for ventilation.
◆
away from humidity and heat, magnetic fields, such as those from loudspeakers etc.,
and with no heavy objects placed on top.
Initial
INSTALLATION
Fitting the remote control's batteries
Switch off all components when connecting or disconnecting cables.
◆Unplug the aerial cable from your TV and plug it into the "ANT. IN"
socket of the video.
Plug the short coaxial cable provided into the "ANT.OUT" socket of
the video and the aerial socket of the TV.
◆Plug a RCA cable into the "RCA” socket of the video and the AV
socket on the TV if available.
This connection will provide best picture and sound quality.
Ask your dealer for an appropriate cable if you do not have one.
Without a RCA cable, you need to follow the steps described under "If you are not
using a RCA cable" (right page and page 21).
◆Make sure the rating of the household mains supply matches the rating shown on
the back of the video.
Now plug in the mains lead. The display of the video should now light.
◆
Plug a phone cable into “Audio L, R” jack on the rear panel and into
the Audio jack on any audio amplifier, if needed.
Fit the batteries as shown by
the pictures in the bay.
ANT
.
OUT
ANT
.
IN
AUDIO
AUDIO
VIDEO
OUT
IN
LL
R
R
+
–
–
1.5 V (AAA)
AC 240 V,
50 Hz
◆Protect your environment by returning used batteries to your dealer. Since batteries
contain toxic substances they require special disposal methods.
◆Make sure the batteries are always of the same type and age, and remove them
from the remote control if you are not using it for a long period.
The buttons to
use are marked
on the following
pages.
DVST7D1D-RB/H(148*210) 01.4.13 3:20 PM ˘`4

Setting up the video recorder
◆
Switch the TV on.
◆
You can also start "Auto Search" in the menu "PR
Preset" "Auto Search".
◆
To tune in new stations (manual tuning) and to enter
station names see page 18-20.
Initial
INSTALLATION
You should see this picture the first
time you switch on the TV and video.
Choose your language.
OK for "Auto Search!".
PR
"AUTO SEARCH" tunes in all the stations you can
receive in your country and ...
... sorts them in an order common for your country.
LANGUAGE SET
ENGLISH
DEUTSCH
ITALIANO
ESPAÑOL
FRANÇAIS
NEDERLANDS
SVENSKA
SUOMI
PR+/-:SELECT
OK:CONFIRM MENU:END
AUTO SEARCH!
OK:CONFIRM MENU:END
AUTO SEARCH
MENU:END
PR03
V-L - - - - - - - - - - - - - -
76%
PLEASE WAIT...
AUTO SEARCH
5
DVST7D1D-RB/H(148*210) 01.4.13 3:20 PM ˘`5

Setting up the video recorder (continued)
6
TV/VCR
PR
PR MENU
EJECT
PAL/SEC
A.SEL
AV
SP/LP
INDEX
123
456
789
0
30
A
OPERATE
REC/
OTR
RC-795 REMOTE CONTROL UNIT
Initial
INSTALLATION
If other stations are positioned
on near the current RF OUTPUT
PR, the guide message appears
automatically.
The VCR recommends the optimal RF
OUTPUT PR number automatically.
Should you wish the stations to
have the same numbers as those
used on the TV, follow the
instructions in "Sorting
programme locations" on page 20.
Else ...
exit the basic installation function and
enjoy your video recorder.
MANUAL SET
PR01 P-01 PR08 P-08
PR02 P-02 PR09 P-09
PR03 P-03 PR10 P-10
PR04 P-04 PR11 P-11
PR05 P-05 PR12 ----
PR06 P-06 PR13 ----
PR07 P-07 PR14 ----
PR+/-:SELECT
OK:CONFIRM MENU:END
ONE OR MORE STATIONS ARE
CLOSE TO THE VIDEO PICTURE.
PLEASE SELECT ANOTHER.
Press the OK button to confirm
the recommended PR.
PLEASE CHANGE THE TV
PR TO 36.
0-9:SELECT (21-69)
OK:CONFIRM MENU:END
CURRENT PR 26
RECOMMENDED PR 36
IMPORTANT!
Then type in the current time and
date.
CLOCK SET
123
456
789
0
MENU
0-9:SETUP (HOUR)
/ :CORRECT MENU:END
TIME - - : - -
DATE - - / - - /- - - -
◆If you don´t see this picture, because you don´t use a RCA cable, search this
picture now (CH 26) with the station tuning functions of your TV set (see its
user manual).
◆In case of interference problems on CH 26, type in an
other transmission channel between 21 and 69 using the
number buttons.
DVST7D1D-RB/H(148*210) 01.4.13 3:20 PM ˘`6

7
OSD ON/OFF
ON
OFF
PR+/-:SELECT
OK:CONFIRM MENU:END
OSD(On Screen Display) ON & OFF
This OSD (On Screen Display) indicates the channel program number and time information onto the
television screen. The factory default is ON for this feature. If you do not wish to have such
information shown during normal picture, follow the steps below and select the OSD OFF mode.
Call the video’s "MAIN MENU".
Choose “VCR SETUP”.
And press the OK button.
Select “OSD ON/OFF”.
If you want OSD OFF mode, select it and press OK
button to confirm.
Then OSD characters are not displayed in the
normal picture.
MENU
MENU
MAIN MENU
TIMER PROGRAM
PR PRESET
VCR SETUP
TAPE CONTROL
PR+/-:SELECT
OK:CONFIRM MENU:END
VCR SETUP
CLOCK SET
LANGUAGE SET
RF OUTPUT SET
16:9 SET
OSD ON/OFF
PR+/-:SELECT
OK:CONFIRM MENU:END
Initial
INSTALLATION
DVST7D1D-RB/H(148*210) 01.4.13 3:20 PM ˘`7
Table of contents
Other Teac VCR System manuals