suprema BioStation T2 User manual


1
BioStation T2 is the IP network-based premium fingerprint verification terminal that delivers various authentication modes such
as fingerprint, RFID, and PIN authentication for access control and time & attendance.
Features
5 inch
touchscreen LCD
An intuitive GUI provided on the high-durable 5 inch touchscreen LCD delivers easy user
management and displays various information and notices.
Camera for
face image capture
The built-in high-performance camera detects the face image and captures image logs which
delivers enhance security through valid identification check.
Embedded Web
Server
The embedded web server (BioStar Lite) allows administrators to manage users and devices
through a web browser in any PC without S/W and database installation.
Fast matching speed
Loaded with world’s best performing Suprema fingerprint algorithm and powerful dual CPU
achieves unparalleled 1:3,000 fingerprint matches in less than a second.
Versatile Interfaces
Provides various interfaces, such as PoE, WiFi, TCP/IP, and RS485/232, allowing users to
connect to PCs and configure the network. In addition, Wiegand and I/O ports allow users to
configure various access control systems.
Video Phone
Provides IP-based AV interface and analog video phone functions.
RF Card Options
Supports EM, Mifare Classic, Mifare Plus, and Mifare DesFire(CSN) cards.
2
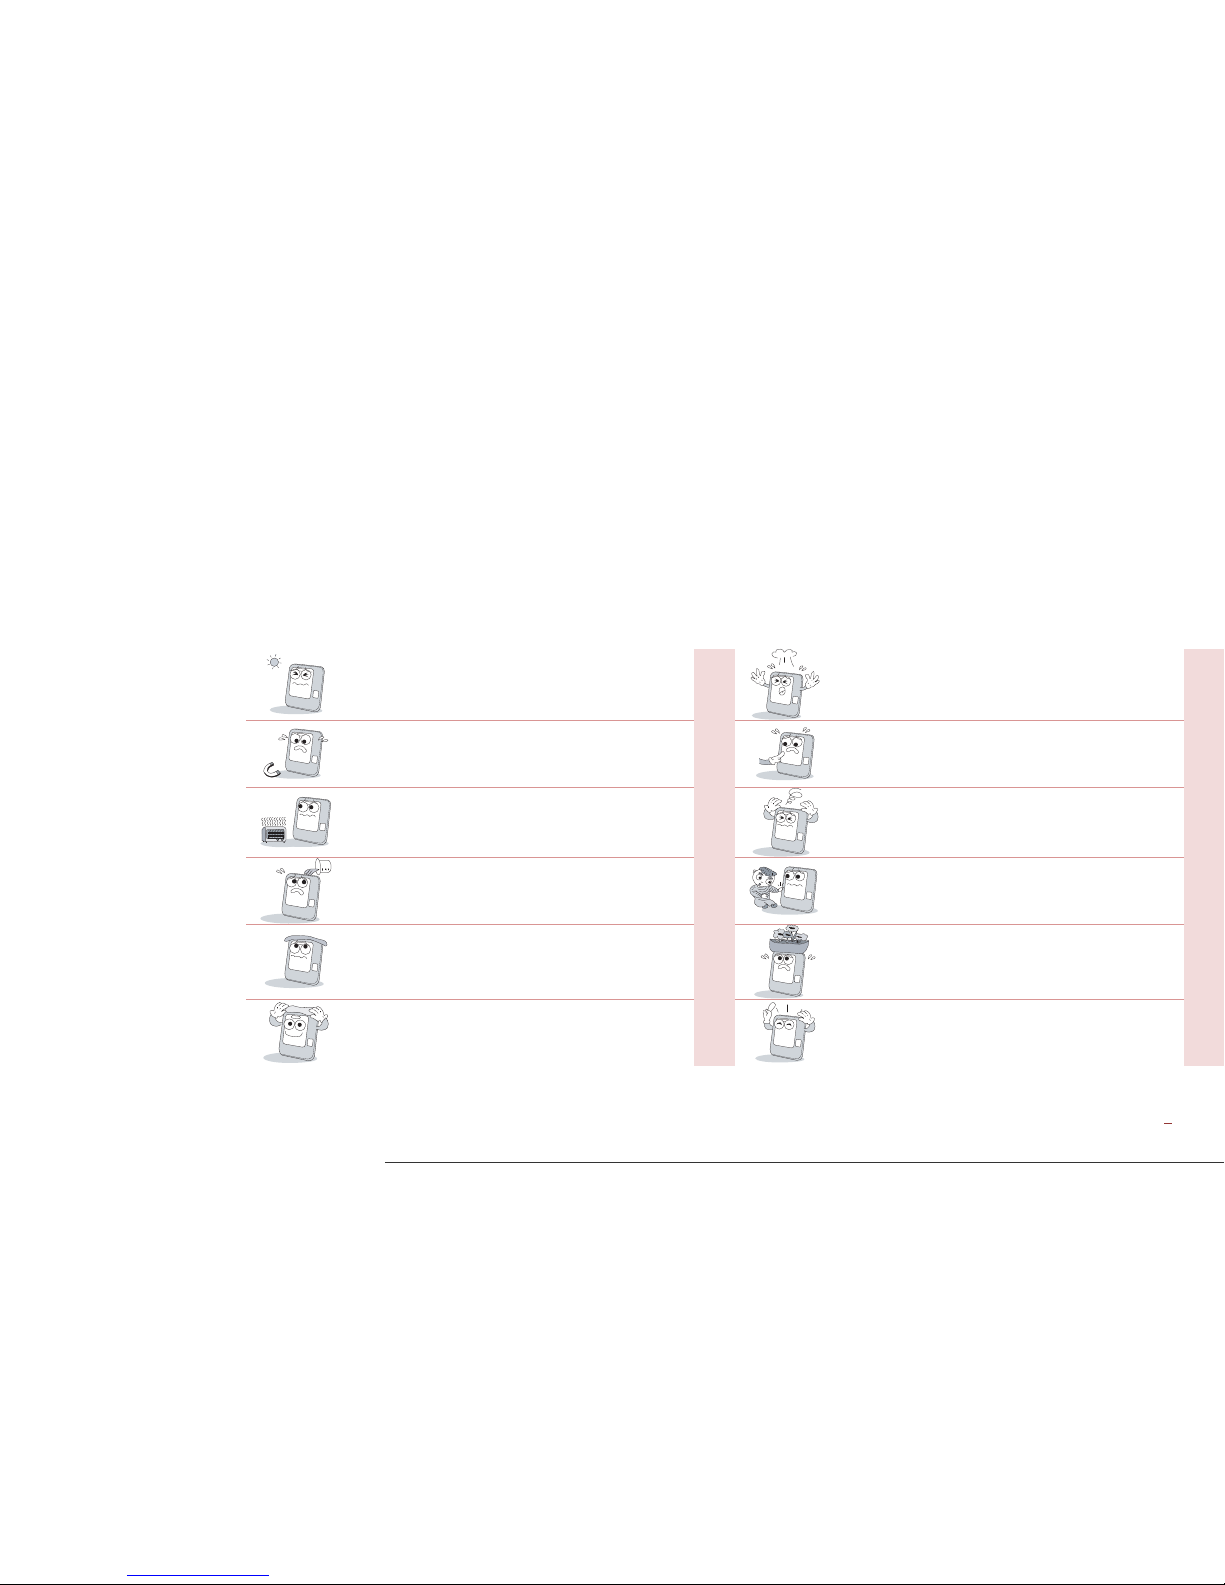
These safety instructions provided here are meant to guard your safety and prevent any possible damage or loss of property.
Please carefully read these and keep them in mind when you use Suprema’s product.
SafetyInstructions
Do not install the terminal in a place affected by direct
sunlight, humidity, dust, or soot.
Do not drop the terminal or cause any impact on the
terminal.
Keep the terminal away from magnets or anything
containing magnetic material, such as magnet, TV sets,
computer monitor (especially CRT) and speakers.
Do not apply heavy pressure to the touch screen.
Keep the terminal away from any heating devices or heat
sources.
Do not disassemble, repair, or reconstruct the terminal
without any direction of Suprema. Otherwise, you cannot
receive proper A/S for the terminal from Suprema.
Do not spill any liquids such as soda, water, or solutions
into the terminal.
Keep the product out of reach from children for safety
purposes.
Use a soft cloth or towel when cleaning the terminal. Do
not spray water on the terminal.
Do not use the terminal for any other purpose than its
original use.
Clean the terminal regularly to prevent dust from settling
onto it.
In case of product malfunction or problems, please
contact Suprema’s Customer Service Center or the sales
agent.

3
TableofContents
1 Before Getting Started................................................................6
Components................................................................................. 7
■Basic Components................................................................ 7
■Optional Accessories ............................................................ 9
Names and Functions of Parts ..................................................10
■Front.................................................................................... 10
■Bottom................................................................................. 11
■Rear .................................................................................... 11
Dimensions ................................................................................ 12
Menu Screen.............................................................................. 14
Standby Screen ......................................................................... 16
Authentication Mode .................................................................. 17
How to place a finger ................................................................. 18
2 Installation ..................................................................................20
Installation.................................................................................. 21
Connector/Cable Specifications................................................. 22
■232 CABLE (3-pin Connector) ............................................ 22
■SWITCH CABLE (8-pin Connector)....................................22
■RELAY CABLE (3-pin Connector)....................................... 23
■WIEGAND CABLE (5-pin Connector)................................. 23
■POWER CABLE (2-pin Connector) .................................... 23
■VIDEO PHONE CABLE (7-pin Connector) ......................... 24

4
■RS485 CABLE (4-pin Connector) .......................................24
Connection ................................................................................. 25
■Power Connection (2-pin Connector)..................................25
■USB Cable Connection .......................................................26
■Ethernet Connection (Ethernet Cable)................................27
■Ethernet Connection (Direct connection to PC) ..................28
■PoE hub connection ............................................................29
■Wireless Connection ...........................................................30
■USB Memory Connection....................................................31
■RS485 PC Connection (4-pin Connector)...........................32
■RS485 Connection to Secure I/O
or Other Terminals (4-pin Connector) ...................................33
■RS232 Connection ..............................................................34
■Videophone Connection......................................................35
■Relay Connection - Fail Safe Lock (3-pin Connector) ........36
■Relay Connection - Fail Secure Lock (3-pin Connector) ....36
■Relay Connection – Automatic Door (3-pin Connector)......37
■TTL Switch Input Connection (8-pin Connector).................38
■Wiegand Input (5-pin Connector)........................................39
■Wiegand Output (5-pin Connector) .....................................39
System Configuration.................................................................40
■Standalone ..........................................................................40
■Secured ............................................................................... 40
■Network Configuration.........................................................41
3 User Menu...................................................................................42
Access Authentication................................................................ 43
Fingerprint Authentication ...................................................... 43
■Fingerprint Only .................................................................. 43
■Fingerprint + Pin Authentication.......................................... 43
■T&A Key+Fingerprint Authentication ................................... 44
■T&A Key + Fingerprint + Pin Authentication........................ 44
Card Authentication................................................................ 44
■Card Only Authentication .................................................... 44
■Card + Password Authentication......................................... 45
■Card + Fingerprint Authentication ....................................... 45
■Card + Fingerprint/Password Authentication ...................... 46
■Card + Fingerprint + Password Authentication ................... 46
ID Authentication.................................................................... 47
■ID + Password Authentication............................................. 47
■ID + Fingerprint Authentication ........................................... 47
■ID + Fingerprint/Password Authentication........................... 48
■ID + Fingerprint + Password Authentication ....................... 48
T&A Mode .................................................................................. 49
■T&A Mode Setup ................................................................. 49
■T&A Authenticate Methods.................................................. 50
■T&A Event ........................................................................... 50
■Personal Entrance/T&A Record Check............................... 51
Authentication Failures .............................................................. 52
4 Admin Menu................................................................................53
Registering an Admin................................................................. 54

5
■Entering into Admin Menu...................................................55
■Configuration of Admin Menu..............................................57
User Enrollment process............................................................59
Registering User to Device (using CSN) ...................................60
■Enroll User...........................................................................61
■Edit/Delete User ..................................................................64
■Search User ........................................................................65
■Checking the Registered User Info .....................................67
■Deleting All Users................................................................67
Registering a User to a Card (using Template Card).................69
■Issuing a Card .....................................................................69
■Formatting a Card ...............................................................71
Network Setup............................................................................72
■TCP/IP Setup ......................................................................72
■Server Setup .......................................................................74
■Serial Communication .........................................................74
■USB .....................................................................................75
■USB Memory.......................................................................75
■Wireless LAN.......................................................................76
Authentication Mode ..................................................................77
■Finger Auth Mode ................................................................77
■Card Auth Mode ..................................................................78
■ID Auth Mode.......................................................................78
■Operation.............................................................................79
■T&A Mode ........................................................................... 80
■T&A Event ........................................................................... 80
■Camera Event ..................................................................... 81
Device Setup.............................................................................. 82
■Fingerprint Setting............................................................... 82
■Door .................................................................................... 84
■Interphone Setting............................................................... 85
■Date & Time Setup .............................................................. 86
■Device Info .......................................................................... 87
■Memory Info ........................................................................ 87
■Touchscreen Calibration ..................................................... 87
■Touchkeypad Calibration..................................................... 87
■Reset................................................................................... 88
■Factory Default.................................................................... 88
Display Setup............................................................................. 89
Log ............................................................................................. 90
■Log List................................................................................ 90
■Log Search.......................................................................... 91
■Delete All Log ...................................................................... 92
■Log Info ............................................................................... 92
5 Appendix.....................................................................................93
Product Specifications ............................................................... 94
Electrical Specification ............................................................... 95

BioStation T2 User Guide
http://www.supremainc.com
6
1 Before Getting Started

BioStation T2 User Guide
1 Before Getting Started
7
Please check the package and ensure that all of the components are prepared.
Components
■Basic Components
Software CD (1 copy)
BioStation T2 Body Wall Bracket Screws and PVC Anchors
(4 EA each)
Mini USB Cable Ferrite Core Cables (7 types, 9 EA)
CARD

BioStation T2 User Guide
1 Before Getting Started
8

BioStation T2 User Guide
1 Before Getting Started
9
■Optional Accessories
Plastic Stand Secure I/O USB Mifare Reader/Writer USB fingerprint scanner
(for enrollment on PC)
Access Point
(For Wireless Model only)
RF Cards Analog Video Phone Power Adapter
Note Theproductshownaboveisjustanimagetoillustratetheproduct.DependingonSuprema’sinternalchanges,someofthecomponents
shownheremaybedifferentandchangedfromthecomponentsthatyouhavereceived.
Other manuals for BioStation T2
1
Table of contents
Other suprema Touch Terminal manuals

suprema
suprema X-Station 2 User manual

suprema
suprema BioStation L2 User manual

suprema
suprema BioLite Net User manual

suprema
suprema X-station User manual

suprema
suprema FaceStation F2 User manual

suprema
suprema FaceStation 2 User manual

suprema
suprema biostation User manual

suprema
suprema BioStation 2 User manual

suprema
suprema BioStation L2 User manual

suprema
suprema biostation User manual


