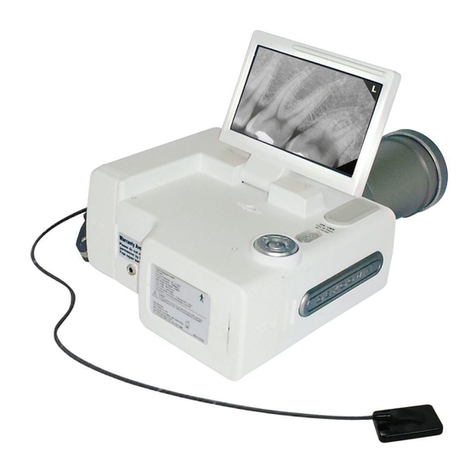
Summer 4560 User manual


Tongue Depressor Instructions
Page 9
Normal Throat
. . . . . . . . . . . . . .
Page 10
The Tongue and Cysts
. . . . . . .
Page
1
1
Acute Tonsillitis/Strep Throat
. .
Page 12 & 13
Sore Throat
. . . . . . . . . . . . . . . .
Page 14
Post Nasal Drip
. . . . . . . . . . . . .
Page 15
Thrush
. . . . . . . . . . . . . . . . . . . .
Page 15
Canker Sore
. . . . . . . . . . . . . . .
Page 16
Bony Growth/Acute Infection
.
Page 17
Contact Us
. . . . . . . . . . . . . . . .
Back Cover
Contents
Your Otoscope
Your Otoscope
. . . . . . . . . . . . .
Page
Page
1
Otoscope Instructions
. . . . . . .
Page 2
Normal Eardrum
. . . . . . . . . . . .
Page 4
Crooked Ear Canal
. . . . . . . . .
Page 4
Ear Wax
. . . . . . . . . . . . . . . . . . .
Page 5
Early Ear Infection
. . . . . . . . . .
Page 5
Swimmer’s Ear
. . . . . . . . . . . . .
Page 6
Drainage Tube
. . . . . . . . . . . . .
Page 6
Fluid Behind The Ear
. . . . . . . .
Page 7
Eardrum Perforation
. . . . . . . . .
Page 7
Using Your Tongue Depressor
Page 8
This booklet is intended to be an educational tool and contains descriptions of con-
ditions offered in good faith based on current knowledge. It is not intended to take
the place of professional medical advice or any medical diagnosis obtained from
your doctor. Your doctor should always be consulted when questions arise about any
condition described in this booklet or that you may be concerned about.

Your Otoscope
Please take the time to read this entire
booklet before proceeding to use your
new Otoscope. Always check proper
working condition before each use. If
the light has become dim or slightly
yellow, it indicates the need for battery
replacement. A yellowing light will make
a normal eardrum appear discolored
and yellow. See battery replacement
instructions, page 2.
It is recommended that after each
use, the Probe be removed and cleaned
by wiping it with rubbing alcohol. Avoid
touching the reflector plate inside your
Otoscope as it will become tarnished,
reducing the reflection of light. See probe
tip replacement instructions, page 2. To
turn Otoscope on, press the thumb button
above the handle grip.
FEATURES
Probe
On/Off Switch
Easy Grip
Handle
Replacement Tips
Battery
Compartment
Compartment
Eyepiece
Eyepiece
1

Otoscope Instructions
To allow for proper insertion into the ear canal you
must straighten what is a naturally crooked ear canal
(Figure A). To do so you must pull the ear up and back
(Figure B). Pull the ear down and back on an infant.
The Probe is then gently inserted and slowly moved
into the ear canal to see the eardrum. Although the
Probe is designed to fit safely into the ear canal
without causing damage, great care should still be
taken when inserting the Probe into this sensitive area.
If pain occurs, the Probe should be pulled out a short
distance.*
*NOTE
: If the Probe is difficult to insert or seems
too large to fit, consider using a smaller size Probe.
Choose the largest size that will fit into the ear canal.
Examining young children can vary in difficulty.
You may require someone’s help to carefully hold the
child as you might do when helping your Pediatrician.
Some infants who are uncooperative can be
examined while sleeping.
If it is difficult to see into the ear canal (Figure A),
it may be necessary to make small up and down
movements
(Figure B). This may be due to the
eardrum being partially
obstructed by wax, or a
crooked ear canal.
NEVER insert a cotton swab or any other instrument
through the Probe into the ear canal as this may
cause injury to the eardrum or ear canal.
2
Unsnap battery cover at base and replace batteries as shown above.
Pull probe tip
to remove, insert
until probe tip
snaps into place.
Probe
Replacement
Battery Replacement

3
Crooked Ear Canal
Pull ear up and back to straighten canal
Pull ear up and back to straighten canal
Figure A
Figure B
Copyright © 2003 Nucleus Medical Art, Inc. All rights reserved. www.nucleusinc.com
Copyright © 2003 Nucleus Medical Art, Inc. All rights reserved. www.nucleusinc.com

Normal Eardrum
A light gray color and a wax-like consis-
A light gray color and a wax-like consis-
tency is visible in a normal eardrum. You
may be able to see through the eardrum.
A bright spot reflecting back from the
Otoscope light will be visible. This is called
the light reflex.
The canal wall is delicate and light
colored. Normally ear canals are crooked,
not straight.
Crooked Ear Canal
The ear canal appears crooked and
narrow due to the bony part of the ear
canal which prevents seeing the whole
eardrum. This is a normal condition.
4
© E.H.Gill/Custom Medical Stock Photo

Ear Wax
(Cerumen)
The ear canal is protected by ear wax which both lubricates and cleanses. However it
may become necessary to remove the wax as it accumulates.
A condition that would require cleaning is if the eardrum is partially blocked by ear wax.
Consult a physician if the ear is completely blocked with wax, as it will cause loss of hearing.
A little ear wax is normal. It may come in a variety of colors and consistencies, from light
brown to almost black.
Early Ear Infection
(Otitis Media)
An early ear infection is indicated by
redness seen over the top part of the
eardrum and along the hammer bone as
shown in this photo. Your physician should
immediately be consulted for treatment.
5
© PROFESSOR TONY WRIGHT, INSTITUTE OF
LARYNGOLOGY & OTOLOGY /SPL/
Custom Medical Stock Photo

6
Swimmer’s Ear
(Otitis Externa)
This condition is especially painful. Avoid touching or moving the ear. The ear canal is
infected and tender as indicated by redness in the ear and the accumulation of material
(called an exudate) on the canal walls. This is a serious condition. You should immedi-
ately see your doctor or ear specialist (otolaryngologist).
Drainage Tube
(in the Eardrum)
This shows a common procedure for
children with chronic ear infections, or other
people who can’t pop their ears. A small
tube is placed in the eardrum to remove
fluid, prevent infections and equalize air
pressure. The tube will fall out painlessly
into the ear canal. It is necessary to follow
the progress of the tube with periodic
checkups by your doctor.
NOTE: There are a large variety of ear
tubes.
The tube shown here is only one of
the various types available.
© ISM / Phototake

7
Fluid
Behind
the
Ear
(Serous Otitis Media)
This photo pictures an ear with fluid
This photo pictures an ear with fluid
behind the eardrum. Occasionally, this is
easily recognizable by visible air bubbles.
The ear will feel full or blocked.
Fluid can accumulate during or after an
infection, allergy, or flying in an airplane
and not having your ears pop or clear. The
presence of fluid indicates that you should
see your doctor.
Eardrum
Perforation
(with Chronic Fluid)
This photo shows a perforated eardrum.
Mucous-like fluid sits just behind the
eardrum. Ears with this condition will drain
and require special medical attention. You
should see your ear doctor for treatment.
© SIU BioMed/Custom Medical Stock Photo
© NMSB/Custom Medical Stock Photo

Using Your Tongue Depressor with Your Otoscope
Using Your Tongue Depressor with Your Otoscope
Before you attempt to use your new
Tongue Depressor, please take the time to
read the entire guidebook and study the
photographs.
It is recommended that after each use,
the Tongue Depressor be cleaned by gently
washing it with soap and water, then dry
and wipe with rubbing alcohol. It is also
dishwasher safe.
FEATURES
Easy Grip Handle
Tongue
Depressor
8
Table of contents
Other Summer Medical Equipment manuals